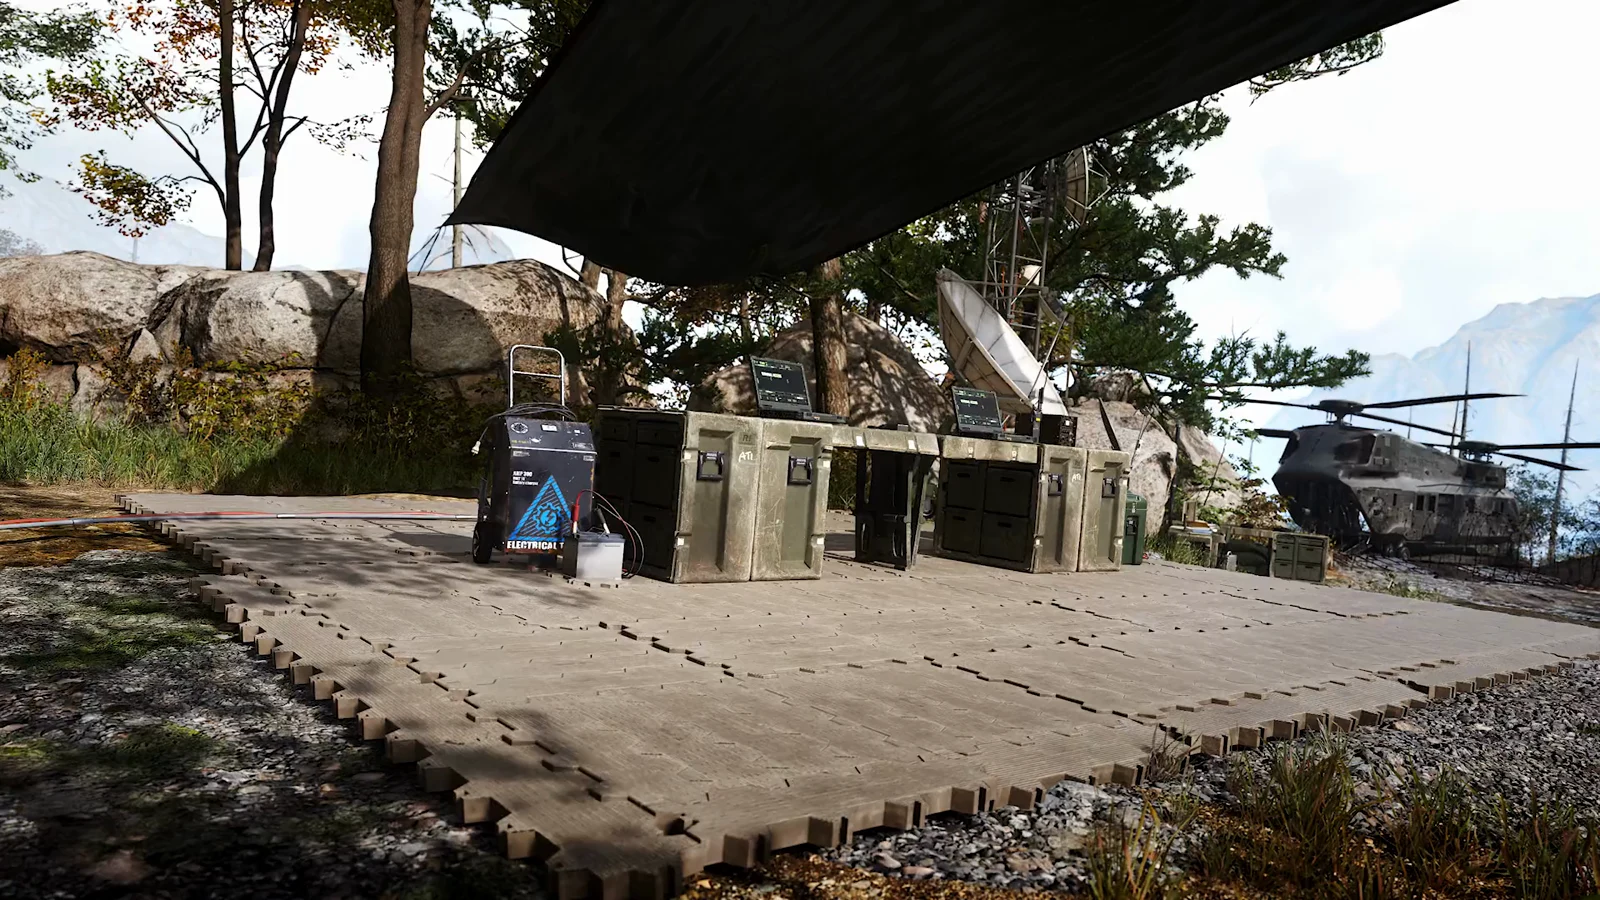
In Modern Warfare 4, DMZ is an extraction experience that Infinity Ward describes as “action extraction.” You arrive in the Hajin exclusion zone with nothing in your backpack, take on North Korean AI forces and rival squads, collect anything worth carrying, then aim to escape by helicopter. Extracted gear stays yours. Die before getting out, though, and you lose what you brought back; your operator is marked Missing In Action. The mode combines Warzone-style play with lasting loot and progression.
Quick answer: At the FOB, choose a deployment type and take the free Ground infil to loot Hajin. Call for an exfil, get inside the helicopter, and remain there until the timer on screen reaches zero.
DMZ access and launch dates
DMZ is not free-to-play this time. It ships as part of the paid Modern Warfare 4 package, which launches on October 23, 2026 for PlayStation 5, Xbox Series X|S, PC, and Nintendo Switch 2. There is no PS4 or Xbox One version. Digital pre-orders unlocked DMZ early access on October 20, a few days after the Campaign early access window that opened October 16.
Modern Warfare 4 is not on Game Pass at launch, so Xbox players need to buy it outright; Game Pass inclusion is slated for Holiday 2027. You can pick up the game through the official Modern Warfare 4 purchase page. On PC, TPM 2.0 and Secure Boot are required.
DMZ match rules: lobby size, squads, and PvPvE
Every deployment drops you into a shared lobby with both AI enemies and real players. Some squads will hunt you, others will try to avoid you, and you can’t switch either one off.
- Each match holds 60 players split into 20 squads.
- A squad can have up to three players, with solo, duo, and trio matchmaking options.
- Matchmaking prefers squads of your size, but a solo can still run into a full trio.
- There is no PvE-only option and no offline solo mode.
- Proximity chat is on, so nearby squads can hear you and you can hear them.
- A standard deployment gives you 30 minutes before radiation starts spreading across the map.
Infinity Ward has acknowledged that it considered a PvE-only mode internally, but favors the current blend of gameplay. You can still reduce your chances of a fight with stealth, UAV-related Traits, an alert on screen when enemies spot you, and POI threat ratings to review before entering a building.
The Forward Operating Base (FOB) and your loadout
Each run begins and finishes at the Forward Operating Base, a third-person hub that you and your squad can explore on foot. Use it between matches to handle operators, equipment, and upgrades. The operator you deploy with occupies an Active Duty slot. Two slots are available at first, and you can unlock a third; Vault Edition owners receive all three from the start. No other station needs setup before your first deployment.
Your stash supplies your gear. Open Stash/Loadout to select a primary weapon, armor vest, and backpack, then choose your lethals, tacticals, and field upgrades. Anything you bring on a run can be lost. If cash or supplies are scarce, enable Equip Free Loadout in the Ready Up lobby. You’ll deploy with random basic weapons, armor, and meds, without using your stored gear.
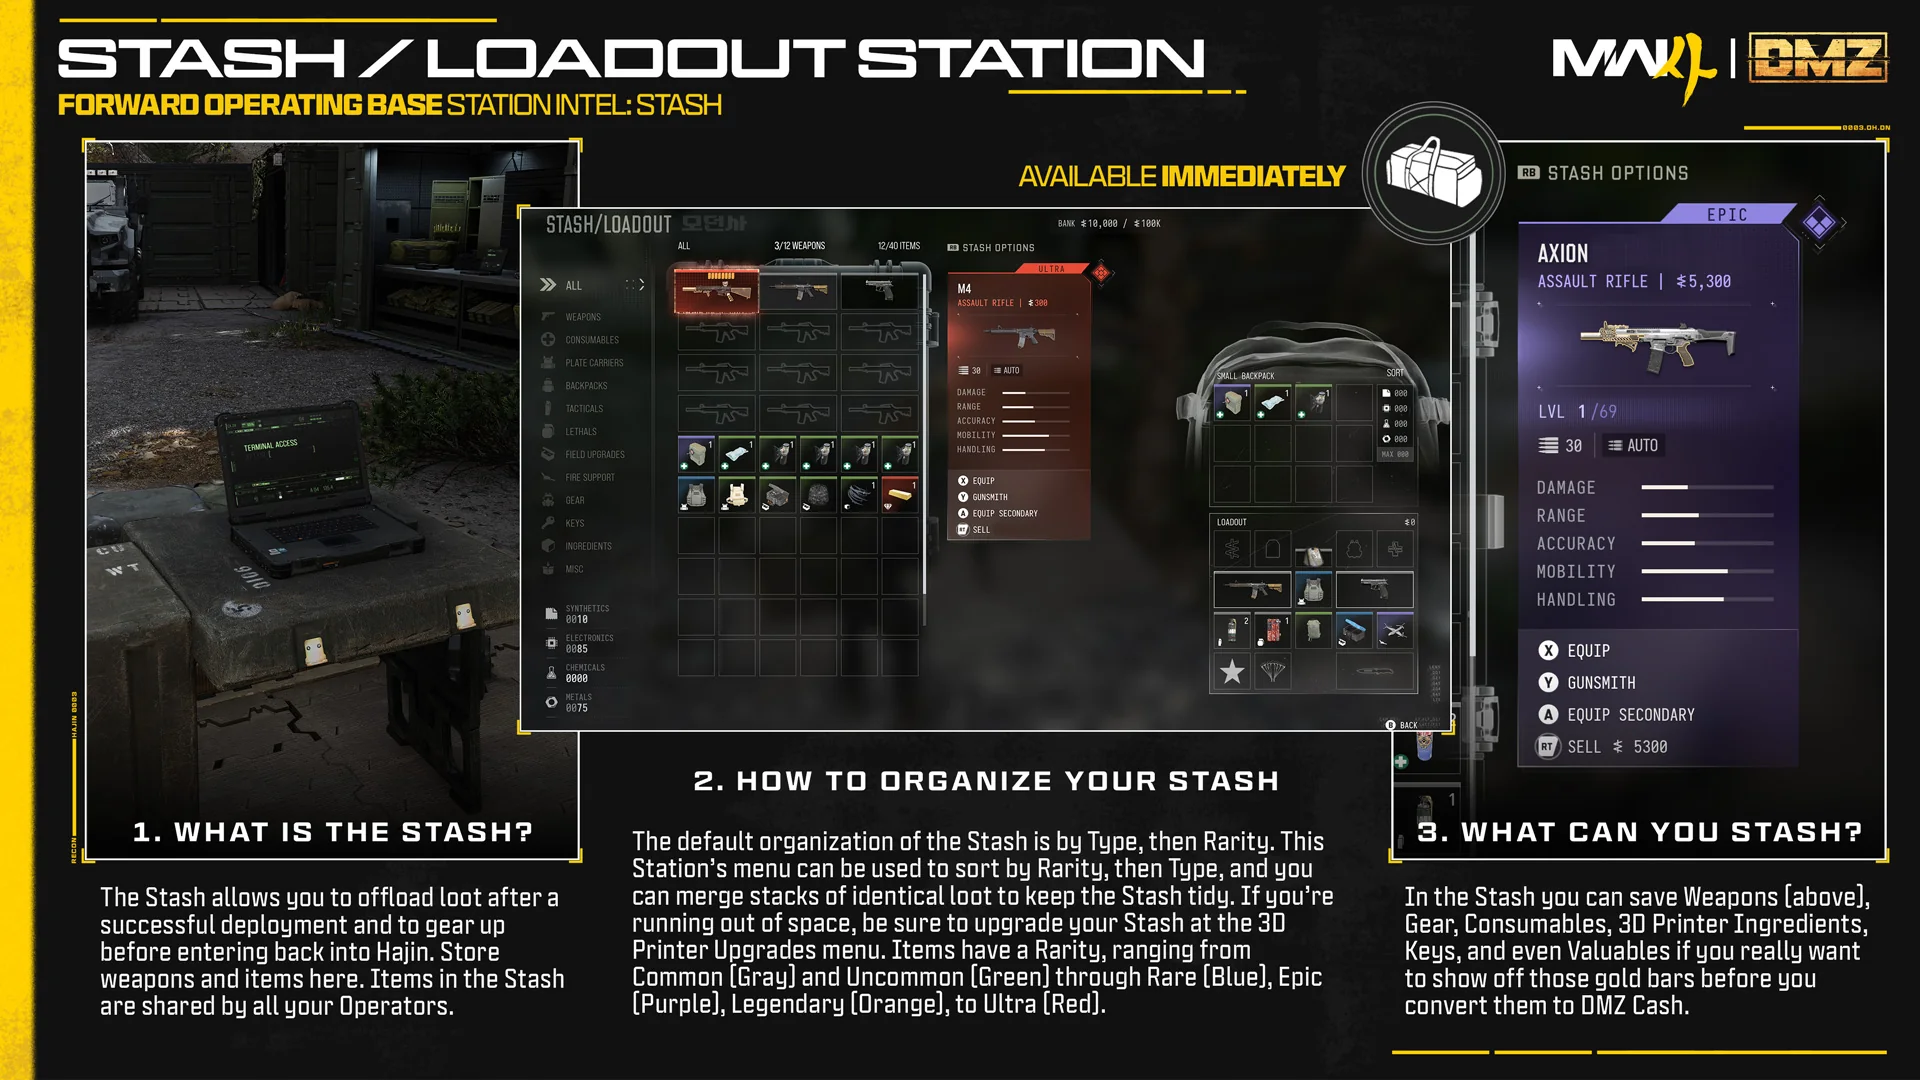
As your DMZ level rises and you complete Orders, the FOB expands from a few stations to more than a dozen.
| Station | Available | What it does |
|---|---|---|
| Operators (Active Duty) | From start | Pick, check, upgrade operators |
| Stash/Loadout | From start | 40 items, 12 weapons |
| DMZ Orders | From start | Story and onboarding tasks |
| Firing Range | From start | Targets past 100 meters |
| Survival Kits | From start | Themed loot packs |
| 3D Printer | DMZ Level 2 | Craft gear, upgrade stations |
| Gunsmith | Later | Build guns, buy attachments |
| Vendor | Later | Gear for cash, daily rotation |
| Boss Board | Later | Lieutenant intel, Dog Tag Cases |
| Bounty Leaderboard | Later | Top 50 Most Wanted and Hunters |
| Dog Tag Case | Later | Display collected tags |
Vault Edition owners also get a Survival Kit bundle with two each of Weapon Insurance Contracts, Operator Rescue Beacons, Fulton Drop Markers, Medium Backpacks, and 2-Plate Carriers.
How to deploy into Hajin
DMZ deployment types
| Deployment | What it is | Example |
|---|---|---|
| Story Missions | Scripted op with briefing | Operation Critical Extraction |
| Dynamic Operations | Randomized multi-step op | Operation: Dead Man’s Cache |
| Free Roam | No mission, open exploration | None |
Six Story Missions are available at launch. They continue the MW4 story past the campaign ending, drop you at or near an objective, and run on a time limit. Rewards include cash and crafting recipes, and some missions open up options elsewhere in DMZ. Operation Shopping Hacks is another example.
Dynamic Operations walk you across the map through a chain of tasks, with the current one shown under the minimap. Each completion in a single deployment grants a Supply Drop, and every drop after the first is rarer. Free Roam has no contract, but you can still trigger dynamic ops in the field through phones and radios, which send you after HVTs, supply caches, or SAM sites. Side ops like activating a UAV Tower or climbing a Lieutenant tower can pop up in any mode.
DMZ infil costs
| Infil option | Cost |
|---|---|
| Ground (Standard Ground Infil) | Free |
| Polaris Dagor | $5,000 |
| LTV | $25,000 |
| Helicopter | $50,000 |
| Plane | $100,000 |
The Helicopter infil starts locked and opens after you complete the Story Mission Operation Grid Assault.
Looting Hajin: backpack, item cards, and where to search
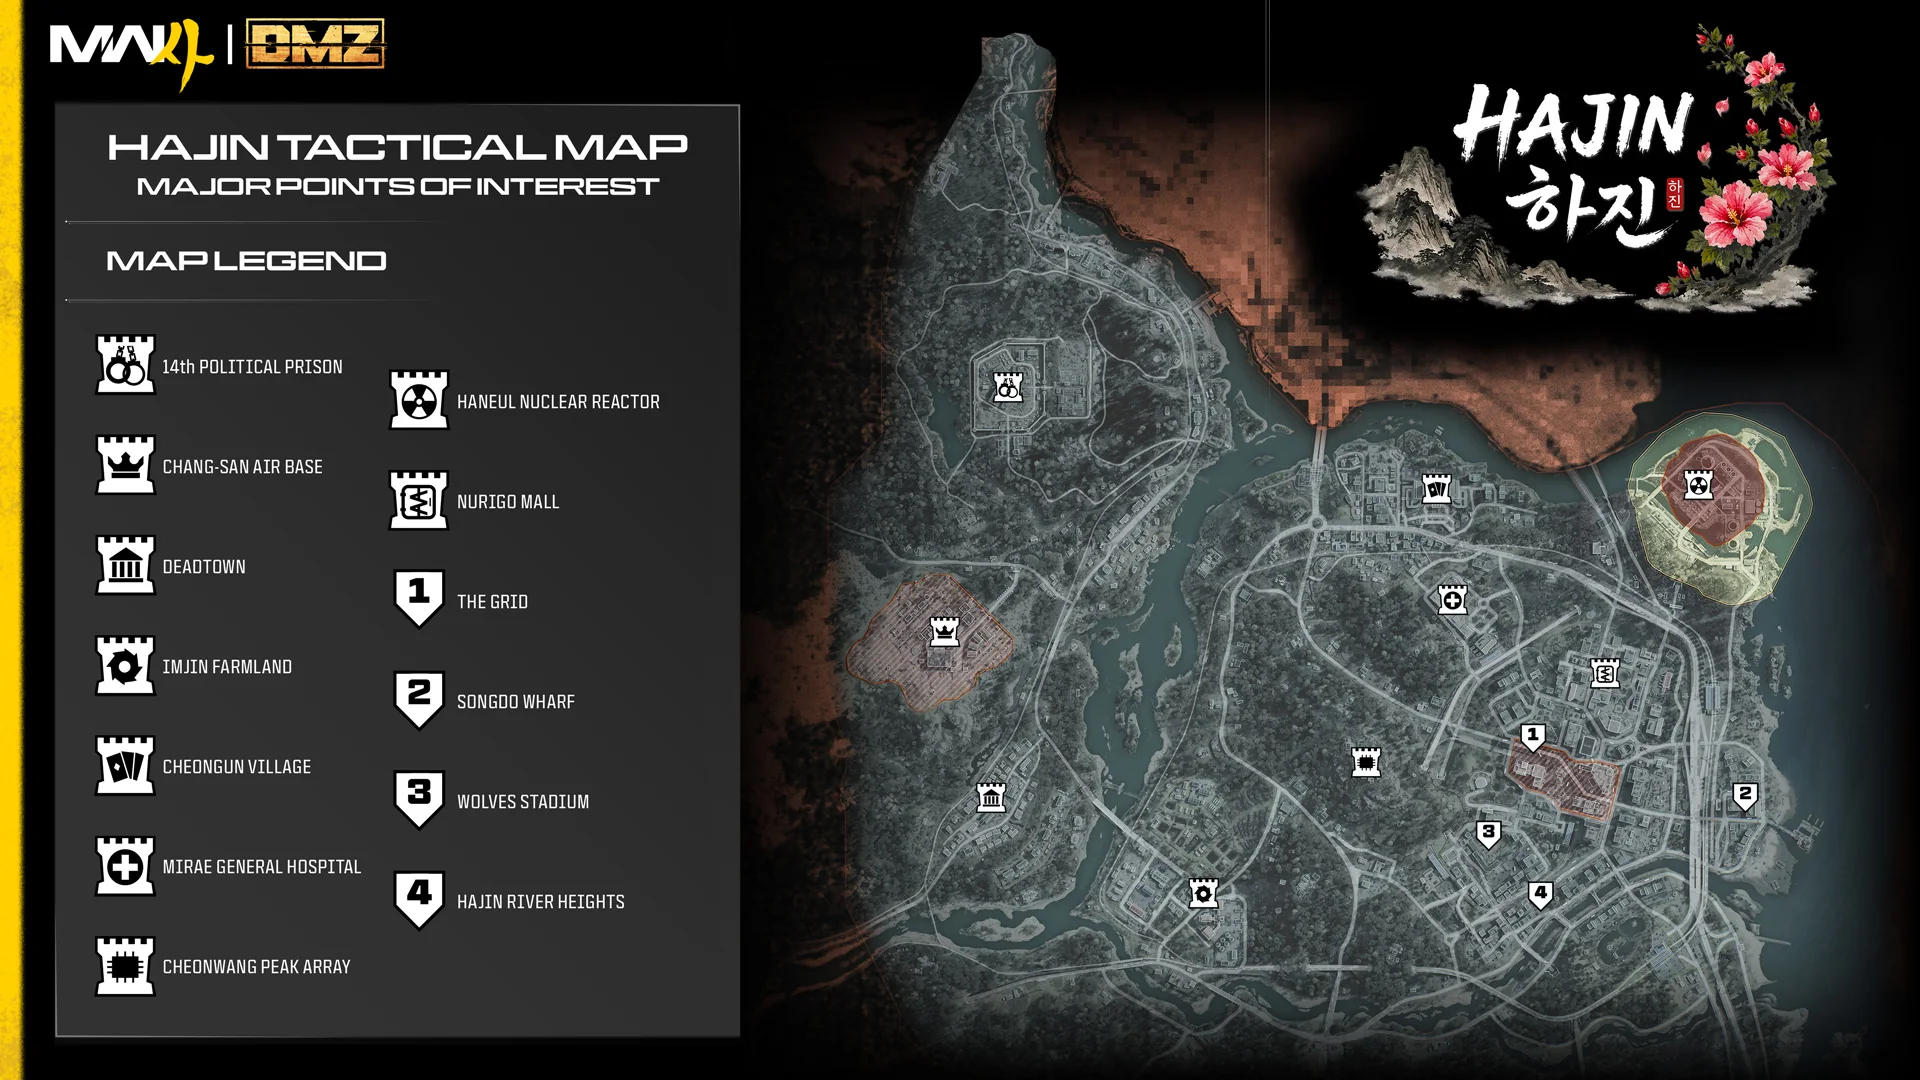
Hajin is a North Korean exclusion zone with 13 major points of interest: 14th Political Prison, Chang-San Air Base, Deadtown, Imjin Farmland, Cheongwun Village, Mirae General Hospital, Cheonwang Peak Array, Haneul Nuclear Reactor, Nuri-So Mall, The Grid, Songdo Wharf, Wolves Stadium, and Hajin River Heights. Smaller landmarks like gas stations, clinics, compounds, UAV towers, and Bounty Stations fill the gaps.
You arrive with an empty backpack. Scavenge computers and desks, containers and duffel bags, items left on tables, and the bodies of AI and dead operators. These searches can yield weapons and armor, along with consumables, keys, valuables, and materials used in crafting. Gold bars and other valuables become cash after extraction. Crafting materials are automatically broken down during the run, so there’s no scrap to manage manually.
An item’s card identifies its type, rarity, cash value, and effect. For instance, the Sedative Inhaler is an Uncommon Consumable valued at $100; it grants 60 seconds of immunity to radar, marking systems, and thermal. With a controller, press A to send an item to your backpack, or use Y to ping it for squadmates.
- Backpack grid: general loot. The Basic Pack has 8 slots; Medium and Large are looted or crafted.
- Secure Slots: A protected spot for the item that matters most to you.
- Loadout: Slots for weapons, a vest, equipment, and other gear.
- Parachute: A separate slot that starts empty. Find or craft a one-use or permanent parachute.
In outdoor areas, search for circular Hidden Caches buried underground. Keys grant access to special loot rooms; if a door is locked from inside, look for a different way in, and check wooded areas for underground entrances. Blueprints, recipes, and Gunsmith manuals are the key finds: printing an item or making a gun at the Gunsmith requires first looting its recipe or manual and extracting with it.
Weapons dropped by AI are often broken, marked by a red square on the weapon card. Expect penalties like a damaged optic or a smaller magazine.
Gas Stations
Gas stations, including marine gas stations, hold gas cans for refueling vehicles. Hajin’s driveable roster includes the Camper, Sedan, Grizzly, Dreadnought, Polaris Dagor A1, LTV, Cargo Truck, D50 Radar Flatbed, RHIB, and helicopters, plus trains and trams.
Fire Stations
Fire stations are where you stock up for radiation: radiation counters, gas masks, and radiation blockers.
Clinics
Clinics and hospitals lean medical: medkits, bandages, sedative inhalers, and self-revive kits.
Police Stations
Police stations favor combat gear and are dangerous to clear. Their locked armories hold weapon lockers with rare guns, lethals, tacticals, and killstreaks, and you need an armory key or a solved puzzle to get in. Residential areas, by contrast, tend toward crafting materials.
DMZ threat levels, enemy AI, and bosses
Every POI has a Threat Level from 1 to 5, shown in the upper-right of the HUD when you enter. It sets how many AI show up, how hard they hit, and how much armor they wear. Enemies scale from Tier 1 grunts through Tier 2 armored soldiers and Tier 3 gas-masked troops up to Tier 4 faceless armored soldiers. You’ll also meet combat drone swarms, LMG drones, K9 robotic quadrupeds (usually underground), attack helicopters, and road convoys.
How you approach matters. Suppressed fire and stealth takedowns that don’t trip an alarm keep reinforcements away, and a HUD stealth meter shows how close you are to being spotted. Gunfire or alarms bring a response and push the threat level up. If a fight gets out of hand, break line of sight, take cover, or back off, and the area calms down once you disengage.
| Boss tier | Names | Drops |
|---|---|---|
| Lieutenants | Bale, The Doctor, Iskra, Jin-Tae, Scavenger | Signature weapons, keys, Dog Tag Cases |
| Commanders | Colossus, Deathstalker, NK Main Battle Tank | 3D Printer ingredients, large cash |
Named operators from earlier Call of Duty games patrol Hajin as Lieutenants. The FOB Boss Board names them, including Gorani, The Chemist, Roze, Jang-Ui, and Warden alongside the five above; each has a $10,000 bounty. Pay $25,000 at the board for a Lieutenant’s location intel, or drive to a Lieutenant Hunt Tower and climb it to ping one at no cost. Lieutenants wear armor and call in airstrikes, so use cover when engaging. A kill yields a high-tier Dog Tag, but collecting it marks your general position for the lobby on the Tac Map.
Defeating Commanders in high-level areas usually takes a coordinated squad with strong gear. A minigun-wielding Juggernaut can patrol with an armored helicopter, a combination that can quickly end your run. Boss weapons can carry up to eight attachments, exceeding the standard five-attachment limit.
PvP in DMZ: bounties, Wanted status, and truces
Operator kills add to the bounty shown on your dog tag, and a “BOUNTY INCREASED – WANTED” banner displays the updated amount. Reaching four operator kills makes you Wanted and places your location on the Tac Map for enemy players. If you collect another player’s dog tag, you can see their bounty and earn the payout by extracting with it. The same markers help cautious squads identify places to avoid.
- Your bounty clears when you die.
- Use OPEN BOUNTY STATION at a Bounty Station to spend cash reducing your bounty or to purchase intel on Wanted players.
- The FOB Bounty Leaderboard tracks the weekly top 50 Most Wanted and top 50 Bounty Hunters.
- Squads can call a temporary Truce. Allies get a white flag overhead, and it ends when someone leaves the area or downs another player.
Watch the sky as well. Vultures circling low mark a dead operator, meaning loot nearby and possibly the squad that did the killing. Weather shifts between clear skies, fog, rain, and snow, and it gets heavier as the match goes on, which cuts how far you can see.
How to exfil in DMZ
Most runs fall apart in the final stretch. Each match has three random helicopter exfil zones marked with green smoke, and the ones closest to the radiation shut down first. Emergency flares and Fulton balloon devices are alternate ways out.
There’s also a flashier route. Completing the Sky Heist dynamic op lets your squad fly its own heavy exfil helicopter, with teammates shooting from the cargo ramp.
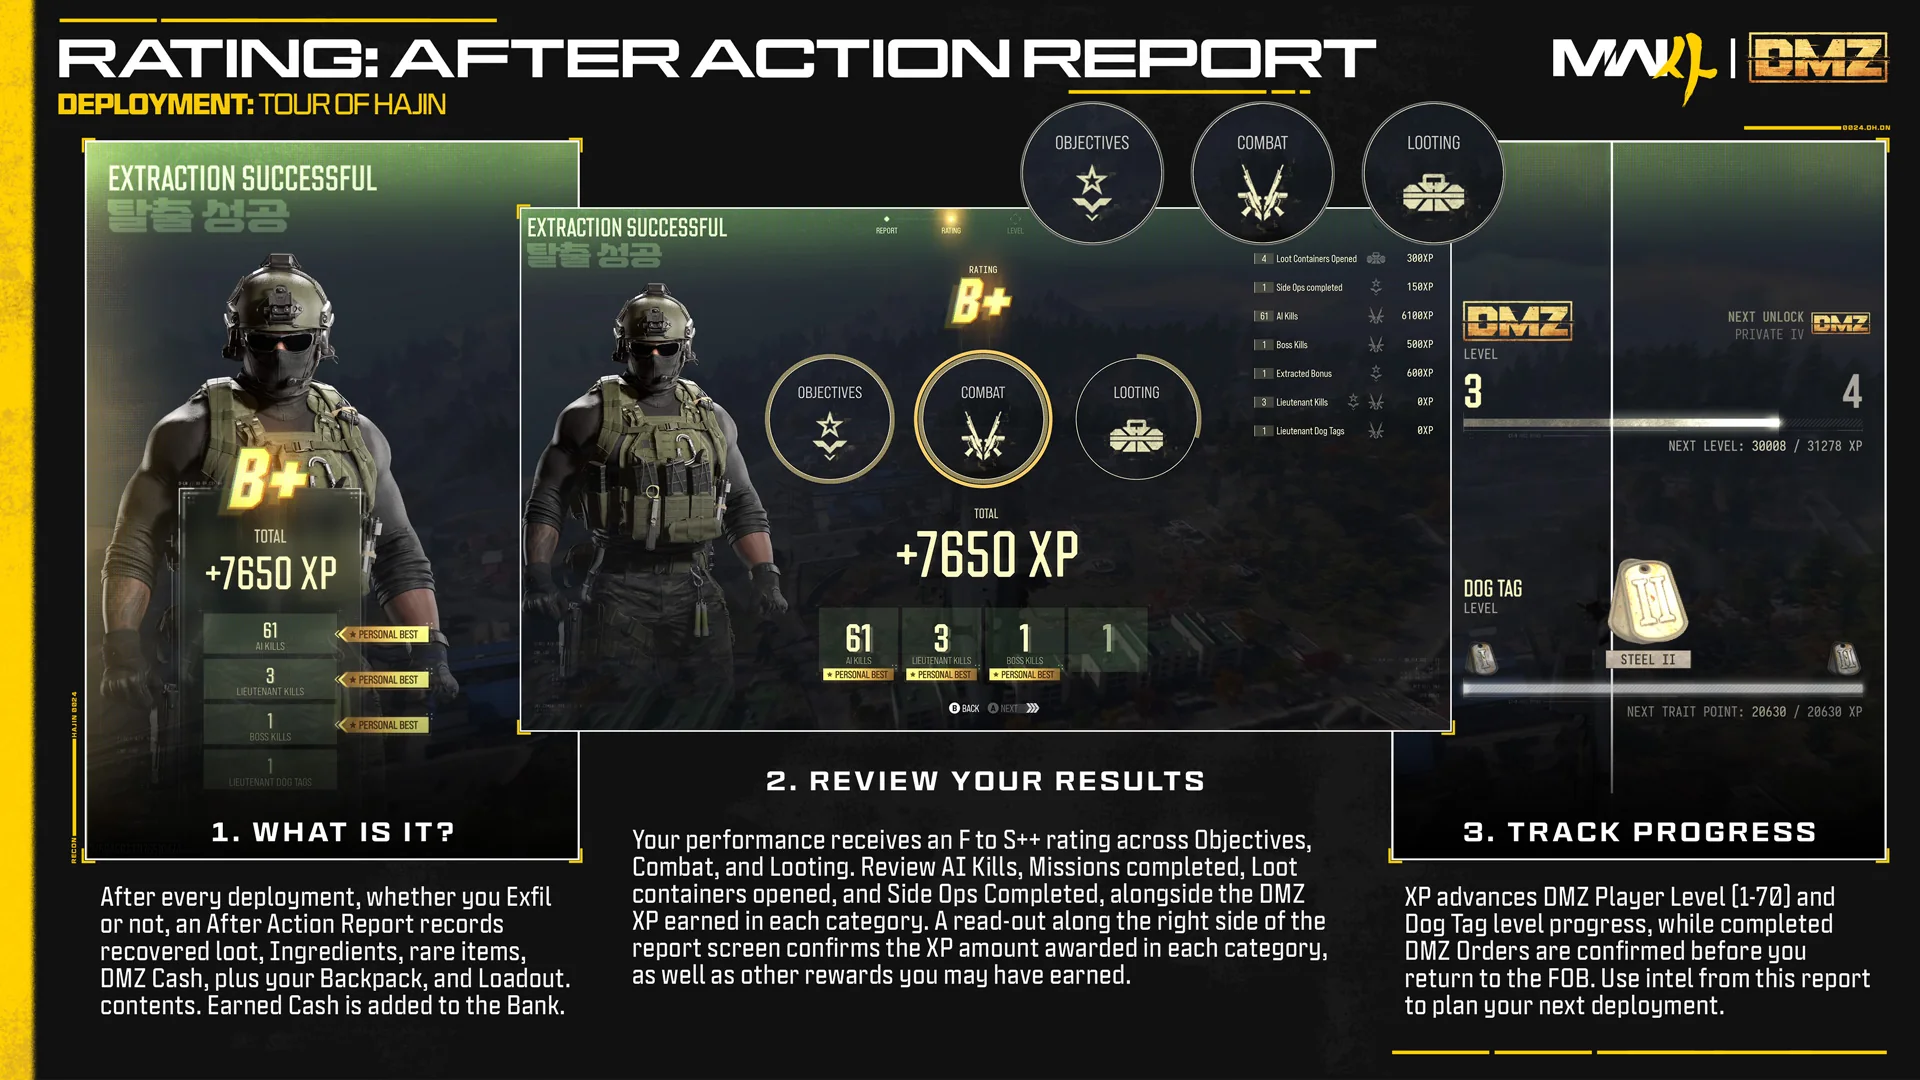
An after-action report appears after every deployment, successful extraction or not. Its four tabs are REPORT, RATING, LEVEL, and SUMMARY. RATING scores OBJECTIVES, COMBAT, and LOOTING on a scale from F to S++; earning the highest grade requires strong results in all three. LEVEL lists your DMZ level, your dog tag tier (Steel I to start), and progress toward another Trait Point. SUMMARY details collected items, banked cash, and contract payouts. If you fail, the report displays “FAILED TO EXFIL” and still grants XP.
Dying in DMZ: gear loss and MIA operators
Death costs you everything you carried, and no plea system can restore it. Your operator remains Missing In Action but can be rescued with Traits intact using cash from your bank; rescues start at $15,000. Alternatively, recruit a Level 1 replacement. Rescuing higher-level operators costs more, so many players earn cash with a low-level operator to cover the fee. MIA operators never expire; they leave your roster only when dismissed from an Active Duty slot. Death does not reduce XP.
With a Tourniquet, you can self-revive the first time you’re downed in a match, but your maximum health is lower. A squadmate can revive you too, provided at least one teammate is alive.
DMZ progression: levels, Traits, and Prestige
XP comes from nearly everything, including kills, opened containers, valuables extracted, and bosses taken down. DMZ player levels run from 1 to 70 and can only be earned in DMZ; they unlock FOB stations and printer recipes. Operators level separately from 1 to 70, earning up to 18 Trait Points apiece, while dog tags progress from Steel through Onyx III.
| Trait tree | Focus | Example perks |
|---|---|---|
| Warfighter | Combat | Health regen, explosive resistance, tactical restock |
| Scout | Stealth and recon | Longer UAV scans, counter-recon |
| Survivalist | Healing and survival | Faster revives, smoke on down, last stand self-extract |
| Prestige | Maxed operators | Up to 3 permanent traits |
Trait Points belong to the operator who earned them, which is why it pays to keep separate operators for PvP, looting, and general runs and swap before deploying. Once an operator has all 18 points, you can Prestige them by spending cash and rare gear to lock in up to three permanent prestige Traits.
Weapon levels work as they do in the rest of Call of Duty and carry over to multiplayer. Extract a Weapon Manual to purchase that gun’s base version at the Gunsmith; a five-attachment build can run six figures. XP from DMZ also advances your multiplayer rank, but multiplayer XP won’t level DMZ operators.
3D Printer, stash, and bank upgrades
Access to the 3D Printer opens at DMZ Level 2. It uses four scrap categories—Synthetics, Electronics, Chemicals, and Metals—along with rarer ingredients. The printer can produce backpacks and plate carriers, as well as NVGs and consumables; Field Upgrades and killstreaks are available too. It also improves other FOB stations. Its menus indicate where particular materials are commonly found, while Commanders drop ingredients for top-tier recipes. In your stash, a diamond icon marks valuables that can be sold. Your stash capacity increases with rank and Stash Item Upgrades. A new bank is capped at $100K, and the bank upgrades below raise that ceiling.
| Printer upgrade | Cost | New bank limit |
|---|---|---|
| Bank Upgrade I | $20,000 | $250,000 |
| Bank Upgrade II | $50,000 | $500,000 |
| Bank Upgrade III | $100,000 + 5 Infantry Invasion Plans | $1 million |
Hajin is set to expand after launch. Season one starts November 6, bringing the Exo-1 (X01) location. Season two will open the northern Russian sector of Hajin, now blocked off by walls, but its date hasn’t been announced. Bunkers beneath the city appear in the intro cutscene, suggesting the 13 major POIs available on day one don’t cover the entire map.