
Windows 11 introduces the ‘Widgets’ panel, providing quick access to personalized content like weather updates, news headlines, sports scores, and more. This guide will show you how to add, remove, customize, resize, and rearrange widgets to tailor your Windows experience.
Adding widgets in Windows 11
To personalize your Widgets panel with information that matters to you, follow these steps to add new widgets:
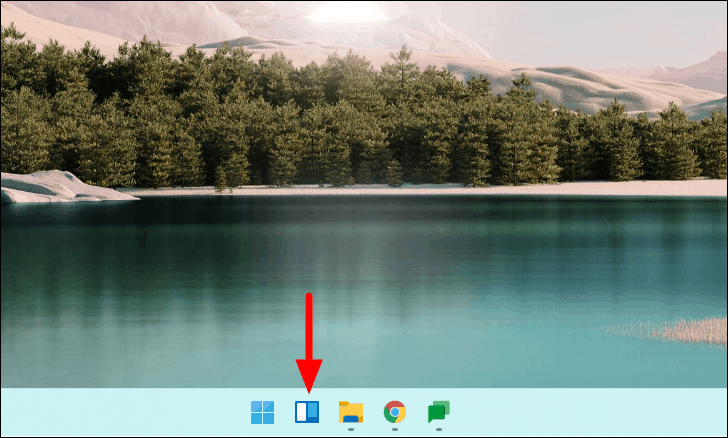
- Open the Widgets panel by clicking the ‘Widgets’ icon on the taskbar or by pressing Windows + W.
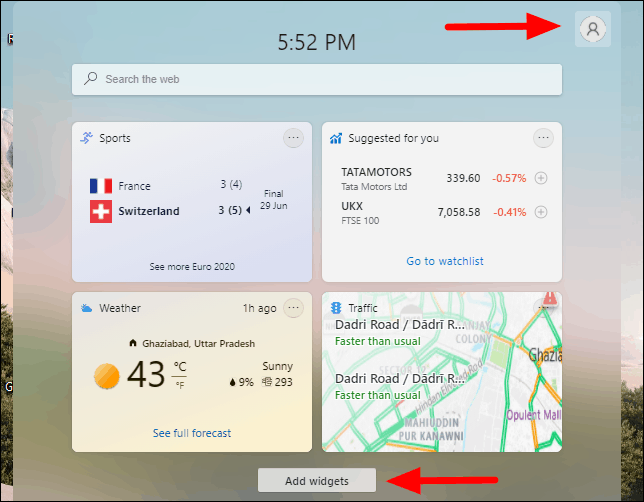
- In the Widgets panel, click on your profile icon at the top-right corner or select the ‘Add widgets’ option.
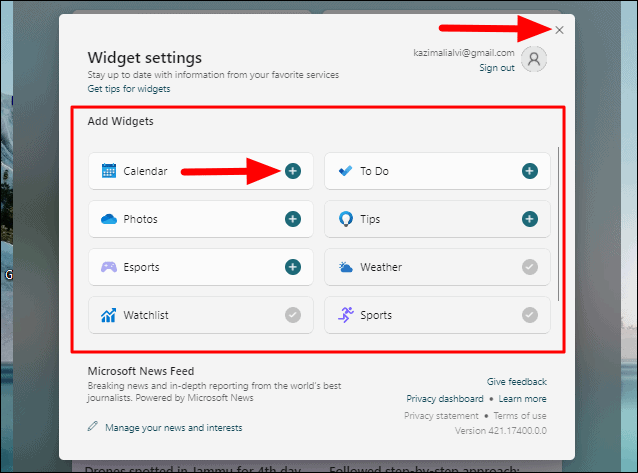
- The ‘Widget settings’ window will appear, displaying all available widgets. Widgets that are already added have a checkmark next to them, while others show a plus sign. Click the plus sign next to a widget to add it to your panel.
Removing widgets in Windows 11
If you have widgets that you no longer use, you can remove them to keep your Widgets panel organized:
- In the Widgets panel, locate the widget you want to remove and click the three-dot menu icon at its top-right corner.
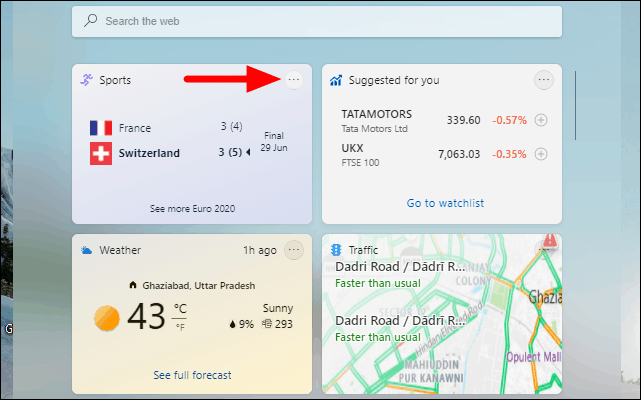
- Select ‘Remove widget’ from the dropdown menu.

Customizing widgets in Windows 11
You can tailor widgets to display information that interests you the most. Here’s how to customize them:
- In the Widgets panel, click the three-dot menu icon at the top-right corner of the widget you wish to customize.
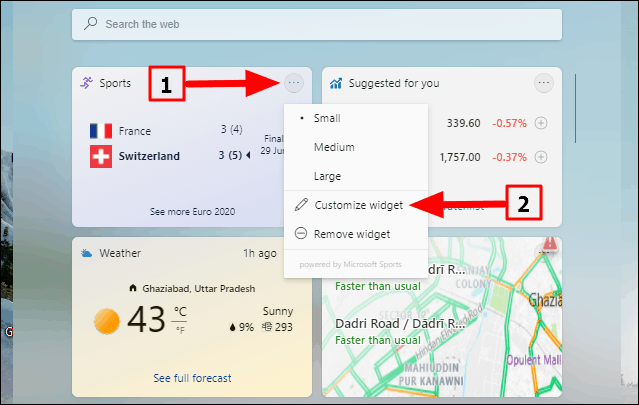
- Select ‘Customize widget’ from the dropdown menu.
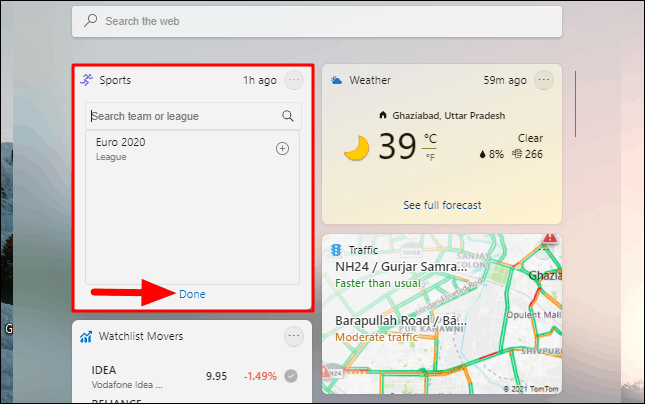
Customizing the Sports widget:
Enter the name of a team or league in the search box to follow their scores and updates. After making your selections, click ‘Done’ at the bottom to save your changes.
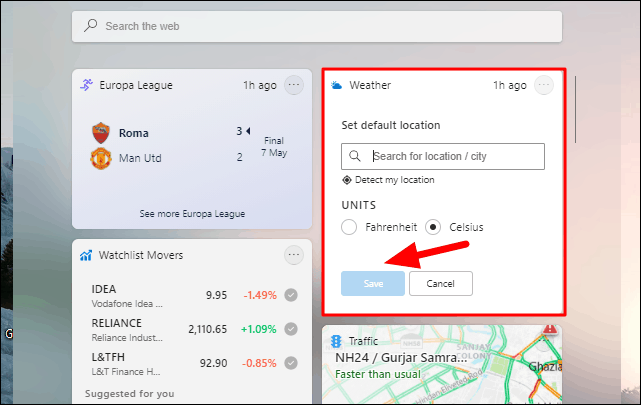
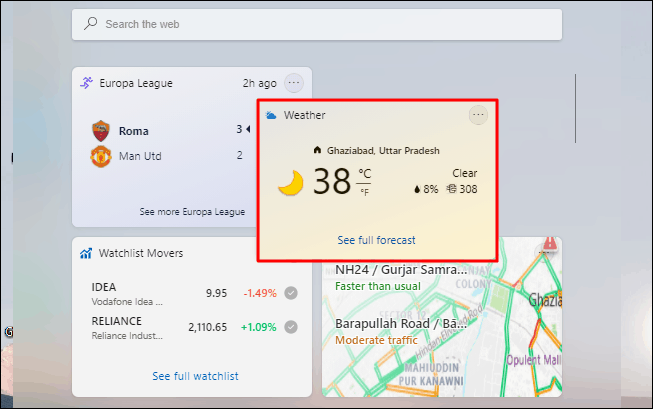
Customizing the Weather widget:
Search for your location or allow Windows to detect it automatically. Choose your preferred units for temperature (Celsius or Fahrenheit), then click ‘Save’ at the bottom.
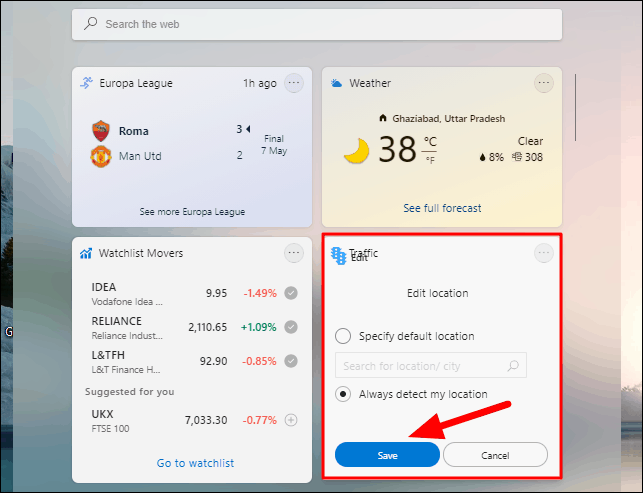
Customizing the Traffic widget:
You can have Windows detect your location automatically or specify a default location. To specify, check the ‘Specify default location’ box, search for your location, and click ‘Save’ at the bottom.
You can customize other widgets similarly to display content that matters to you.
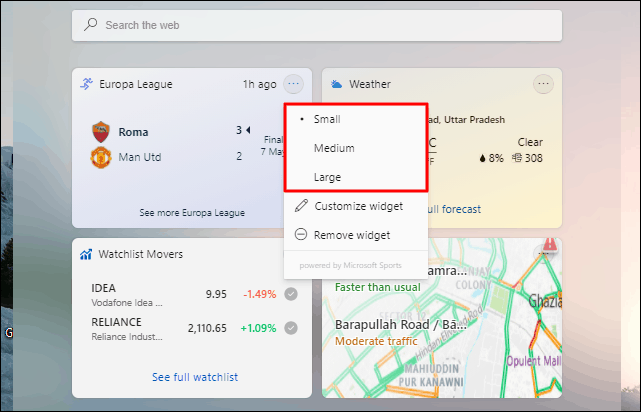
Resizing widgets in Windows 11
Adjusting the size of widgets can help you view more information at a glance. You can choose from Small, Medium, or Large sizes, but note that resizing only affects the widget’s height:
- In the Widgets panel, click the three-dot menu icon at the top-right corner of the widget you want to resize.

- Select ‘Small’, ‘Medium’, or ‘Large’ from the menu. The current size will be indicated with a dot.
Rearranging widgets in Windows 11
To organize your Widgets panel, you can rearrange widgets to prioritize the information you need the most:
- Hover your cursor over the top of the widget you want to move until it changes to a hand icon.
- Click and hold the widget, then drag it to your desired position. Other widgets will adjust as you move it.
- Release the mouse button to place the widget.
By customizing your Widgets panel, you can access personalized content quickly and make your Windows 11 experience more efficient and enjoyable.


