Backing up your Windows to an external drive can be rather helpful. Here's how you can do it in Windows 11.
Backing up your Windows to an external drive can be rather helpful. Here’s how you can do it in Windows 11.
by Raj Kumar
Backing up your Windows 11 system to an external drive is crucial to protect your data from unexpected system failures, malware attacks, or hardware issues. This guide provides various methods to help you back up your important files and system configurations, ensuring that you can restore them when needed.
Backup Windows 11 Files to External Drive Using File History
The File History feature in Windows 11 allows you to automatically back up your personal files to an external drive. It’s a convenient way to ensure your important data is regularly saved.
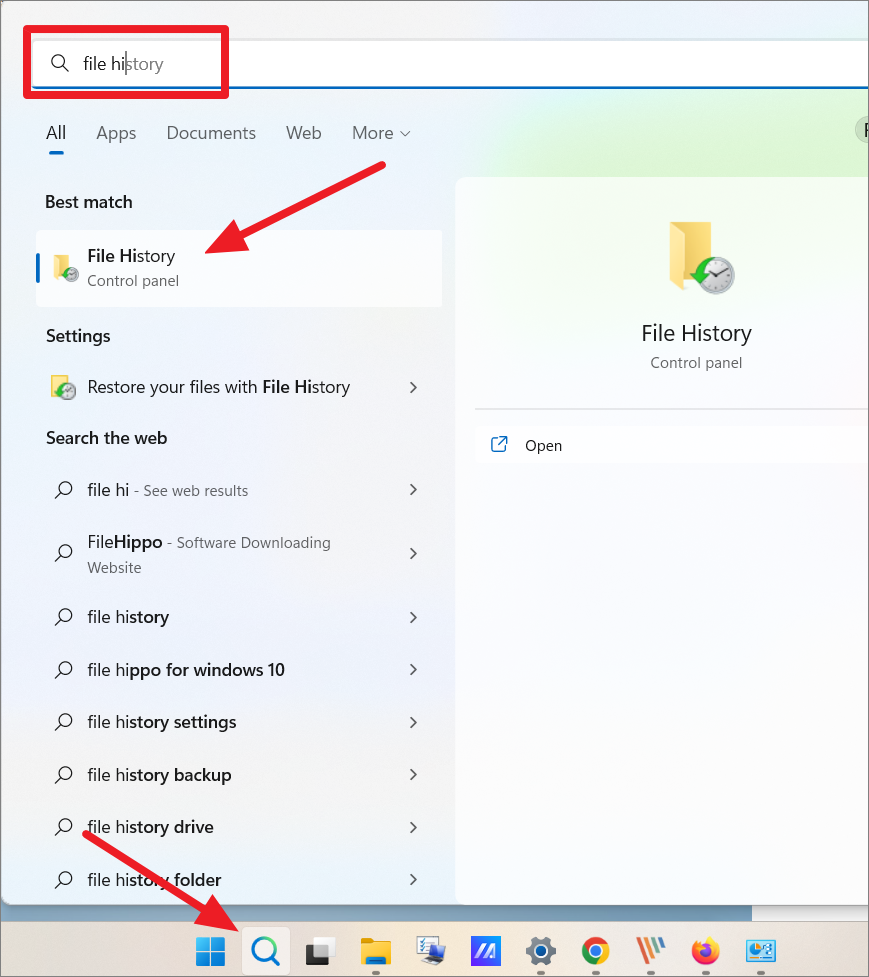
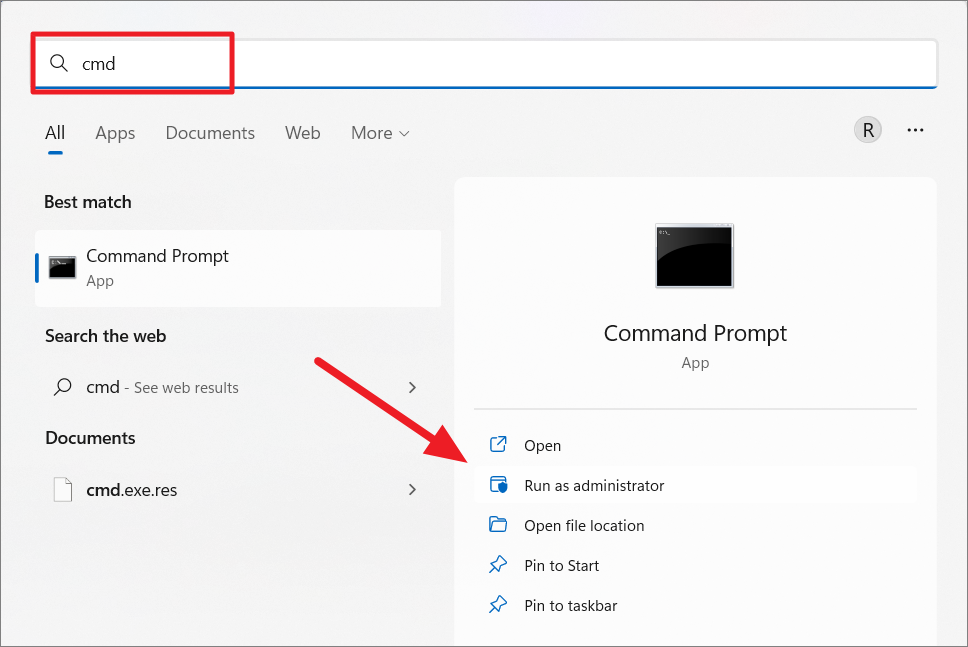
Connect an external hard drive to your computer. Click on the Search icon in the taskbar, type File History in the search bar, and select the corresponding result.
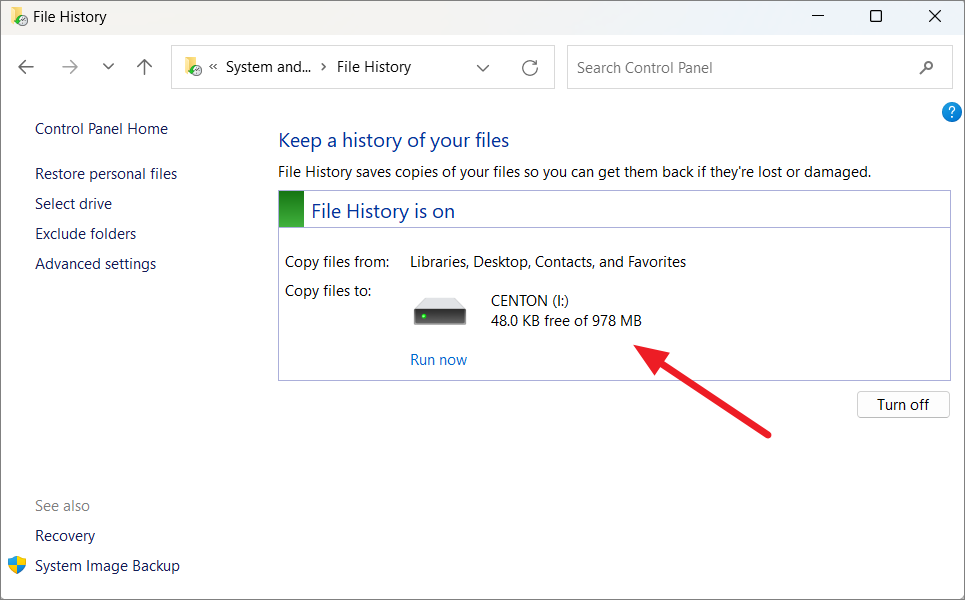
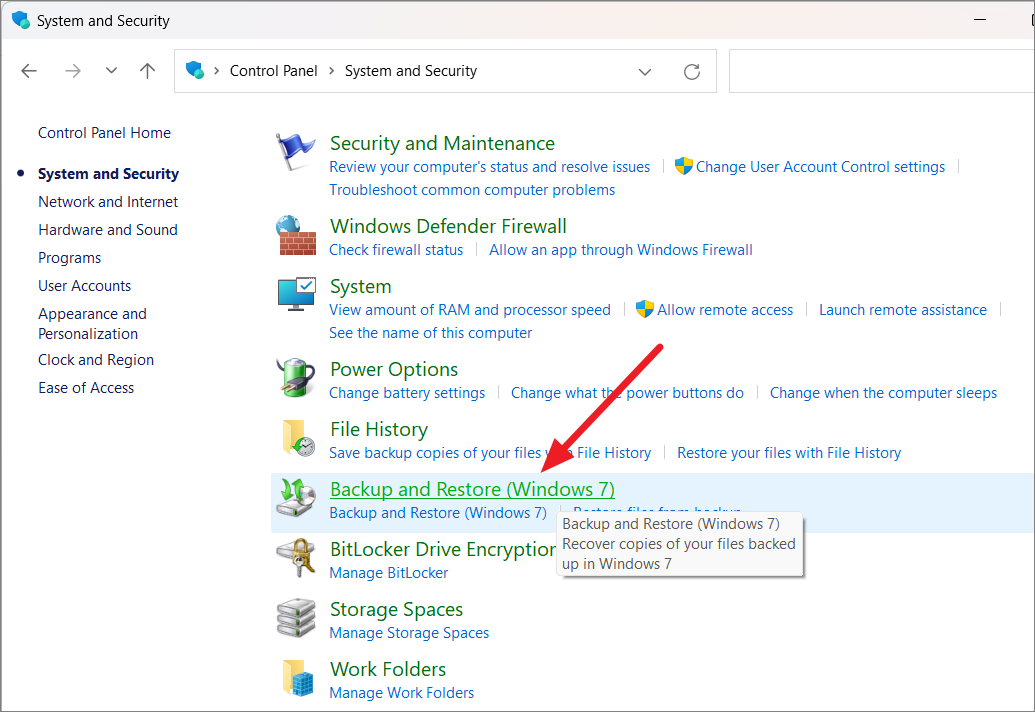
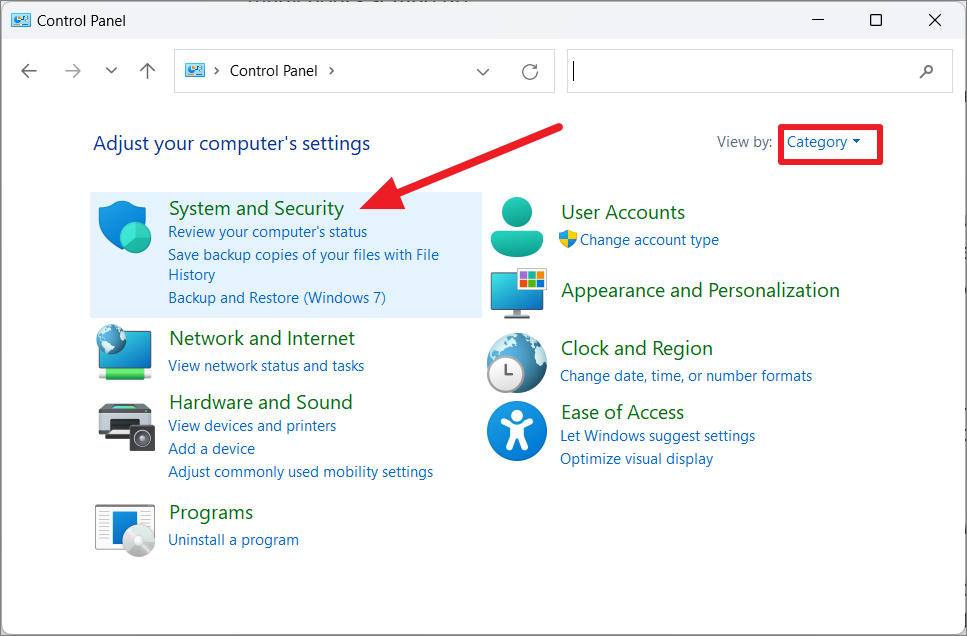
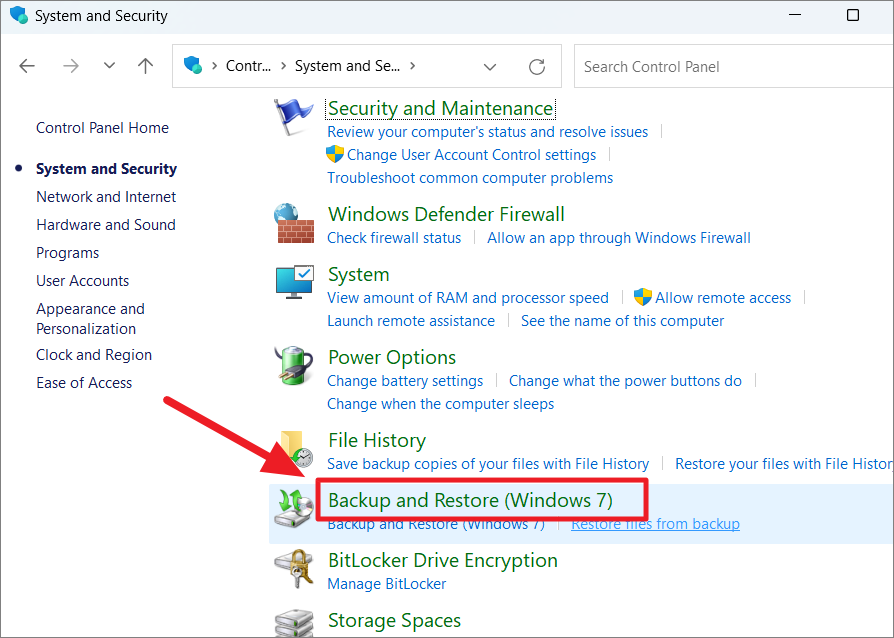
Alternatively, navigate to Control Panel by typing Control Panel in the search bar and selecting it. Then, go to System and Security and click on File History.
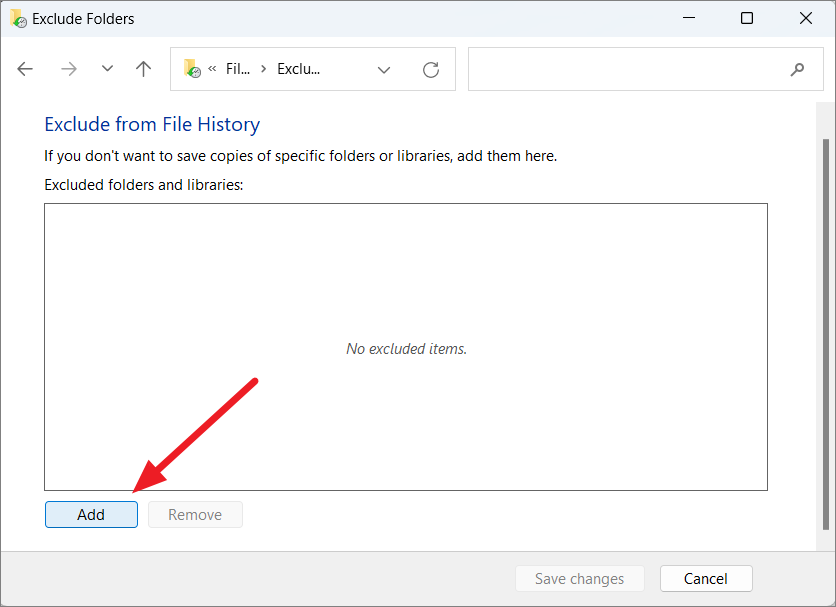
To exclude certain folders from the backup, click on Exclude folders in the left panel. Then, click Add, select the folders you wish to exclude, and click Save changes.
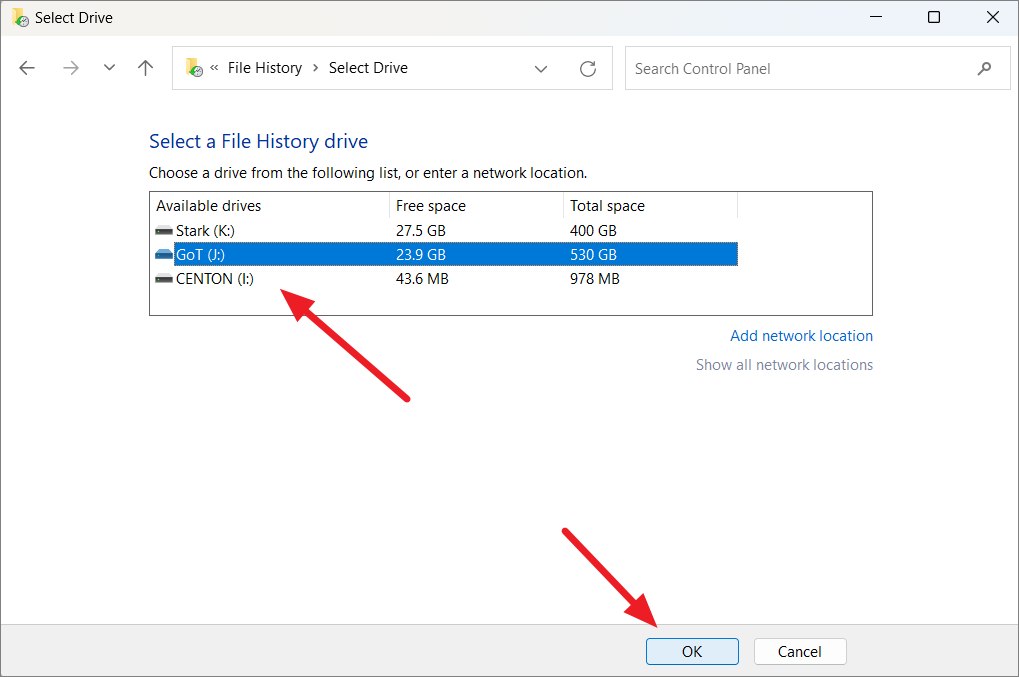
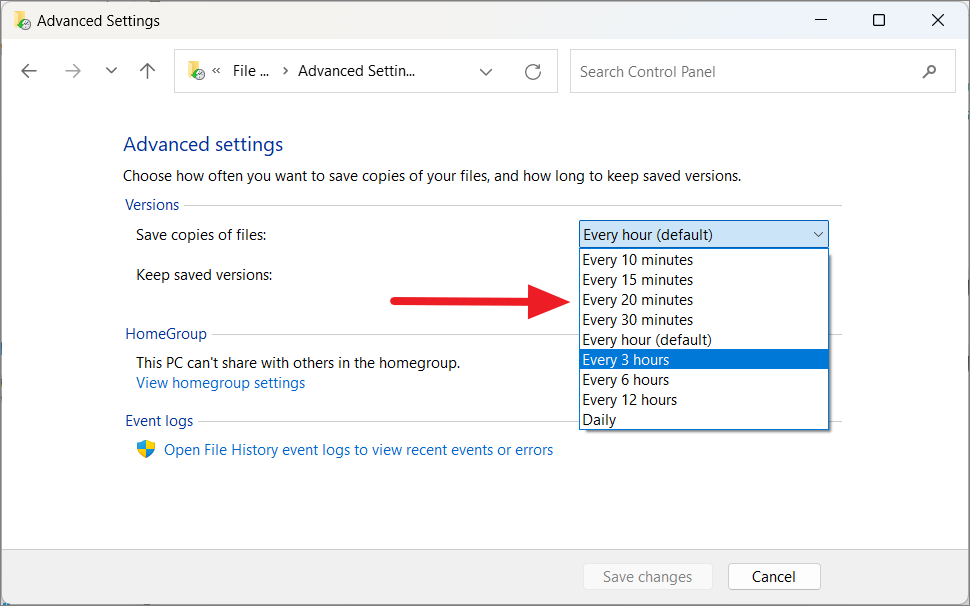
To adjust backup frequency and retention, click on Advanced settings. Set how often you want to save copies under Save copies of files and specify how long to keep them under Keep saved versions.
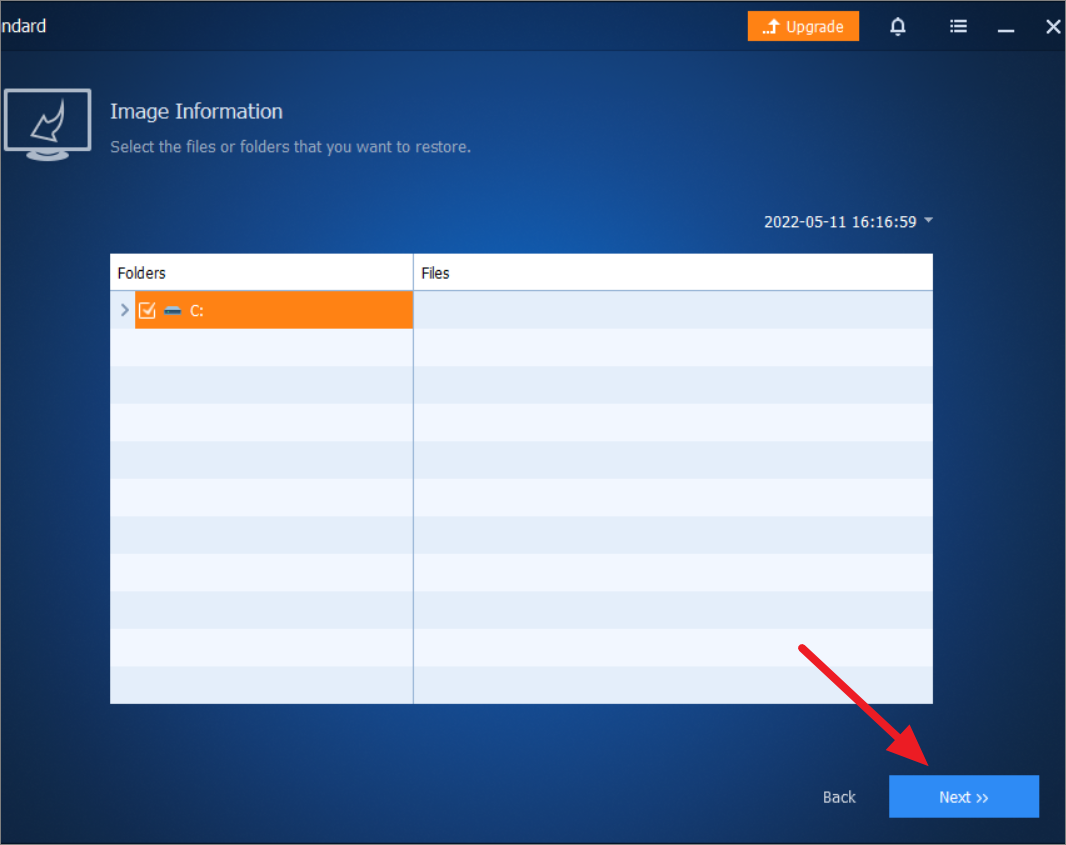
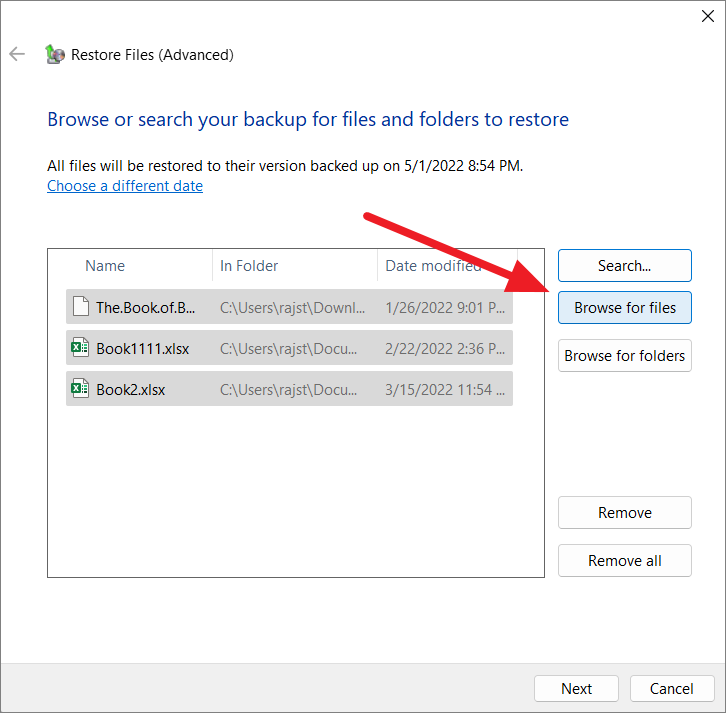
To restore files, click on Restore personal files in the File History window. Browse through your backups, select the files or folders you want to restore, and click the Restore button.
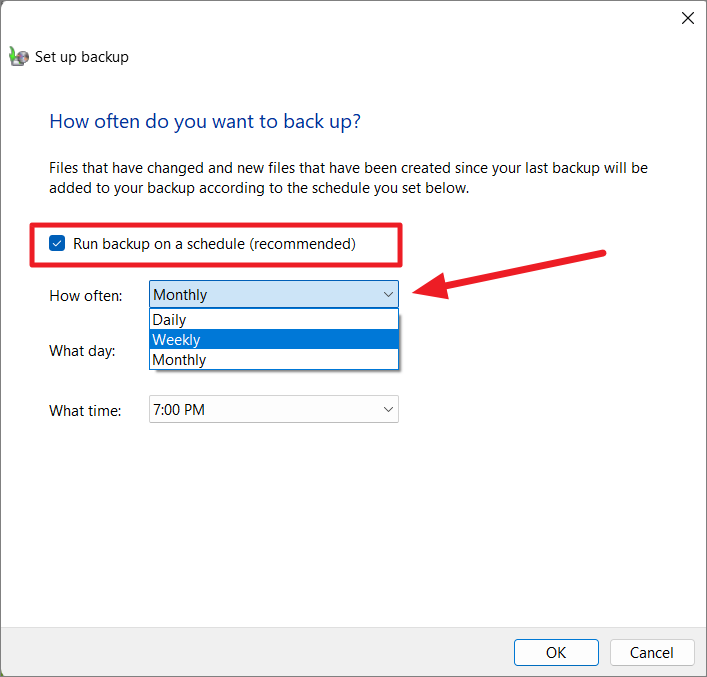
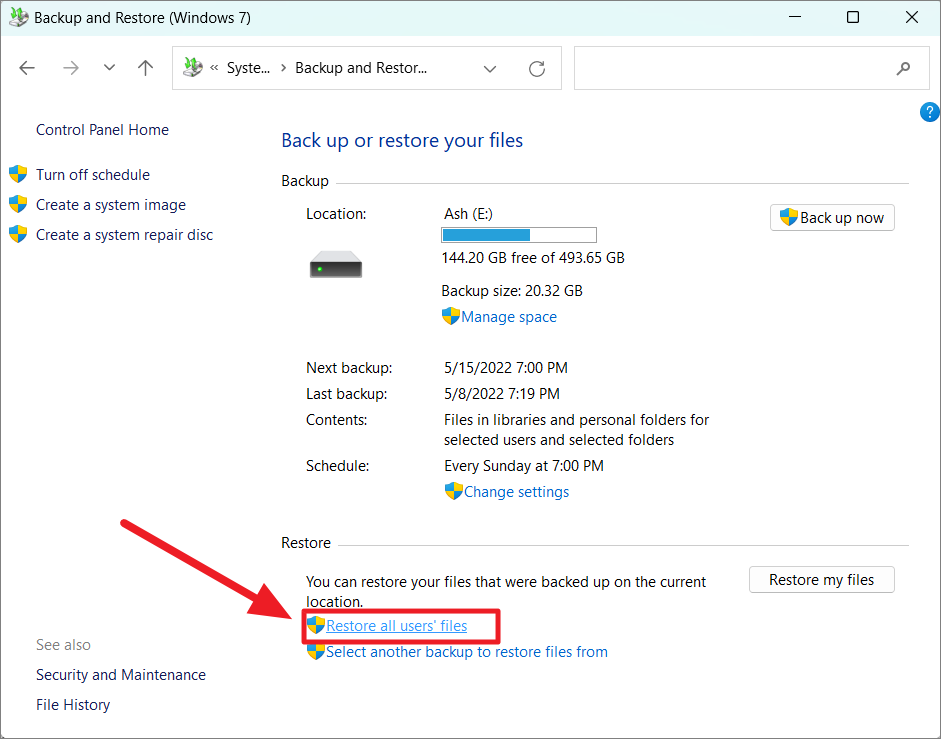
Set Up Automatic Backup of Windows 11 to External Hard Drive
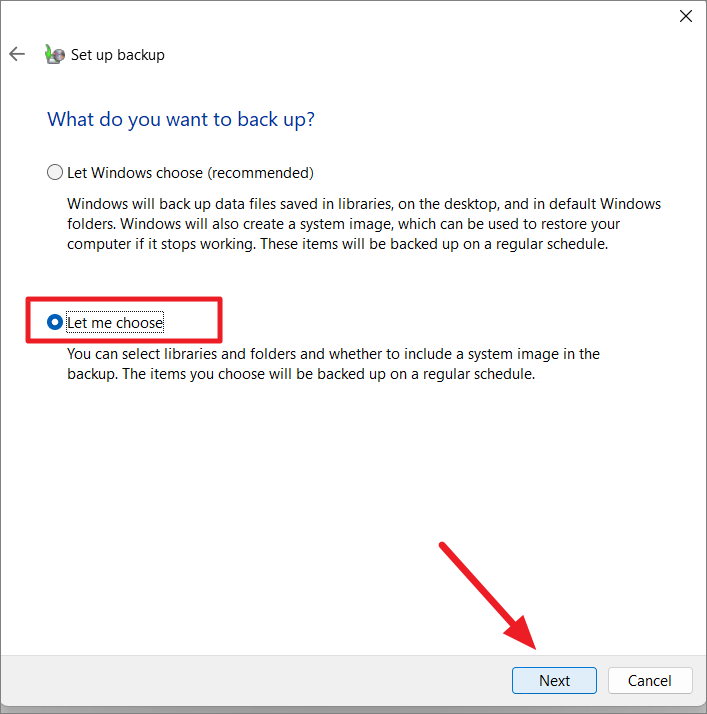
Automating backups ensures your data is regularly copied without manual intervention. Windows 11’s Backup and Restore feature allows you to schedule backups.
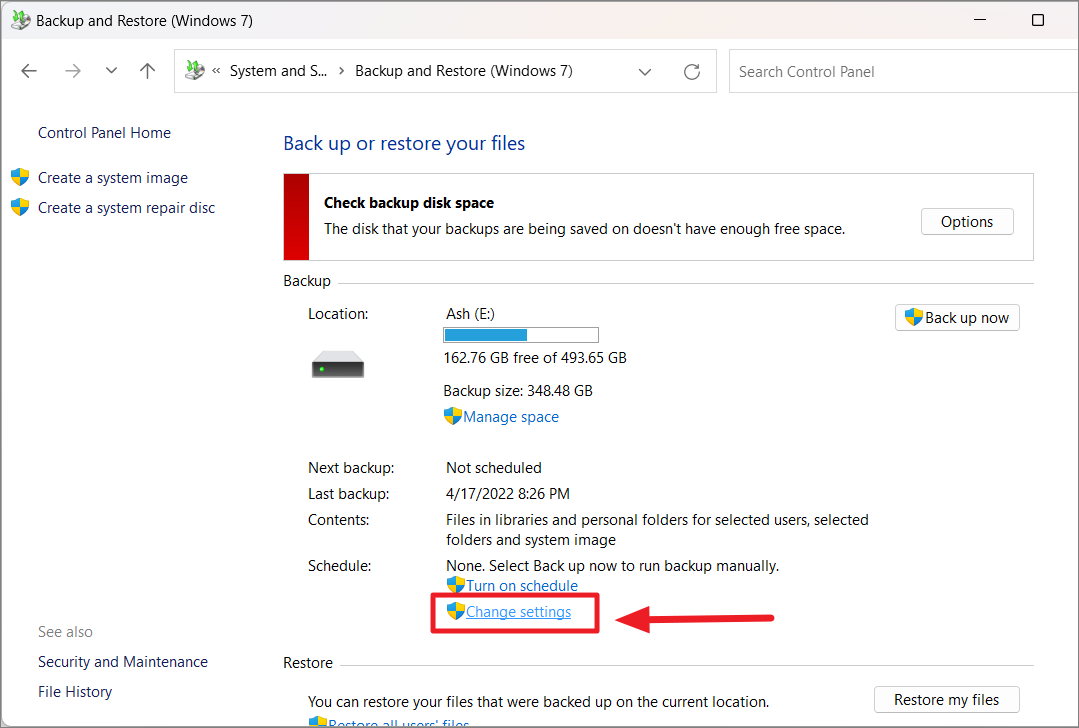
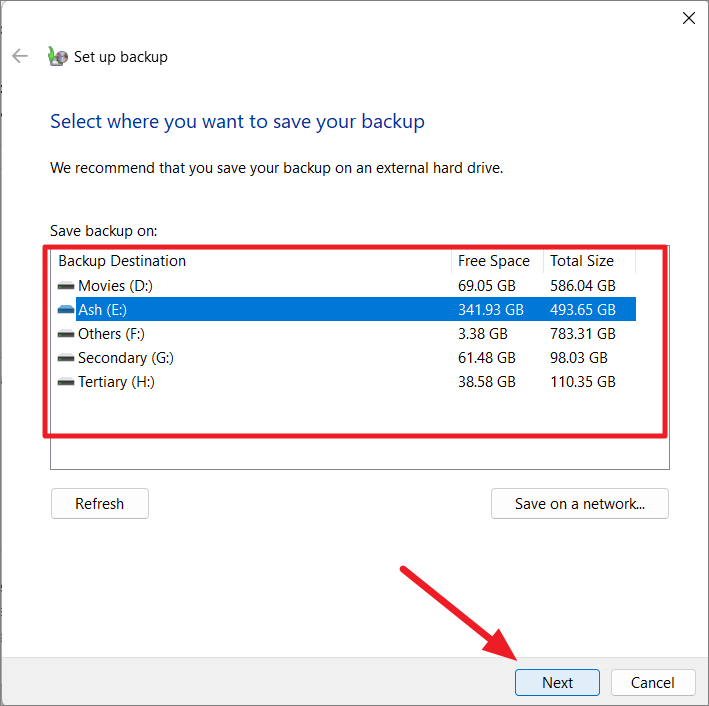
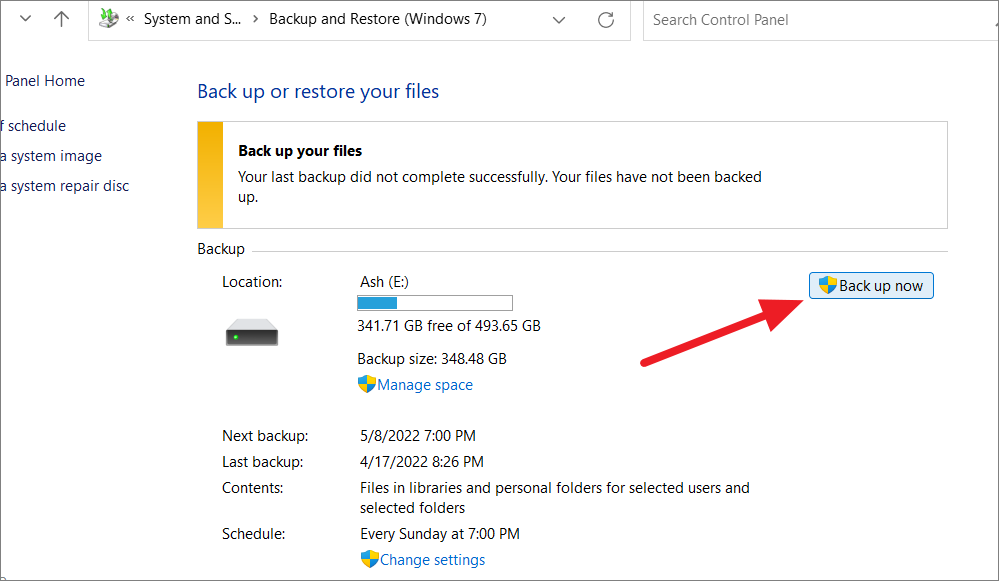
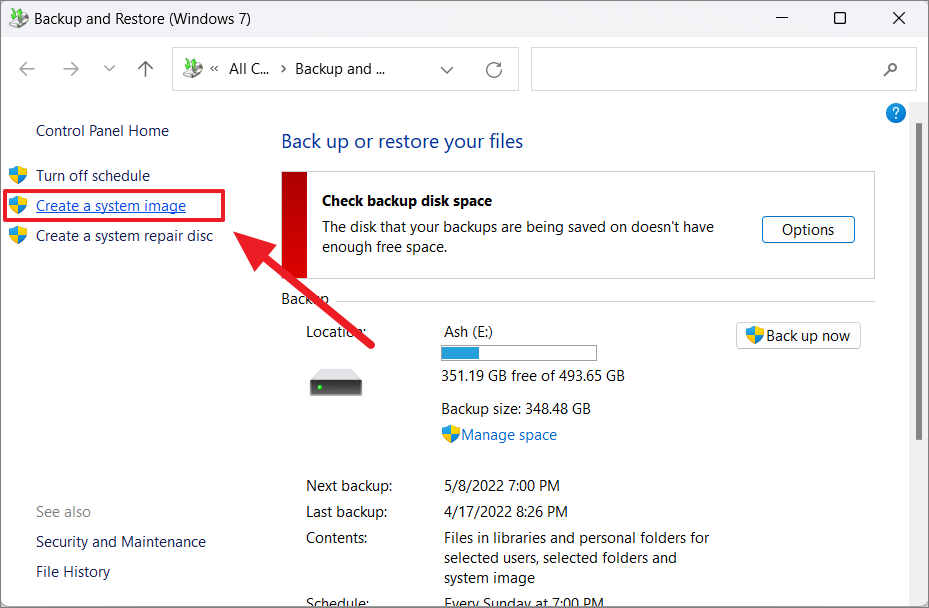
Connect your external drive to the PC. Open the Start menu, type Control Panel, and select it. Navigate to System and Security, then click on Backup and Restore (Windows 7).
Click Save settings and exit. The backup might start immediately; if not, click Backup now to initiate it.
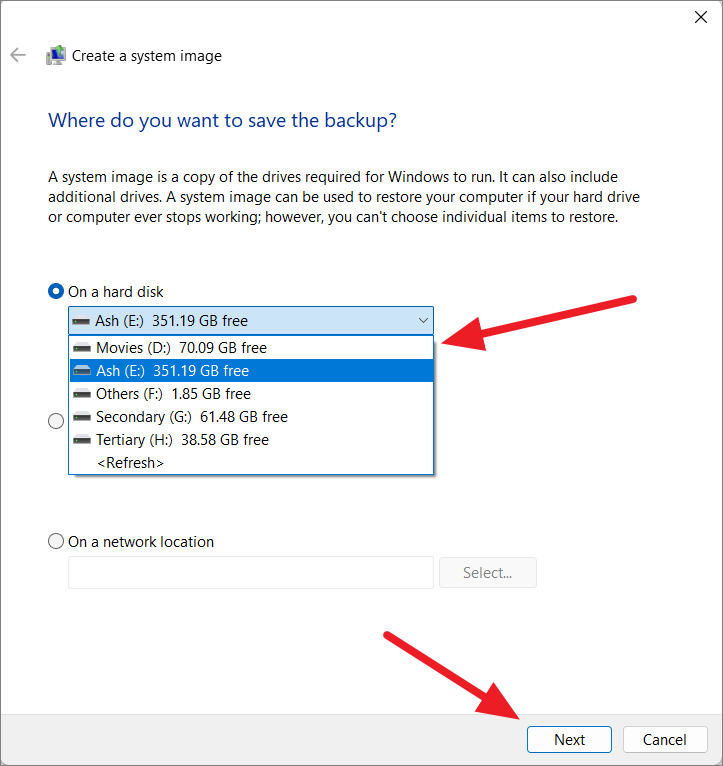
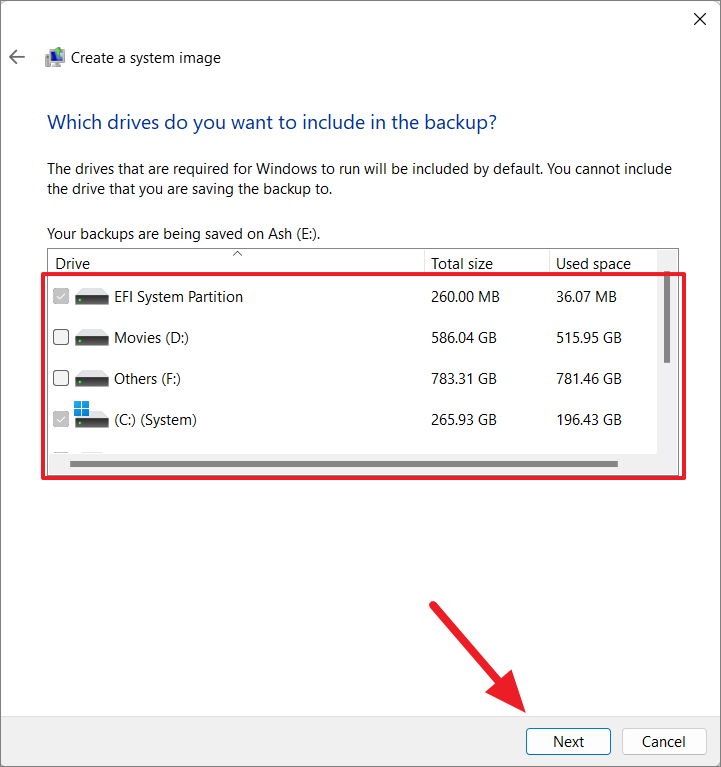
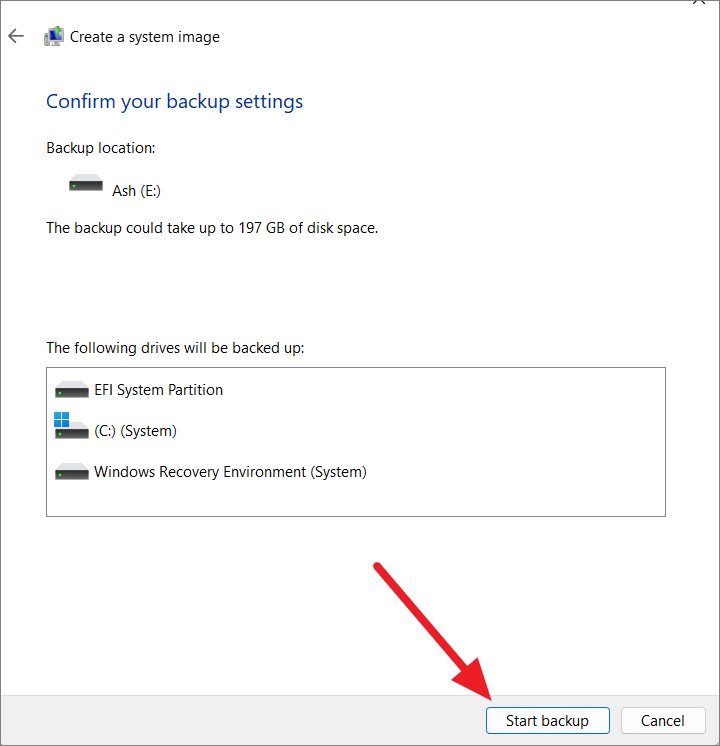
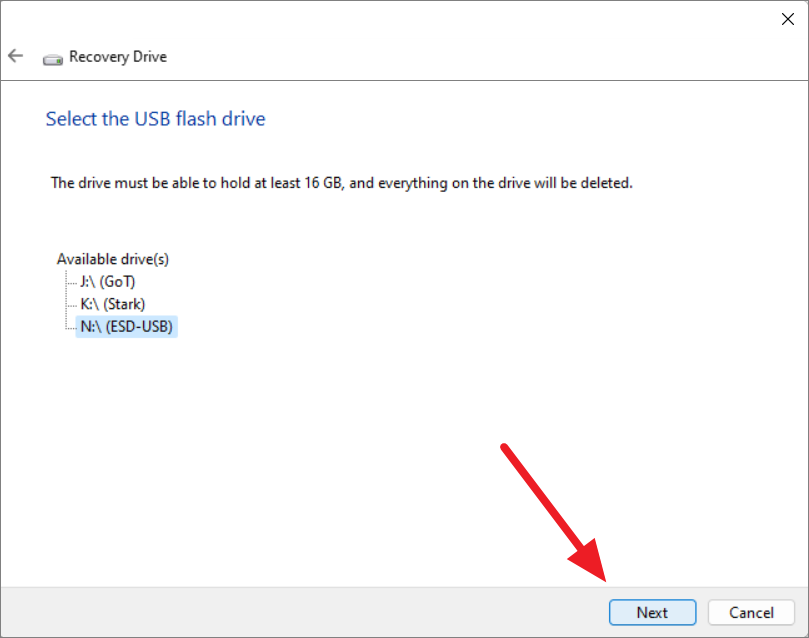
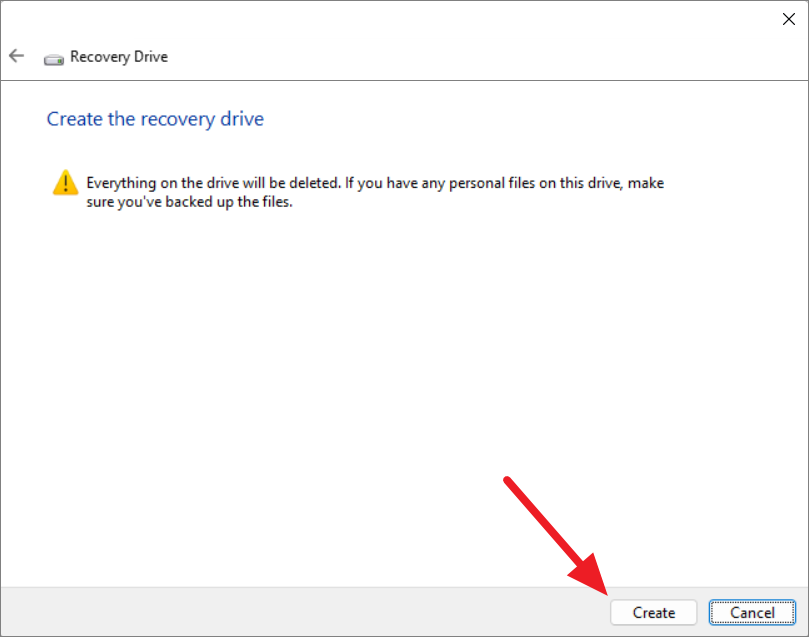
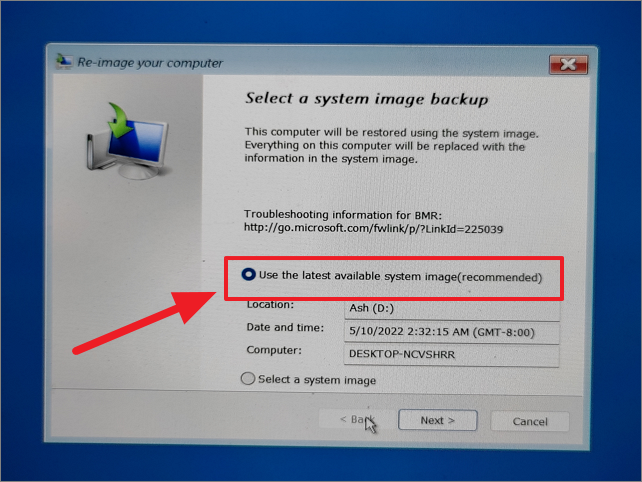
How to Create a System Image Backup Using Backup and Restore Feature
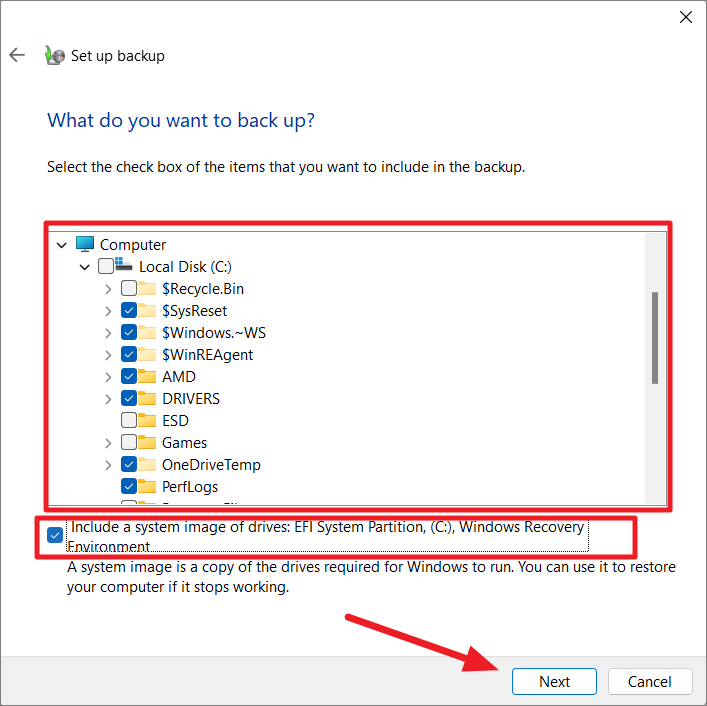
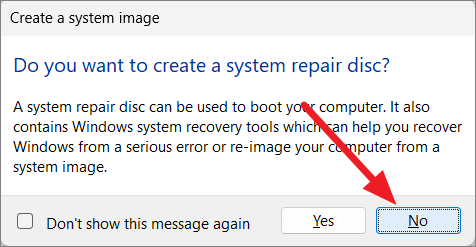
A system image backup captures the entire state of your system, allowing you to restore everything in case of catastrophic failure. Step 1: Open the Start menu, search for Control Panel, and select it.
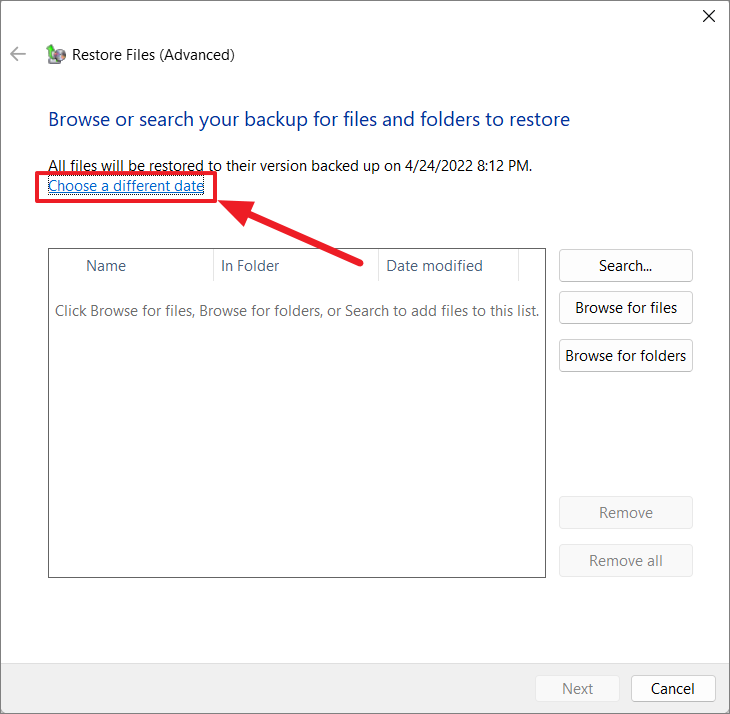
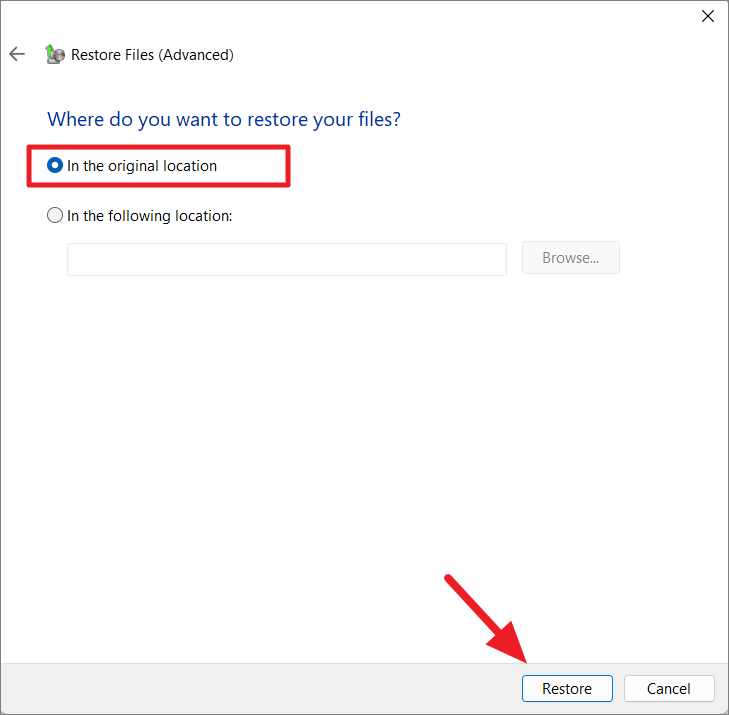
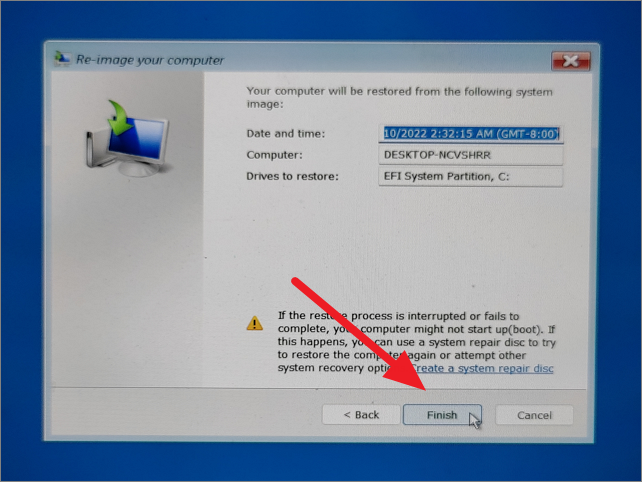
Confirm your choices and click Finish. Confirm any warnings to start the restoration.
Regular backups are essential to protect your data and system settings. By following these methods, you can ensure your Windows 11 system is securely backed up and can be restored if necessary.