
In any computer, ‘Administrator’ is the default admin account. Users also have the option to create more accounts as per their requirements.
Many people like to have a fancy administrator name or something they like. Windows 10 offers the user an option to change the administrator name. It can be done in a few simple steps.
Changing Administrator Name
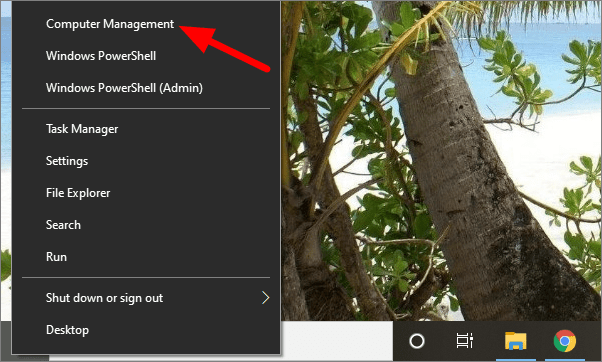
Right click on the windows sign at the bottom left corner of the screen and select ‘Computer Management’.
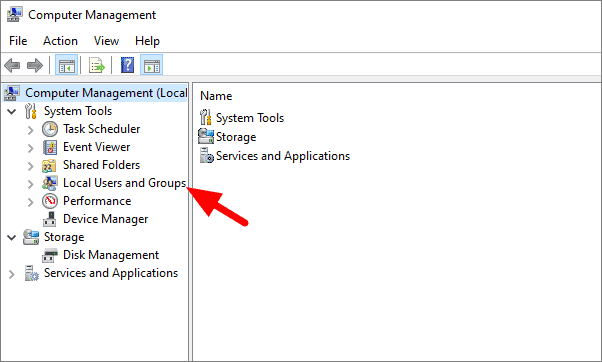
In computer management, click on ‘Local Users and Groups’ under sytem tools. It is on the left side of the screen.
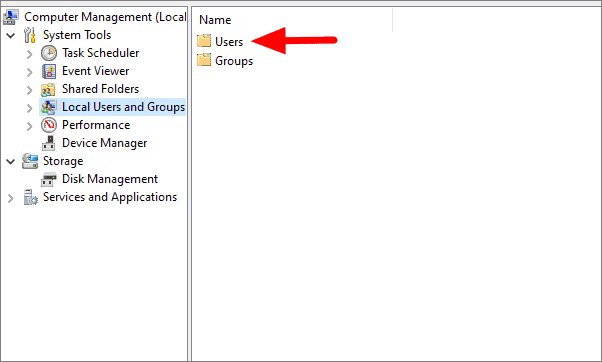
Here, you will have two options, users and groups. Double-lick on ‘Users’.
You will see the list of all the users in this section. To change the administrator name, right-click on ‘Administrator’ and then click on ‘Rename’.
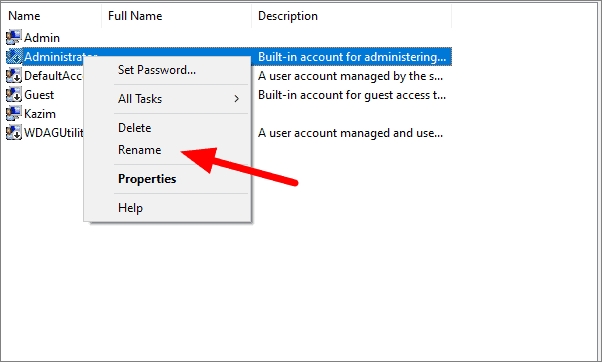
You can now change the name to anything you want. Simple, isn’t it?


