Whenever your system is connected to a network, an IP is leased to it. The period for which an IP is leased to a system is the DHCP (Dynamic Host Control Protocol) lease time.
DHCP lease time comes into play only in cases of temporary IPs. After the lease time is over, the IP is assigned to another system. Since only a limited number of IPs are allotted to each network, DHCP lease time has to be kept low. We can go for higher lease time in the case of home networks but for offices and social places, the lease time is kept low.
Changing DHCP Lease Time from your Router
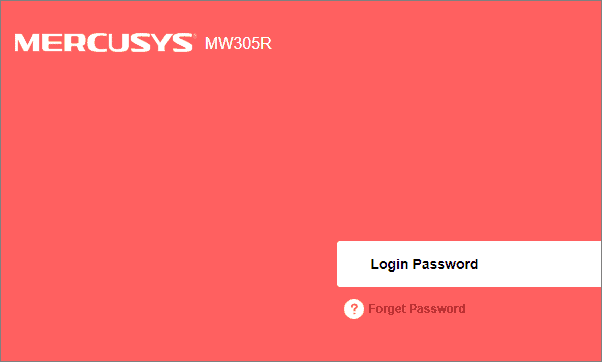
To change the DHCP lease time, you need to change the DHCP settings of the router. On your browser, enter the IP address of your router. It’s generally written on the router or can be found in the network settings. In most cases, it is 192.168.1.1
Enter your login password and continue.
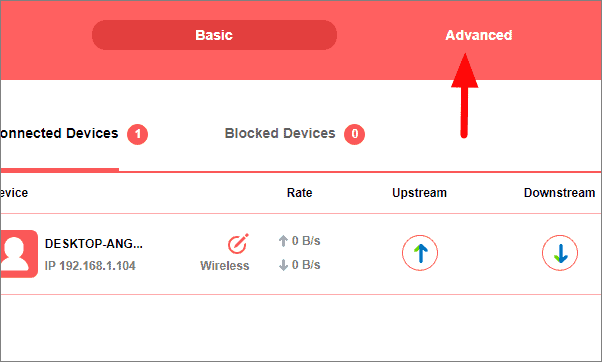
Search for the ‘Advanced’ option on the next page and click on it.
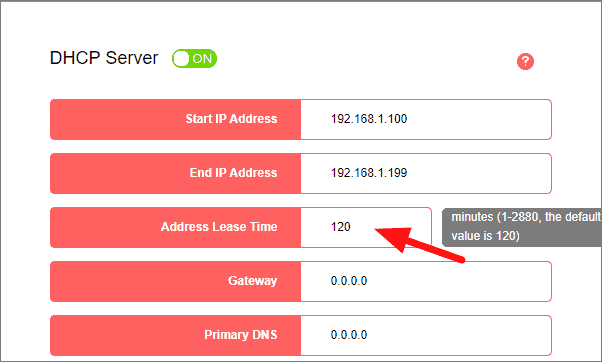
Under the ‘Advanced’ tab, select the ‘DHCP Server’.
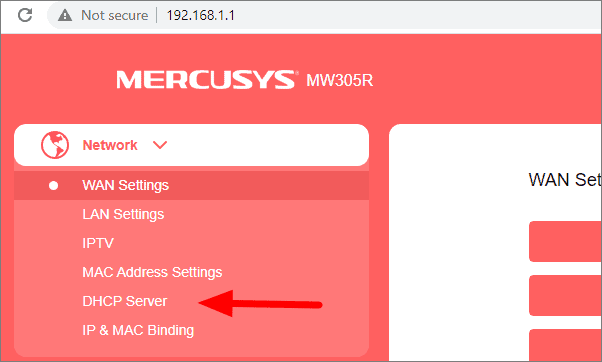
On this page, you will see multiple options regarding DHCP server. Here you can change the DHCP Lease Time.
Different routers use different units for lease time, some use minutes while others use seconds. Always check this before changing the DHCP lease time and set it accordingly.


