
If you are a Windows user, you must have at some point wanted to change the drive letter assigned to a particular drive. Windows 10 offers this feature for all the drives, namely hard disk drive, USB drive, and CD drive.
It is very simple to change the drive letter in Windows 10. It can be done in many ways but some are a bit technical, therefore we will guide you through the simplest one.
Changing Drive Letters in Windows 10
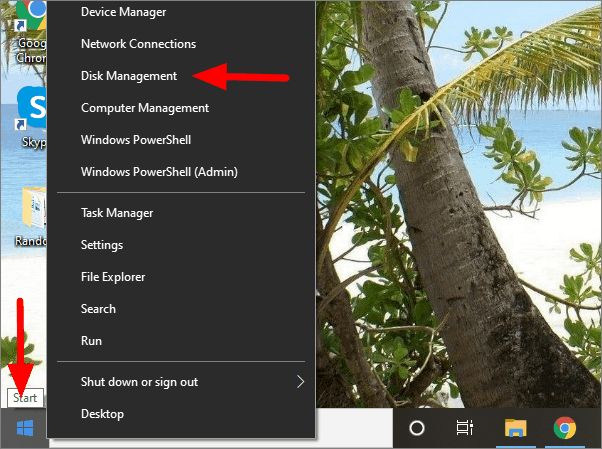
Click on the Windows icon on the left corner of the Taskbar and then select ‘Disk Management’ from the menu.
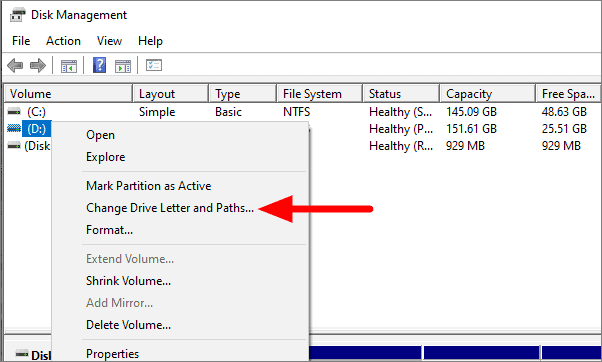
You will now see the list of all the drives on your system. Right-click on the drive name you want to change and select ‘Change Drive Letter and Paths..’.
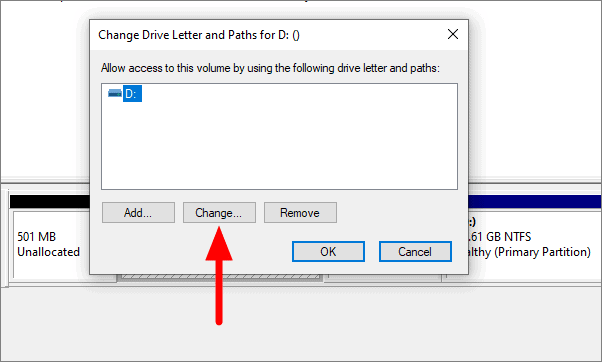
Click on ‘Change’ on the next window to change the drive letter.
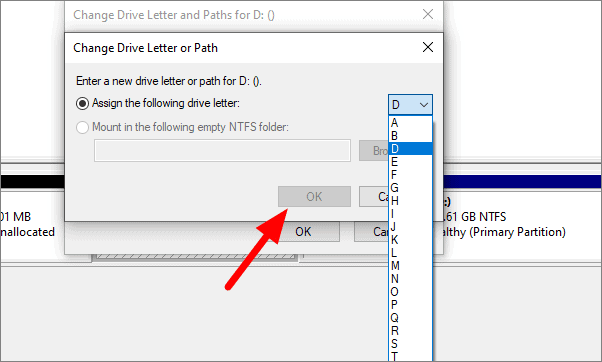
Click on the box next to ‘Assign the following drive letter’ and select the drive letter of your choice. After you select the drive letter, click on ‘OK’ at the bottom.
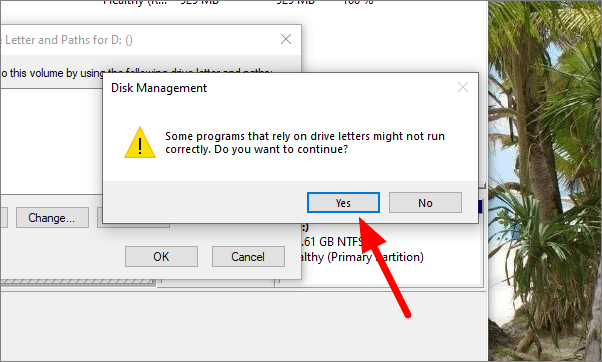
A warning will be displaced on the screen saying that some programs that rely on drive letters might not run correctly. Click on ‘Yes’.
Some applications and software might not function properly after changing the drive name. Therefore, it is advised not to change the drive name of the drive on which you have installed any applications.


