Don't like the user folder name on your Windows 11 PC? It's easy to change it.
Don’t like the user folder name on your Windows 11 PC? It’s easy to change it.
by Parth Sawhney
When setting up a new user account on Windows 11, the system automatically creates a corresponding user profile folder in the C:\Users directory. This folder is usually named using the first five letters of your account name. If this default folder name doesn’t meet your preferences, you can change it by editing the Windows Registry. Before proceeding, it’s crucial to understand the potential effects on your applications and take necessary precautions.
Will your apps still work if you change the user folder name? Yes, most applications will continue to function normally after you change the user folder name. However, some Microsoft Store apps like OneDrive and Outlook might encounter issues. To resolve any problems, you can simply sign out and sign back into these apps.
Note: It’s highly recommended to create a system restore point before making any changes to the Registry. Incorrect modifications can lead to serious issues that may require a full reinstallation of Windows.
Change the User Folder Name Using the Registry Editor
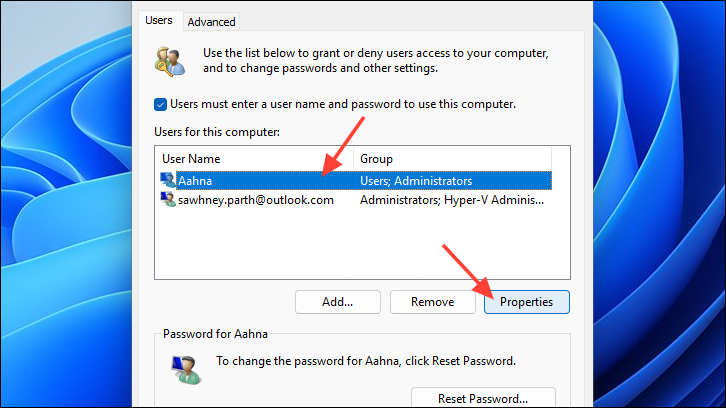
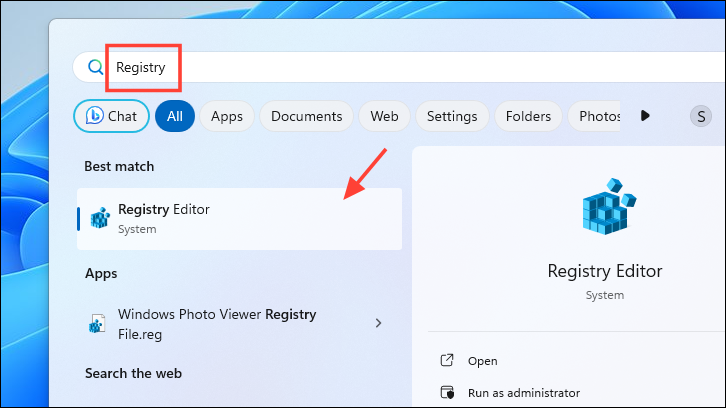
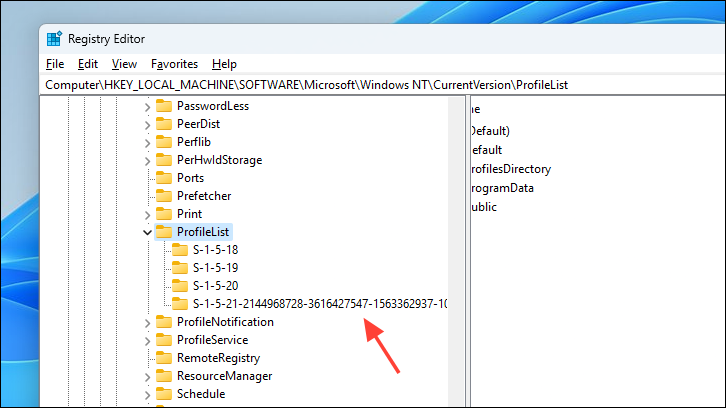
To change the user folder name, you’ll need to create a new administrator account and then modify the Registry settings for your original account. Follow these steps carefully to ensure a smooth process.
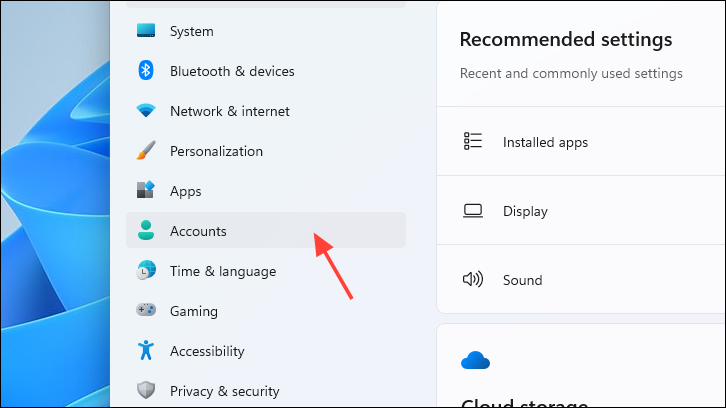
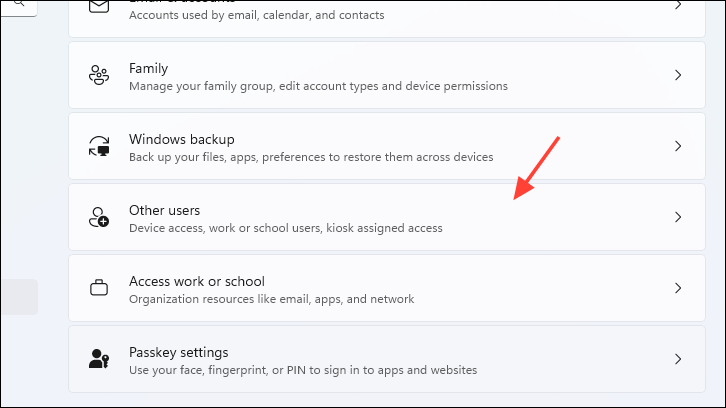
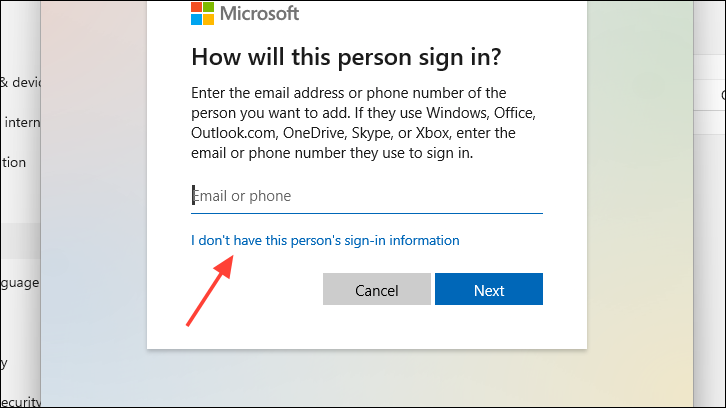
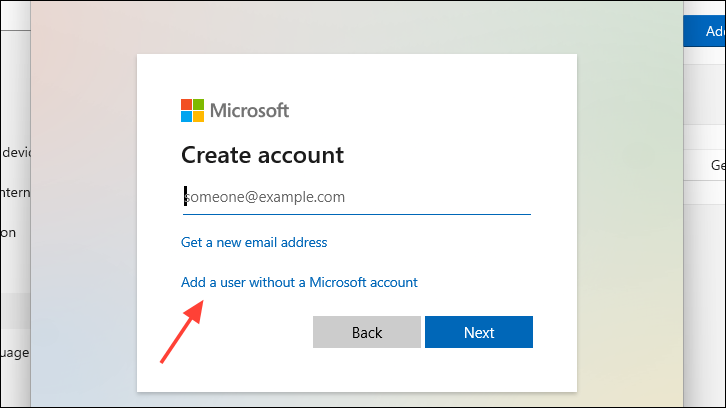
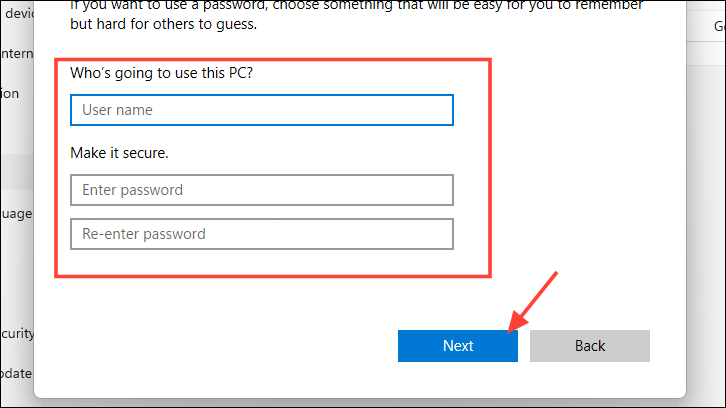
If you don’t have another administrator account, you need to create one. Press Windows+I to open the Settings app. From the left sidebar, select ‘Accounts’.
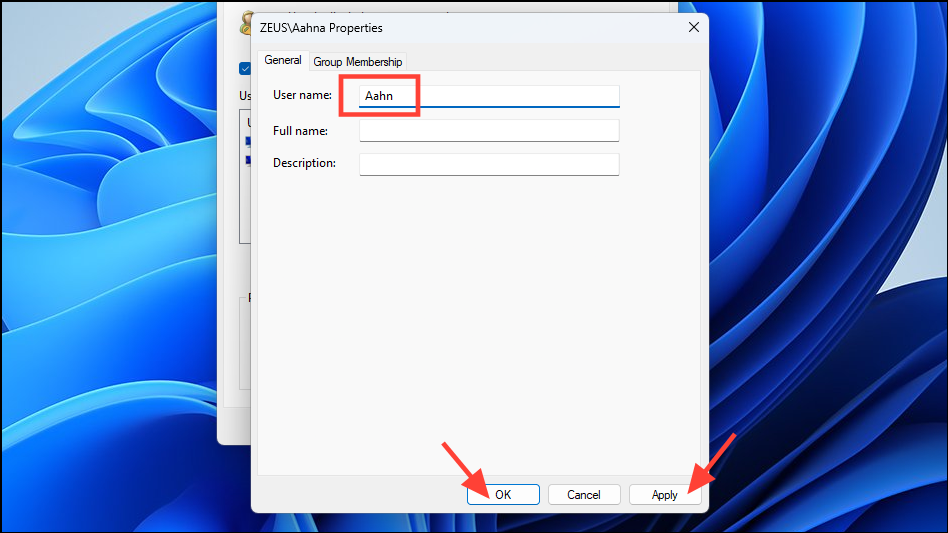
In the ‘User name’ field, enter the new name you want for the user folder. If desired, fill in the ‘Full Name’ field with how you want your name displayed at login. Click ‘Apply’ and then ‘OK’ to save the changes.
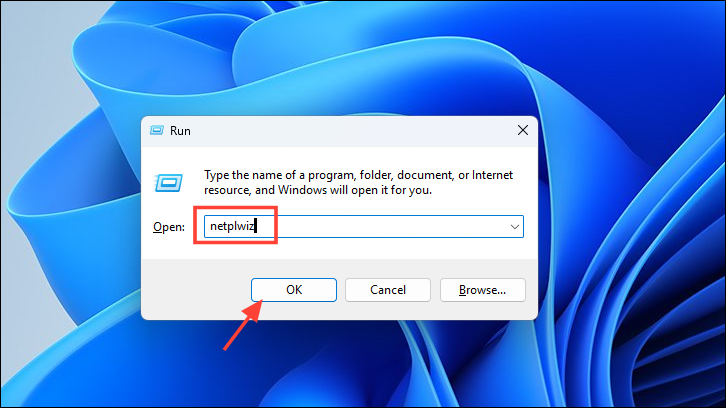
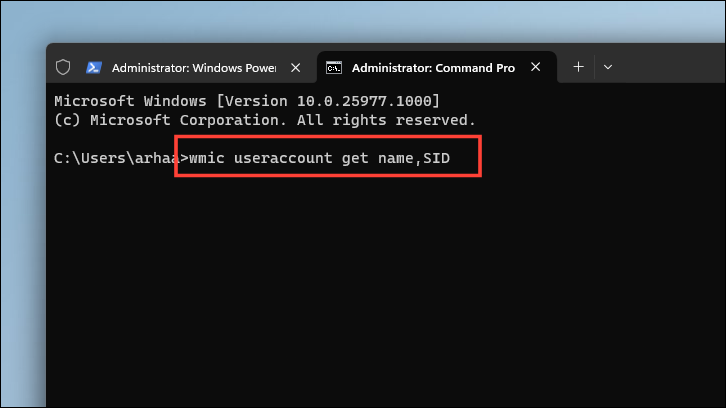
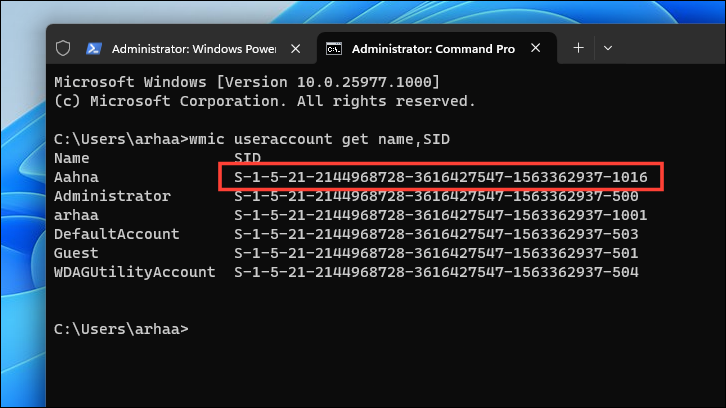
After the restart, open the Command Prompt with administrative privileges. Click the Start Menu, type ‘Command Prompt’, right-click the app, and select ‘Run as administrator’.
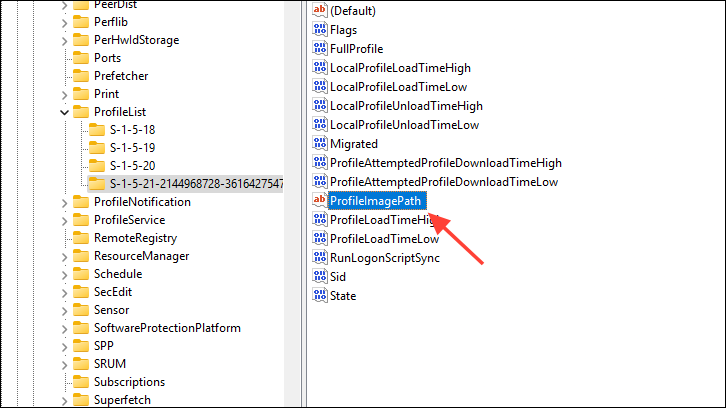
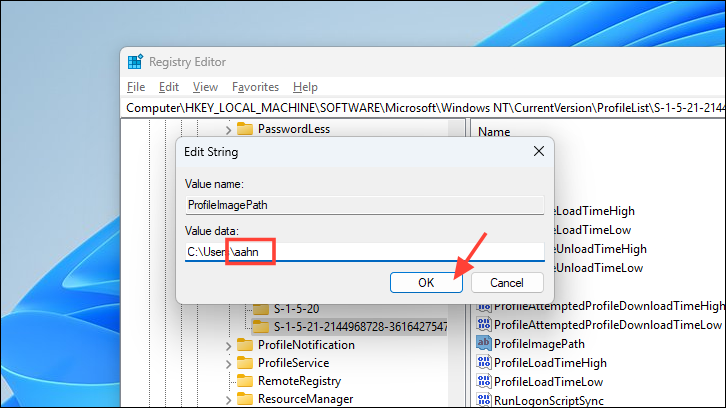
Modify the path in the ‘Value data’ field to reflect the new user folder name after C:\Users\. Be careful not to change any other part of the path. Click ‘OK’ to save the changes and close the Registry Editor.
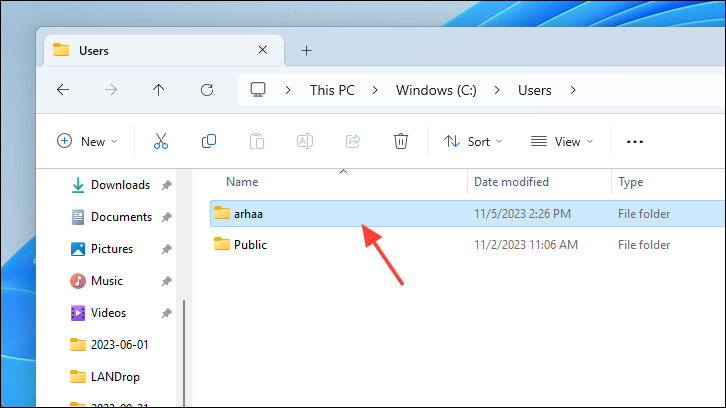
Find your original user folder, right-click on it, and select ‘Rename’. Change the folder name to match the new name you specified in the Registry Editor, then press Enter.
Note: If you encounter an error stating “You can’t perform this action”, ensure you’re completely signed out of your original account. Restart your computer and try renaming the folder again.
By meticulously following these steps, you can successfully change your user folder name on Windows 11. Always exercise caution when editing the Registry to prevent any unintended system issues.