
Windows 11 provides a built-in Magnifier tool that allows you to zoom into specific parts of your screen, enhancing readability and making it easier to view details in images or text. Adjusting the Magnifier’s zoom level can greatly improve your user experience, especially if you have visual impairments or prefer larger on-screen elements. This guide explains how to change the zoom level for the Magnifier using the Settings menu and the Registry Editor.
Change Magnifier zoom level using the Settings menu
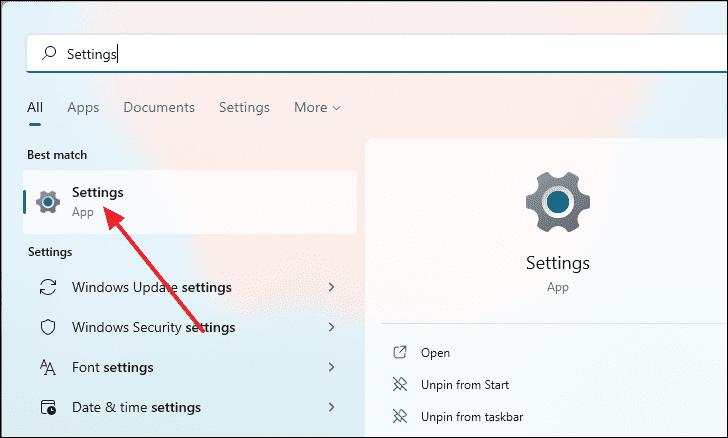
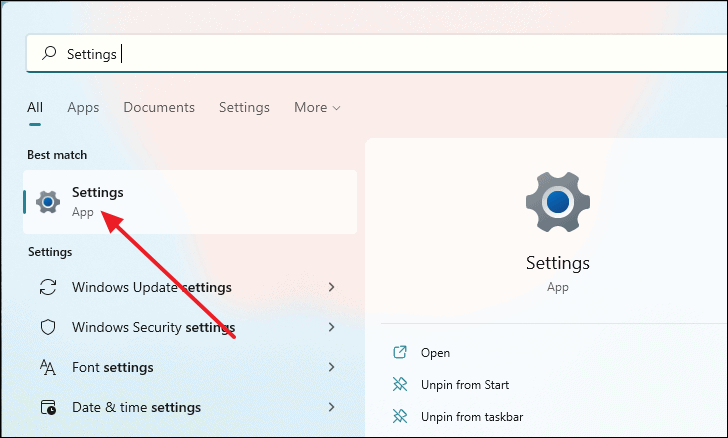
- Open the Settings menu by clicking the Start button and selecting Settings, or by pressing
Windows+Ion your keyboard.
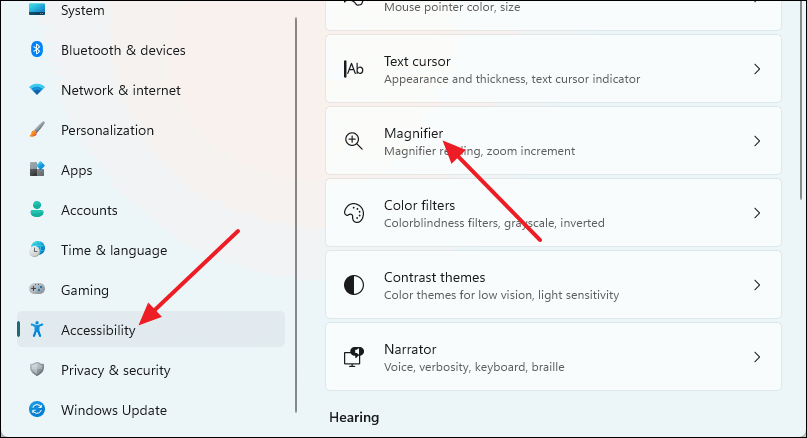
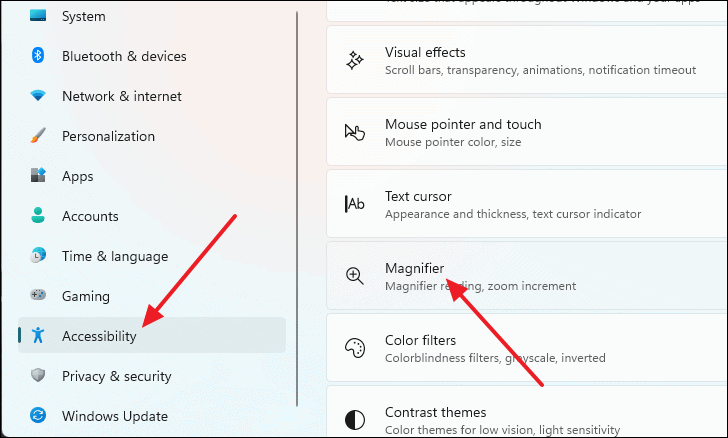
- In the Settings window, select Accessibility from the left-hand menu, then click on Magnifier on the right pane.
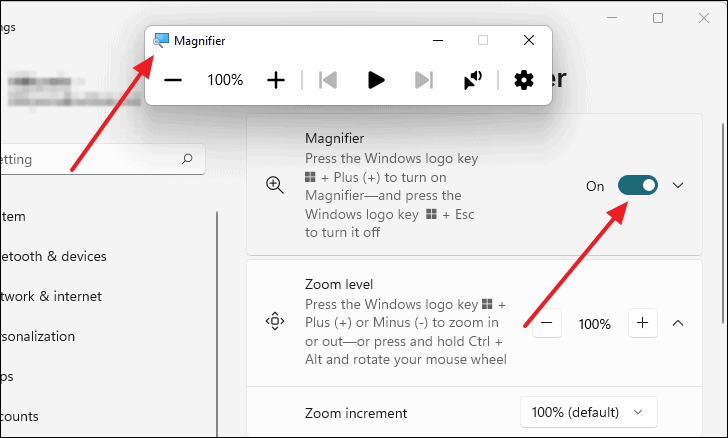
- Toggle the switch to On to enable the Magnifier.
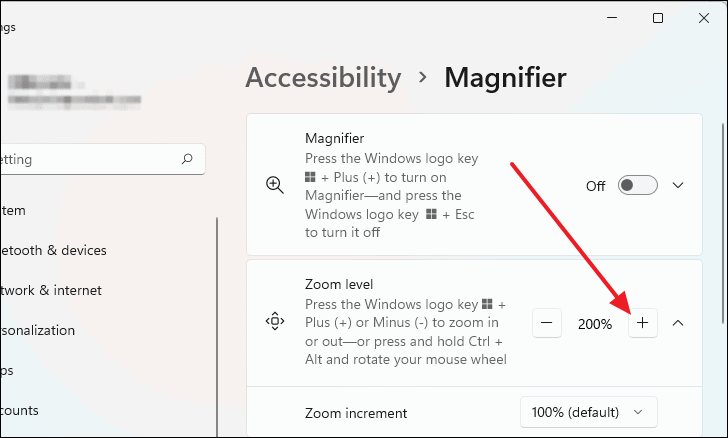
- Under the Zoom level section, adjust the zoom percentage by clicking the + or – buttons to increase or decrease the magnification.
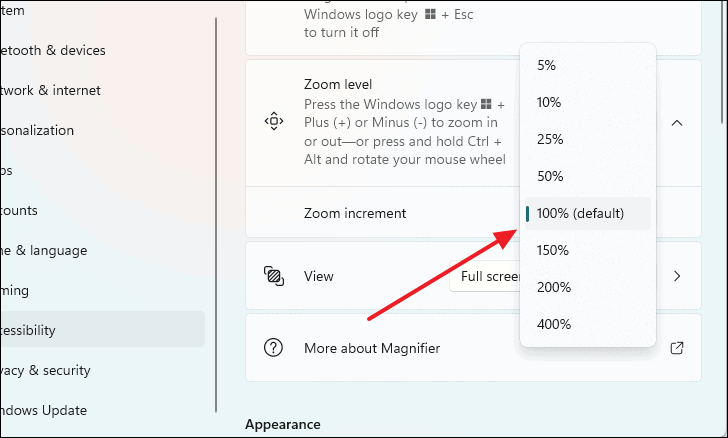
- To change how much the zoom level increases or decreases with each click, select your preferred value from the Zoom increment dropdown menu.
How to launch the Magnifier
You can open the Magnifier in Windows 11 using a keyboard shortcut or through the Settings menu.
Using keyboard shortcut
Press Windows++ on your keyboard to launch the Magnifier instantly. The magnifier overlay will appear, allowing you to adjust the zoom level by clicking the + or – buttons.
Using the Settings menu
- Open the Settings menu by clicking the Start button and selecting Settings, or by pressing
Windows+I.
- Select Accessibility from the left-hand menu, then click on Magnifier on the right.
- Toggle the switch to On to enable the Magnifier. The magnifier overlay will appear.
Change Magnifier zoom level using the Registry Editor
You can also adjust the Magnifier’s zoom settings by editing the Windows Registry. Be cautious when making changes to the registry, as incorrect modifications can affect system stability.
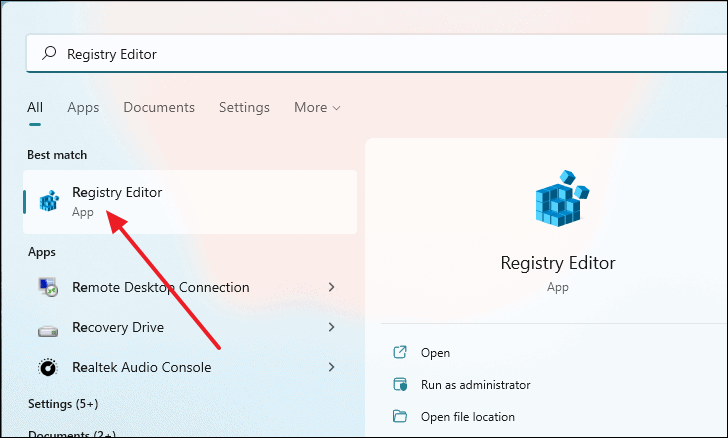
- Open the Registry Editor by typing Registry Editor in the Start menu search and selecting it from the results.
- In the Registry Editor, navigate to the following path by copying and pasting it into the address bar, then pressing
Enter:
HKEY_CURRENT_USER\Software\Microsoft\ScreenMagnifier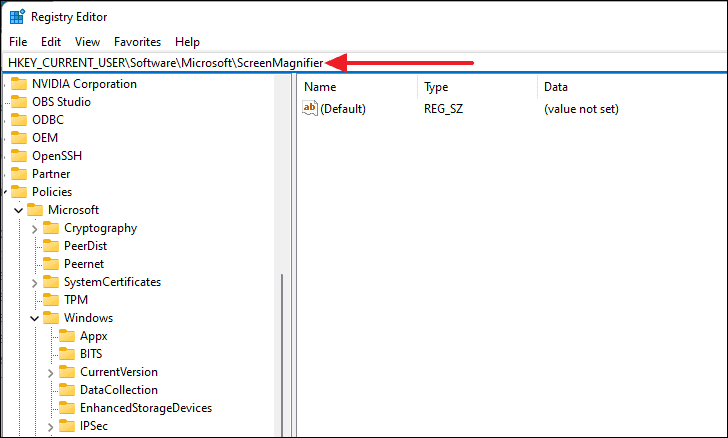
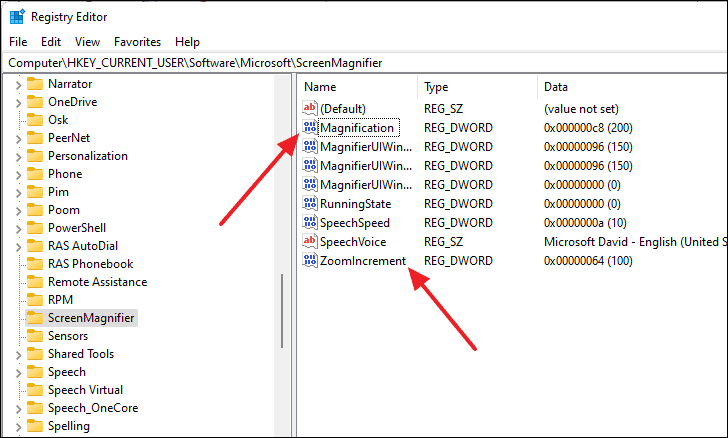
- On the right pane, locate the entries named Magnification and ZoomIncrement. These control the zoom level and zoom increment settings, respectively.
- To modify the zoom level, double-click on the Magnification entry. A dialog box will open.
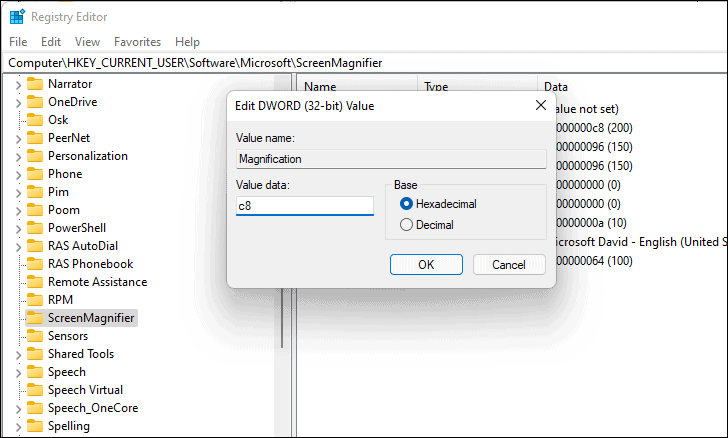
- In the dialog box, select Decimal under Base. Enter your desired zoom level percentage in the Value data field (e.g.,
100for 100%,200for 200%).
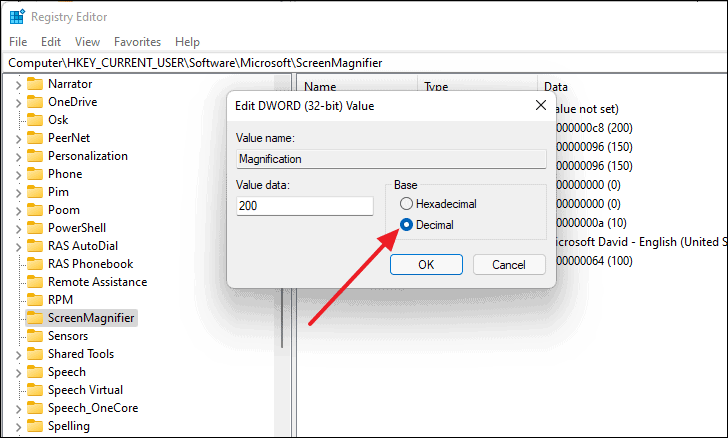
- Click OK to save the changes.
- To adjust the zoom increment, repeat the process for the ZoomIncrement entry.
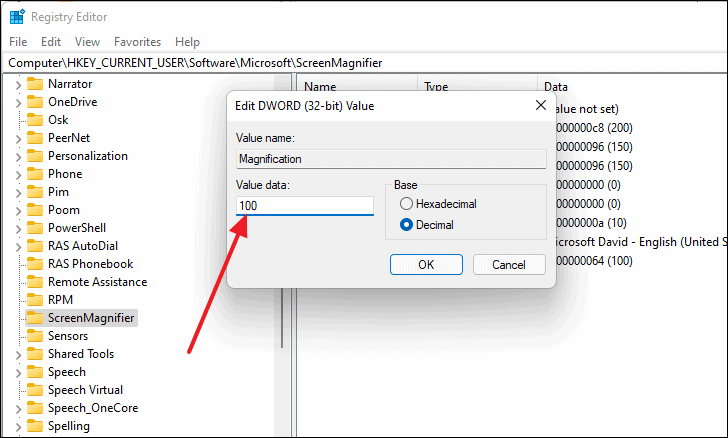
It’s recommended to use standard values like 50, 100, 200, or 400 to avoid potential magnification errors.
Adjusting the Magnifier’s zoom settings in Windows 11 can enhance your viewing experience, making on-screen content more accessible and easier to read. Whether through the Settings menu or the Registry Editor, you have the flexibility to customize magnification levels to suit your needs.


