
Collaborating can be a very painful experience without the right set of tools. And we’re all collaborating on something or other these days. Whether it’s making a presentation in Keynote with a colleague or something as simple as planning a trip with friends, without collaborative tools, the experience can become a pain in the neck.
To make collaboration easier than ever on your Apple devices, iOS 16, iPadOS 16, and macOS Ventura are introducing collaboration in Messages and FaceTime. But collaboration in Messages is at the heart of the entire overhaul.
What Does It Mean to Collaborate Using Messages?
Collaborating using Messages is exactly what it sounds like – you’ll be collaborating in different apps by sending an invitation in Messages. But the scope of collaboration in messages doesn’t end with sending an invitation only; that would be too anticlimactic.
Most apps use email as a primary means for sending collaboration invitations. But corresponding over emails while collaborating doesn’t feel very natural. But chatting over messages is as responsive as written communication can get, especially with all the features Messages already has in the Apple ecosystem. The new collaboration experience in iOS 16, iPadOS 16, and macOS Ventura leverages this.
Even sending an invite is easier over messages than email. And if you already have a group chat with friends, which chances are you do, it even cuts down the work of having to add those people individually. You can select their existing group chat.
When you’re using messages to collaborate in a supported app, the people in the chat are automatically added to the note, document, presentation, or project in question. You can chat over messages right in the app you’re collaborating in. Along with messages, the option to start a FaceTime call is also present right at your fingertips in the project itself. You can easily hop on a FaceTime call and share your screen to make the collaboration session even more effective.
Moreover, any updates made to the project will also be visible in the chat thread. So, you don’t have to pop over to the project all the time to keep an eye on updates.
Collaboration is compatible with Files, the Finder in Mac, Keynote, Numbers, Pages, Notes, Reminders, and Safari, as of now. But it will also be compatible with third-party apps, i.e., where the developers choose to implement it in their apps.
How to Collaborate Using Messages?
You can send a collaboration invitation over Messages for supported apps on your iPhone running iOS 16, iPad with iPadOS 16, or Mac with macOS Ventura. Only people themselves using these software versions will be able to see your collaboration invitation in the Messages app. People on older OS versions will only see an iCloud link that won’t work.
Sending a Collaboration Invitation
Let’s see how it works with the example of the Notes app on iPhone first.
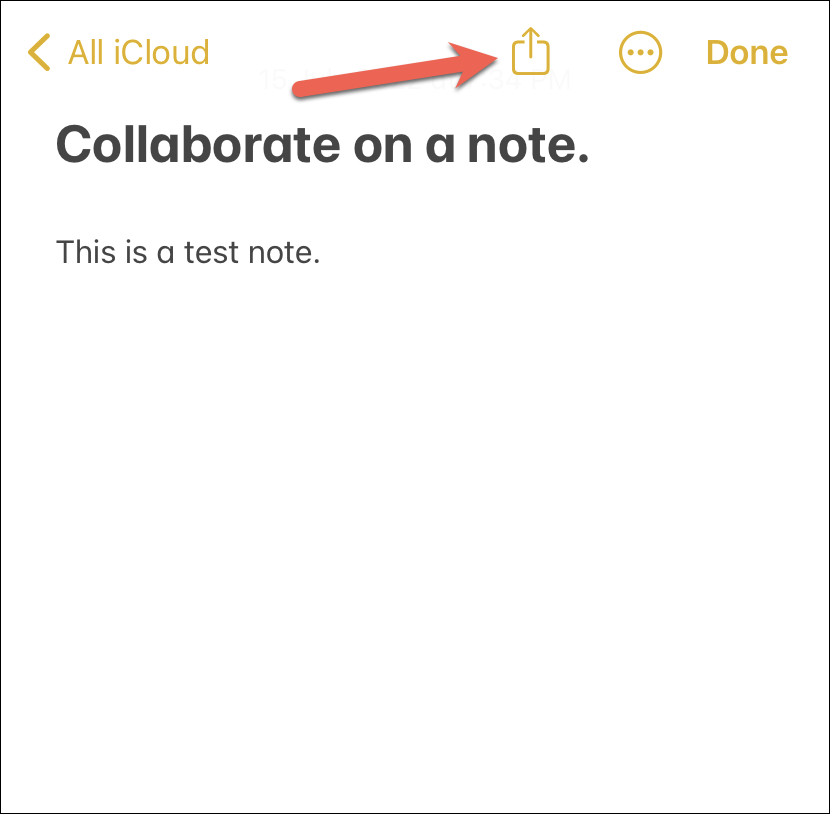
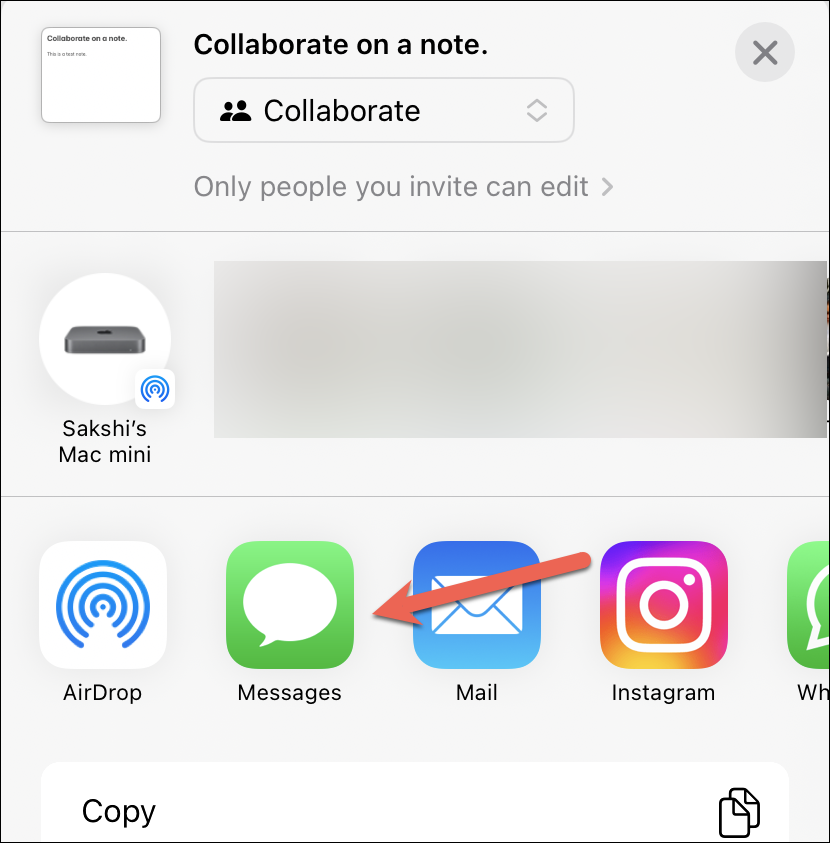
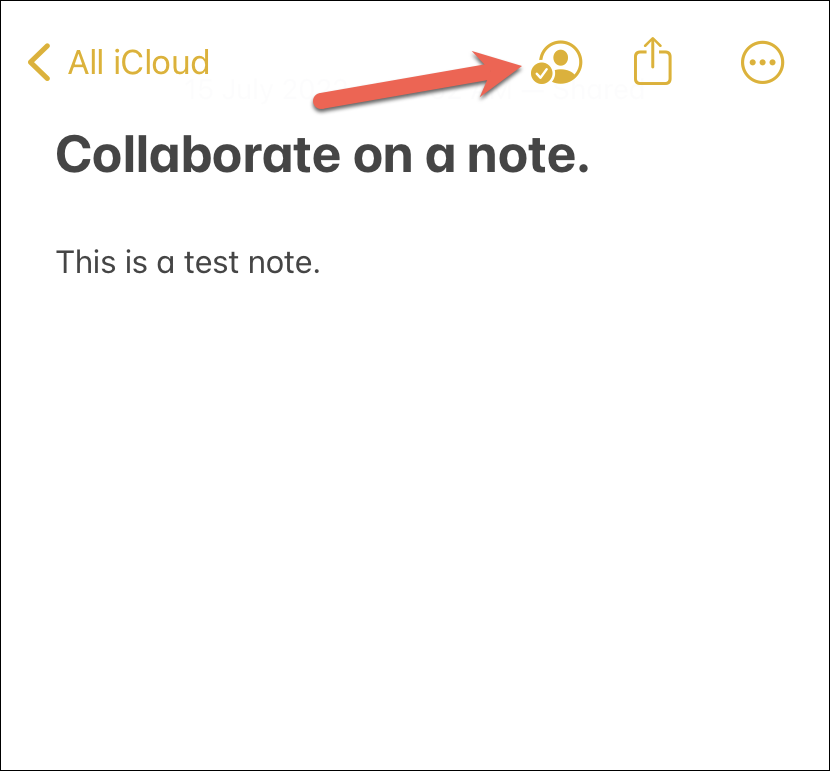
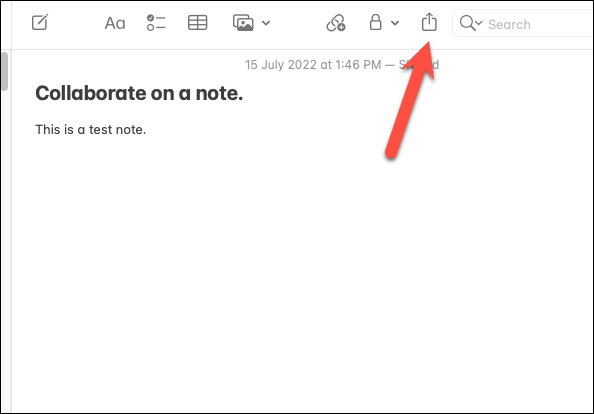
Open the note that you want to collaborate on and tap the ‘Share’ button from the toolbar at the top.
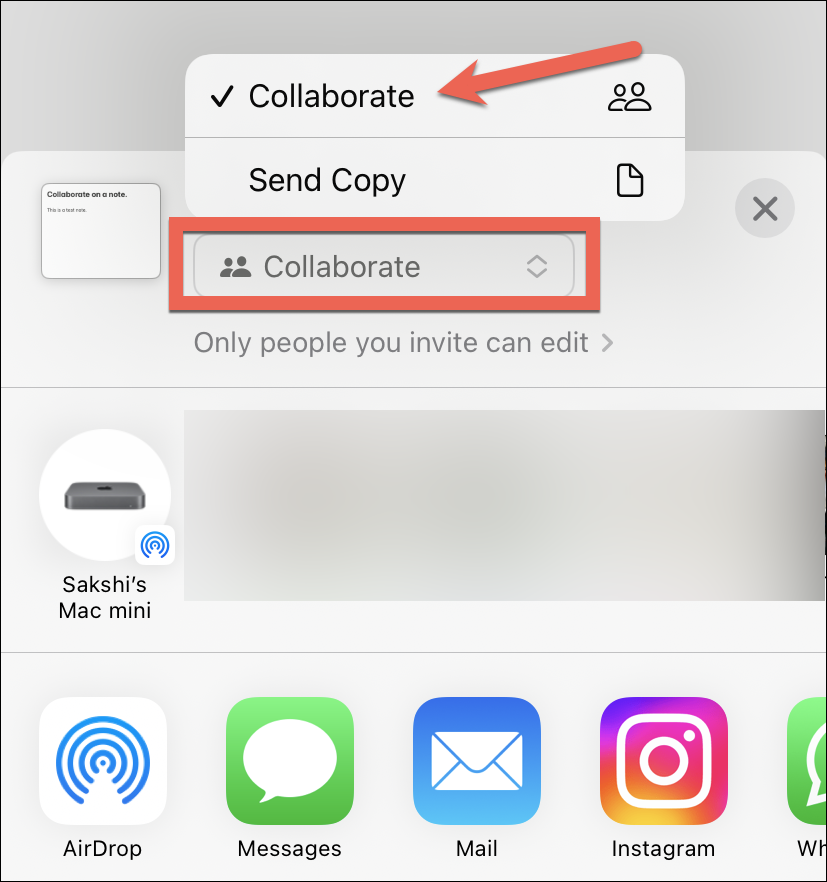
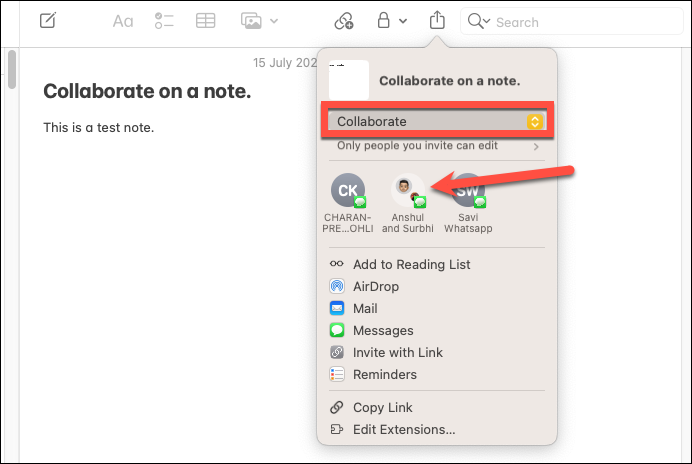
The Share Sheet will open. You can choose whether you want to share a copy of the note with someone or collaborate on it. Choose ‘Collaborate’ from the options.
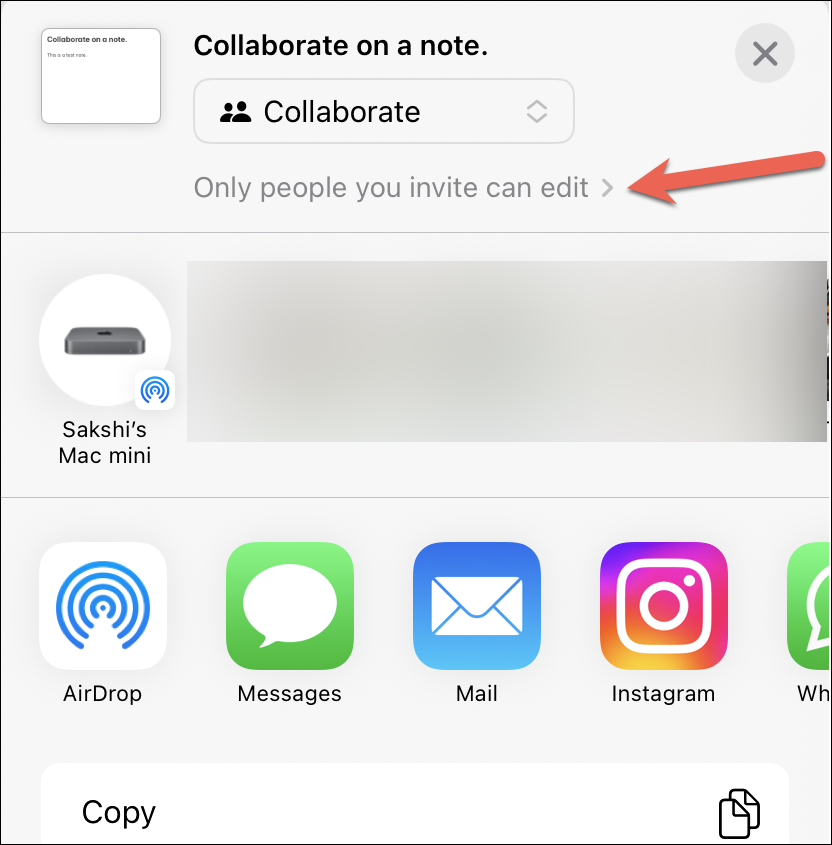
You can also make changes to the permissions for the shared project before sending the invite. Tap the text ‘Only people you invite’ underneath the Collaborate field.
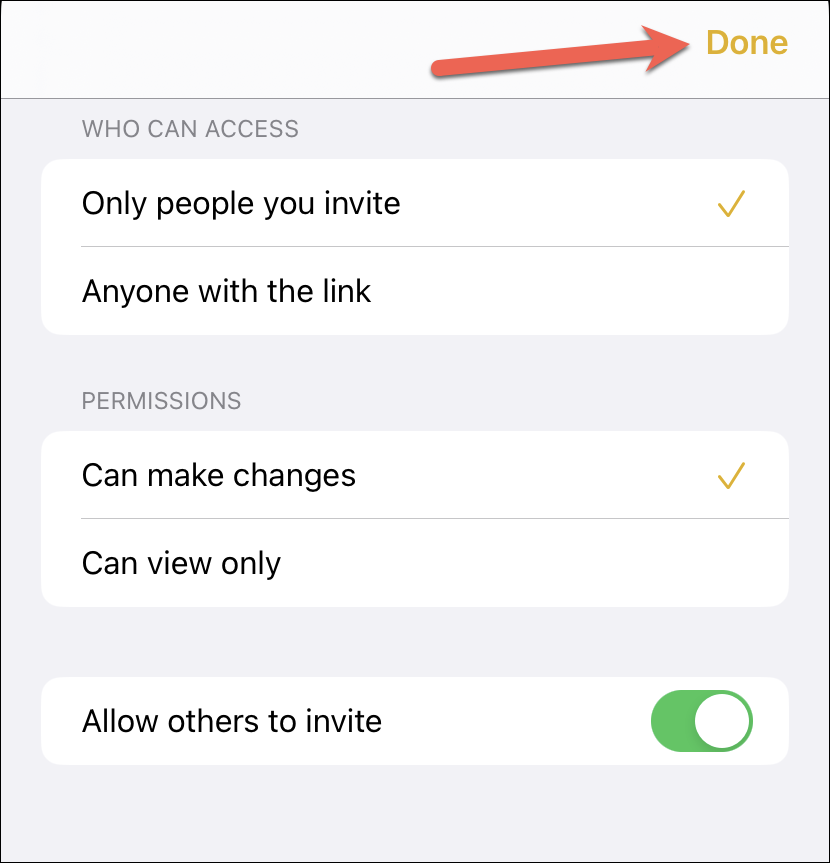
An overlay menu will open. Here, you can make changes to ‘Who Can Access’ the note, and whether others can make changes or only view it. Tap ‘Done’ in the upper-right corner to close the permissions.
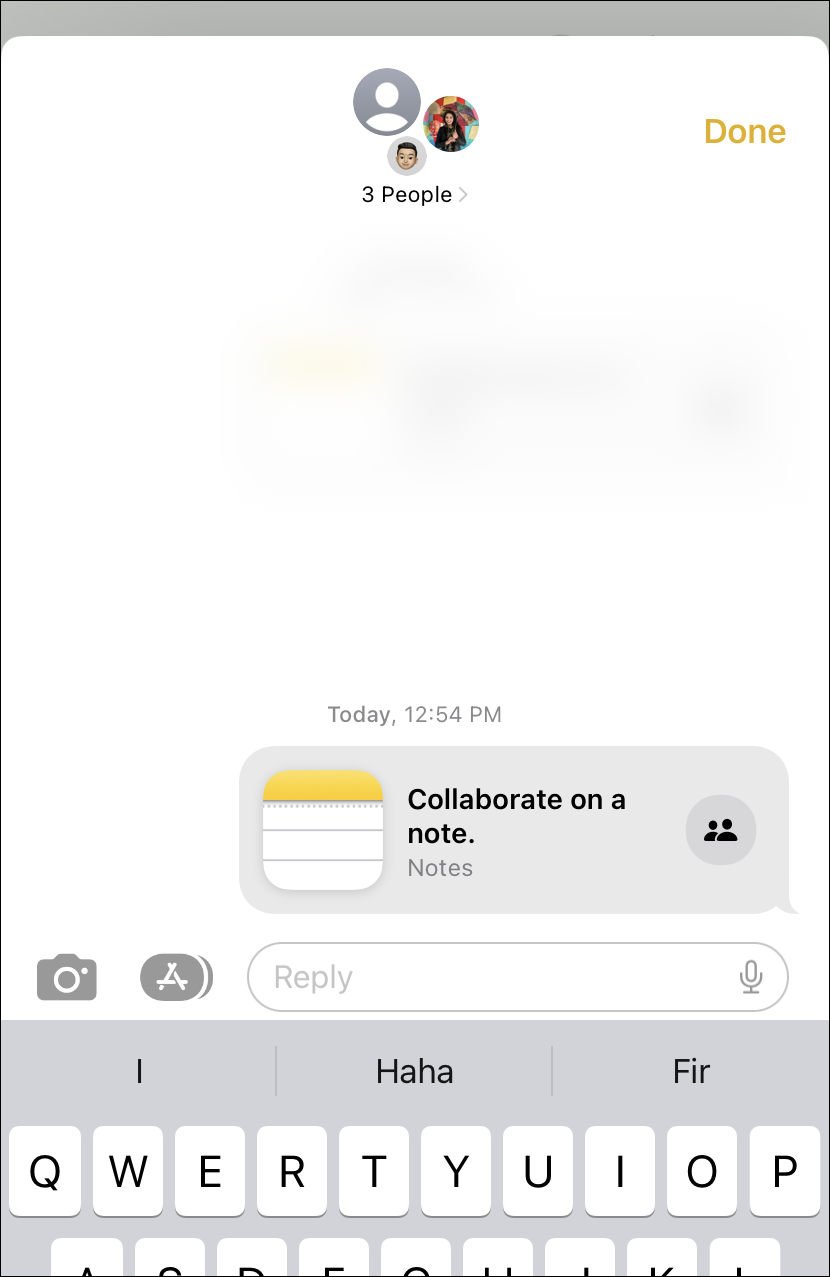
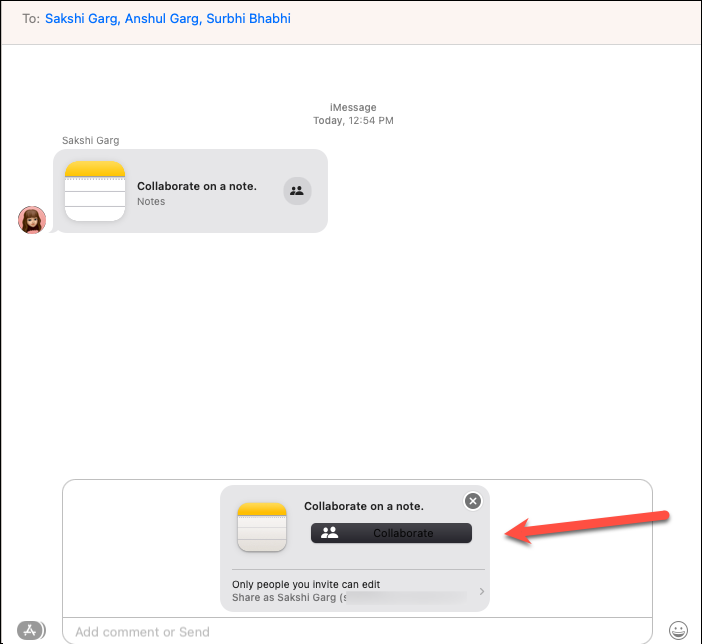
Then, you can choose how to send the invitation from the Share Sheet. It’ll have options for all apps such as Messages, Mail, and other communication apps. If you frequently chat with a person or a group, their chat will also appear in Siri suggestions. Tap the chat from the Siri suggestions right away if the option is present. Otherwise, select ‘Messages’ from the apps.
The invitation for the shared project (in this case, the note) will load in the message box. You’ll be able to see and still edit the permissions from the invitation before sending it without having to go back to the Share Sheet. Once you’re satisfied with all the settings, enter the name of the contacts you want to add to the note in the ‘To’ section.
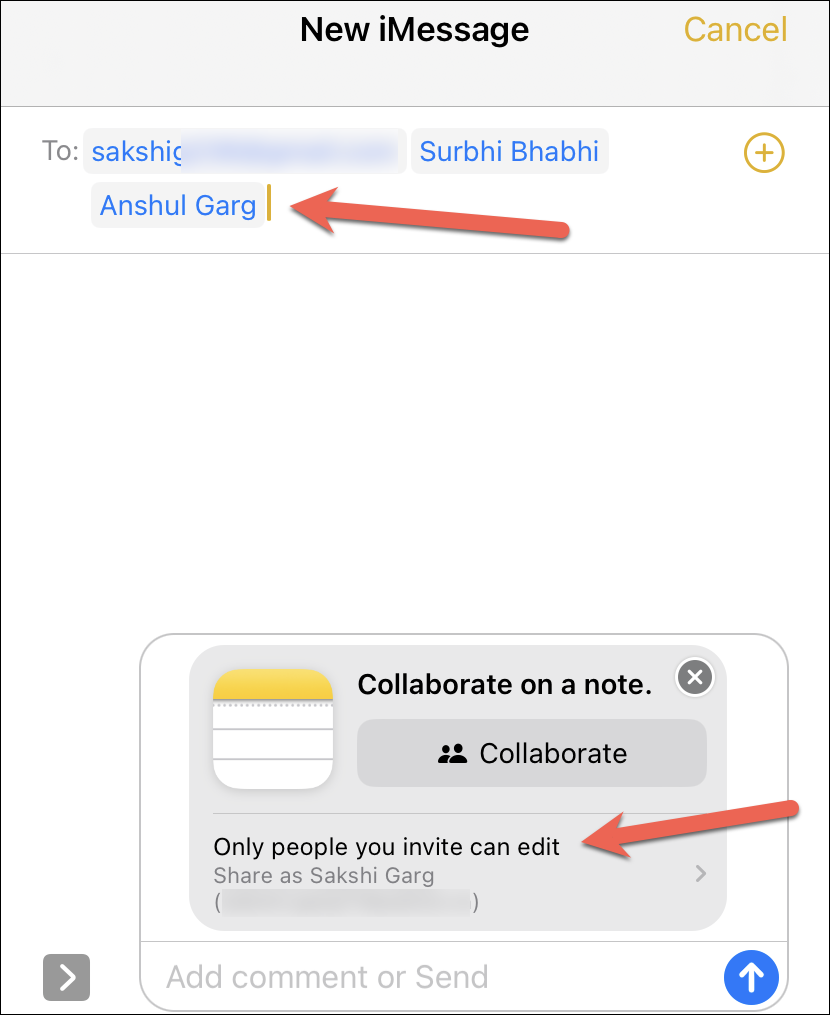
Then, tap the ‘Send’ button.
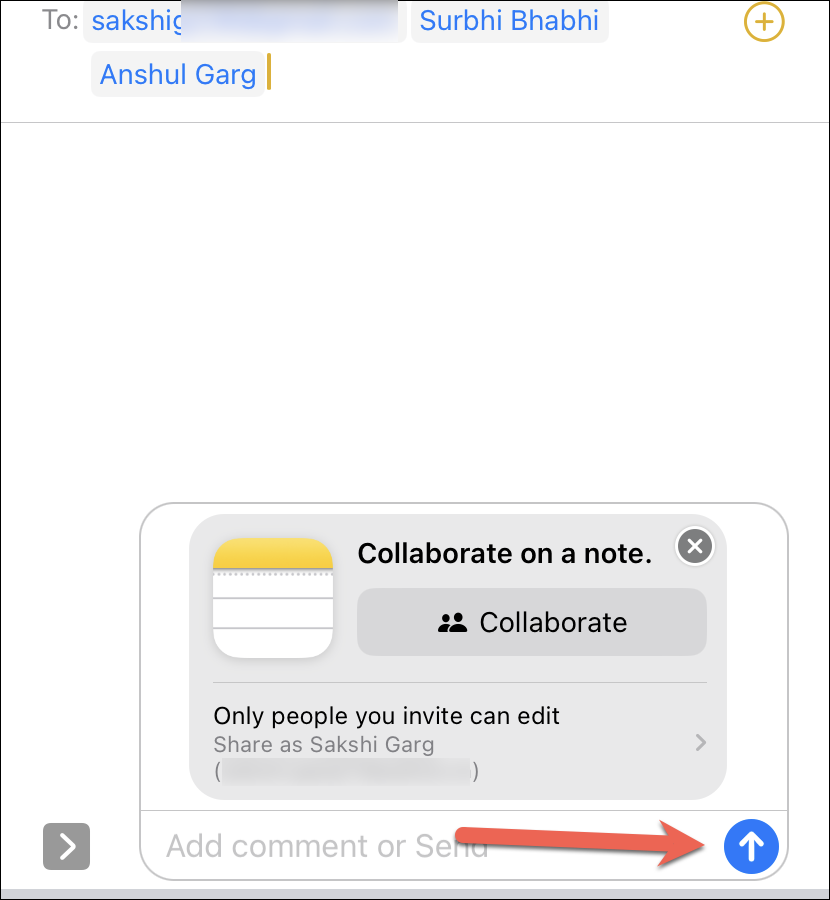
The people in the thread that you send the invite to will be added to the note automatically.
Collaborating in the App
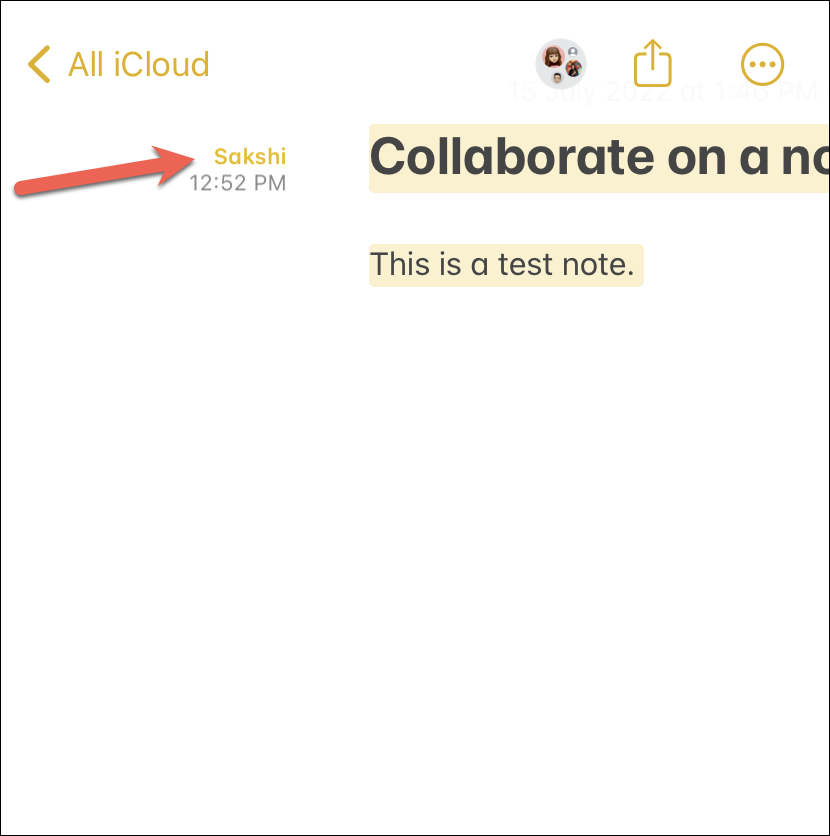
There’s no wait for others to have to accept the invite. As soon as you tap the ‘Send’ button, the collaboration will kickoff. If the group chat or the contact has a photo in your Messages, that photo will appear automatically in the toolbar next to the Share button to indicate collaboration.
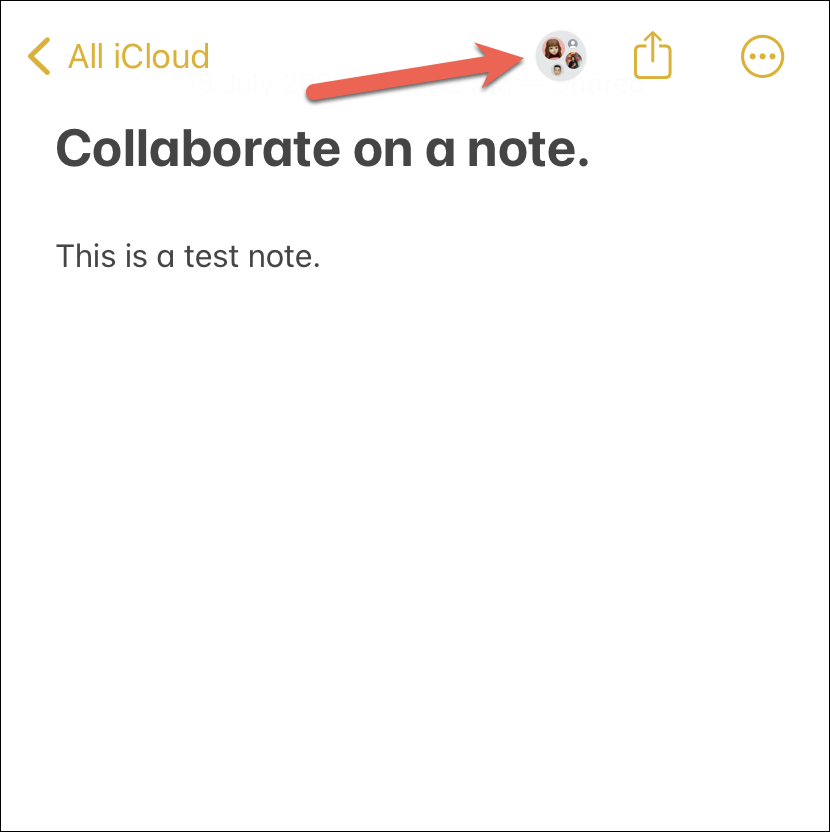
Otherwise, the standard icon for collaboration will appear. This icon or photo is your entry point for viewing everything related to collaboration in the app.
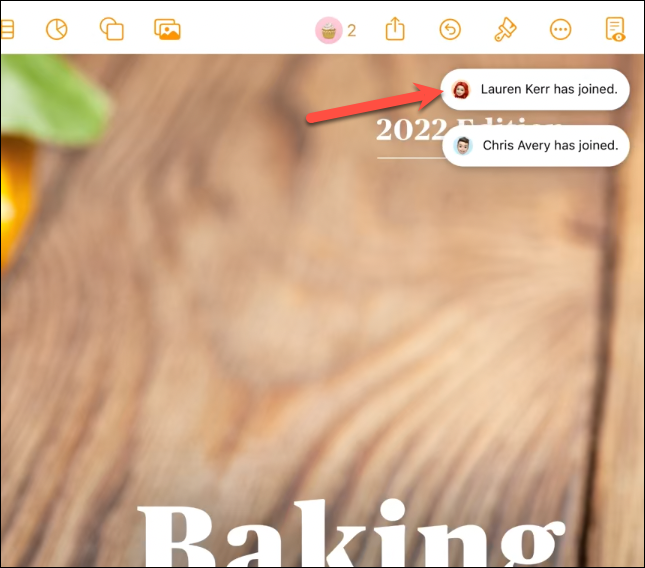
Even though the collaboration will begin instantly for you, you’ll see a notification when someone finally joins the shared project in real-time.
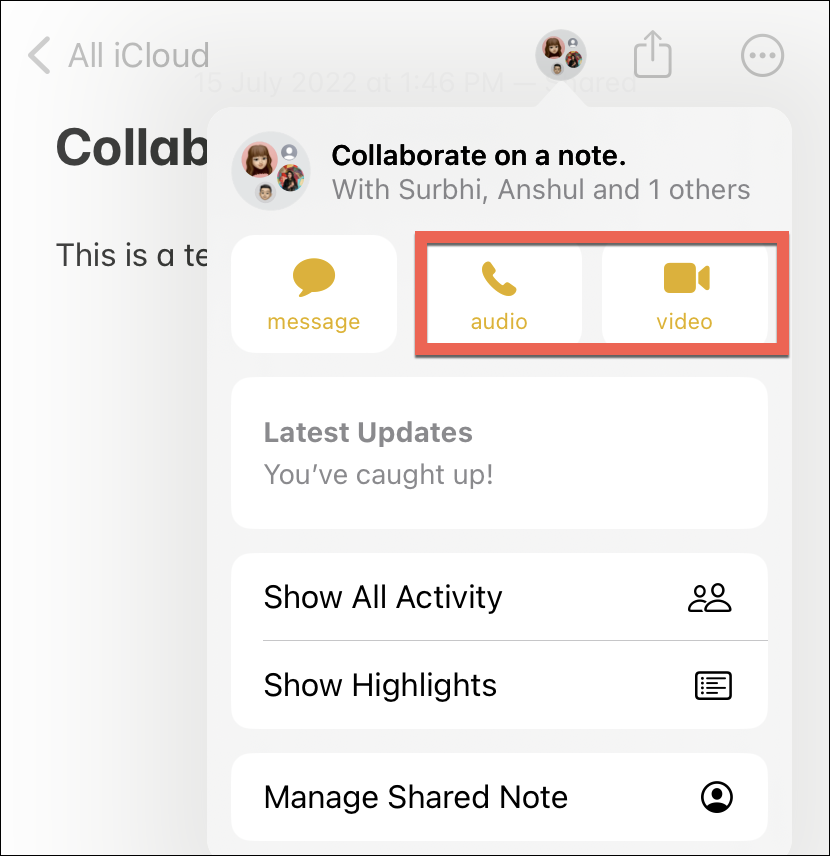
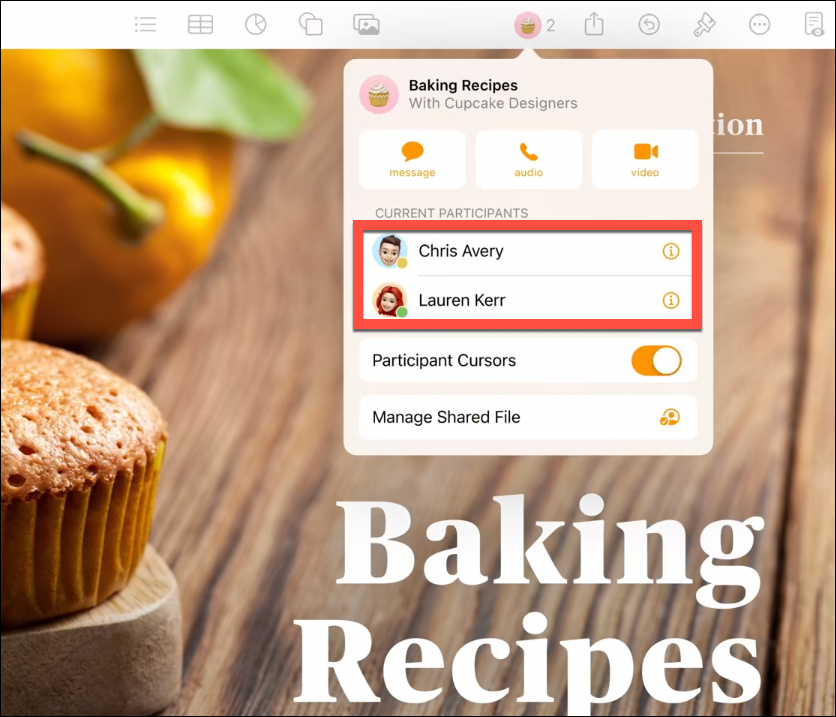
Tap the collaboration icon or the conversation photo to open the collaboration pop-over. The collaboration pop-over makes it easy to access the communication tools, like Messages, FaceTime audio, and FaceTime Video. Tap the ‘Message’ option to begin a conversation with everyone added to the note.
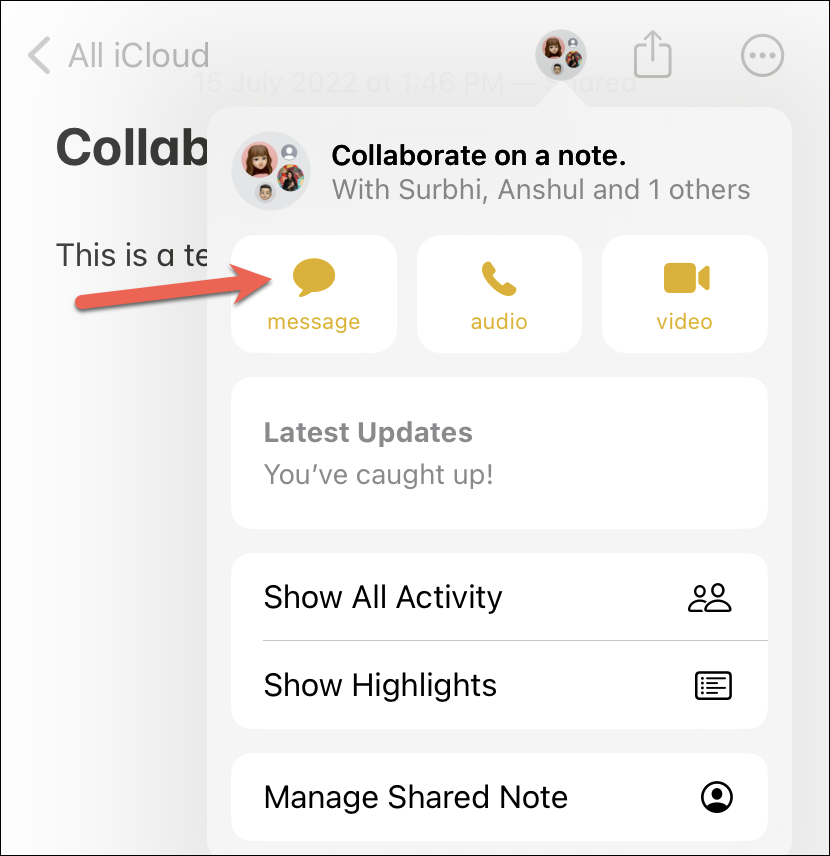
The conversation is linked with the shared project and the message screen will appear in an overlay window over the project itself, making it easy to chat and then return to the project.
You can also start a FaceTime call by tapping the ‘Audio’ or ‘Video’ options.
In some apps, like Pages, the people who are currently participating in the document will also appear in the pop-over.
The Notes app displays a quick overview of all the collaborative updates in the ‘Latest Updates’ section instead of the active people along with the options to show all activity and highlights. When your friends make edits to the note in real-time, you’ll see the latest updates related to those edits here. Reminders and Files, on the other hand, might not have anything in this section at all. That’s to say that the Collaboration pop-over will vary depending on the app
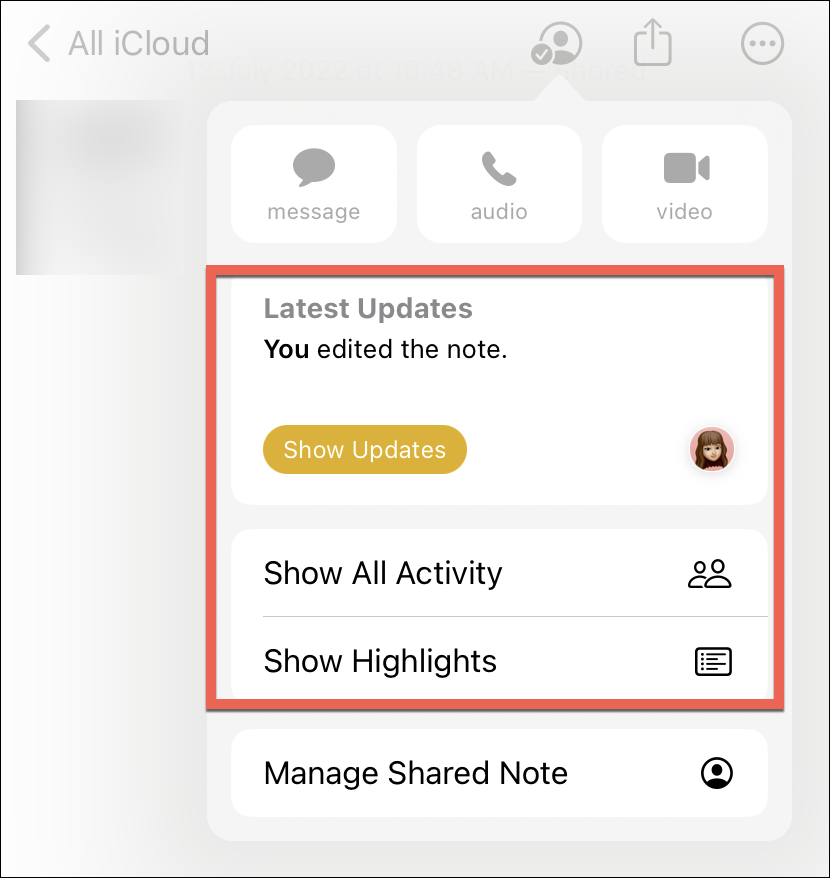
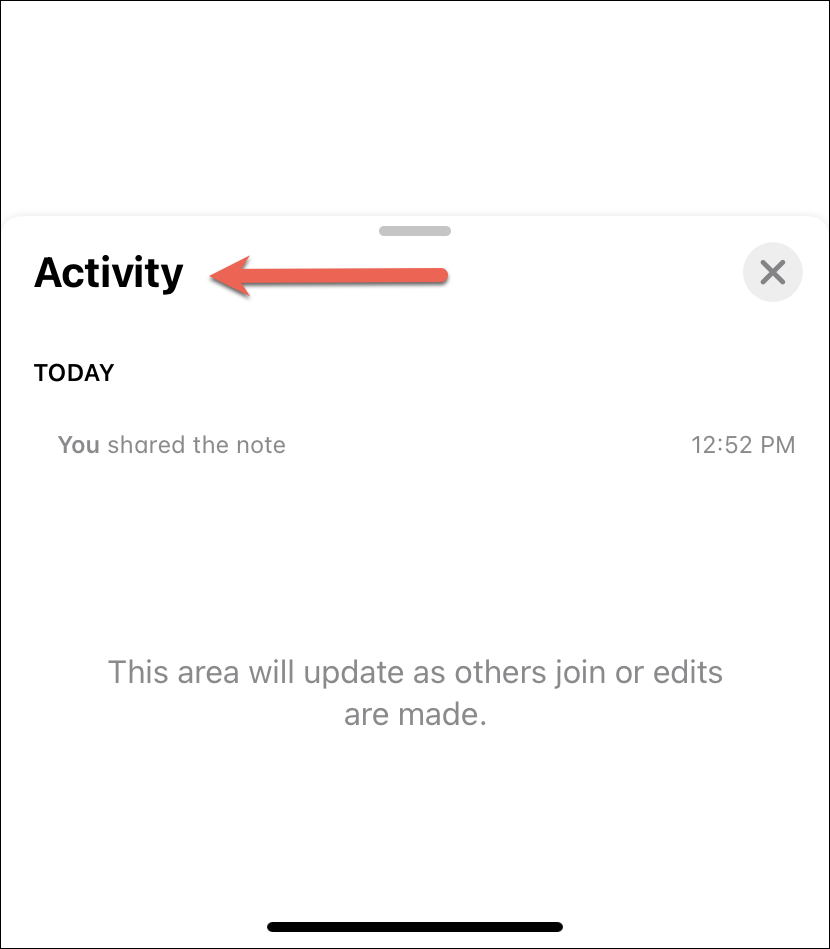
To view the complete activity, tap ‘Show All Activity’ from the menu. Activity will open in an overlay menu at the bottom of the screen.
To see the highlights in the note, i.e., who made what edits, tap the ‘Show Highlights’ option. All edits will be highlighted with the name of the person who made the edits on the left.
Tap ‘Hide Activity’ or ‘Hide Highlights’ from the Collaboration pop-over to return to the normal view.
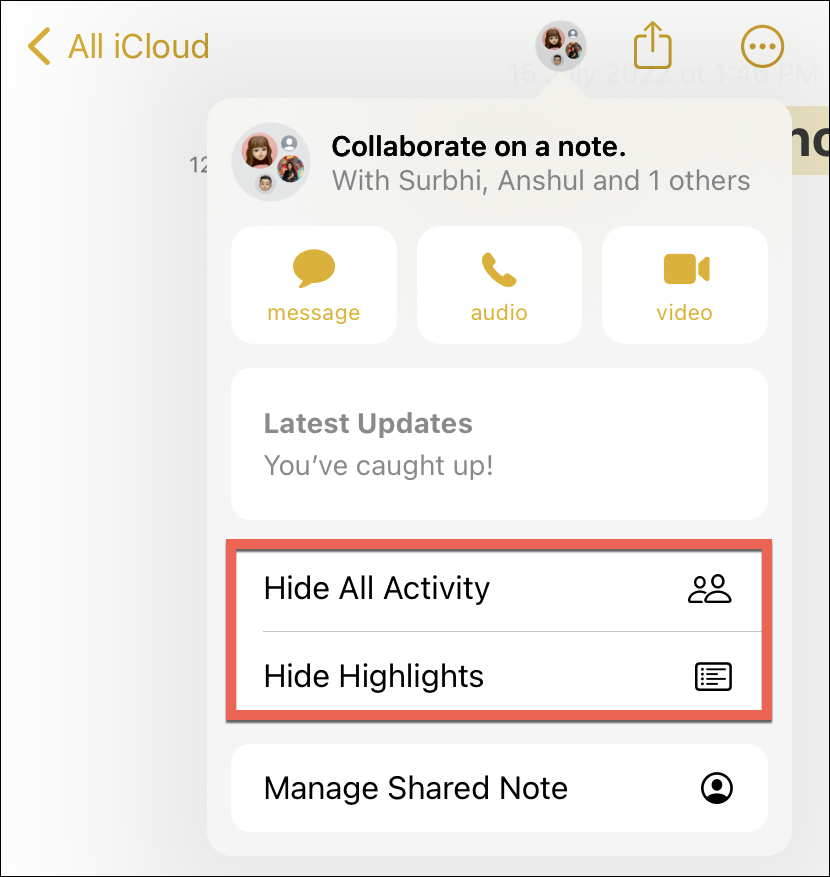
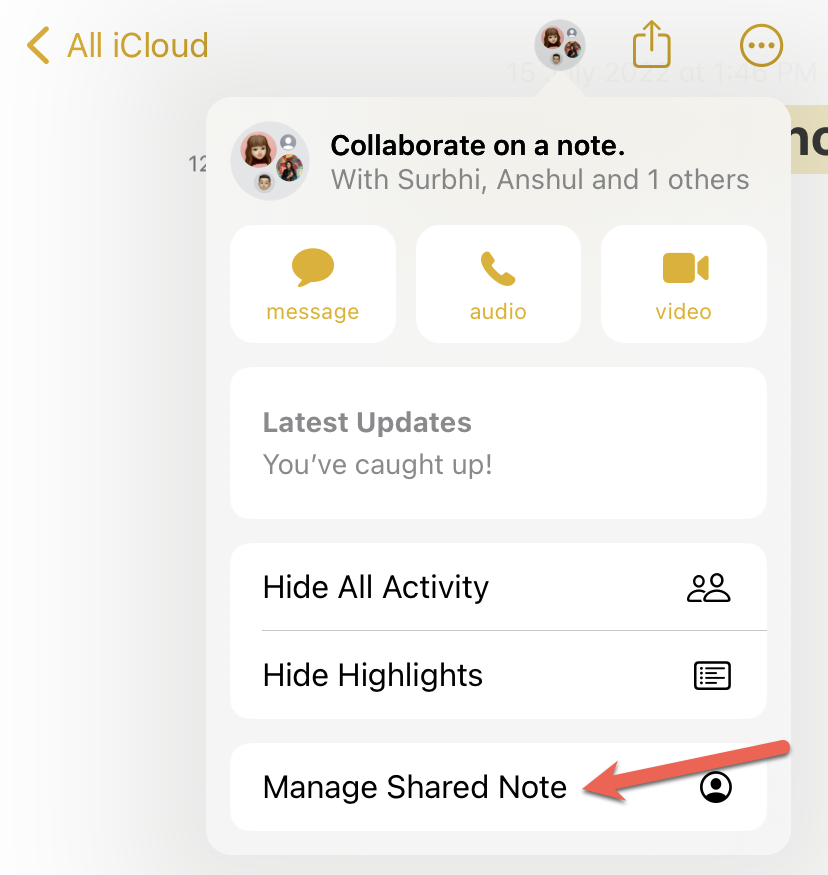
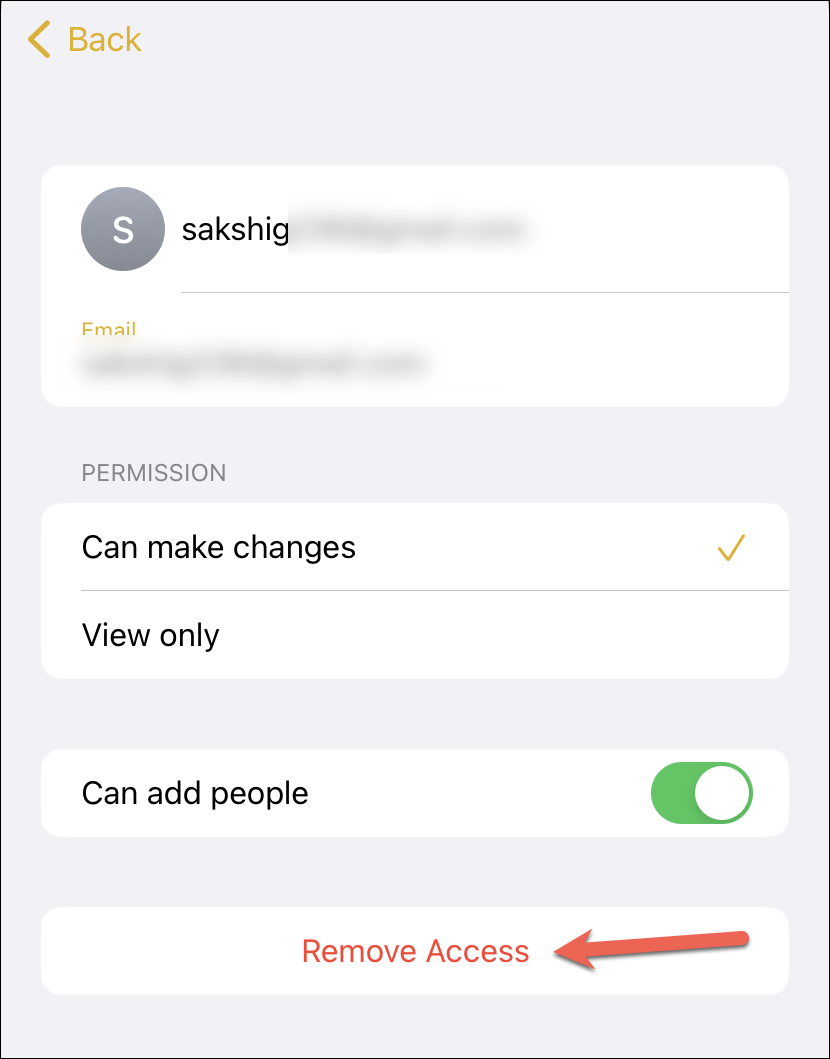
Tap ‘Manage Shared Note’ to open the Collaboration Management screen.
Here, you can change permissions or access to the note and invite more people or remove someone. You can also enable the option for ‘Highlight All Changes’ to keep seeing who made what changes to the note by default. Tap ‘Stop Sharing’ to stop collaboration entirely, or tap a person’s name to manage permissions individually.
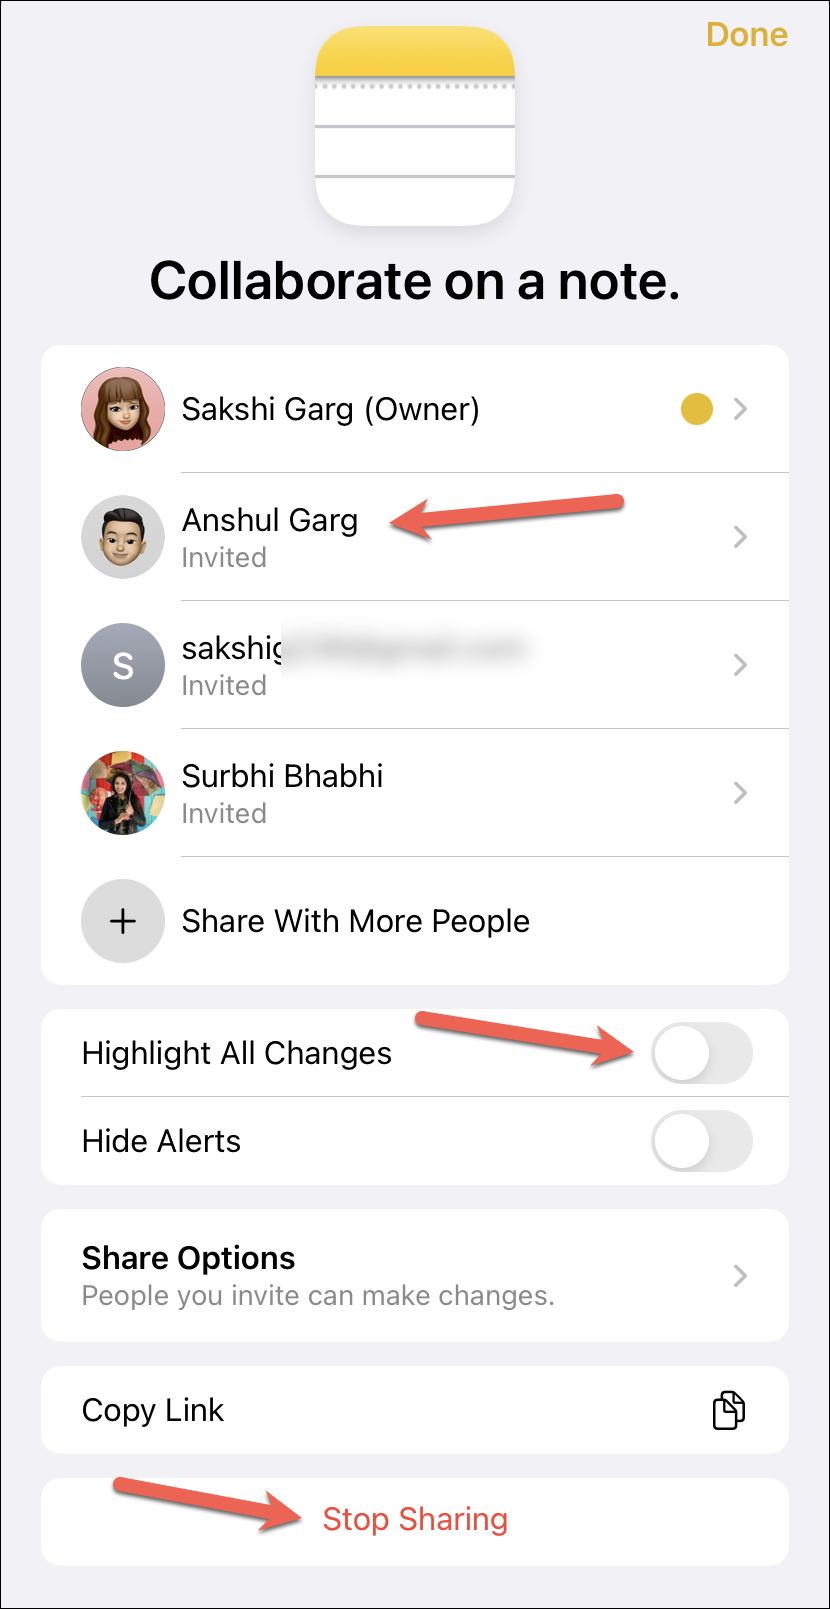
Here, you can remove the person from the shared project or change their editing or inviting permissions.
Collaboration Updates in the Messages App
As mentioned before, the role of Messages doesn’t end when you send the collaboration invites. Messages now enjoy a tight integration with collaborative apps and show notifications in the conversation itself whenever someone makes an edit.
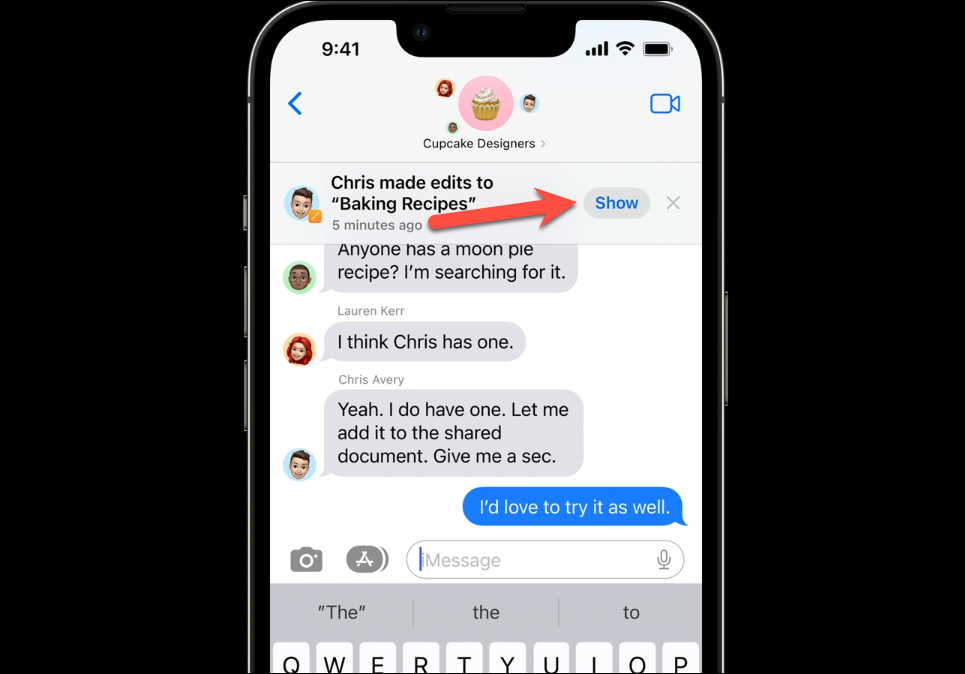
Whenever someone makes an edit to the project, a banner will appear at the top of the conversation to notify you of the update. Suppose someone makes an edit to the document, then the notification “[Person] made edits to the [Note Name]” will appear in the conversation. Tap ‘Show’ from the banner to open the shared project or ‘x’ to dismiss the notification.
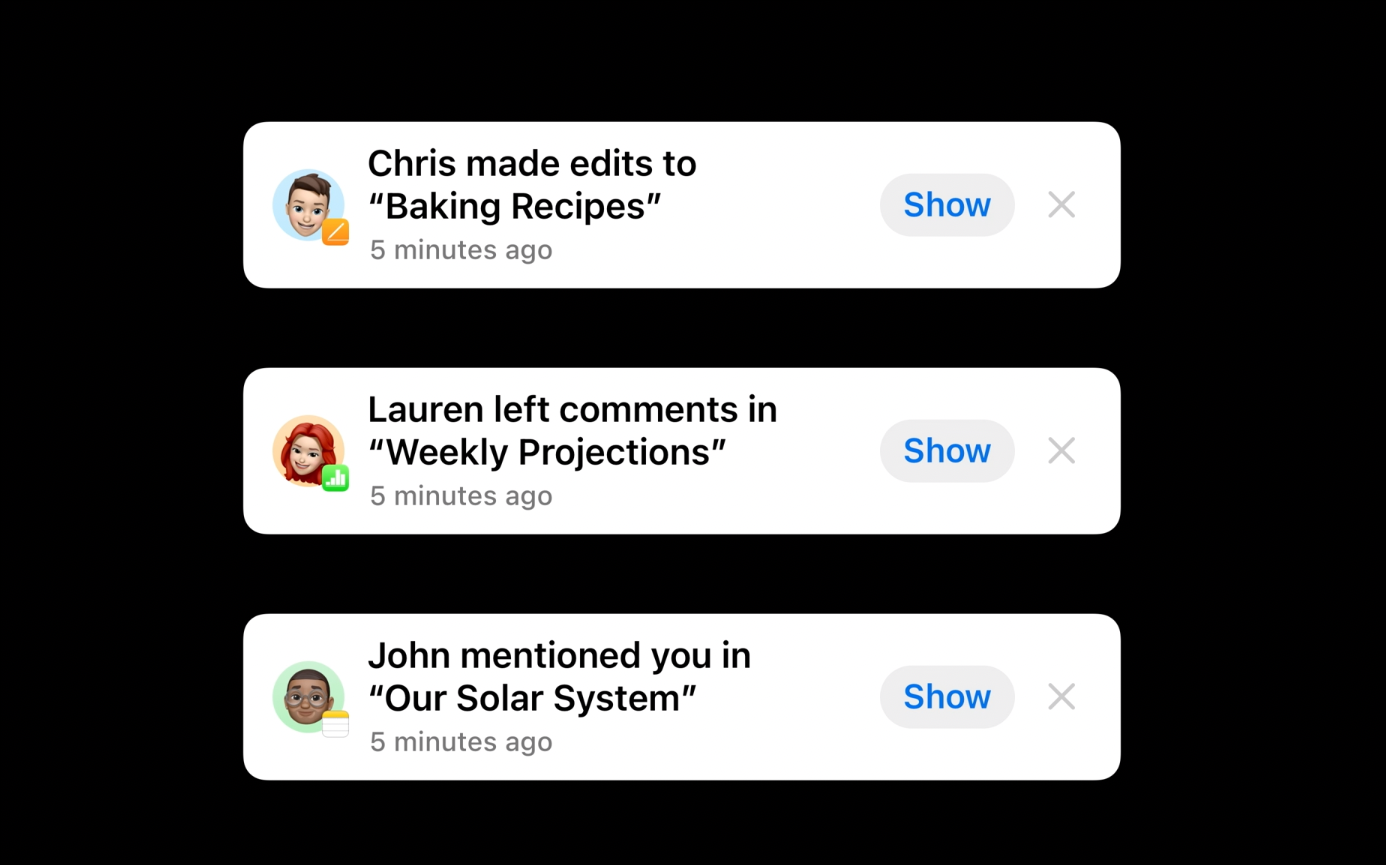
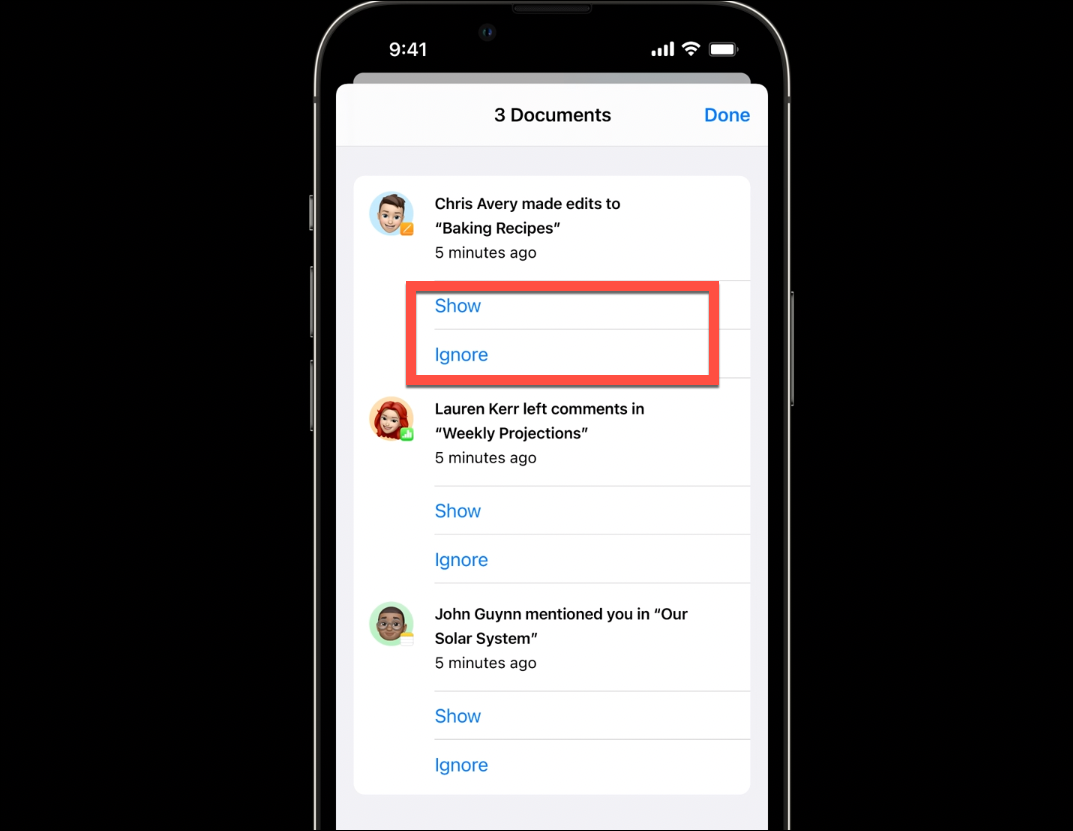
Any kind of update that is made to the shared project will appear here. For example, if someone leaves a comment or mentions you or modifies any files, you’ll get updates right in the Messages in form of non-invasive banners. Tapping this banner will open the shared project and show the update.
If you’re collaborating on multiple projects with the same group of people and there are multiple updates across those projects, you won’t see a horde of banners in the Messages app obscuring the entire conversation. That would be too overwhelming and frankly, a bad design choice. Instead, you’ll see one consolidated update along the lines of “[N People] made updates to [N] Documents”. Tap ‘View’ to see the complete list of updates.
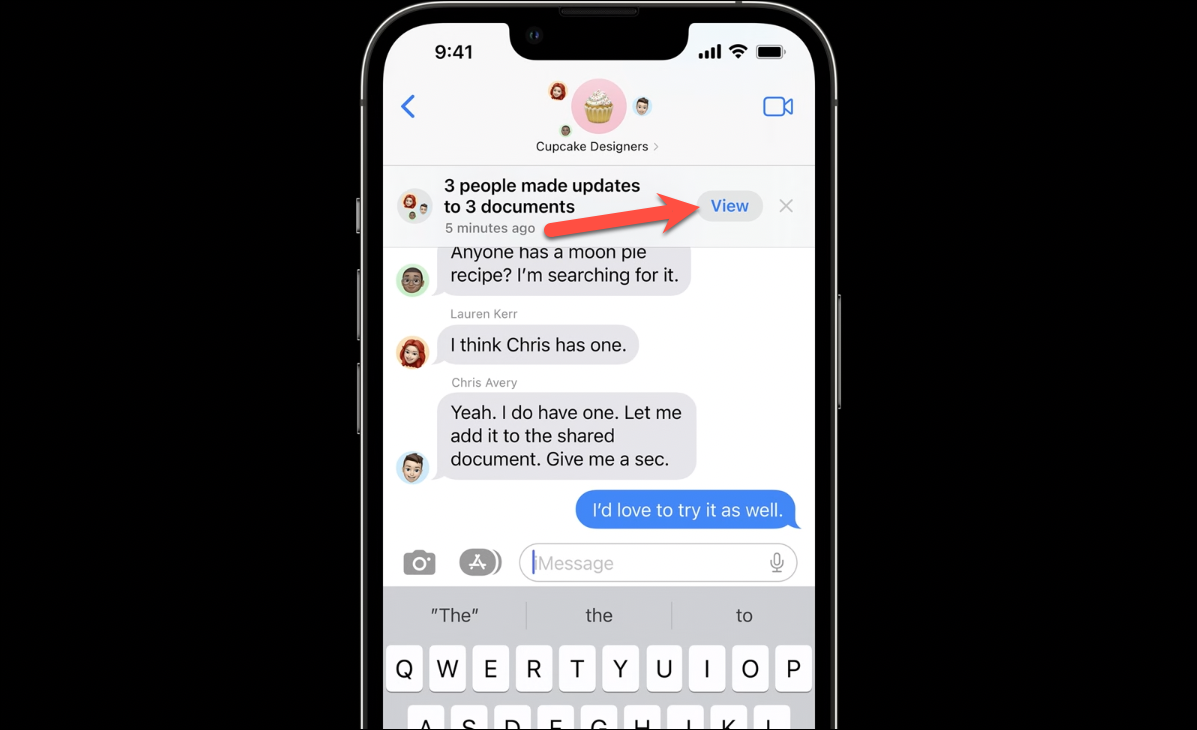
An overlay screen will open that’ll show all the updates to your different projects. Tap the ‘Show’ option on an update to open the corresponding project. Otherwise, tap ‘Ignore’.
Collaborating from Mac
Collaborating in an app from your Mac running macOS Ventura is similar to the iPhone or iPad. The collaboration user interface is consistent across all platforms. You’ll find the same collaboration pop-over in the supported apps and the same update banners in the Messages app.
To send a collaboration invitation, click the ‘Share’ button from the toolbar.
The same UI as above will open. Select ‘Collaborate’ from the drop-down menu, review your permission settings, and either select a conversation or click the ‘Messages’ option to send the invitation.
The collaboration invitation will load in the message field. Send the invitation to begin the collaboration.
You can also drag and drop a document in the message field on a Mac to send an invitation.
Collaborating using Messages is going to be a game changer given how easy it makes the entire process. The Messages app is also getting other updates in the new OS, like starting a SharePlay within a message instead of a FaceTime call.


