Creating a bootable Windows 11 USB drive on a Mac is entirely possible, even without access to a Windows computer. By utilizing the Terminal application and a few additional tools, you can prepare a USB drive to install Windows 11 on your target PC.
Pre-requisites
- The Windows 11 ISO file.
- A USB flash drive with at least 8GB of storage capacity.
- A Mac computer running macOS.
- A Windows PC where you plan to install Windows 11.
Create a Windows 11 USB from Mac
- Open the Terminal application on your Mac. You can find it in the Launchpad under the ‘Utilities’ or ‘Other’ folder.
- In the Terminal window, type the following command and press Enter to list all connected storage devices:
diskutil list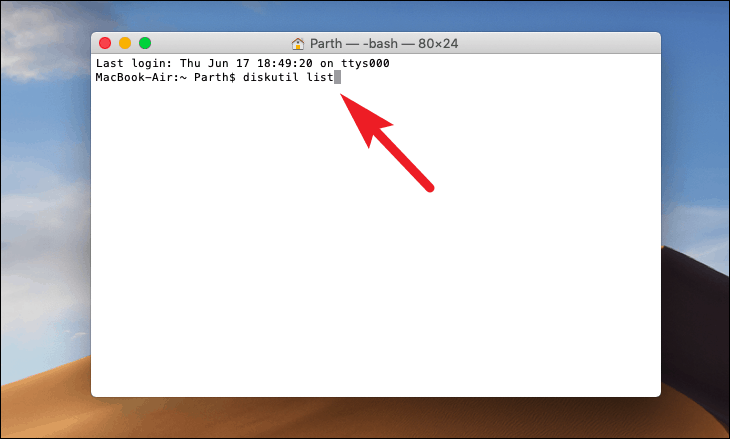
- From the displayed list, identify your USB flash drive. Note its identifier (e.g.,
/dev/disk2) and partition scheme labeled asFDisk_partition_scheme.

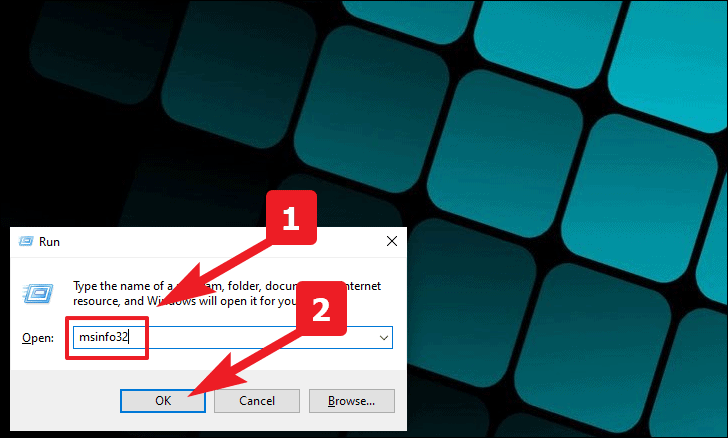
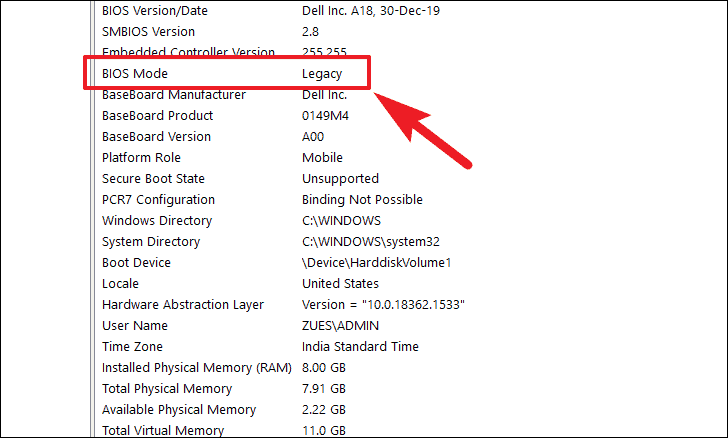
- On your Windows computer, determine the BIOS mode of the target PC. Press Windows + R to open the Run dialog, type msinfo32, and click ‘OK’.
- In the System Information window, find the ‘BIOS Mode’ field to see if your system uses ‘Legacy’ or ‘UEFI’.
- Back on your Mac, format the USB drive based on the BIOS mode of your Windows PC.
Note: Replace /dev/disk2 with the correct identifier for your USB drive.
If your BIOS Mode is ‘UEFI’, enter the following command in Terminal:
diskutil eraseDisk MS-DOS "WIN11" GPT /dev/disk2If your BIOS Mode is ‘Legacy’, enter this command:
diskutil eraseDisk MS-DOS "WIN11" MBR /dev/disk2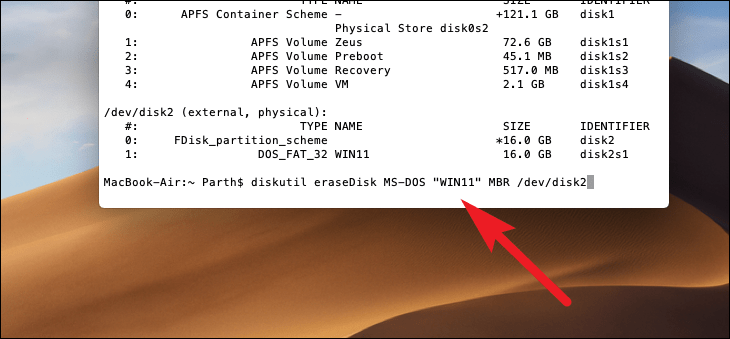
- Wait for the formatting process to complete. This may take a few moments.

- Mount the Windows 11 ISO file. If it’s in your ‘Downloads’ folder, use the following command in Terminal (replace <file-name-here> with the actual file name of the ISO):
hdiutil mount ~/Downloads/<file-name-here>.iso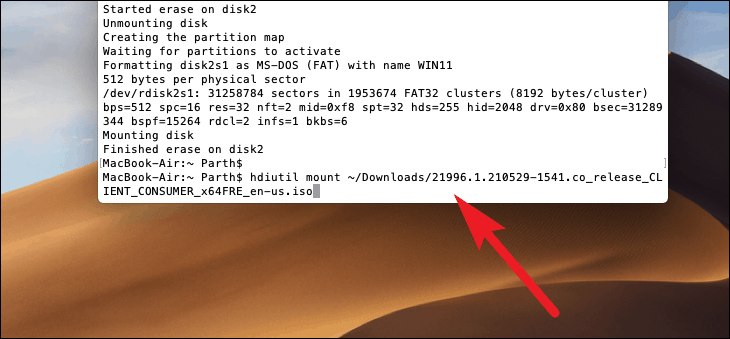
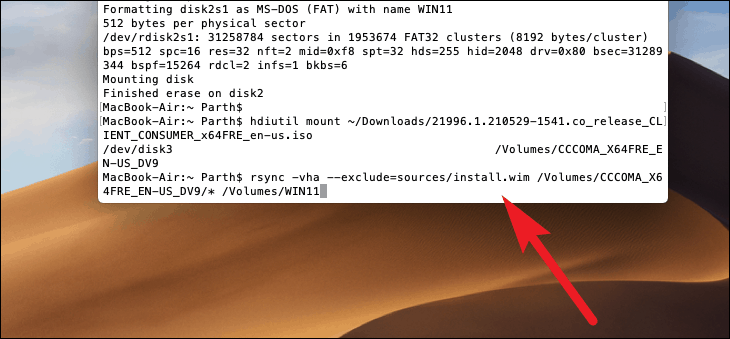
- Since the FAT32 file system cannot handle files larger than 4GB and the
install.wimfile exceeds this size, you’ll need to copy all files exceptinstall.wimto the USB drive. Use this command in Terminal (replace <Your mounted File Name here> with the name of the mounted ISO volume):
rsync -vha --exclude=sources/install.wim /Volumes/<Your mounted File Name here>/* /Volumes/WIN11Note: This command will copy all files to the USB drive except the large install.wim file.
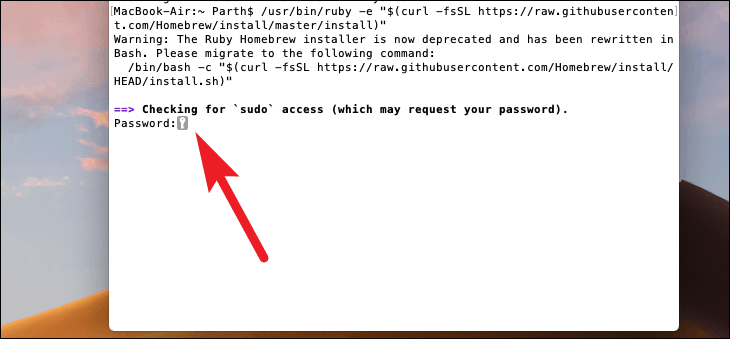
- Install Homebrew on your Mac if it’s not already installed. Run the following command in Terminal:
/usr/bin/ruby -e "$(curl -fsSL https://raw.githubusercontent.com/Homebrew/install/master/install)"Note: If Homebrew is already installed, you can skip this step.
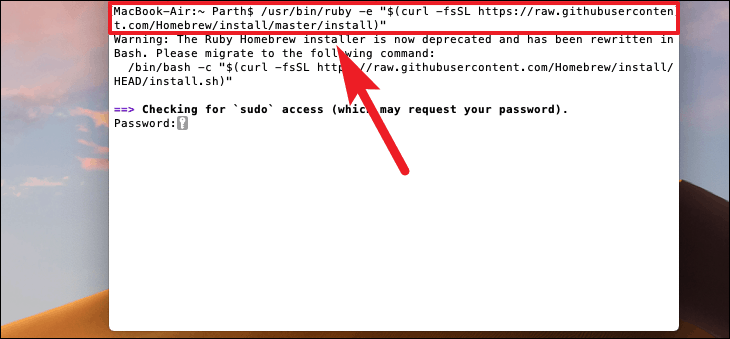
- When prompted, enter your Mac user password and press Enter. The password input may not be visible; this is normal.
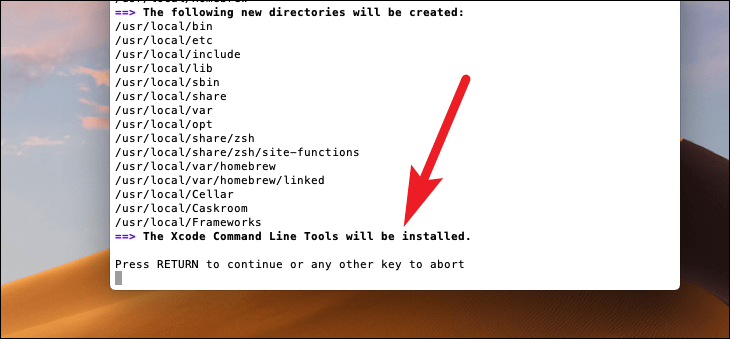
- Press Enter again to install the Xcode Command Line Tools when prompted.
- After Homebrew is installed, use it to install
wimlibby running this command in Terminal:
brew install wimlib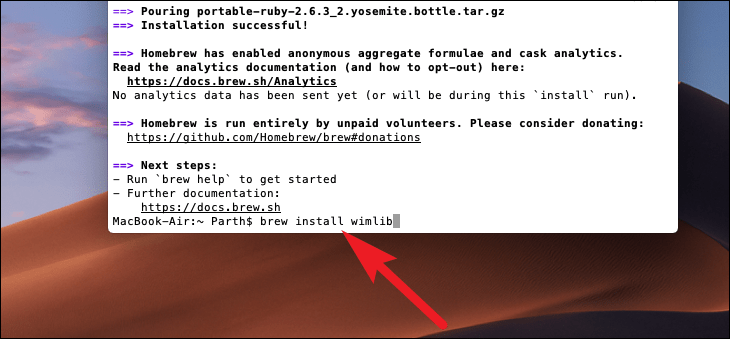
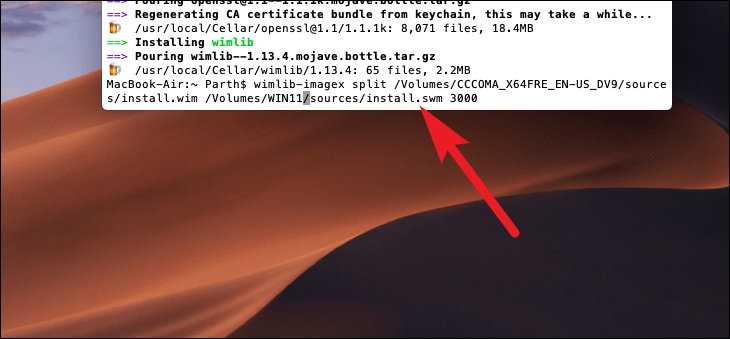
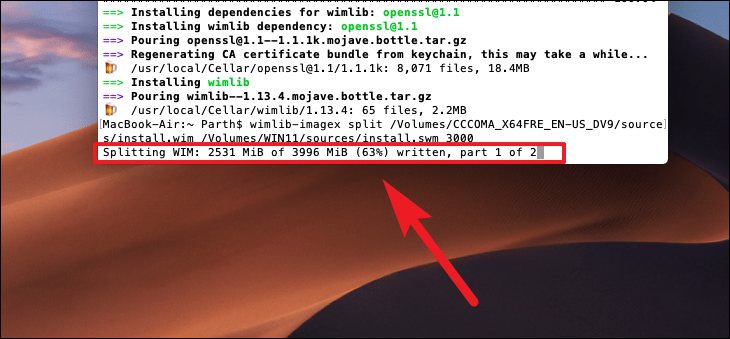
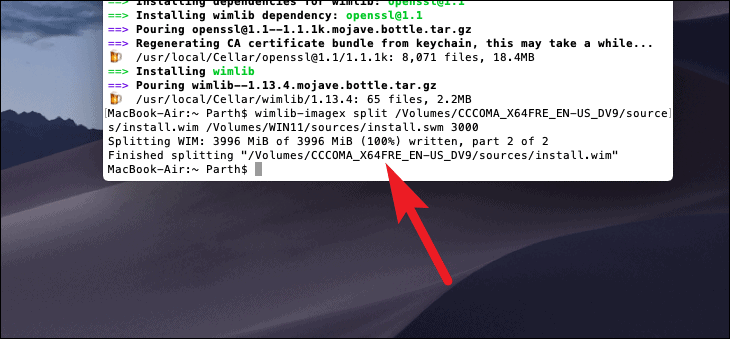
- Split the large
install.wimfile into smaller parts that can be stored on the FAT32-formatted USB drive. Run the following command (replace <Your mounted File Name here> with the name of the mounted ISO volume):
wimlib-imagex split /Volumes/<Your mounted File Name here>/sources/install.wim /Volumes/WIN11/sources/install.swm 3000Note: The number ‘3000’ specifies the maximum size in megabytes for each split file. Adjust this value if necessary.
- Allow the splitting process to complete. It may take several minutes, and progress might appear to stall—do not interrupt it.
- Once the process is finished, eject your USB drive safely. It is now ready to be used as a bootable Windows 11 installation media on your target PC.
Although the process may seem complex initially, following these steps allows you to create a bootable Windows 11 USB drive directly from your Mac without needing a Windows computer.


