How to Disable Automatic Driver Download on Windows 11
3 ways to disable automatic driver download on your Windows 11 PC.
3 ways to disable automatic driver download on your Windows 11 PC.
by Parth Sawhney
Drivers are essential software components that allow your computer’s hardware to communicate effectively with Windows 11. While automatic driver updates help keep your system running smoothly, there may be situations where you want to disable this feature. Whether you need specific driver versions for certain applications or wish to prevent unexpected changes, here are several methods to stop Windows from automatically downloading drivers.
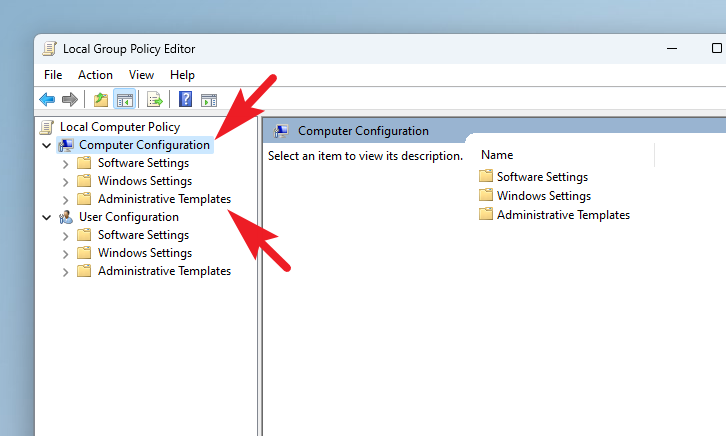
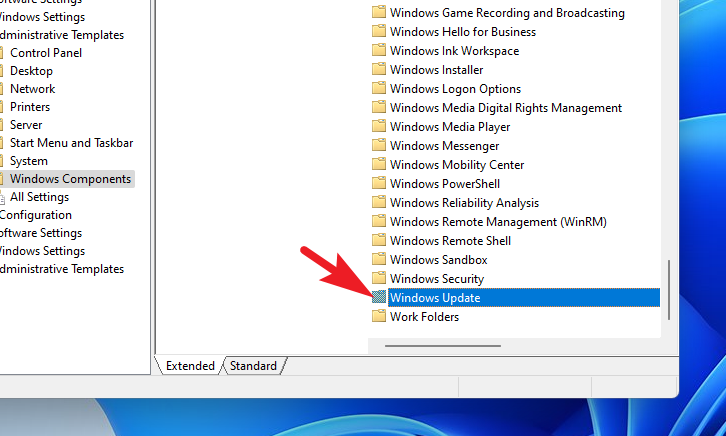
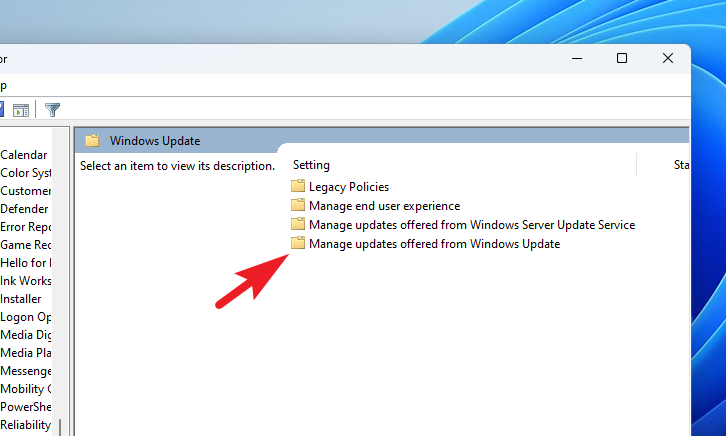
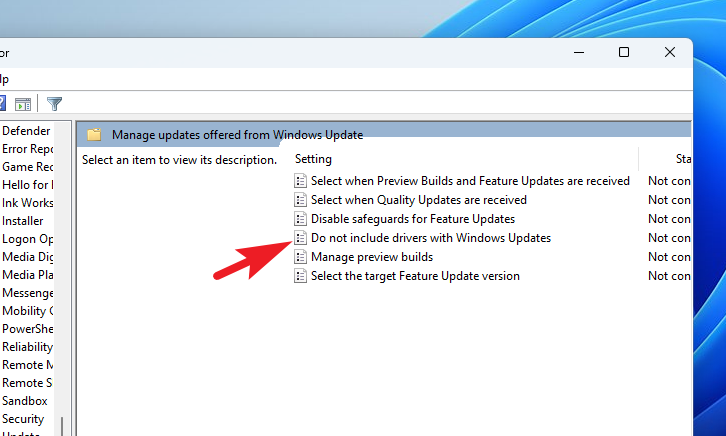
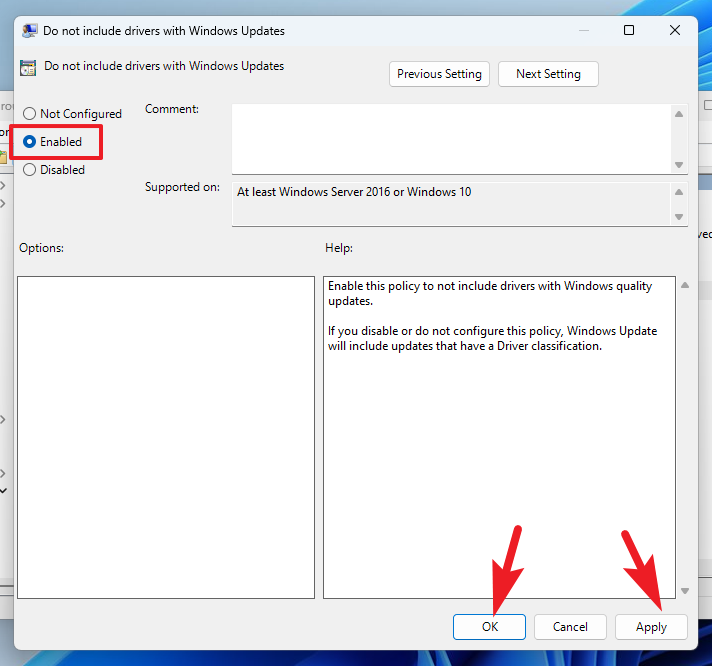
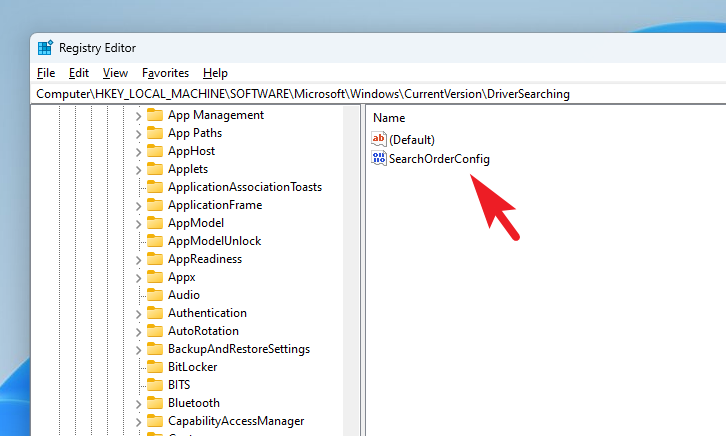
1. Use the Group Policy Editor to Stop Automatic Driver Updates
Note: The Group Policy Editor is only available in Windows 11 Pro and higher editions.
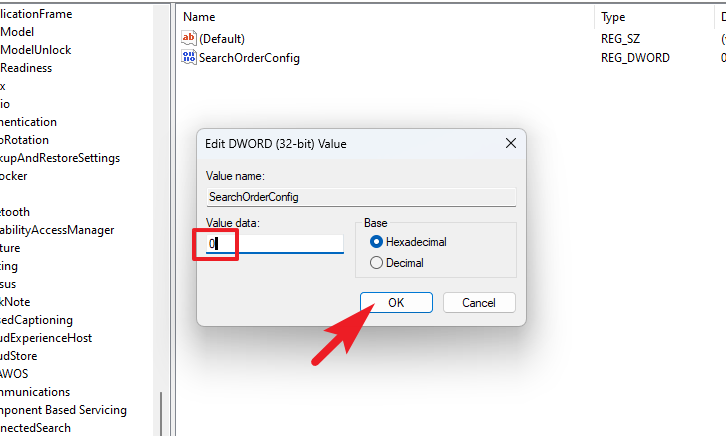
In the ‘Device Installation Settings’ dialog box, choose ‘No (your device might not work as expected)’ and click ‘Save Changes’. You may be prompted for administrator credentials to proceed.
Although automatic driver updates can enhance your system’s performance and security, there are times when disabling them is necessary. By following the methods outlined above, you can prevent Windows 11 from automatically downloading and installing driver updates, giving you greater control over your system’s configuration.