
CPU throttling in Windows 11 is a feature designed to dynamically adjust your processor’s clock speed, helping to conserve energy and manage heat generation. While this can be beneficial for extending battery life and preventing overheating, it may sometimes hinder performance for power users and gamers who require maximum processing power. In this guide, we’ll explore various methods to disable CPU throttling and unleash the full potential of your system.
What is CPU Throttling?
CPU throttling, also known as Dynamic Frequency Scaling (DFS), is a technique used by computers and smartphones to manage the clock speed and temperature of the processor. When the CPU is under heavy load, it consumes more power and generates additional heat. To prevent potential overheating and damage, the system reduces the CPU’s clock speed and voltage, effectively slowing it down.
There are two primary types of CPU throttling:
- Thermal Throttling: This occurs when the CPU temperature reaches a certain threshold. The system automatically reduces the clock speed to prevent further heating.
- Power Throttling: This happens when the CPU’s power consumption exceeds a specific limit. The system lowers the clock speed to conserve energy.
In Windows 11, CPU throttling is a built-in feature aimed at conserving power, especially on battery-powered devices. While it helps in managing energy use and heat generation, it can also lead to decreased system performance when running resource-intensive applications.
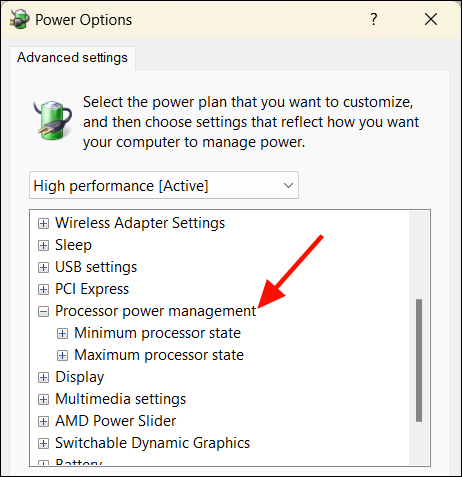
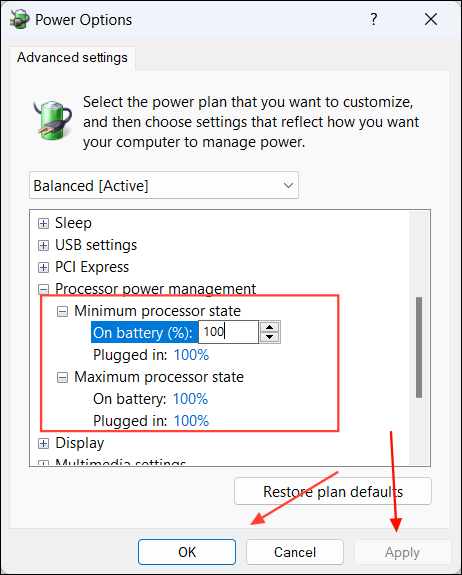
Modifying Power Plan Settings to Prevent CPU Throttling
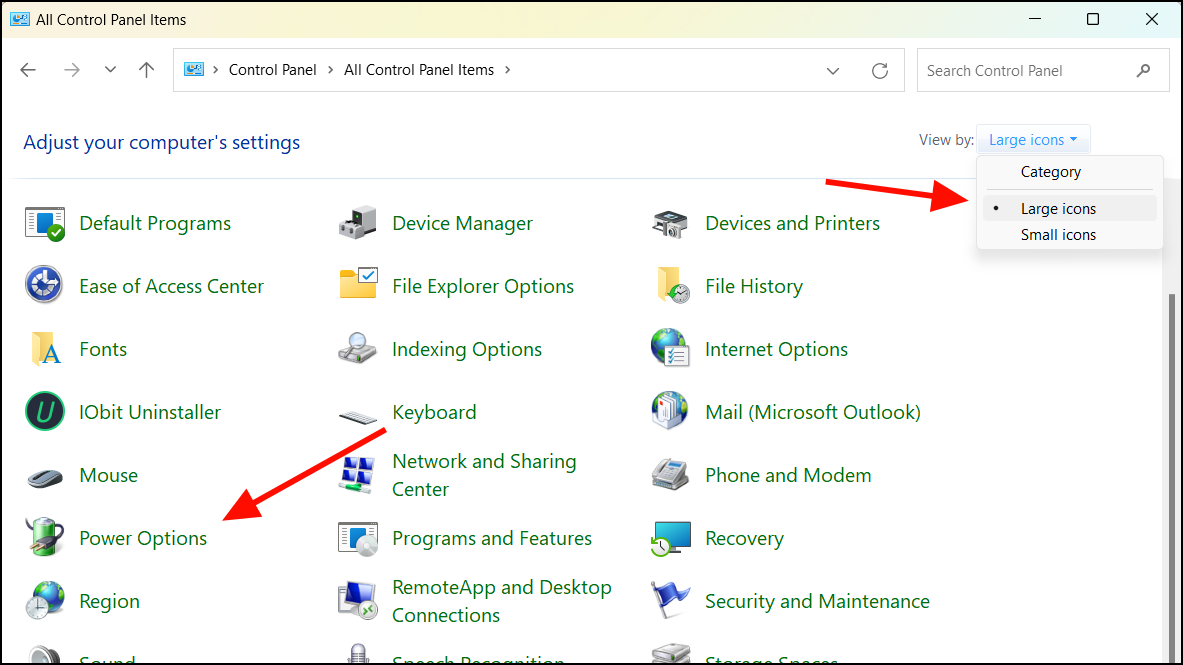
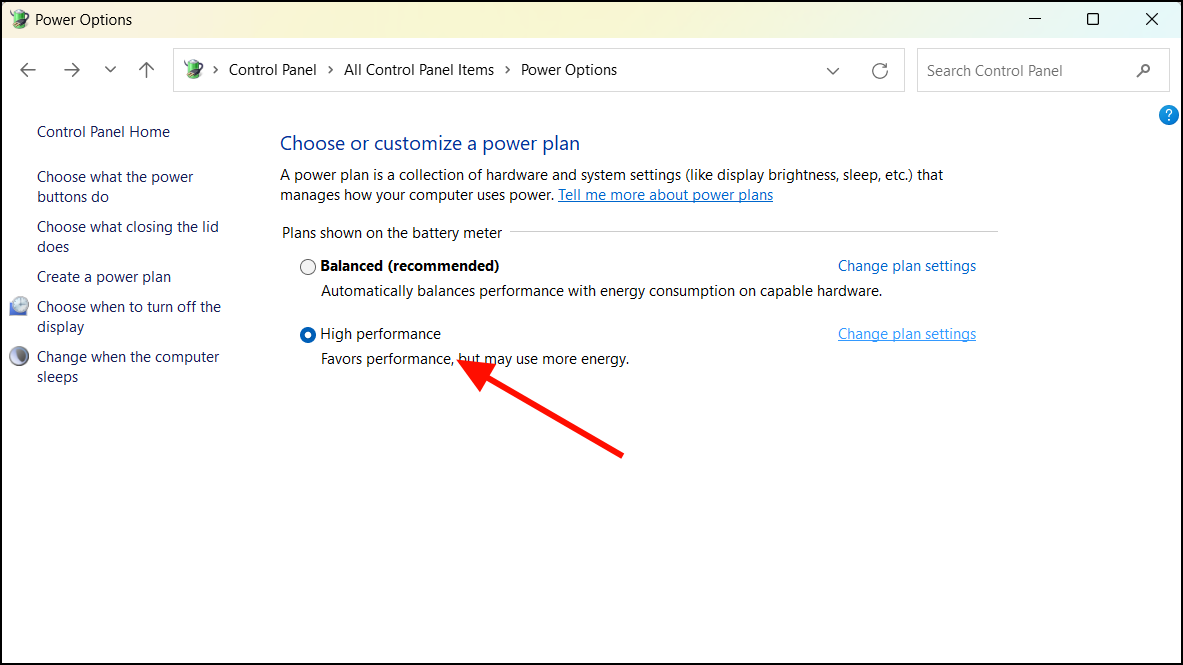
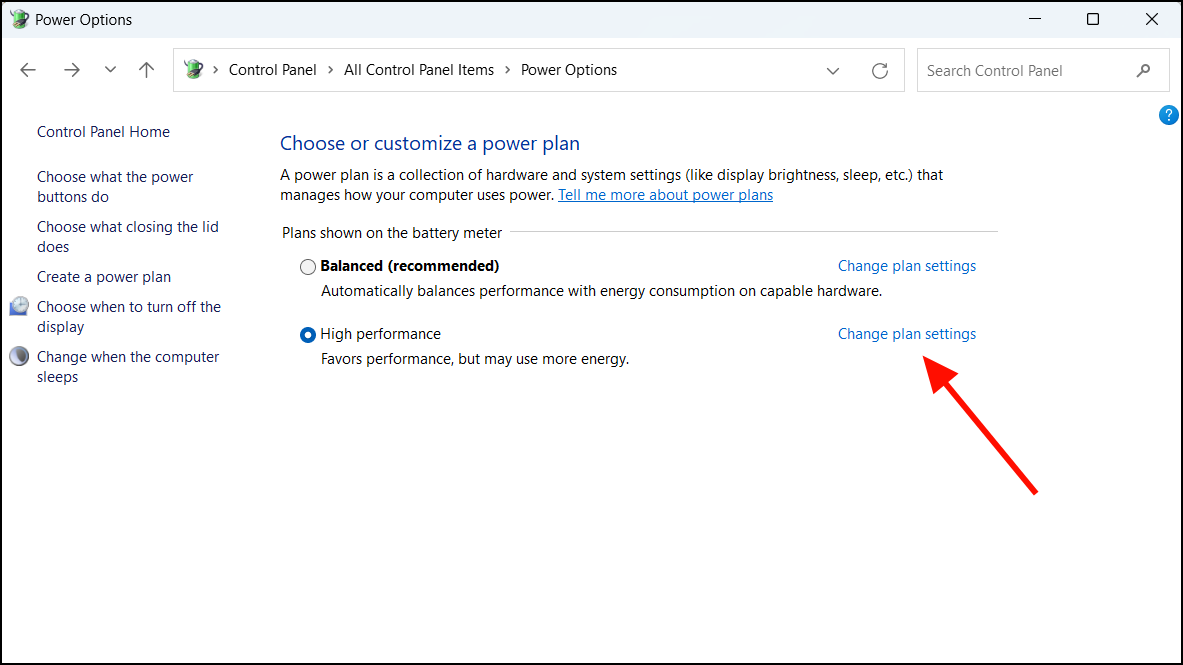
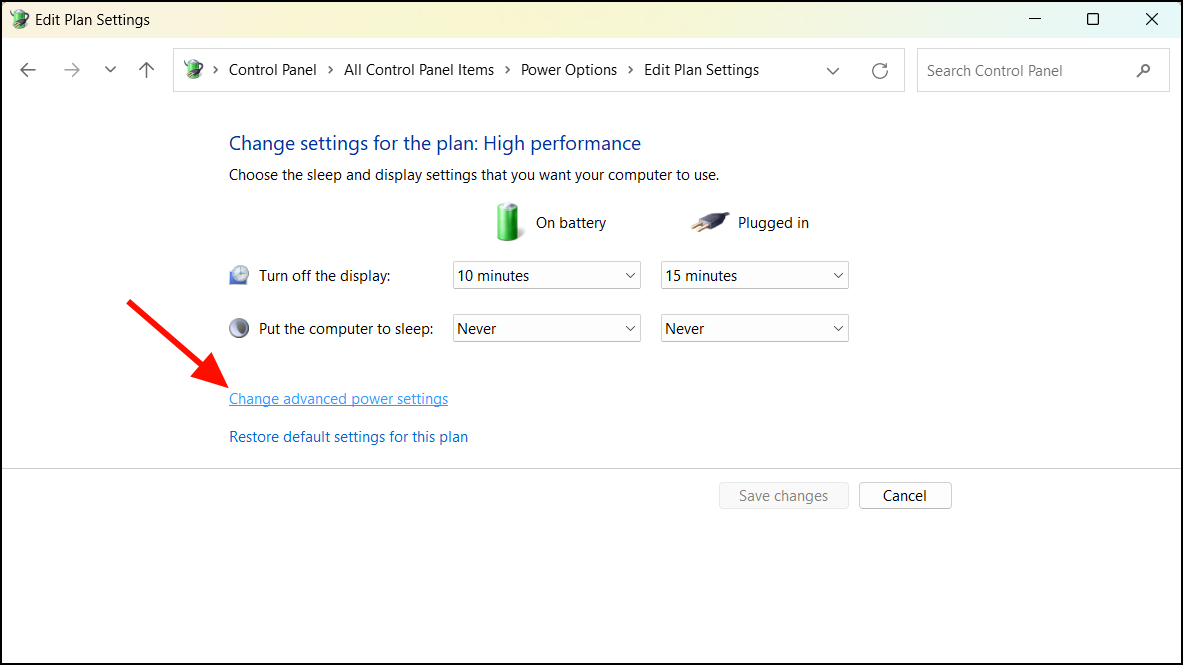
Adjusting your power plan settings is an effective way to disable CPU throttling in Windows 11. By selecting the ‘High Performance’ plan and setting the minimum processor state to 100%, you ensure that your CPU operates at its full potential. Here’s how to modify the power plan settings:
Disabling CPU Throttling via Power Settings
Adjusting your system’s power mode can also disable CPU throttling. By switching to ‘Best Performance’ mode, you can prevent Windows from reducing your CPU’s clock speed. Here’s how:
Windows + I, then navigate to ‘System’ and select ‘Power & battery’ on the right.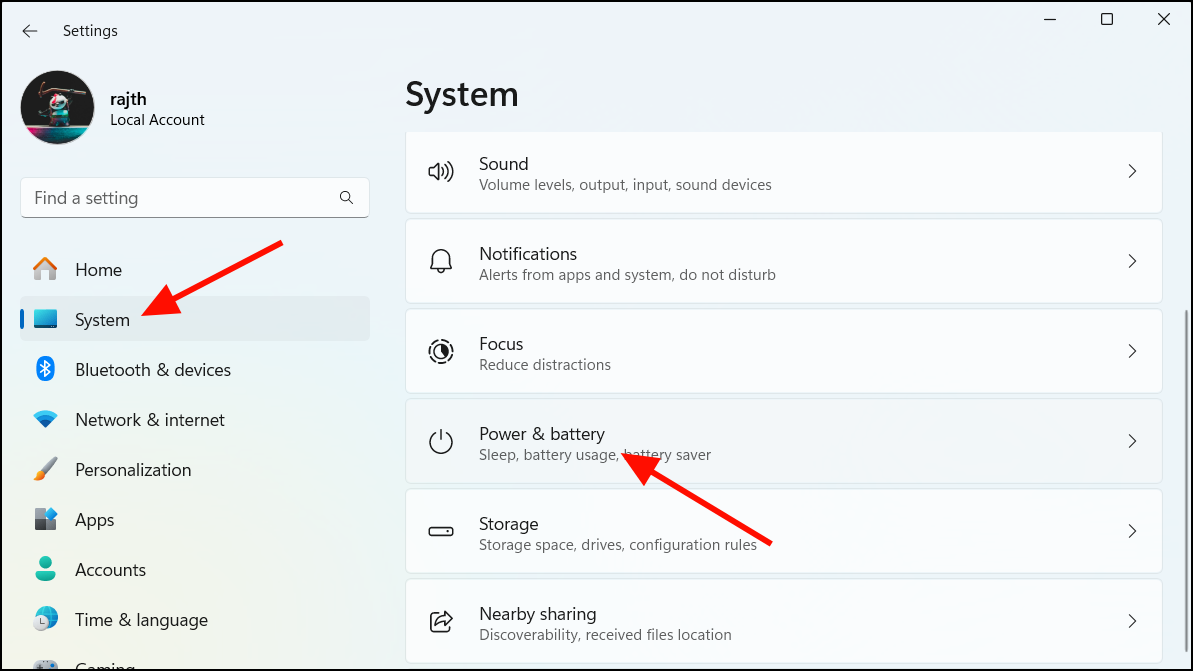
- Best power efficiency: Enables power throttling to conserve energy.
- Balanced: Balances performance and power efficiency; power throttling is enabled.
- Best performance: Disables power throttling to maximize performance.
By selecting ‘Best performance’, you disable CPU throttling and allow your CPU to operate at full speed.

Disable CPU Throttling for an Individual Process Through Task Manager
You can disable CPU throttling for specific processes by adjusting their priority level in Task Manager. This method ensures that critical applications receive more CPU resources. Here’s how to proceed:
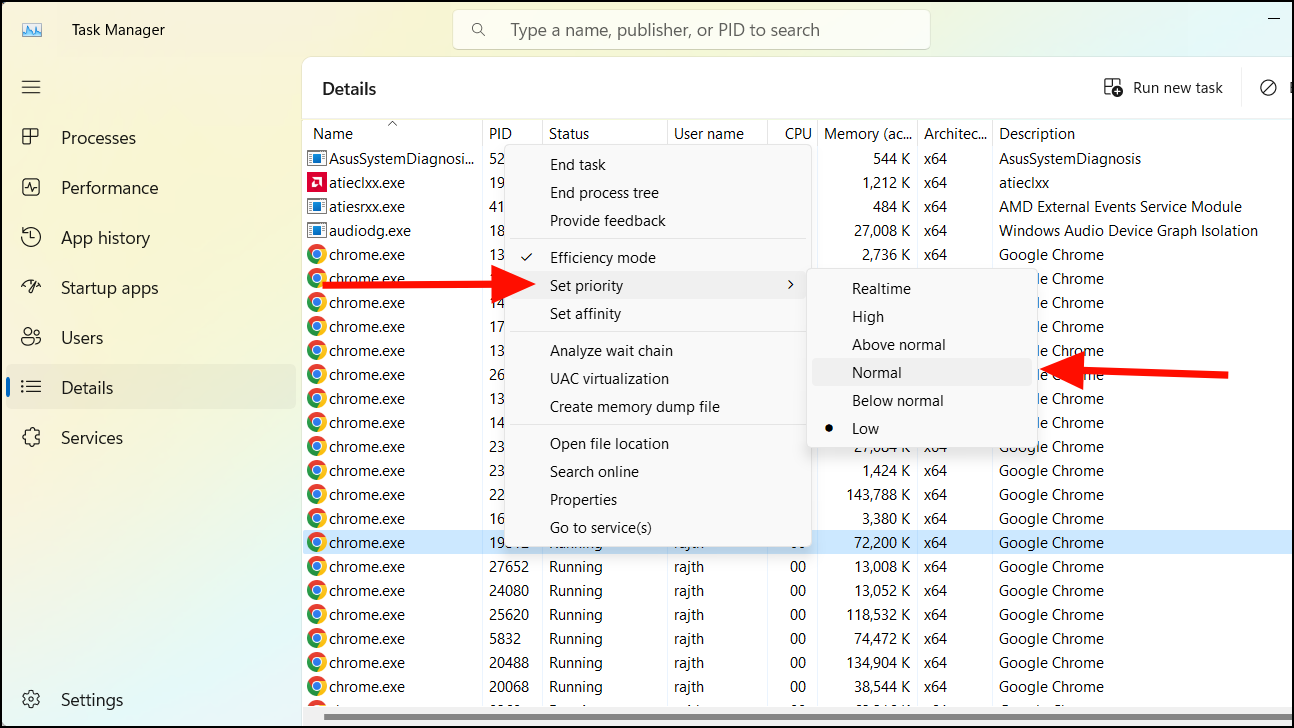
Adjusting the process priority signals the system to allocate more resources to it, effectively reducing or eliminating CPU throttling for that specific process.
Turning Off Power Throttling Using the Group Policy Editor
If you’re using Windows 11 Pro, Education, or Enterprise editions, you can disable CPU throttling system-wide through the Group Policy Editor. Here’s how:
Windows + R, type gpedit.msc, and press Enter to launch the Local Group Policy Editor.Computer Configuration > Administrative Templates > System > Power Management > Power Throttling Settings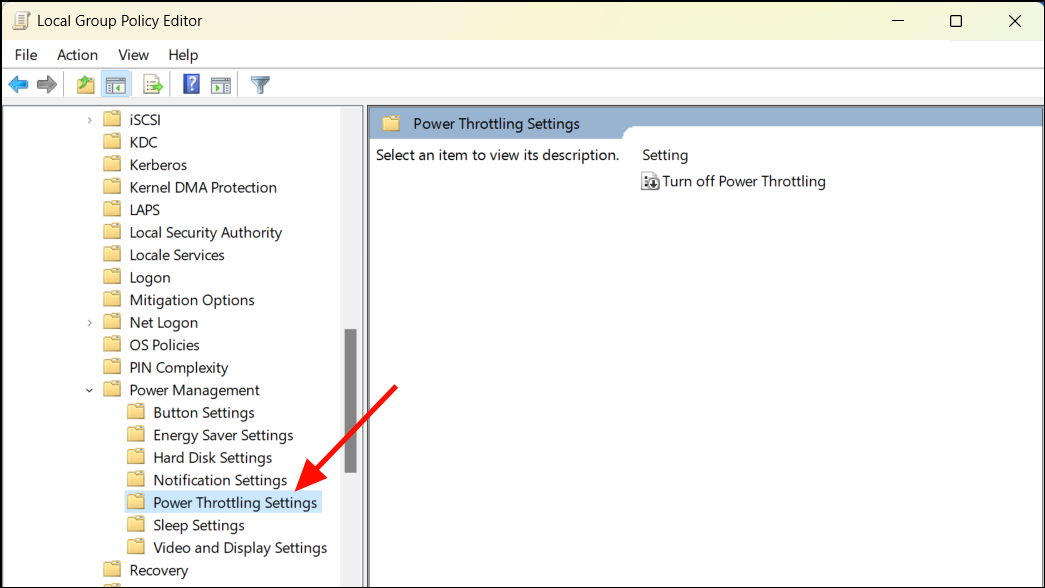
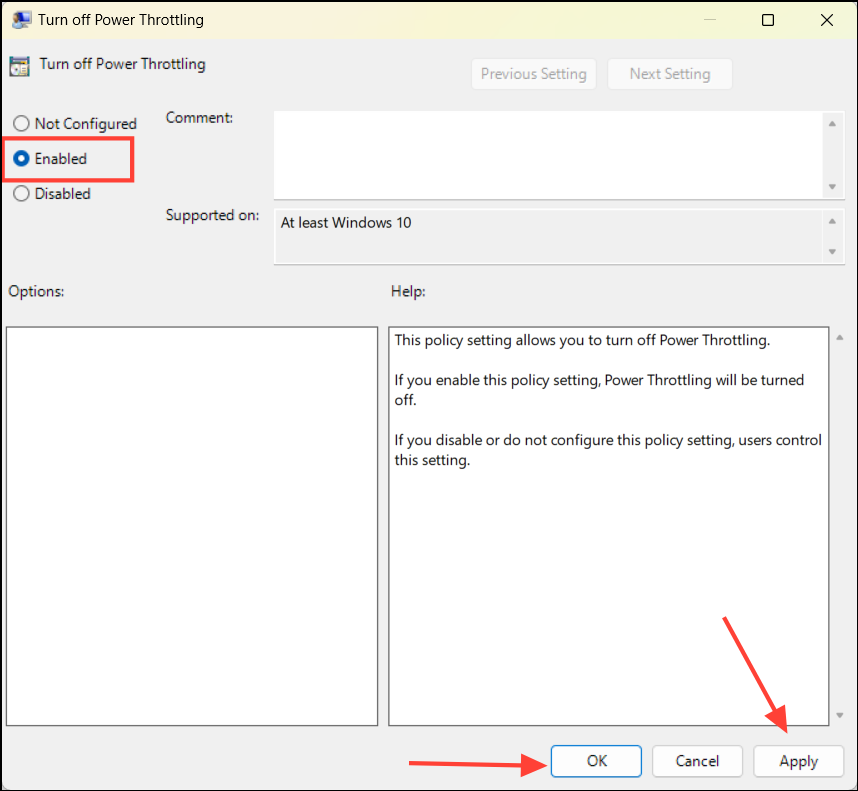
To re-enable CPU throttling, follow the same steps and set the policy to ‘Disabled’ or ‘Not Configured’.
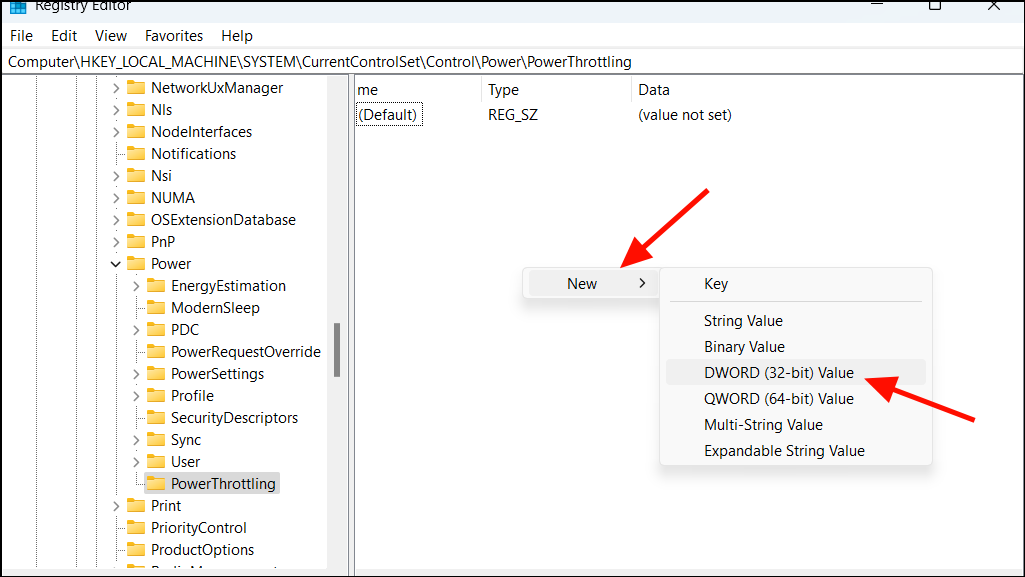
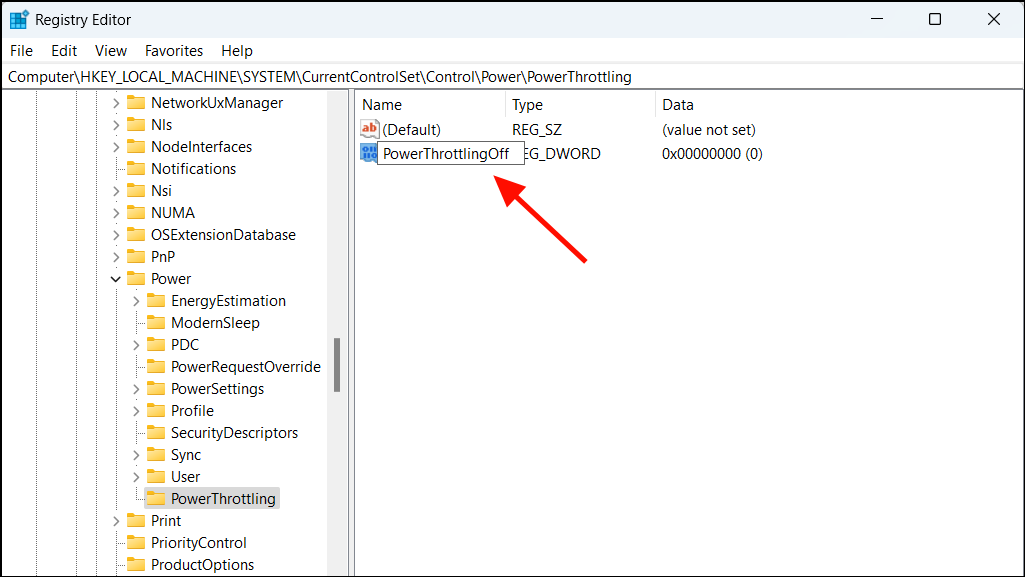
Turning Off CPU Throttling Using Registry Editor
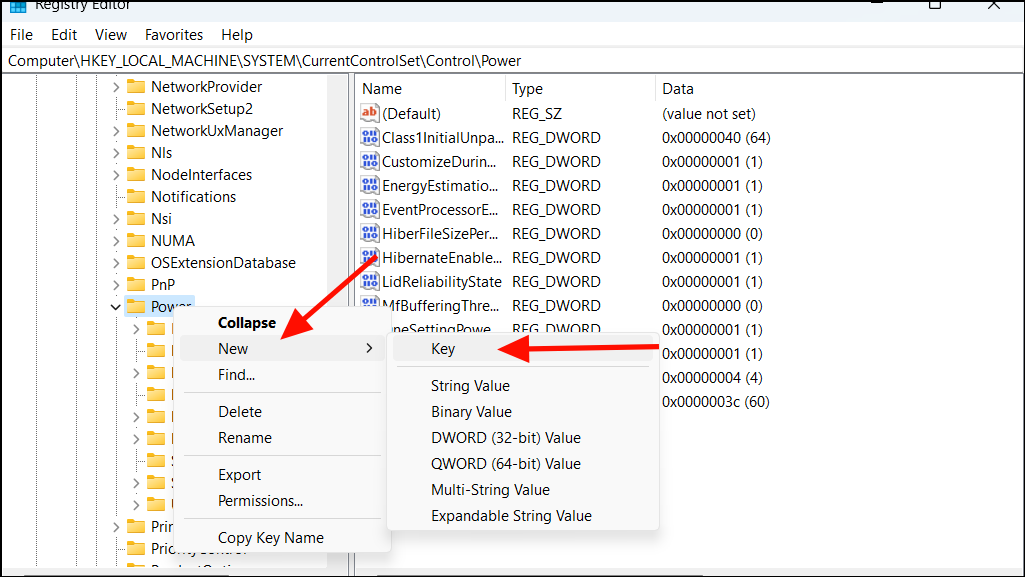
Users on Windows 11 Home edition can disable CPU throttling by modifying the registry. Be cautious when making changes to the registry, as incorrect modifications can cause system instability. It’s recommended to back up the registry before proceeding.
Computer\HKEY_LOCAL_MACHINE\SYSTEM\CurrentControlSet\Control\Power
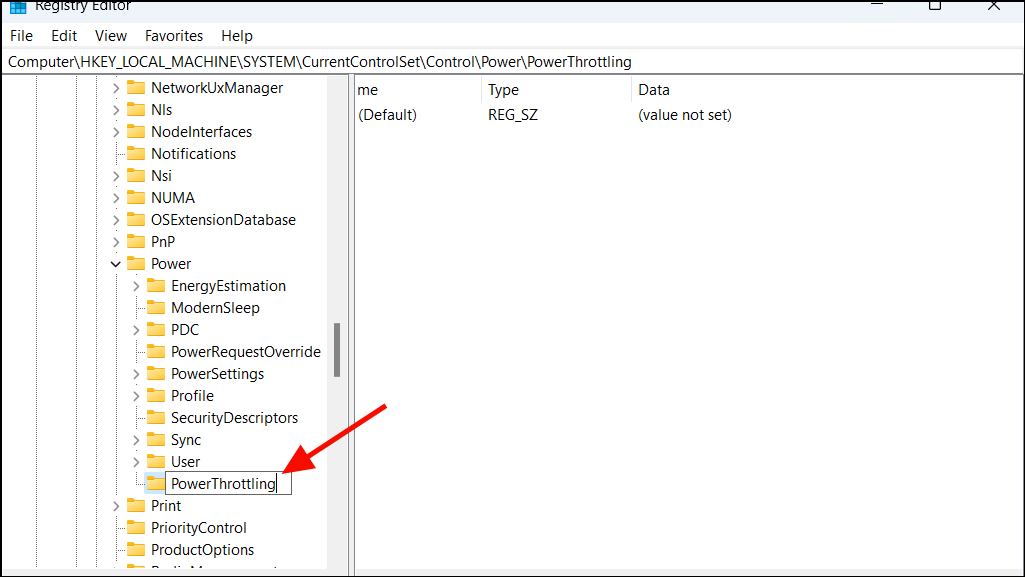
1, and click ‘OK’. This action disables CPU throttling.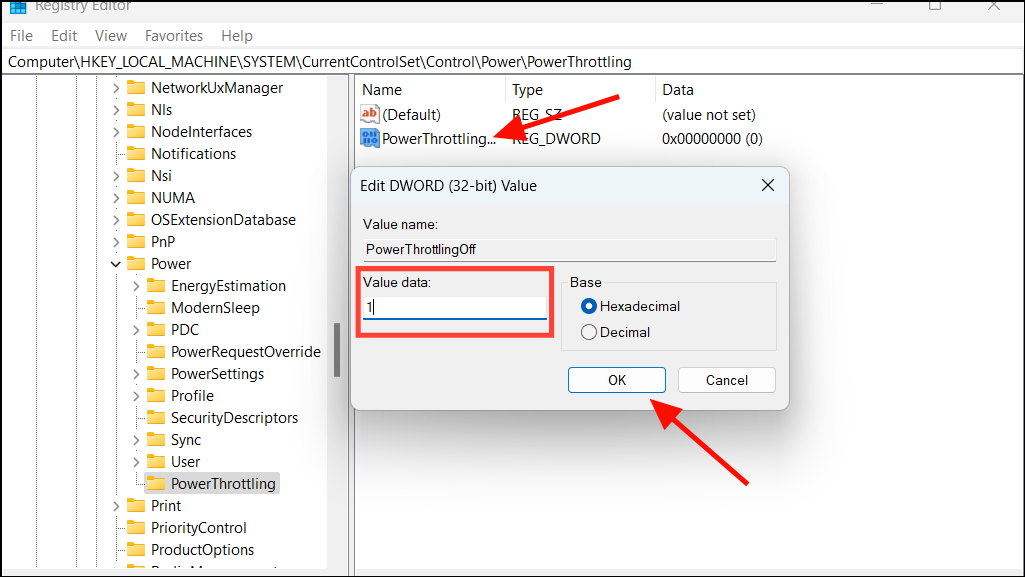
To re-enable CPU throttling, change the ‘Value data’ back to 0 and restart your system.
Turning Off CPU Throttling for Specific Apps in Windows 11
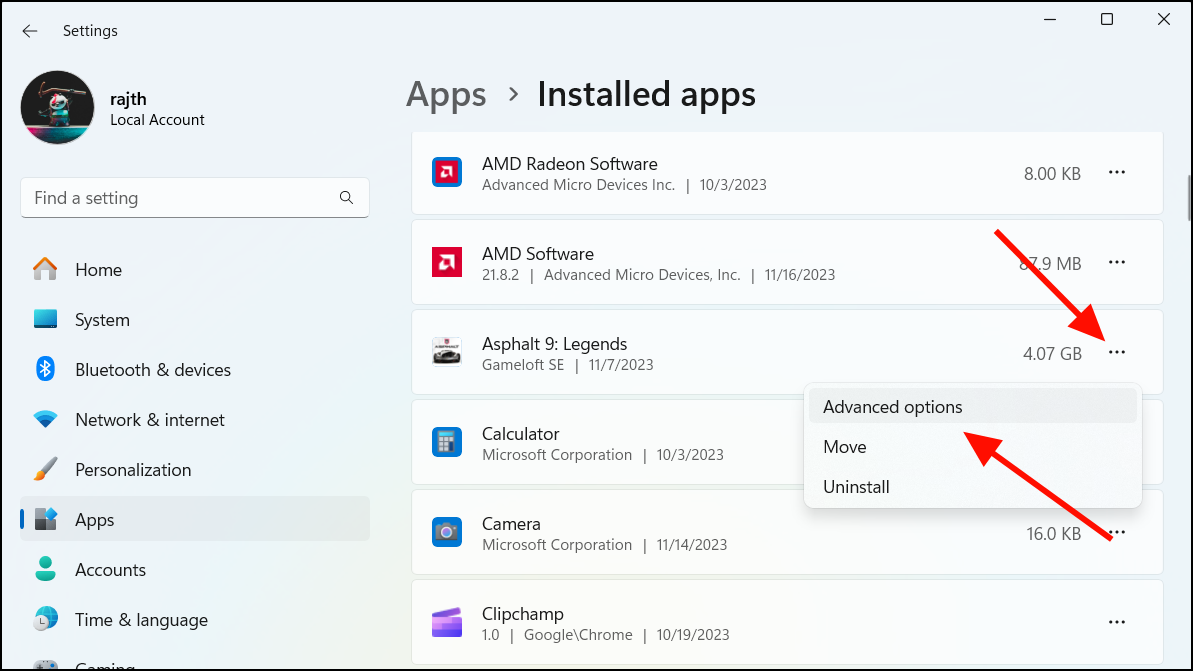
Windows 11 allows you to prevent CPU throttling for specific applications, ensuring they run at full performance even in the background. Here’s how to adjust these settings:
Windows + I, navigate to the ‘Apps’ section, and select ‘Installed apps’ on the right.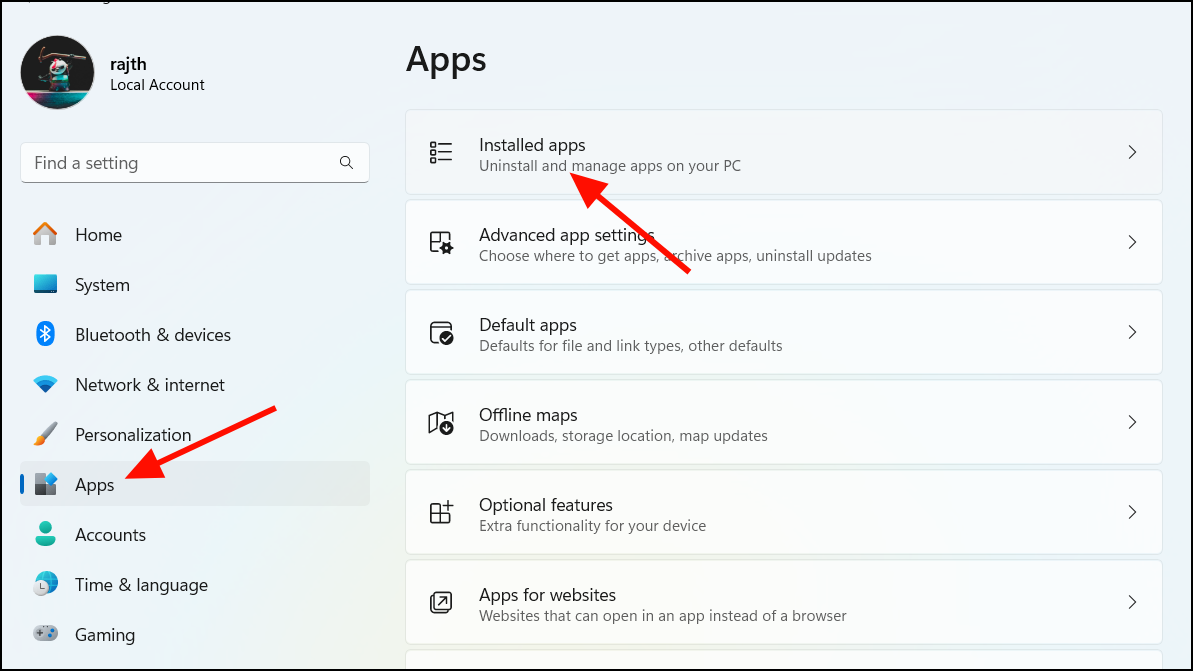
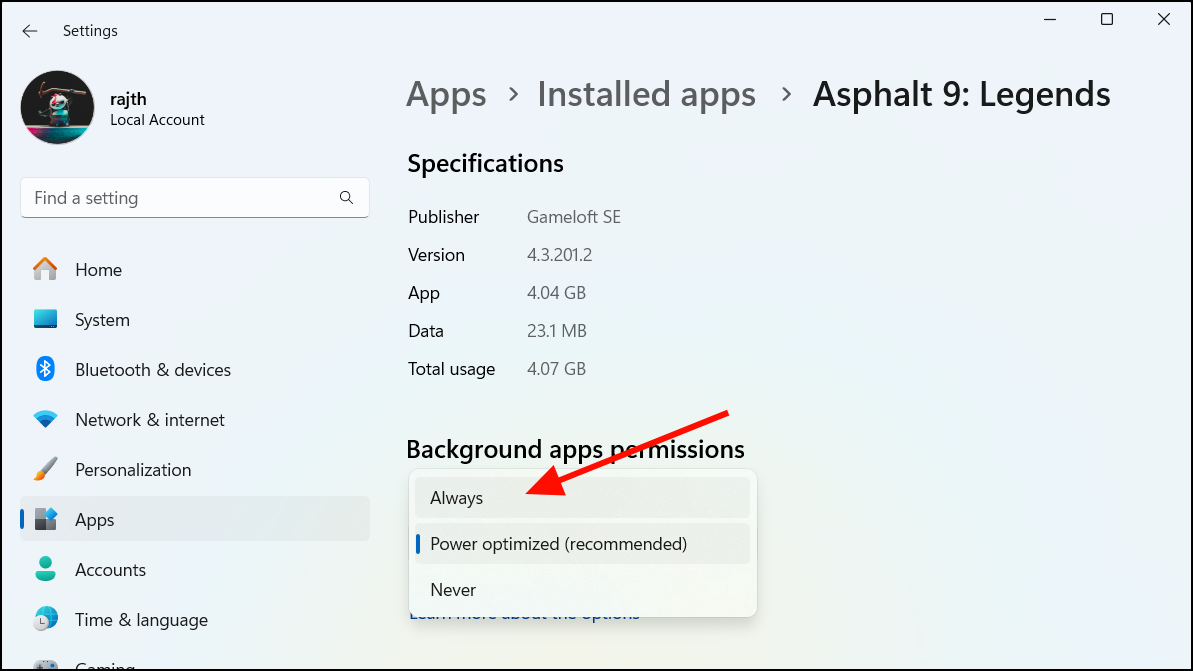
By allowing the app to always run in the background, you prevent Windows from throttling its CPU usage, ensuring optimal performance.
Underclock Your PC to Prevent Throttling
Underclocking your CPU reduces its maximum clock speed, which can prevent it from reaching temperatures that trigger throttling. Although this method helps manage heat generation, it also lowers overall system performance.
You can use tools like Intel Extreme Tuning Utility (XTU), AMD Ryzen Master, or ThrottleStop to underclock your CPU. Choose a tool compatible with your processor and follow the application’s instructions carefully.
When underclocking, monitor your system’s temperature and stability to ensure it’s operating safely. Make gradual adjustments and test your system thoroughly after each change.
Disabling CPU throttling can enhance your system’s performance but may lead to increased heat and power consumption. Always ensure your cooling system is adequate, and monitor temperatures to maintain safe operating conditions.


