
Hardware Acceleration is used to boost the speed and performance of your PC. Generally, when an application is running, it runs on the standard Central Processing Unit (CPU) of your PC. There are certain heavy tasks like video rendering or video games with heavy graphics that require more power beyond the CPU that in turn affect the performance of your PC if not provided.
With Hardware Acceleration, an application offloads computing tasks on to specialized components of your PC like Graphics Processing Unit (GPU). The main intention behind Hardware Acceleration is to speed up the performance by moving the task from the CPU to a dedicated hardware component.
Hardware Acceleration is by default enabled on Windows 10. There are certain situations where you don’t do heavy tasks or you see no reason to use hardware acceleration. In such cases, you can disable it easily.
Disable Hardware Acceleration from your GPU Software
Earlier, you can enable or disable hardware acceleration in the display settings of Windows. Now, it is embedded into your graphics card settings such as NVIDIA, AMD, Intel, etc.
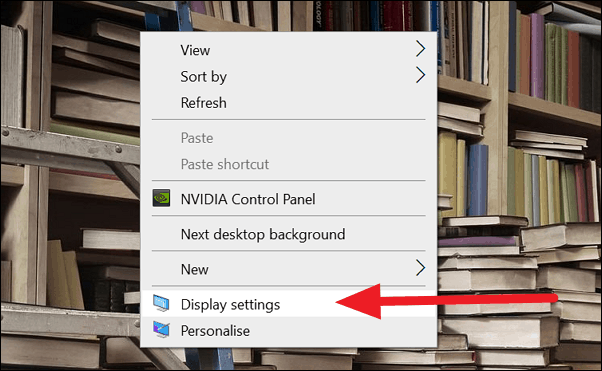
To disable hardware acceleration in the Nvidia Control Panel, right-click on the desktop and then select ‘NVIDIA Control Panel’ from the context menu open its settings.
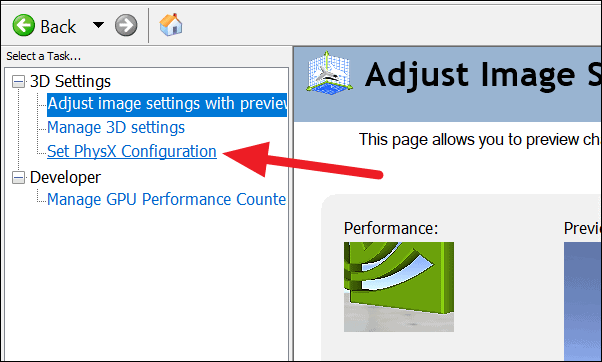
In the ‘NVIDIA Control Panel’, click on ‘Set PhysX Configuration’ from the left-side bar.
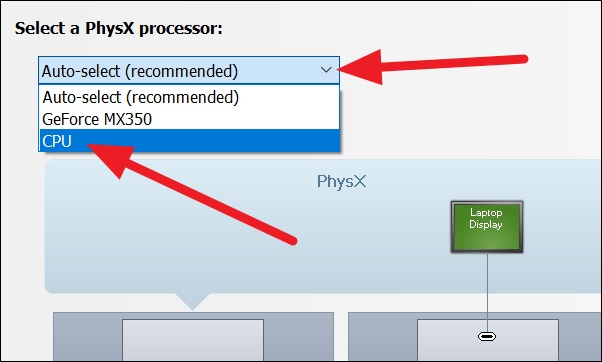
You will now see the option to select the PhysX processor. Click on the drop-down button (as seen in the image) and select CPU.
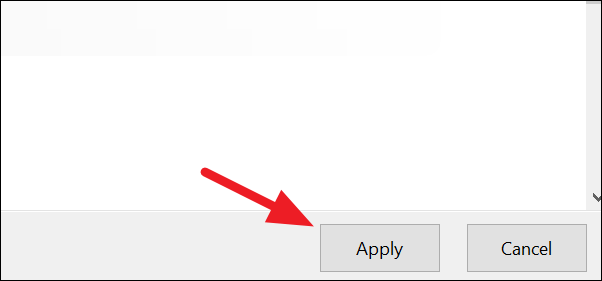
Once you have selected ‘CPU’ as PhysX processor, click on ‘Apply’ in the bottom-right corner of the window to apply the changes.
This will disable hardware acceleration on your Nvidia GPU powered computer. If you use a different brand GPU, use their software to similarly turn off hardware acceleration.
Disable Hardware Acceleration using Regedit
If the above method does not work on your PC or you do not find the options to do so, you can disable it through Windows Registry.
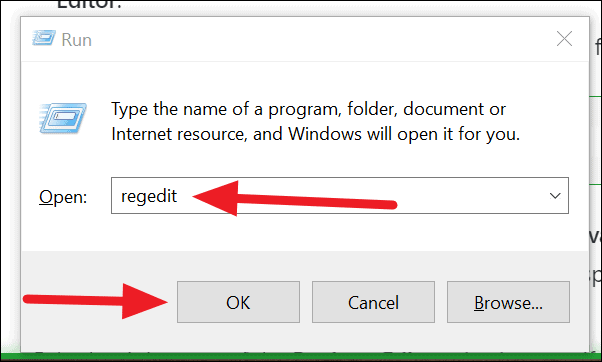
To access Registry Editor, press Windows key+R, type regedit in the ‘Run’ text box and click on the ‘OK’ button.
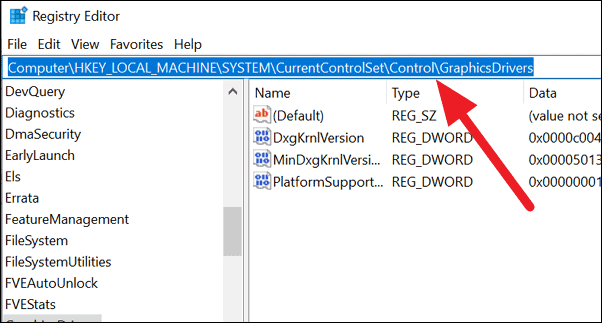
You will now see the ‘Registry Editor’ window. Copy and paste the following path in the address bar.
HKEY_LOCAL_MACHINE\SYSTEM\CurrentControlSet\Control\GraphicsDrivers
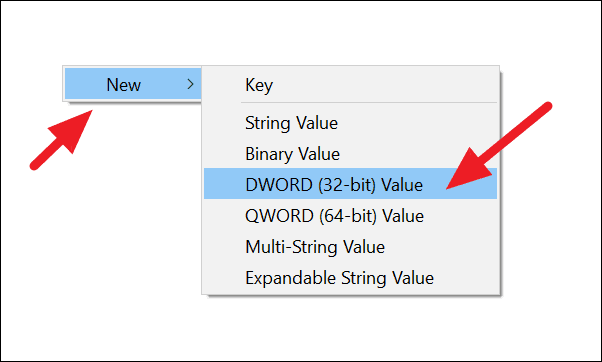
Right-click in the white space of ‘Registry Editor’ to see the ‘New’ option and then select ‘DWORD (32-bit) Value’.
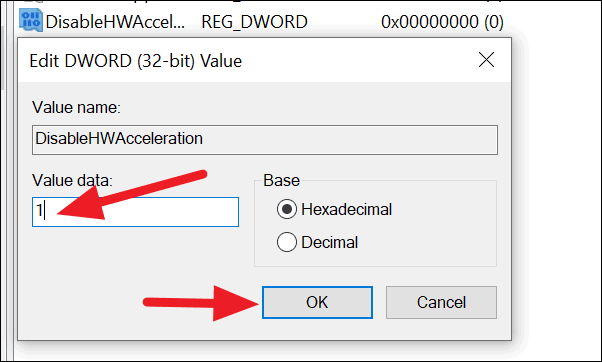
Name the new registry we created ‘DisableHWAcceleration’ or anything of your choice. Just remember the name for any future use. Double-click on it, enter ‘1’ in ‘Value data’ box, and click on the ‘OK’ button.
Close the Registry editor window and restart you PC for the changes to take effect.
In some PCs, you will find ‘DWORD – DisableHWAcceleration’ by default, in the same location as above. You just have to change the value data of it to 1 instead of creating a new one.


