
Windows Photos app also has a video editing feature, which many of the users are unaware of. It’s very similar to a third-party app with most of the editing options available. The advantage of using the video editor in the Photos app is that it comes with Windows and is perfectly safe to use.
Most third-party video editing apps charge you a premium membership, while the video editor on the photos app is free of cost. A simple user interface coupled with exciting features is what appeals to the users.
In this article, we will see how to use the video editor in Windows 10 photos app.
Using the Video Editor in Photos App
Before we proceed with the various features and their use, you must understand how to access the video editor.
Search for Video Editor in the Start Menu and then click on it to access.
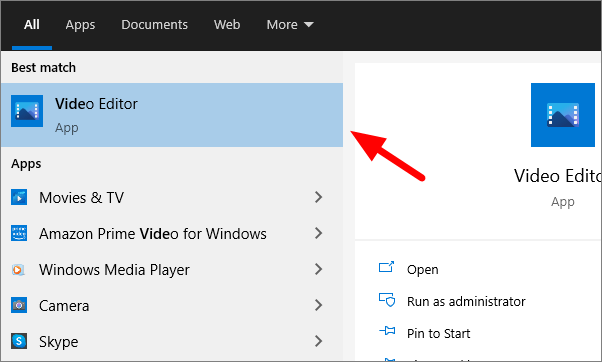
The Video Editor in the photos app will open.
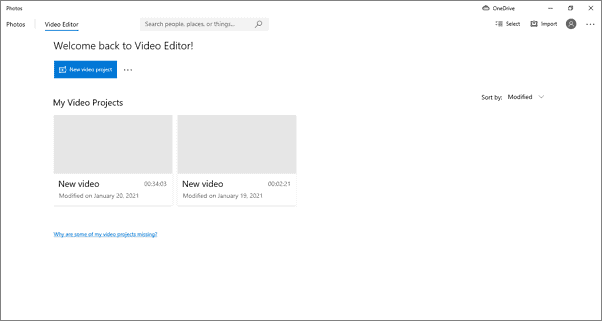
You can start editing a new video by clicking on ‘New video project’ or pick up from where you left the last time by selecting a video under ‘My Video Projects’.
Create a New Project
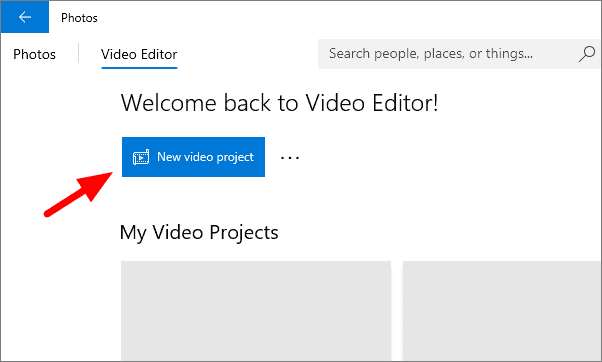
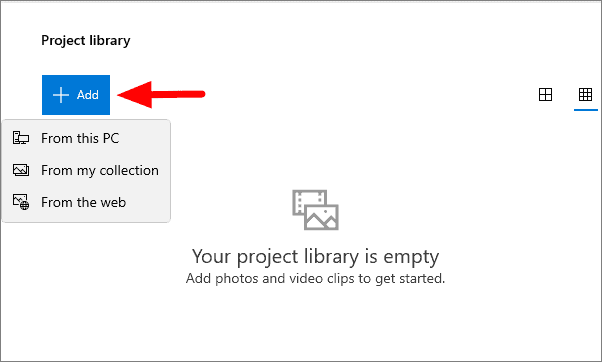
To start a new project in the Video Editor, click on ‘New video project’ near the top-left corner.
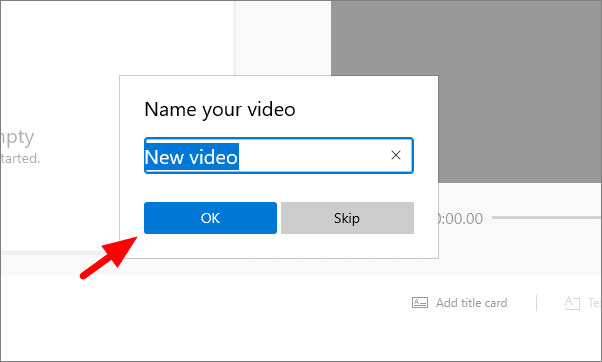
Now, you have the option to name your video. Enter a name in the text box and click on ‘OK’.
To start editing a video, click on ‘Add’ and then select one of three options from the menu. If you have the video on your system, click on ‘From this PC’, browse and select the video
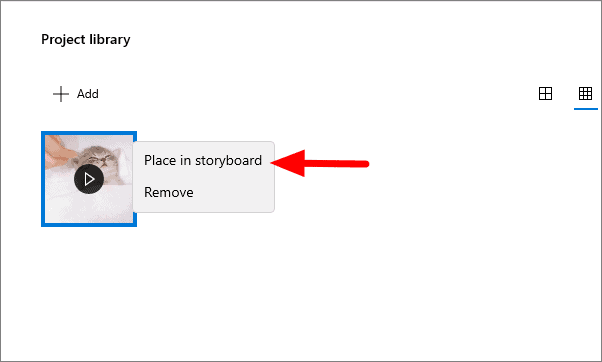
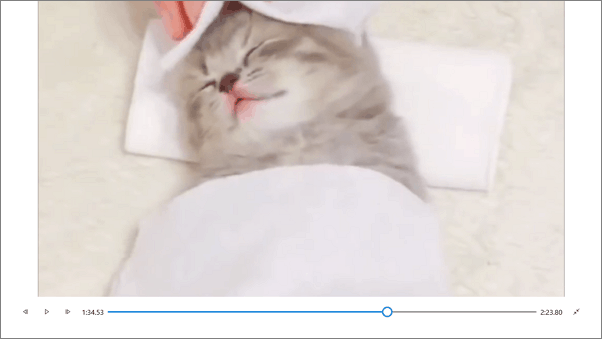
Once a video has is to your project library, right-click on it and select ‘Place in storyboard’ or you can drag and drop it to the ‘Storyboard’ to start editing.
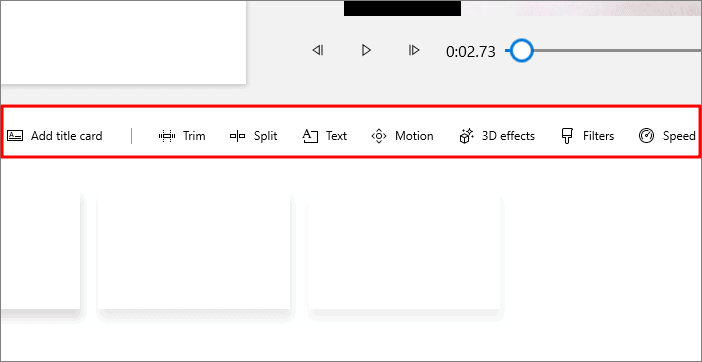
Once you have added a video to the storyboard, you will see several editing tools in the toolbar. We will see how to use all of these tools one by one.
Adding a Title Card
When you click on ‘Add a title card’, the first option in the tab, it will add a 3 second(by default) title card at the start of the video.
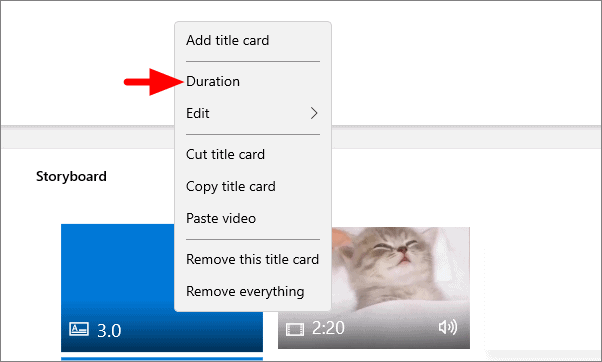
The duration of the title card can be adjusted as per the user’s preference. To change the duration, right-click on the title card and select ‘Duration’ from the context menu.
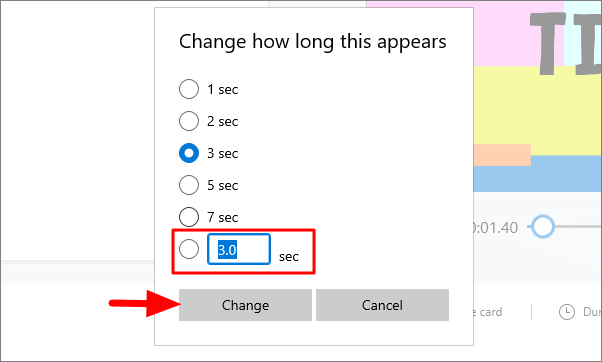
You can now select the duration from one of the options or type a custom one in the box at the bottom and then click on ‘Change’.
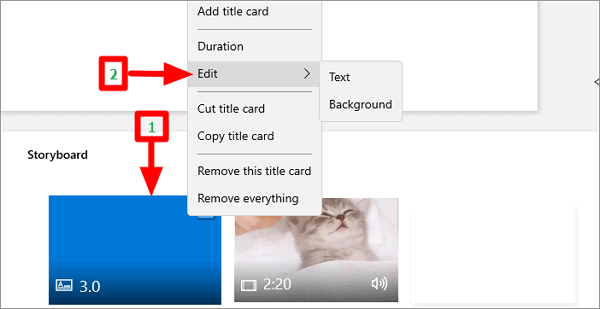
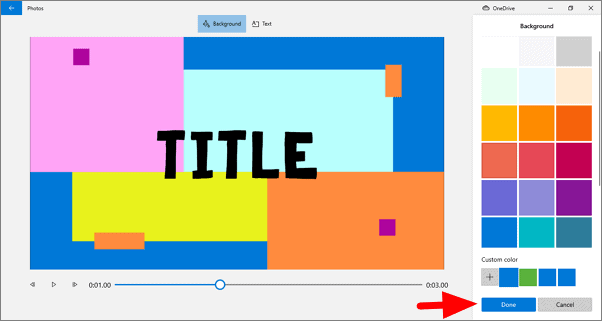
To make other changes right-click on the title card and then select ‘Edit’ from the menu. You can now choose whether you want to add text or change the background of the title card.
If you click on ‘Text’, add the title in the box in the top-right corner. You can also select a text style from the list of options on the left. Moreover, you can change the layout of the text by selecting one from the layout section at the bottom right. Also, you can set the time of display of text in the title card by adjusting the pointers.
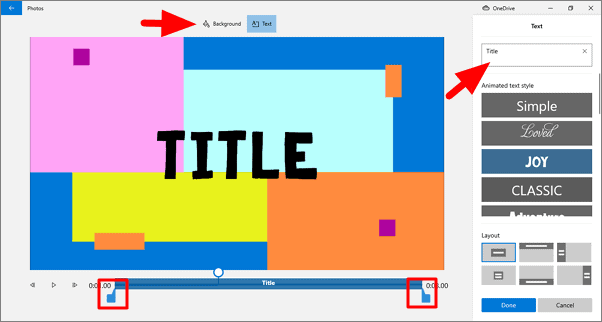
After you are done with the text, click on ‘Background’ at the top to change the background color. You can select a color from the list of options or choose a custom one by clicking on the ‘+’ sign at the bottom. Click on ‘Done’ when you have set up the title card.
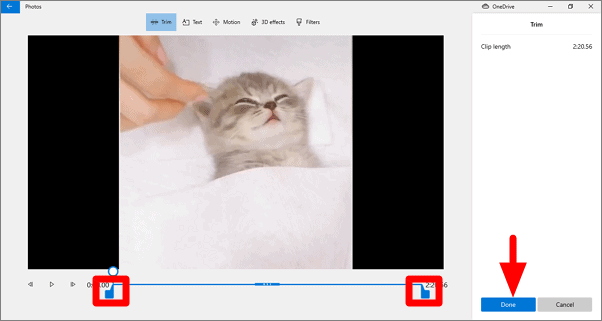
Trimming a Video
The next option in the toolbar is ‘Trim’. With trim, you can cut a relevant part of the video and save it. To trim a video, slide the two pointers to the required positions, to trim that part. The clip length mentioned at the top-right will initially be the length of the video, but will change when you select a part of the video by sliding the pointers. Once you have chosen the part you want to trim, click on ‘Done’ at the bottom.
Splitting Video
With the Split tool, you can divide the video into two parts. To split a video, slide the pointer to a time where you want to split the video. If you are unsure about the time of the split, hit the play button, identify the split point, hit pause, and then click on ‘Done’ to split the video.
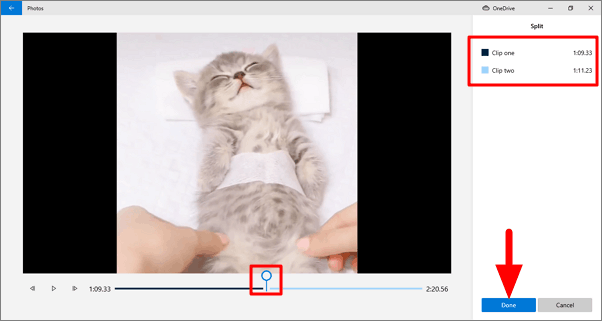
Furthermore, the split feature also displays the length of both the clips at the top-right. The video to the left of the pointer is ‘Clip one’ while that to the right is ‘Clip two’.
Adding Overlay Text to a Video
Like the title card, text can be added to a video as well. Enter the text you want to add in the box on the top-right corner, select the text style from the options underneath it, and then select the layout of the text at the bottom.
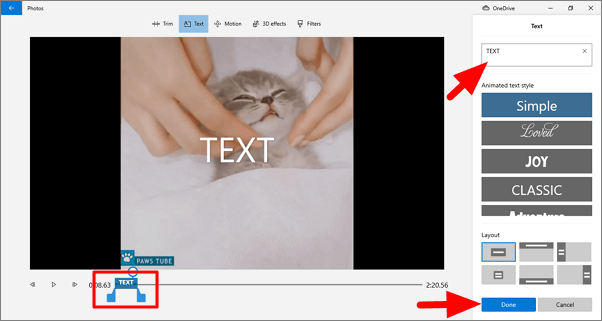
You can also select the start and endpoint and the duration for which you want the text to be displayed in the video. Set the time by adjusting the pointers at the bottom. You can slide either of them or both to set a point and duration.
Adding Motion Effects
The next option in the toolbar is ‘Motion Effect’. When you select the tool, you will see several options on the left under ‘Motion’. These include zooming in and out of various sections of the video.
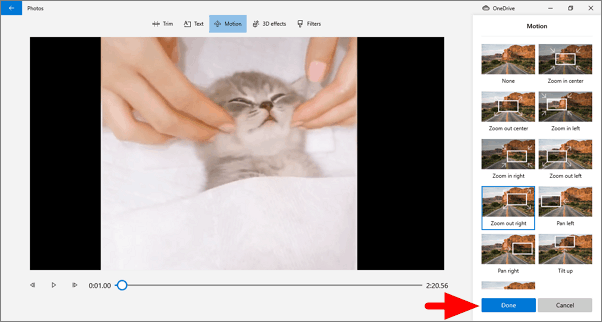
After you have selected a motion effect, you can preview it before making the changes. To preview, hit the play button and see how the effect works on your video. If you are content with the motion effect, click on ‘Done’ to save the changes.
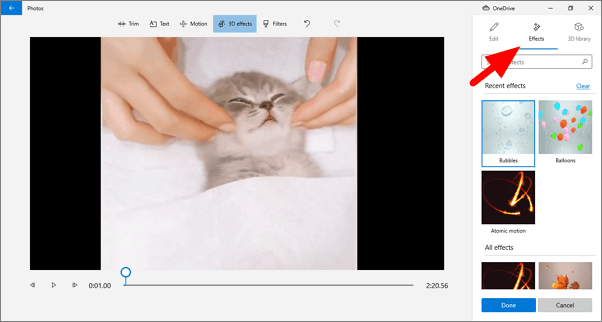
Applying 3D Effects
You can add several 3D effects in the Video Editor. To add a 3D effect, click on it in the toolbar and head to the ‘Effects’ section on the 3D effects window. Select the effect you want to apply from the various available options.
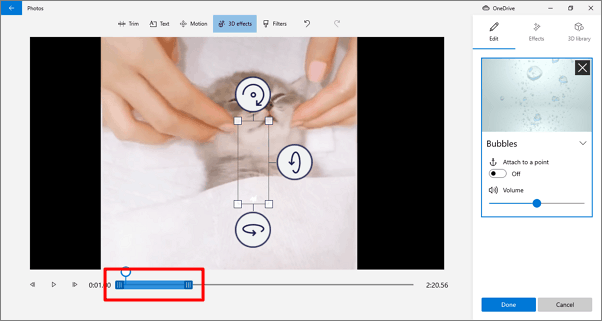
Once you have selected an effect, you can add it wherever you want on the video by dragging and placing the effect box. Furthermore, you can set the period when you want to display the effect. To set a time, slide the pointers to required positions and hit the play button for a preview before finalizing the 3D effect.
The Video Editor also allows you to add 3D objects to the video. Head to the ‘3D library’ section on the top-right and select a category. There are various objects under each category, thus providing you a multitude of options.
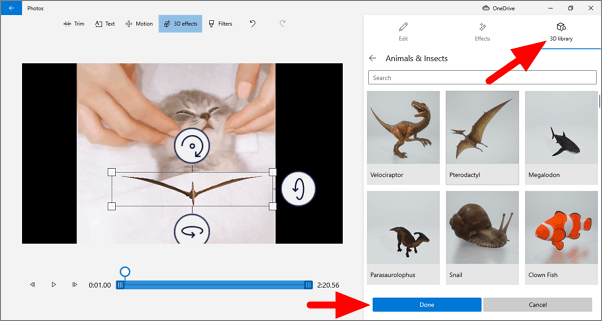
After selecting an object, you can adjust not just its position in the video but the orientation as well. To change the orientation, use the three curved arrows around the object. As was the case with other effects, you can set a time of display for the 3D object as well by adjusting the pointers.
Once you have added the 3D effects, click on ‘Done’ to apply the changes.
Adding Video Filters
The next available editing option is ‘Filter’. A filter in a video is similar to the one for pictures. When you add a filter, the colors in the video change accordingly.
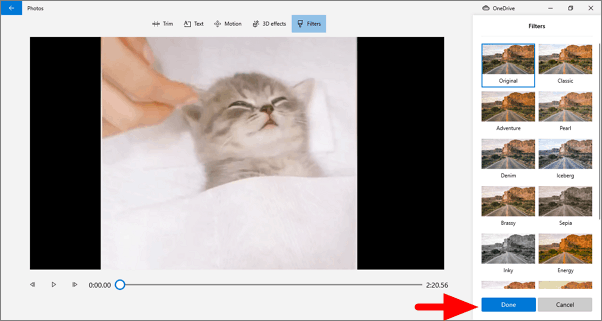
You can select a filter from the options available on the right, see how it works for your video and then click on ‘Done’ to apply the filter.
Unlike the other editing tools, you cannot set a time frame for the filter to be in effect. Once select, it will be applied throughout the video.
Change Video Speed
The ‘Speed’ editing tool changes the speed with which the video plays. It is similar to fast-forwarding a video.
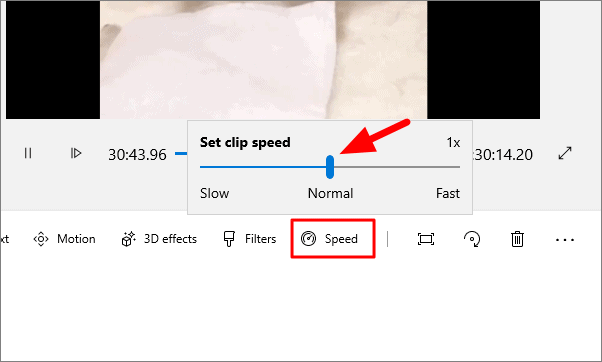
To change the video playing speed, slide the pointer in either direction. Sliding it to the right will increase the speed and vice versa. You can adjust the video speed between 0.02x, the slowest to 64x, the fastest.
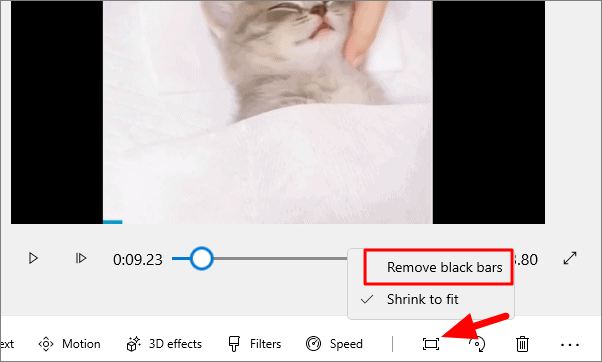
Fit Video to Full Screen by Removing Black Bars
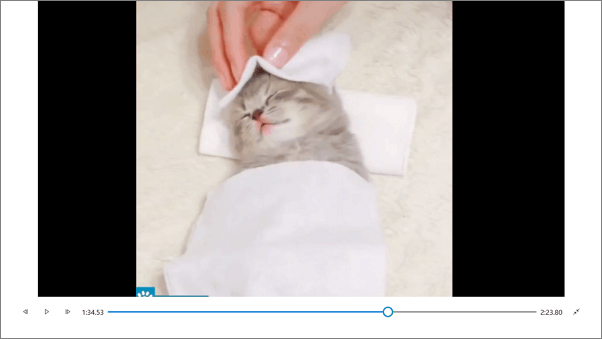
The second last tool in the storyboard toolbar is ‘Remove or Show Black bars’. There are two options in this tool, remove black bars and shrink to fit.
Given below is the full screen view of the video when ‘Shrink to fit’ is selected.
If you select ‘Remove black bars,’, the video will fit to screen, and black bars at the sides will be removed. Shown below is a full-screen view of the video with the black bars removed.
Removing the black bars may affect the video, therefore it is recommended to play the whole video once before applying the changes.
Rotating a Video
Rotate is the last tool in the storyboard toolbar. When you click on the rotate sign, it rotates the video by 90 degrees in the clockwise direction.
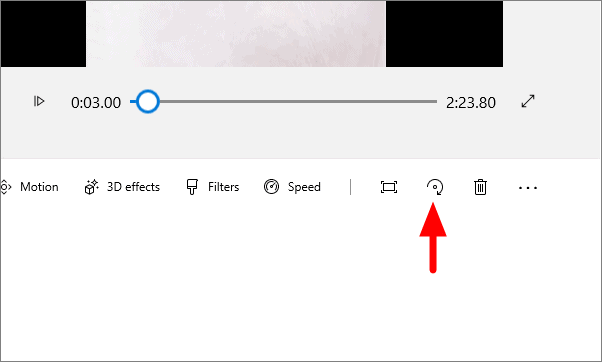
Many users prefer the keyboard shortcut, CTRL + R to rotate the video.
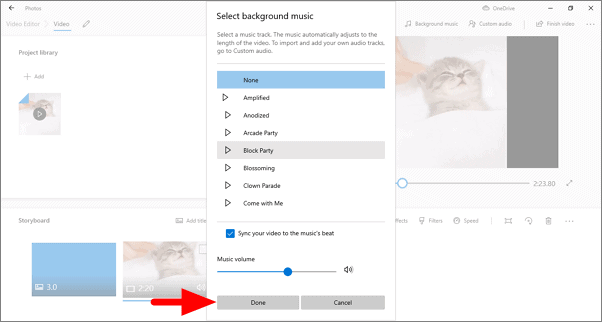
Adding Background Music to the Video
In the Video Editor, you can add background music to the video. You can select from a list of options the editor offers or add a track of your choice.
Click on ‘Background music’ at the top-right corner of the editor to add music.

You can now select a music track to add as background music. Hit the play button right behind the music track to listen to it before making the selection. Click on ‘Done’ at the bottom once you have selected the music track.
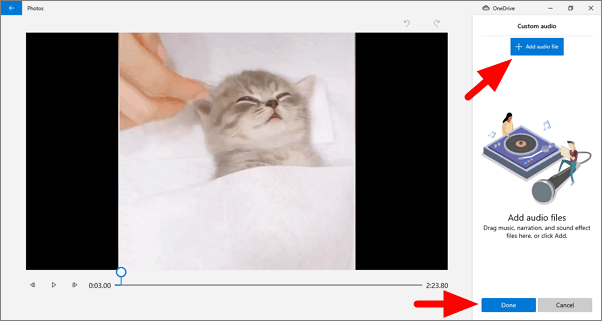
To add a track of your choice, select ‘Custom Audio’, right next to the background music option.
Click on ‘Add a file’ under custom audio, browse and select a track on your system and then click on ‘Done’.
Using Preset Themes
Themes are one of the best features offered by the Video Editor in Photos app. It offers several themes to choose from and can considerably enhance the standard of the video. You must have seen videos online with high-quality graphics, adding a theme will do just that.
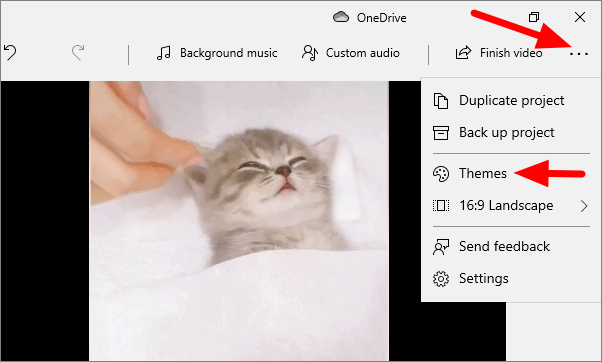
To add a theme, click on the three horizontal dots at the top-right corner and select ‘Themes’ from the menu.
Select a theme from options displayed on the screen. When you select a theme, a small preview video plays on the left, which helps you identify the right theme for your video. After selecting a theme, click on ‘Done’ at the bottom to apply the same.
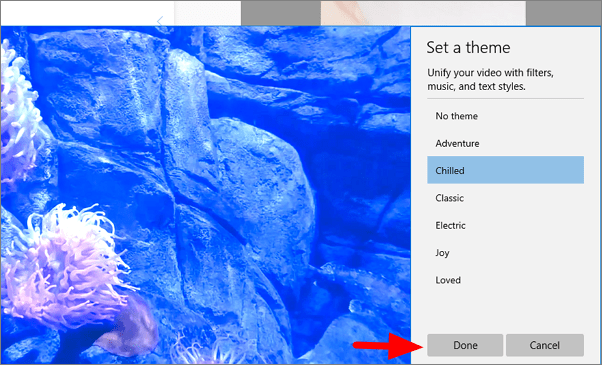
If you have applied a theme and don’t find it appropriate, you add another one from the list or select ‘No theme’ to revert the changes.
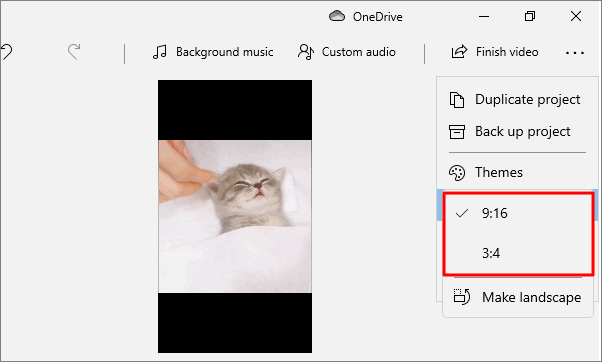
Change Aspect Ratio
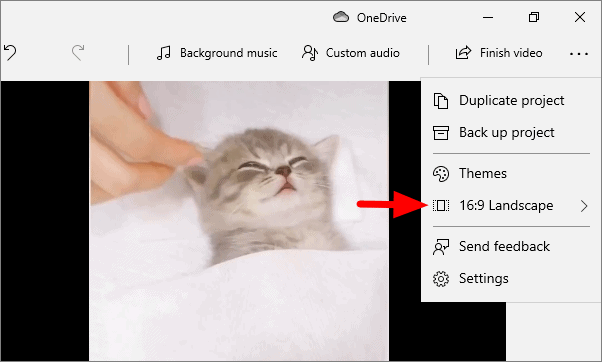
Many users want a video in a particular mode or aspect ratio. In the video editor, you can choose whether you want the video in landscape mode or portrait mode. Once you select a mode, it allows you to pick an aspect ratio. The video is by default set to landscape with an aspect ratio of 16:9.
To change the mode and aspect ratio, right-click on the three dots and select the tile showing the mode and ratio.
In Landscape mode, which is set by default, you have two options, 16:9 and 4:3. The 16:9 ratio is set by default. To change, click on the other aspect ratio. Moreover, to change the mode to portrait, select the last option, ‘Make portrait’.
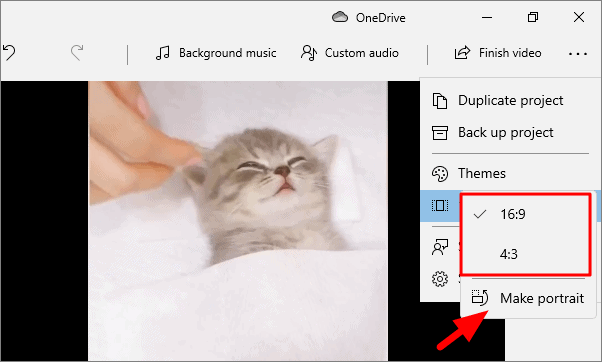
When you change the mode to portrait, the aspect ratios are reversed.
That’s all about the Video Editor in Photos app you need to understand to start working on it and use the various tools to edit videos.


