
Accidentally deleting important files can be frustrating, especially when there’s no prompt to confirm your action. By default, Windows 11 doesn’t display a confirmation dialog when you delete files, which can lead to unintended deletions. Fortunately, you can enable the delete file confirmation dialog to add an extra layer of safety before files are sent to the Recycle Bin or permanently removed. In this guide, we’ll walk you through the most effective methods to activate this feature.
Enable delete confirmation dialog from Recycle Bin properties
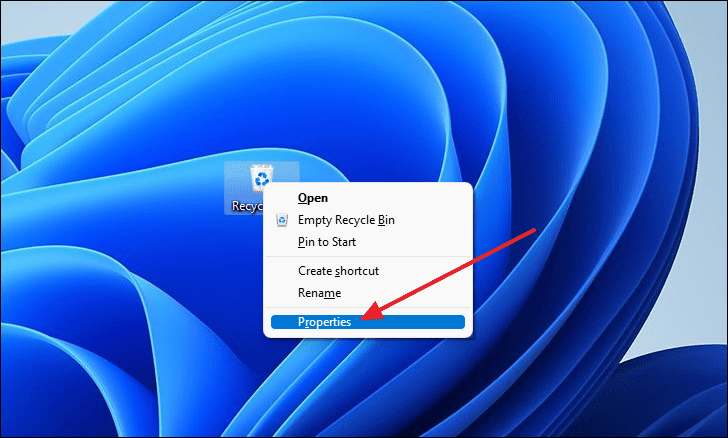
To activate the delete confirmation dialog through the Recycle Bin properties, follow these steps:
- Right-click on the Recycle Bin icon on your desktop and select Properties.
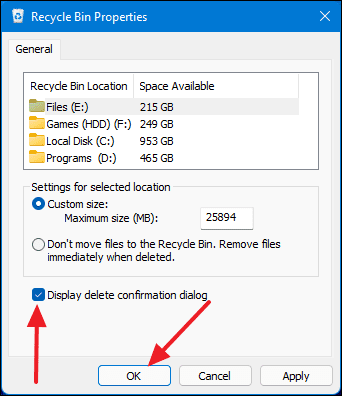
- In the Recycle Bin Properties window, check the box next to Display delete confirmation dialog.
- Click OK to save the changes.
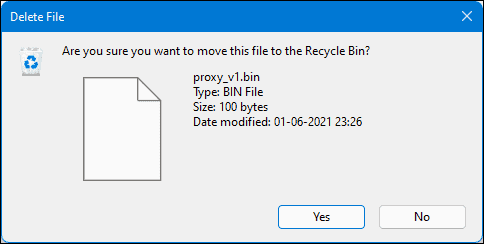
Now, whenever you attempt to delete a file, a confirmation dialog will appear asking if you’re sure you want to proceed.
Enable delete file confirmation dialog using Registry Editor
If you’d prefer to use the Registry Editor to enable the delete confirmation dialog, you can do so with the following steps:
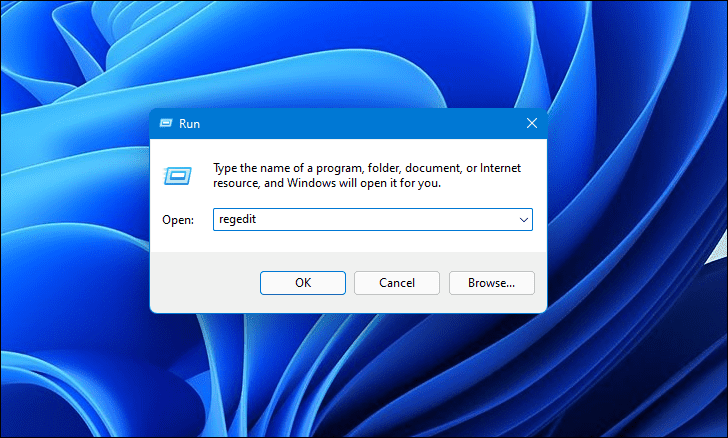
- Press
Windows+Ron your keyboard to open the Run dialog. - Type
regeditand pressEnterto launch the Registry Editor.
- In the Registry Editor, navigate to the following path by copying and pasting it into the address bar and pressing
Enter:
HKEY_CURRENT_USER\Software\Microsoft\Windows\CurrentVersion\Policies\Explorer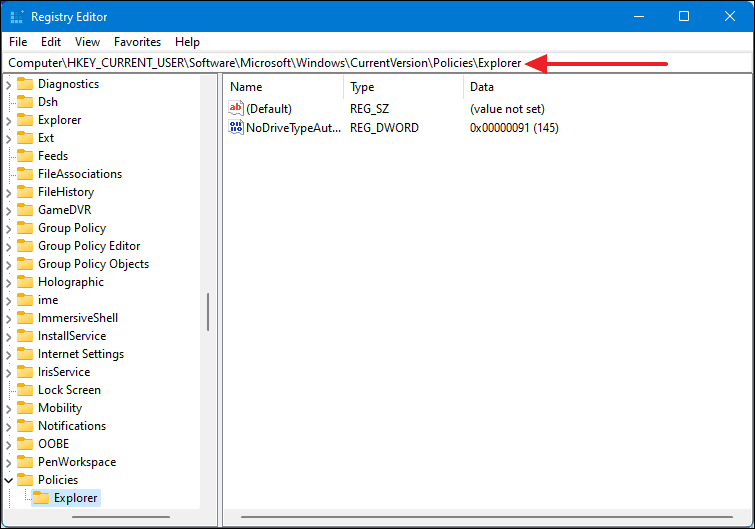
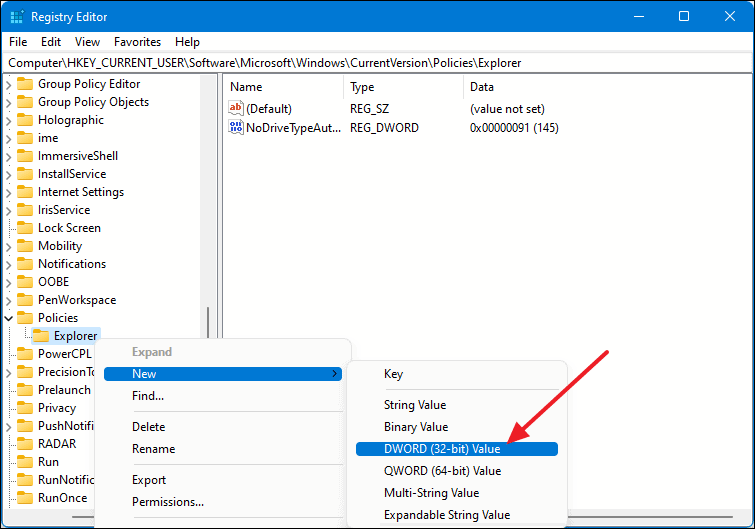
- Right-click on the Explorer folder under Policies, select New, and then choose DWORD (32-bit) Value.
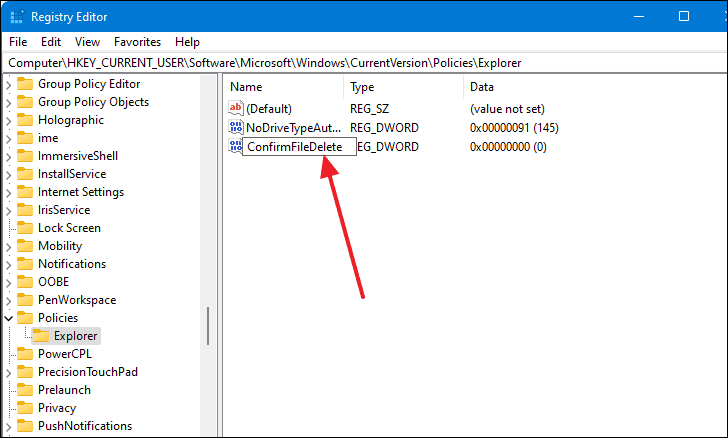
- Name the new value
ConfirmFileDelete.
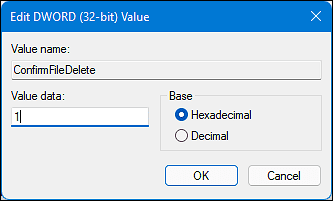
- Double-click on
ConfirmFileDelete, set the Value data to1, and click OK.
Now, the delete confirmation dialog is enabled on your Windows 11 system.
Enable delete file confirmation dialog via the Group Policy Editor
You can also enable the delete confirmation dialog using the Group Policy Editor. Here’s how:
- Press
Windows+R, typegpedit.msc, and pressEnterto open the Group Policy Editor.
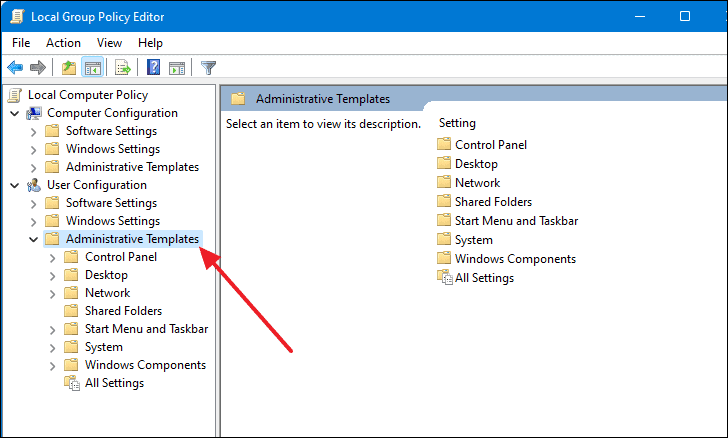
- In the Local Group Policy Editor, navigate to User Configuration > Administrative Templates > Windows Components > File Explorer.
- Scroll down and find the policy named Display confirmation dialog when deleting files.
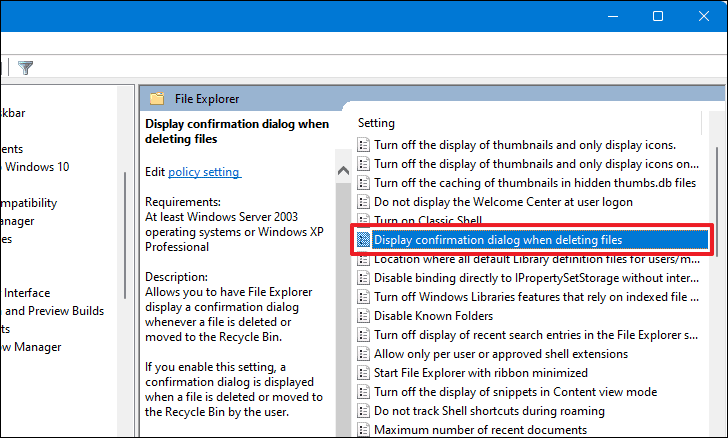
- Double-click on the Display confirmation dialog when deleting files policy.
- Select the Enabled option.
- Click OK to apply the changes.

By enabling the delete confirmation dialog using any of these methods, you can prevent accidental deletions and have an extra layer of security when managing your files in Windows 11.


