
Windows Narrator is a built-in screen-reading application that reads aloud text on your screen, assisting users with visual impairments to navigate their computers more effectively. Enabling or disabling Narrator is straightforward, and there are several methods available to suit your preference.
Toggle Narrator with a keyboard shortcut
One of the fastest ways to turn Narrator on or off is by using a simple keyboard shortcut.
Windows + Ctrl + Enter keys together from any screen. This action will activate Narrator and open the Narrator Home window on your screen. If you do not wish to see the Narrator Home each time it starts, uncheck the option ‘Show Narrator Home when Narrator starts’ located at the bottom-left corner. Alternatively, you can minimize the window by clicking the ‘Minimize’ button to keep it out of your way.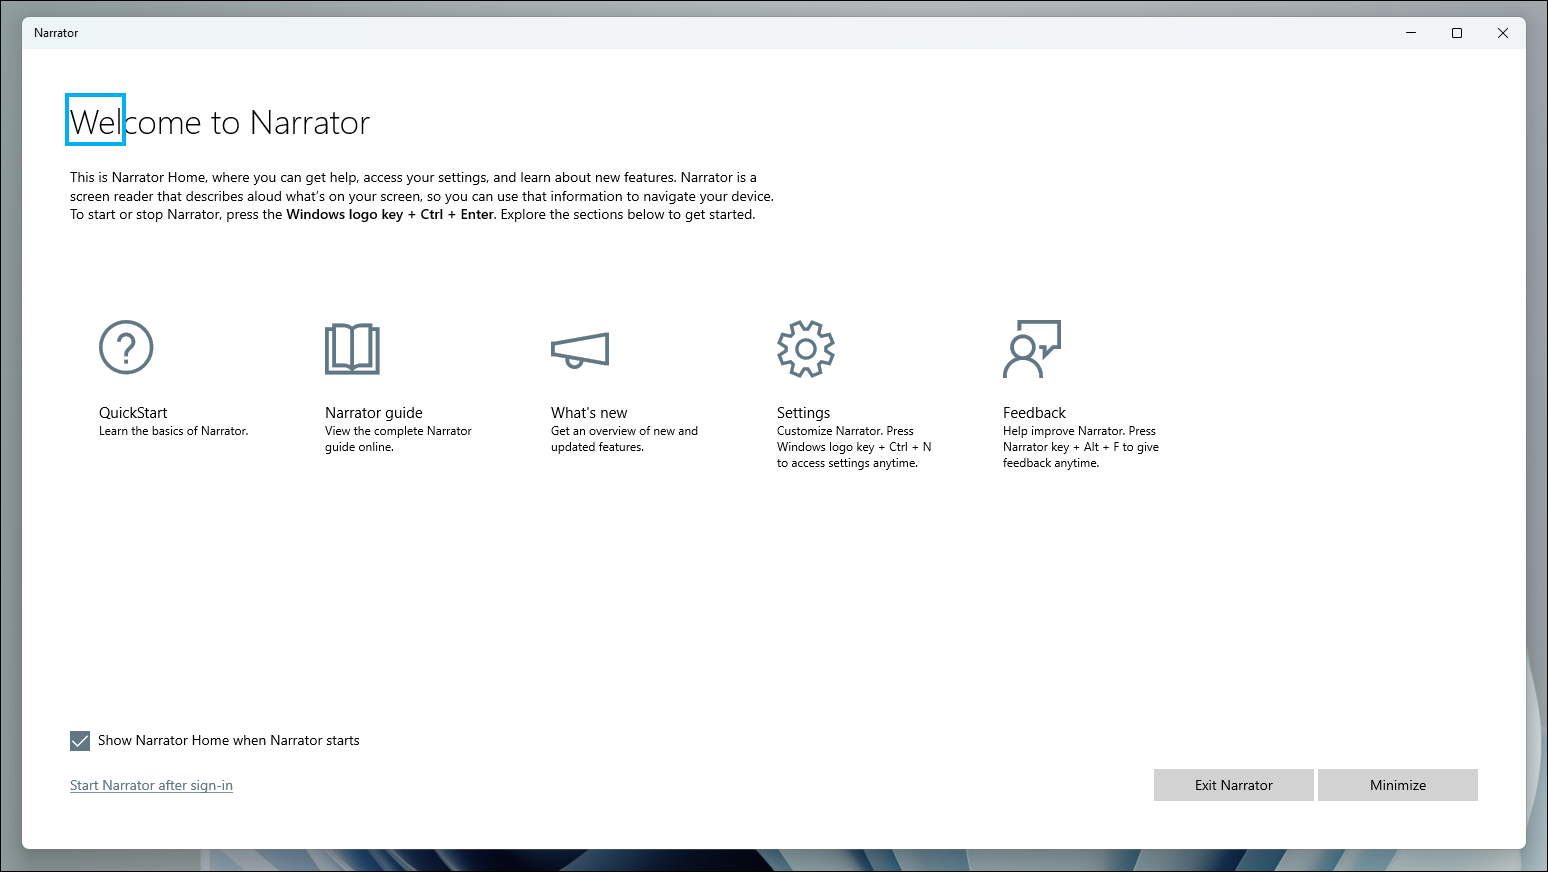
Windows + Ctrl + Enter keys again. You can also click on the ‘Exit Narrator’ button within the Narrator window to turn it off.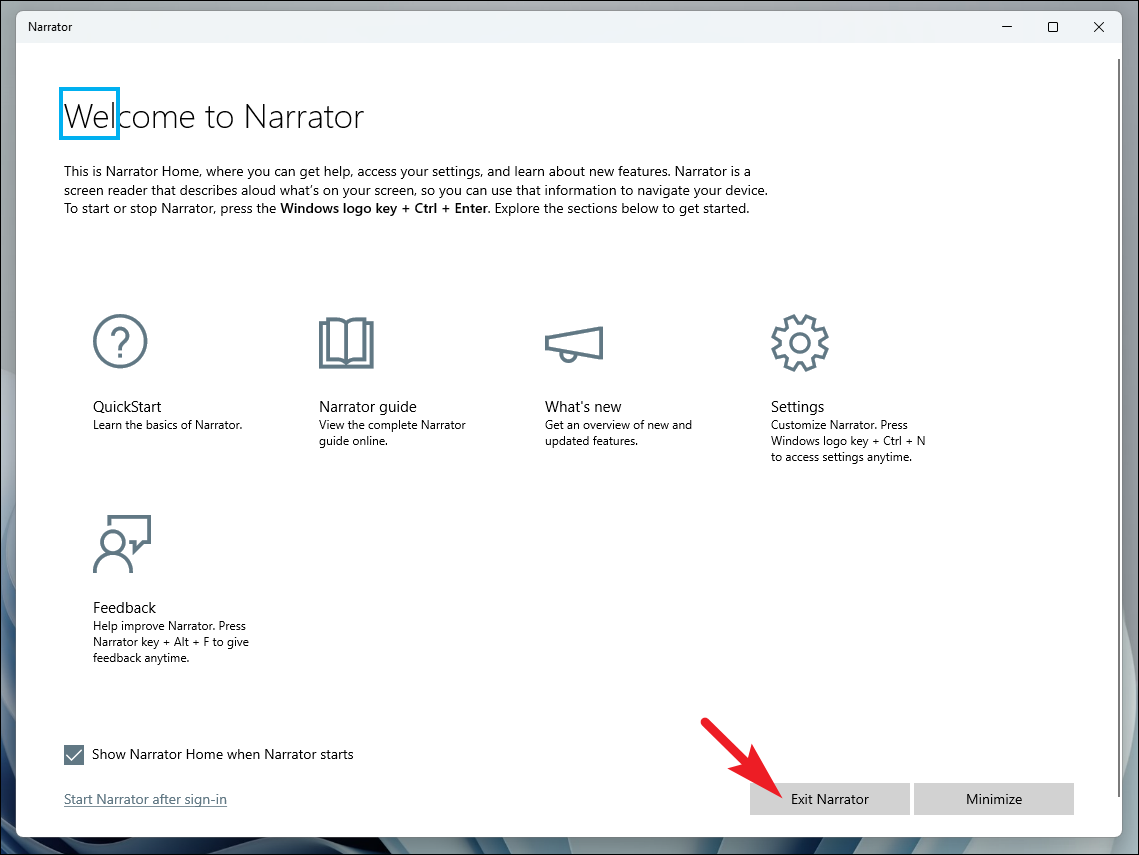
This keyboard shortcut provides a quick and convenient way to toggle Narrator as needed.
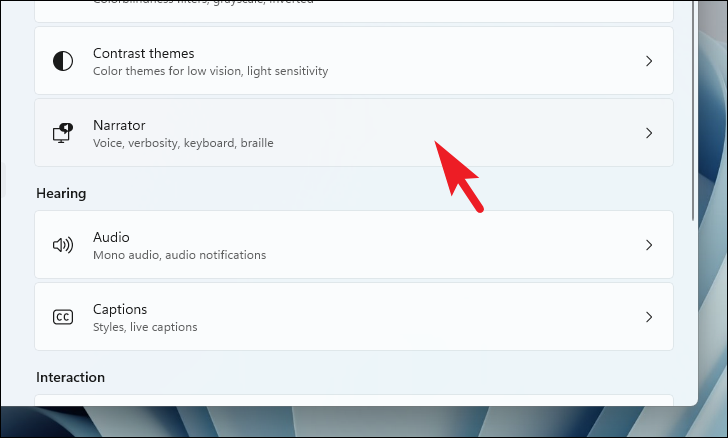
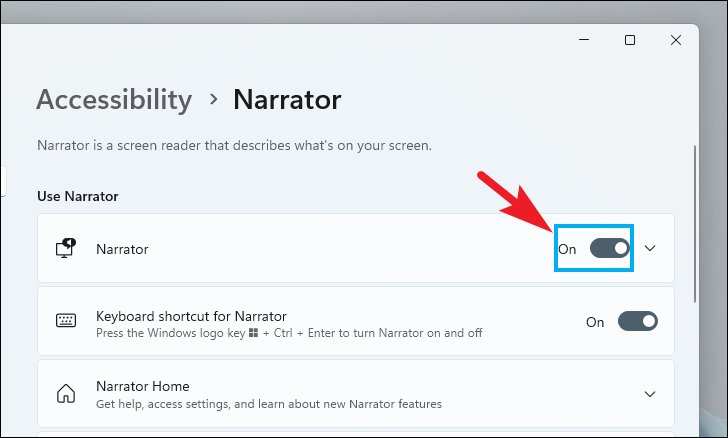
Toggle Narrator through Settings
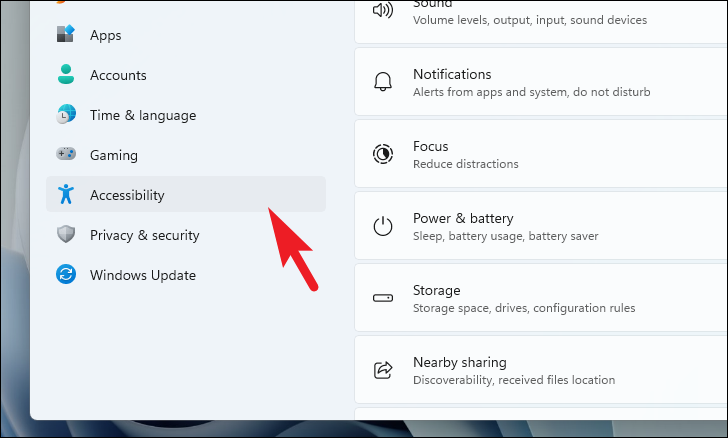
If you prefer using the graphical interface or if you’re already in the Settings app, you can enable or disable Narrator from there.
Windows + I on your keyboard to open it directly.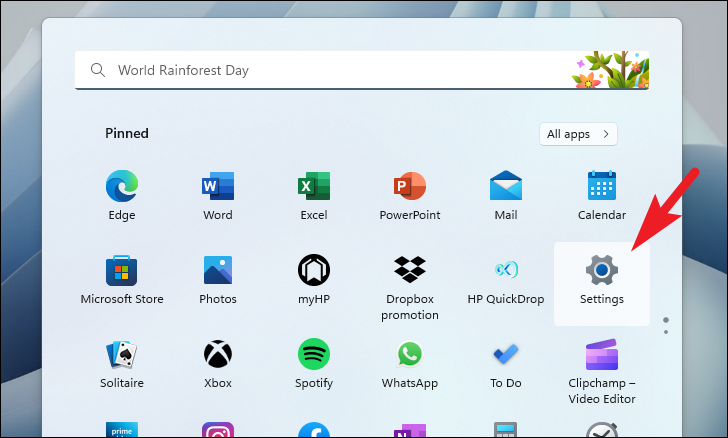
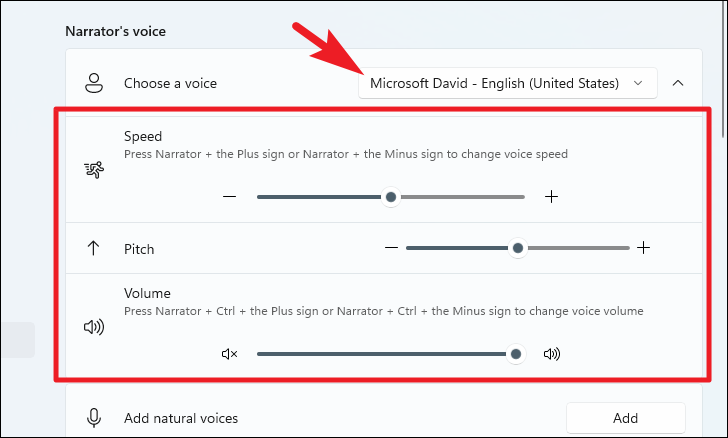
Customize Narrator voice and verbosity
The Settings app also provides options to customize Narrator’s voice, behavior, and the level of detail it provides.
To change Narrator’s voice: In the ‘Voice’ section, choose a preferred voice from the ‘Select a voice’ drop-down menu. You can adjust the ‘Speed’, ‘Pitch’, and ‘Volume’ sliders to fine-tune how the voice sounds.
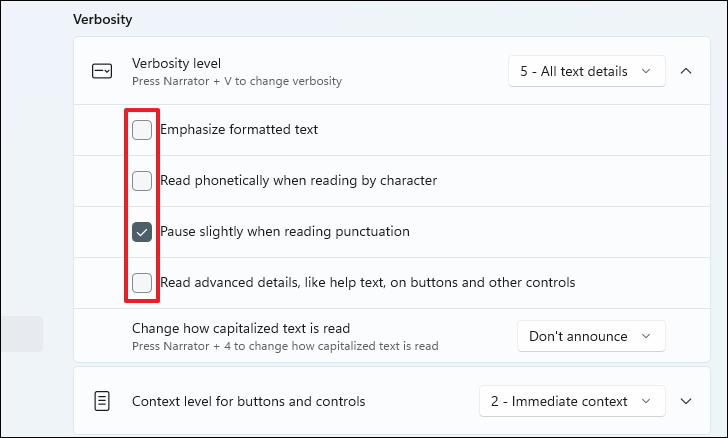
To adjust verbosity level: Under the ‘Verbosity’ section, select your desired level from the ‘Verbosity level’ drop-down menu. This setting determines how much detail Narrator provides about controls and content on the screen.
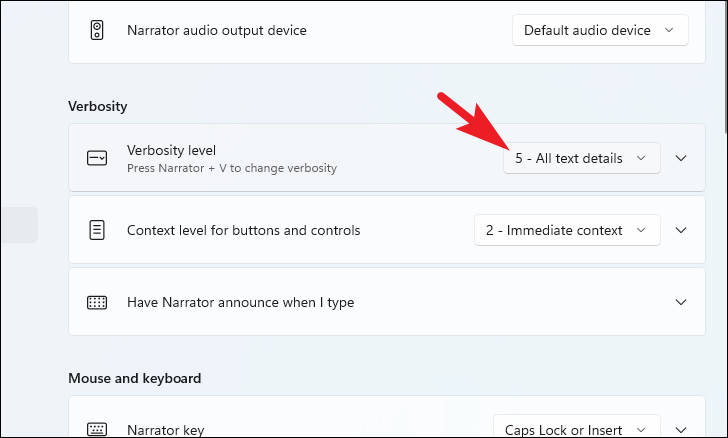
You can expand the ‘Verbosity level’ options to enable or disable specific feedback by clicking on the section and checking or unchecking the boxes as desired.
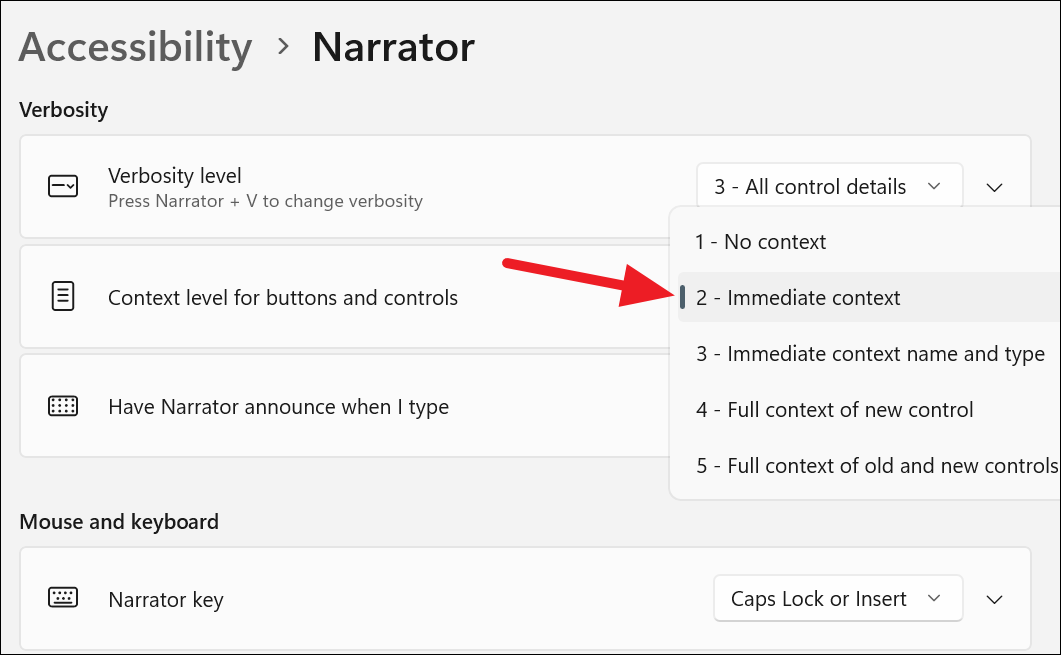
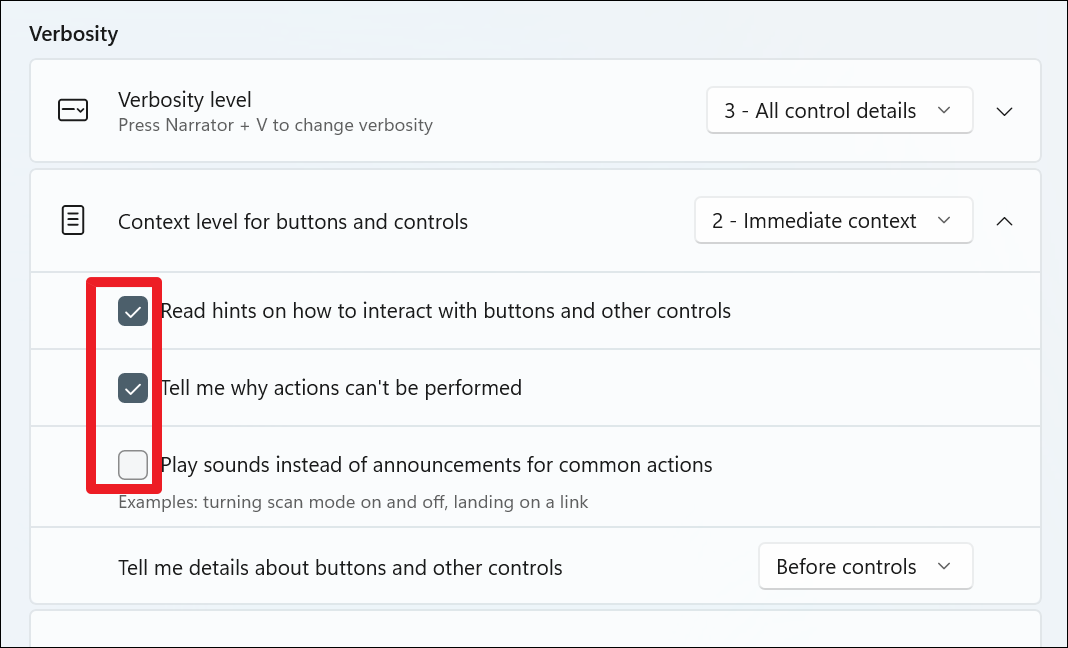
To control how much context Narrator provides for buttons and controls, adjust the settings under ‘Context level for buttons and controls’. Select your preferred context level from the drop-down menu and modify additional options by expanding this section.
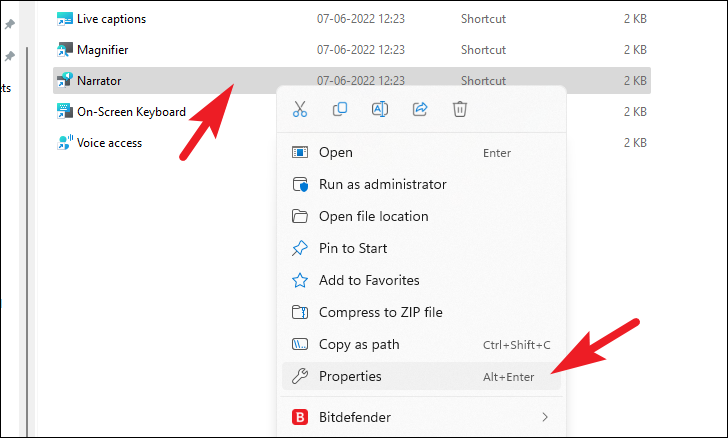
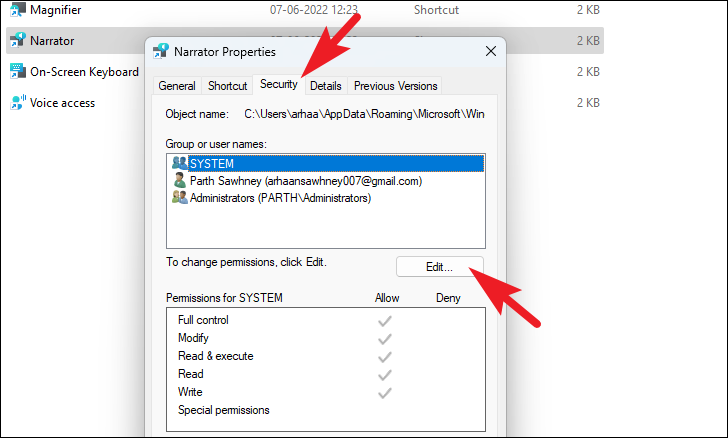
Revoke Narrator permission to access the system
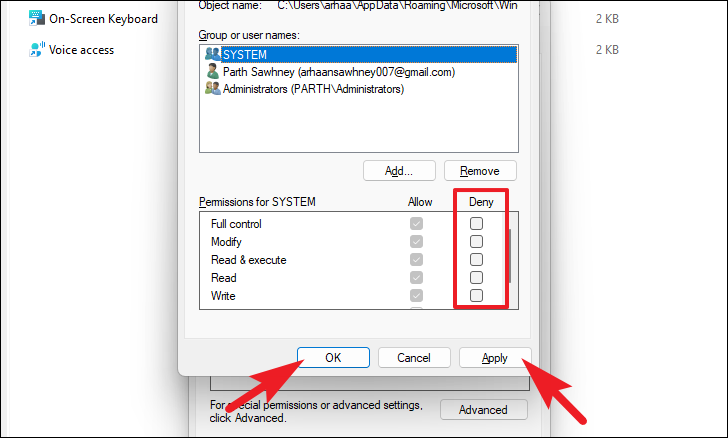
If you’re unable to disable Narrator using the above methods, you can revoke its permissions, effectively preventing it from running. Please note that this method is not recommended for general use, and you’ll need to reverse these steps to enable Narrator again.

To enable Narrator again, repeat the steps above and uncheck all the boxes under the ‘Deny’ column, then click ‘Apply’ and ‘OK’.
By following these methods, you can easily manage the Narrator feature on your Windows 11 PC according to your preferences.


