
Quick Access is a useful feature in Windows 11’s File Explorer that provides easy access to your frequently used files and folders. By default, this feature might be disabled, but enabling it can significantly enhance your productivity. This guide will walk you through the process of enabling, disabling, or completely removing Quick Access in Windows 11.
Enable Quick Access in File Explorer
To activate Quick Access in Windows 11:
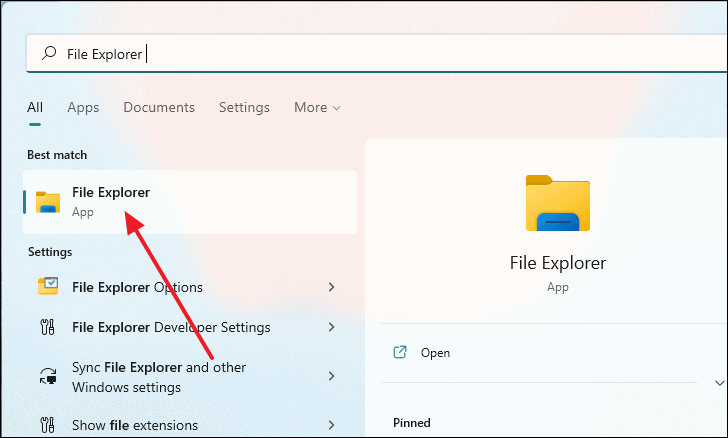
- Open File Explorer by pressing
Windows+Eor searching for it in the Start menu.
- Click on the three horizontal dots in the toolbar to open the menu.
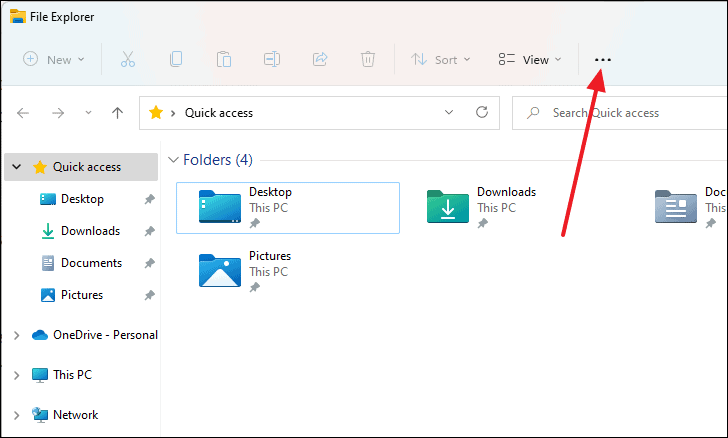
- Select ‘Options’ from the dropdown menu.

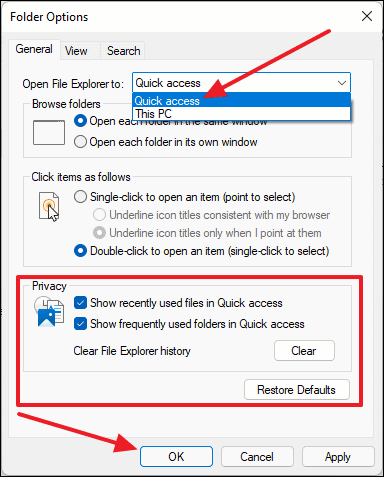
- In the ‘Folder Options’ dialog box, find the ‘Open File Explorer to:’ dropdown menu.
- Choose ‘Quick access’ from the options.
Customize Quick Access settings
You can further customize Quick Access by managing the display of recent and frequently used items:
- In the ‘Privacy’ section of the Folder Options dialog, you’ll find two checkboxes:
- ‘Show recently used files in Quick access’
- ‘Show frequently used folders in Quick access’
- Check or uncheck these boxes according to your preference.
Disable Quick Access in File Explorer
If you prefer not to use Quick Access, you can disable it using the Registry Editor:
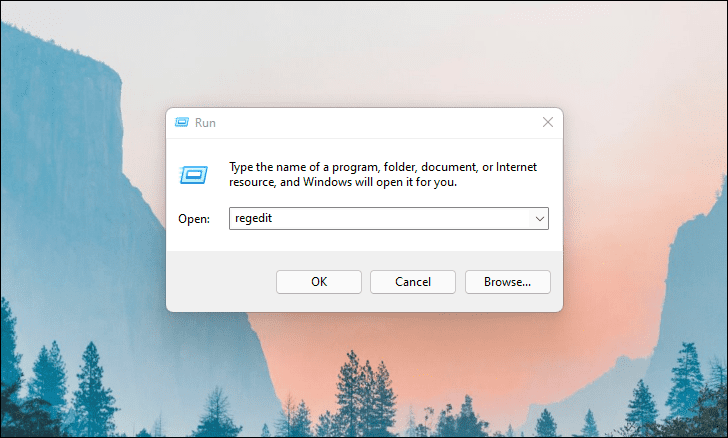
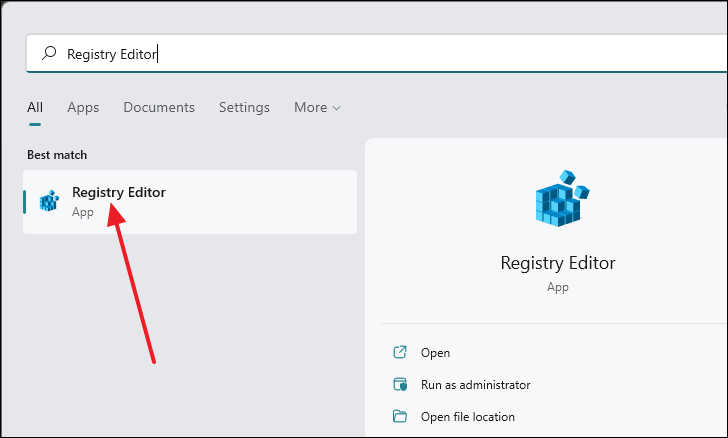
- Press
Windows+Rto open the Run dialog. - Type ‘regedit’ and press Enter to launch the Registry Editor.
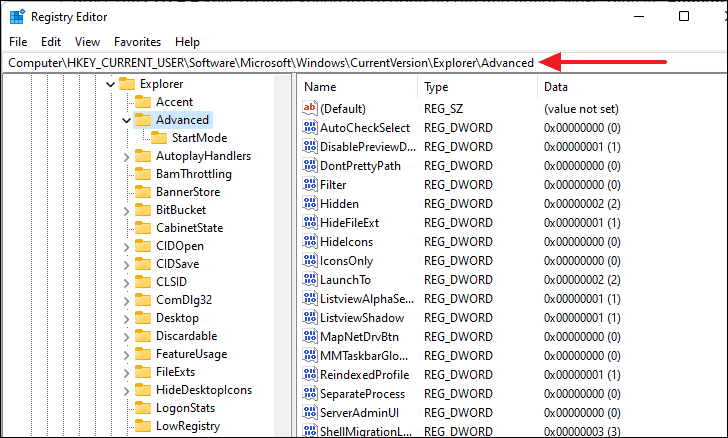
- Navigate to the following path in the Registry Editor:
HKEY_CURRENT_USER\SOFTWARE\Microsoft\Windows\CurrentVersion\Explorer\Advanced
- Locate the ‘LaunchTo’ string in the right panel.
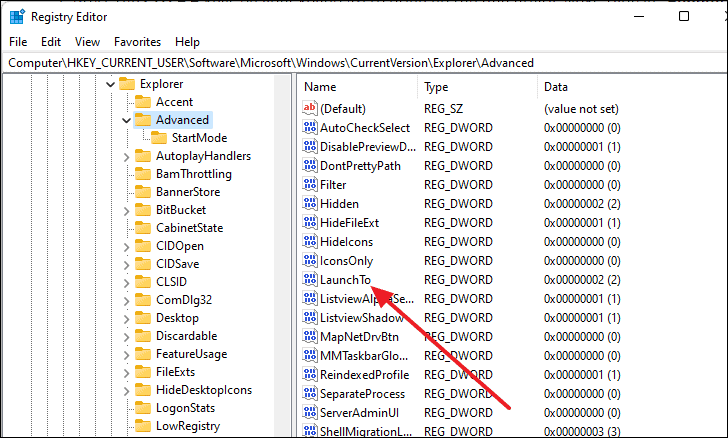
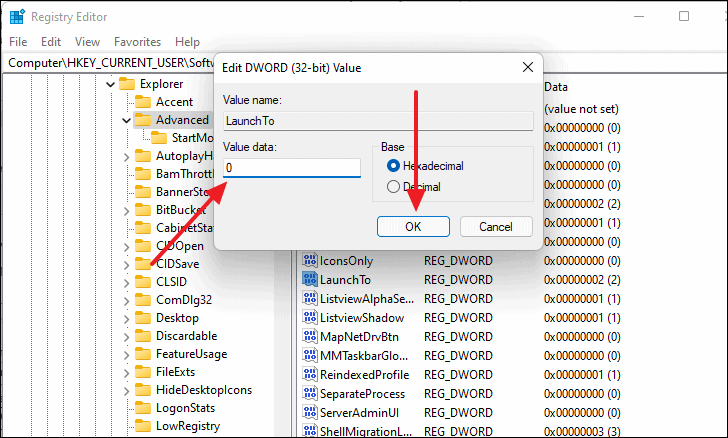
- Double-click ‘LaunchTo’ and set the ‘Value data’ to 0.
- Click ‘OK’ to save the changes.
- Restart your computer for the changes to take effect.
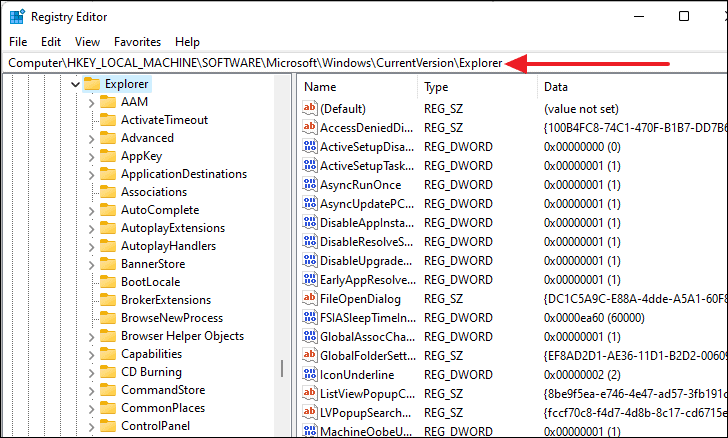
Completely remove Quick Access from File Explorer
For those who want to entirely remove Quick Access from the Navigation panel, follow these steps:
- Open the Registry Editor by searching for it in the Start Menu.
- Navigate to the following path:
HKEY_LOCAL_MACHINE\SOFTWARE\Microsoft\Windows\CurrentVersion\Explorer
- Right-click in an empty area of the right panel.
- Select ‘New’ > ‘DWORD (32-bit) Value’.
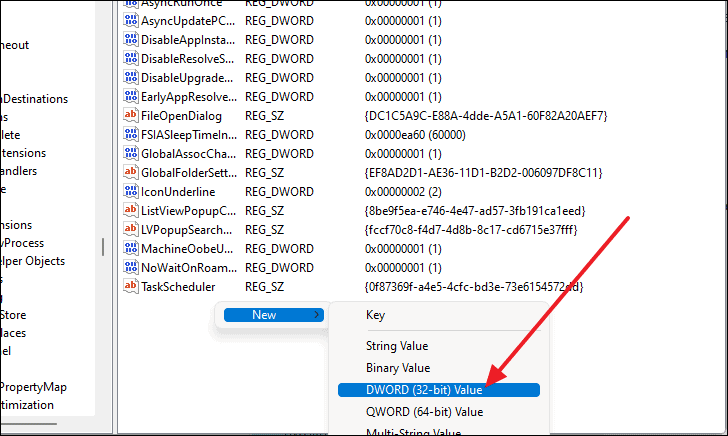
- Name the new value ‘HubMode’.
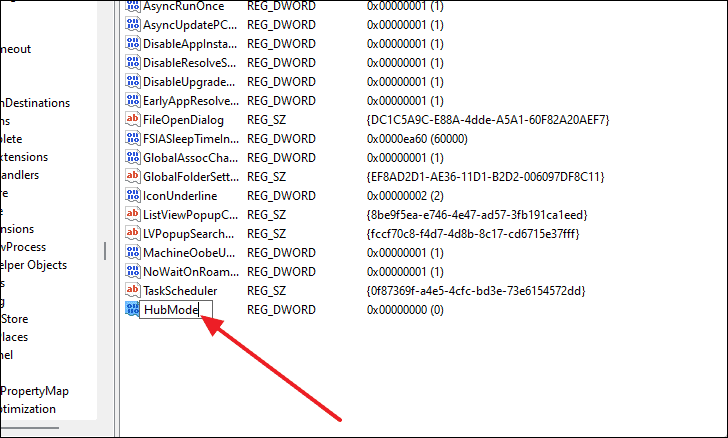
- Double-click ‘HubMode’ and set the ‘Value data’ to 1.
- Click ‘OK’ to confirm.
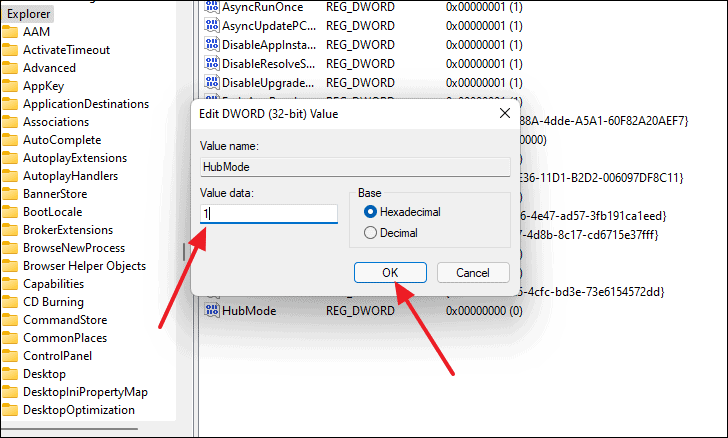
- Restart your computer to apply the changes.
Remember to exercise caution when editing the Registry, as incorrect modifications can cause system instability. It’s advisable to create a backup of your registry before making any changes.


