Windows errors occur when there is a hardware failure or any system file is corrupted. In that case, we can only see the error code but not details about it or detailed fixes to recover our PC from it. Lets us see how we can fix the error ode 0xc000000e in recovery.
What is Error code 0xc000000e?
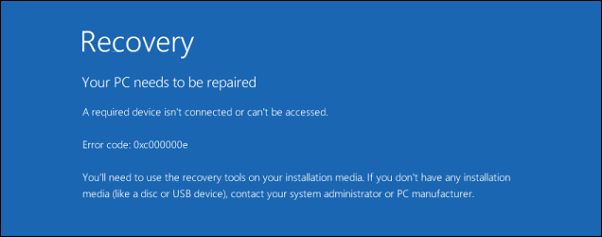
Error code 0xc000000e is generally called a Blue Screen of Death (BSOD) error. It occurs due to failure in the hardware of your PC or from the corruption of system files that impacts any hardware of your PC. This error prevents the system from starting up, showing one of the error messages as below:
- An expected error has occurred.
- Required device is inaccessible.
- The selected entry could not be loaded.
- A required device isn’t connected or cannot be accessed.
- The selected entry could not be loaded because the application is missing or corrupt.
- The boot selection failed because a required device is inaccessible.
How to Fix Error code 0xc000000e
There are many ways to fix this error. Since we cannot point out the exact reason for the error, we shall adopt a trial and error method in fixing it. Any one of the fixes mentioned below might work for you in fixing it.
Check Device Connections
We normally ignore checking physical device connections to fix this issue. Sometimes, the system may be booting with an external hard drive connected to it or a USB device but not with the disk with Operating System files. Then it may run into error 0xc000000e.
We must check those devices and disconnect them to boot with the default hard disk.
It may fix the issue. If not, there are some other fixes for the issue.
Windows 10 Automatic Repair Tool
Windows 10 comes with an automatic repair tool that finds the issues and fixes them automatically when run. To repair using this tool, you need Windows 10 CD or a bootable USB drive.
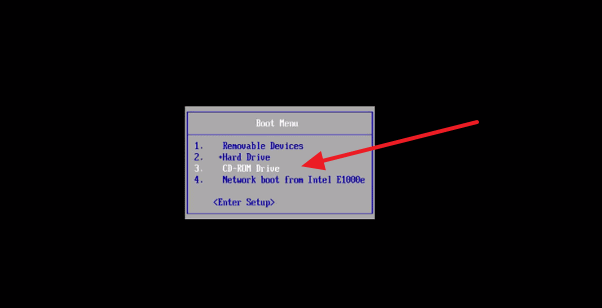
Insert the Windows 10 CD/DVD in the drive or connect the USB. Then shut down the PC and restart. As soon as the manufacturer’s logo appears on the screen, press the F2 key to enter into the boot menu.
In the boot menu, select CD/DVD or USB (whichever has Windows 10) to boot with.
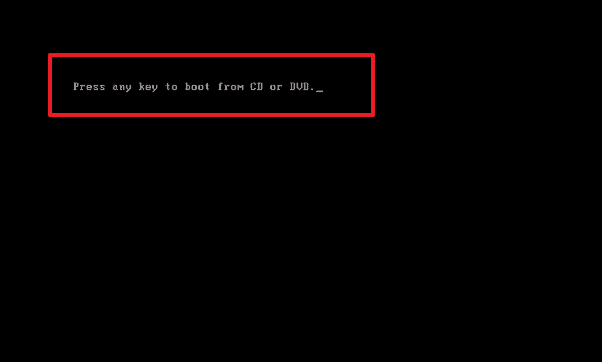
You will see a message ‘Press any key to boot from CD or DVD/USB.’ Press any key on your keyboard to go to the next step.
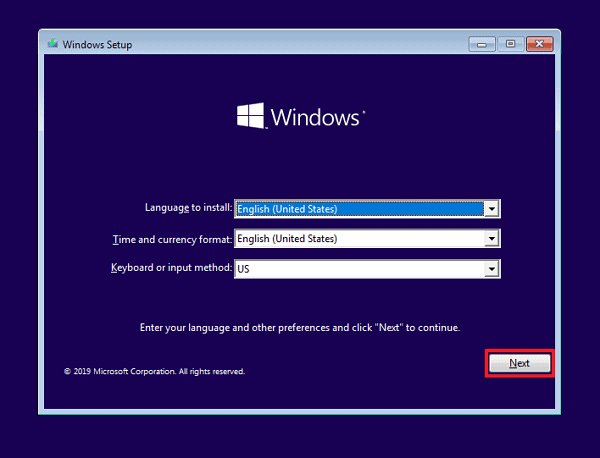
It will start the process of installing/repairing the Windows. Select your time zone, language and currency, and keyboard input method. Then click on the ‘Next’ button.
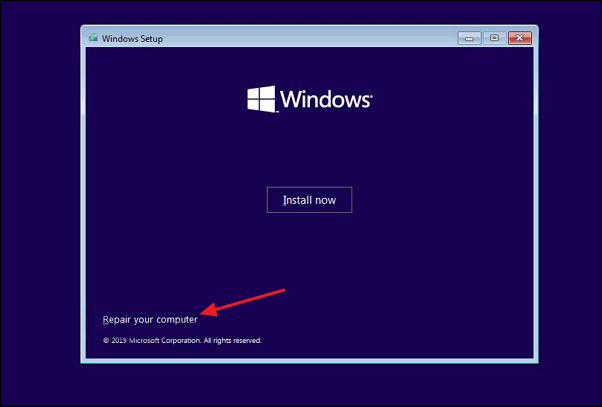
On the next screen, you see options to install or repair Windows. Click on ‘Repair Your Computer’ in the bottom-left of the screen.
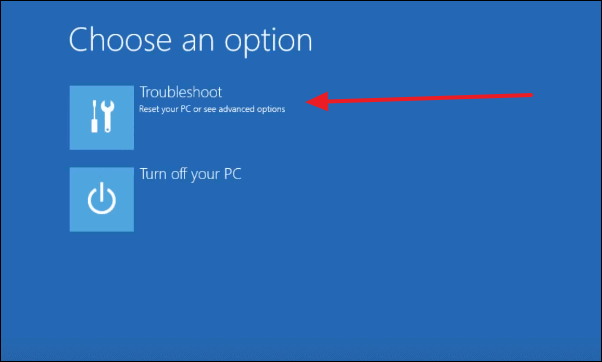
Select ‘Troubleshoot’ from the options you see after clicking on ‘Repair your computer.’
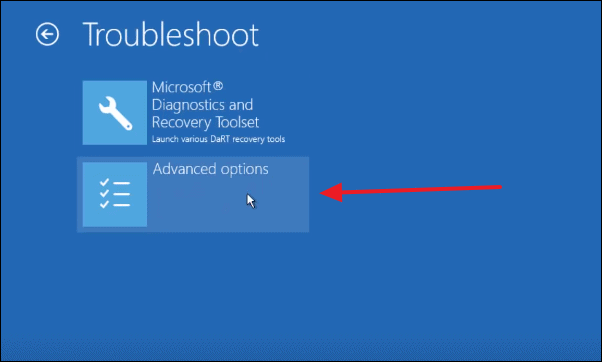
Now select ‘Advanced options’ to see the ‘Automatic Repair’ option.
In some versions of Windows 10, you will see the ‘Automatic Repair’ option. In other versions, you see ‘Startup Repair.’ Select it accordingly and enter your PC’s password, if asked. It will automatically find the cause of your problem and fix it.
If your problem is still not fixed, move on to the other methods below.
Rebuilding Boot Configuration Data File
Boot Configuration Data (BCD) file tells Windows how to boot. If the file is corrupted, you get the error 0xc000000e. You have to rebuild the file to fix the error.
To rebuild Boot Configuration File, you need Windows CD/DVD or a bootable USB. You need to shut down the PC and enter boot mode with the F2 key and select one of the devices to boot.
Like in the previous method, you need to Select language, timezone, and currency, keyboard input method, and click next.
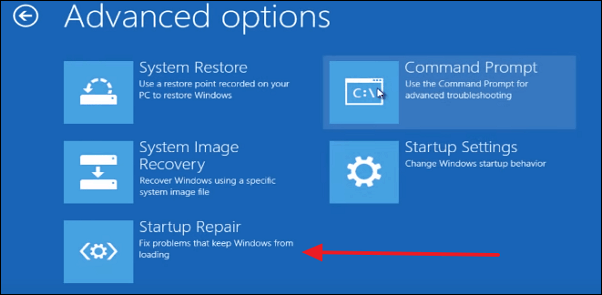
Click on ‘Repair Your Computer’ located in the bottom-left and then select troubleshoot, then Advanced Options, and finally select Command Prompt.
After you have opened Command Prompt, enter the following commands one by one and press enter.
bootrec /scanos
bootrec /fixmbr
bootrect /fixboot
bootrec /rebuildbcd
This should fix your issue. Continue reading.
Resetting BIOS/UEFI Configuration
BIOS misconfiguration can also cause the error 0xc00000e. This can be resolved by resetting the BIOS configuration.
To reset BIOS Configuration, restart your PC and access the BIOS setting by pressing F12 or F2 or Esc or Del (whichever works for you) when the manufacturer’s logo is shown.
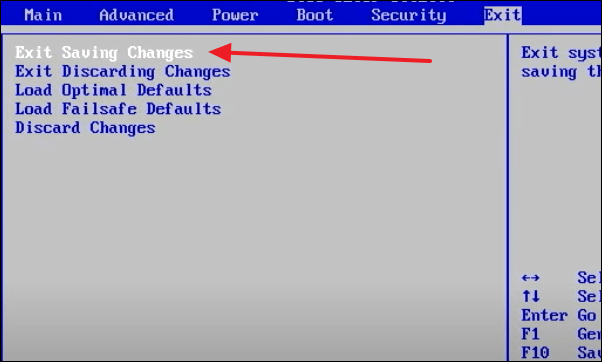
In the BIOS settings, use keyboard arrow keys to navigate between Menus. Navigate to the ‘Exit’ menu.
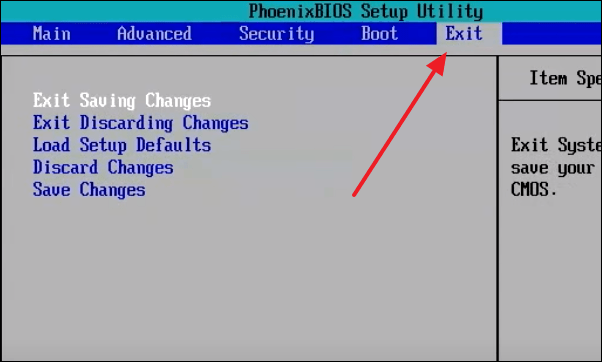
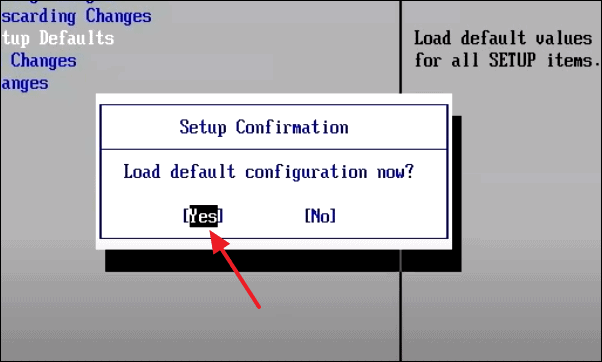
In the options you see in the Exit menu, select ‘Load Setup Defaults’ using arrow keys and press enter.
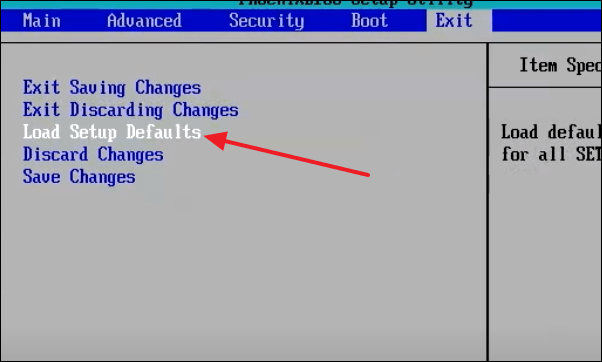
It will ask you for confirmation. Press enter selecting the ‘Yes’ button with arrow keys.
Exit the BIOS settings using the exit menu or pressing the F10 key on the keyboard. The error would be fixed if it was caused by BIOS settings.
If the error is still not fixed, try the next fixes.
Mark Boot Disk as Online
It is possible in some cases where your booting disk might have been marked offline by your PC. It is one of the potential reasons for the error. You just have to mark the disk as online to fix the problem.
You need a Windows CD/DVD or bootable USB Drive in this process of fixing the error.
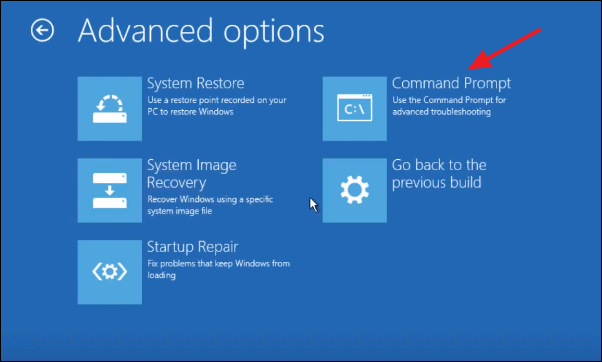
Like in the previous methods, you need to reach the ‘Advanced Options’ in ‘Repair Your System’ settings. In ‘Advanced options’ select, Command Prompt and type the following command, and press enter.
diskpart
Then type the following command to get the list of all the available disks on your PC
list disk
After getting the list of disks, to select the disk you want to make online, type the following command, replacing the x with your partition name, and press enter.
select disk X
Now, type the following command to make the disk online. Replace ‘x’ with your partition name.
online disk x
This makes the wrongly marked offline disk, which resulted in the error, online. If the error is still not fixed, let us try other fixes mentioned below.
Scan your Disk with CHKDSK Utility
CHKDSK a.k.a Check Disk utility helps in checking hard disk’s health. It scans everything on the disk and fixes the corrupt files that run against the functioning of the disk. To run the CHKDSK utility also, you need a bootable USB or CD/DVD with the Windows file.
To access the CHKDSK utility you need to open Command Prompt using, the previous steps. You need to boot with Windows CD/DVD or a bootable USB and enter the language, timezone, keyboard method and select ‘Repair Your Computer’, then troubleshoot, then Advanced Options and finally Command Prompt. It opens the command prompt.
In the command prompt, type the following and press enter. If your Windows is not installed on the C drive, replace it with the path of drive on which Windows was installed.
chkdsk C: /f
It will find any errors in the disk and troubleshoot them.
Re-install Windows 10
If none of the methods mentioned above worked in fixing the issue, reinstalling Windows is the last resort. It should fix the issue but you may lose your data. You may recover your data using recovery software.


