
An improperly configured mic can sure cause a lot of problems like background noise or a buzzing sound when using your microphone. These problems might sound trivial to many, but people who rely on good audio quality might want to optimize mic sensitivity.
Users who record audio, say for a podcast or a song, or someone having an important online meeting wants crisp and clear audio. Many a time, the fault lies with the hardware, and you have to configure the settings to fix it. In this article, we will discuss how to fix mic sensitivity on Windows 10.
Before we proceed, we must know a few things about a good mic and tips for clear audio. If your work relies on good audio quality, always purchase high-quality mics with a noise-canceling feature. You could also opt for an air filter to minimize noise. Always use mics with a 3.5 mm jack instead of one with a USB connection as it considerably affects the audio quality. When recording, stand at an optimum distance from the mic. The optimum distance varies from person to person and mic to mic, so it’s recommended to check it before proceeding with something important.
Adjusting Sound Output and Reducing Background Noise
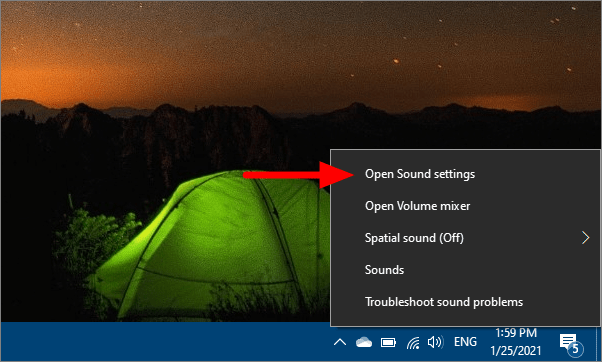
To adjust sound output, right-click on the speaker sign on the Taskbar and select ‘Open Sound settings’.
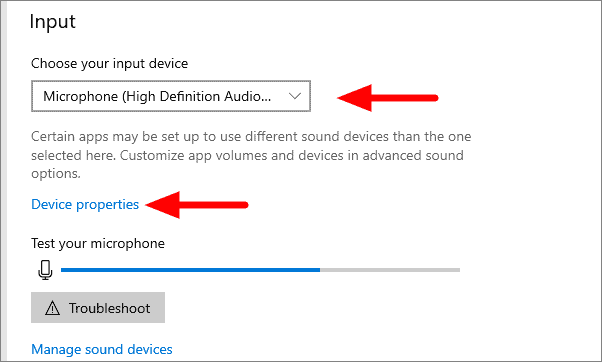
In the Sound settings, select the input device you are facing noise issues with and click on ‘Device properties’.
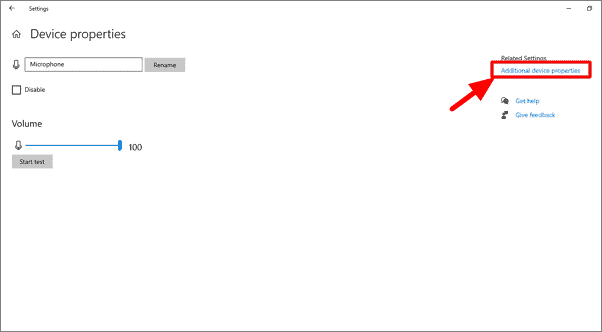
On the next window, you have the option to rename your mic. Now, click on ‘Additional device properties’ at the top right corner under Related Settings section.
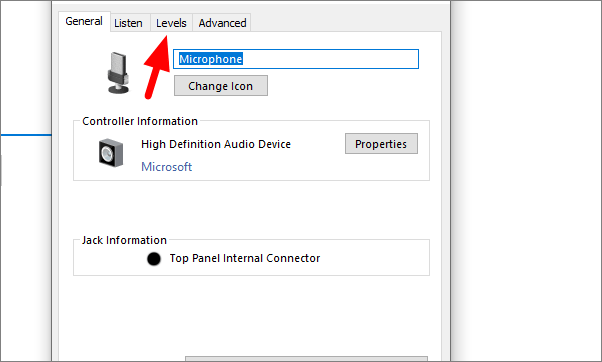
A dialog box will open, go to the ‘Levels’ tab.
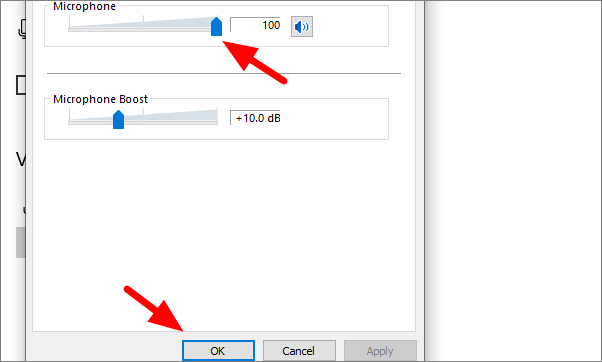
Set your microphone to 100 by sliding the shape to the right. Also, check that your microphone is not mute. This is the maximum audio your mic can deliver. If you consider it a bit too loud, you can reduce it and set it to an optimal level at which you feel comfortable, and then click on ‘OK’ at the bottom. Also, make sure the ‘Microphone Boost’ is at +10.0 dB or higher.
In some microphones with background noise cancellation, you will see an ‘Enhancement’ tab. In the Enhancement tab, tick the checkbox for ‘Immediate mode’ and select ‘Noise Suppression’ and ‘Acoustic Echo Cancellation’.
This shall resolve the mic issue. In case the problem persists, check for driver updates.
Checking Microphone Driver Updates
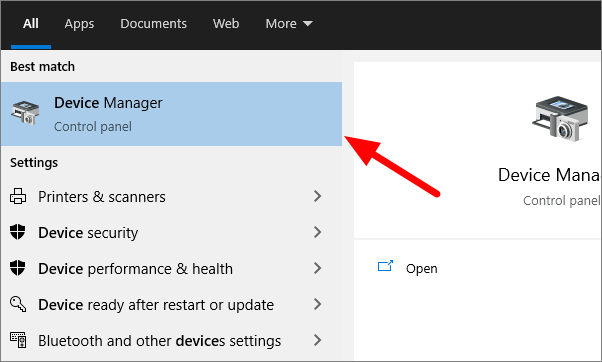
Search for ‘Device Manager’ in the search menu and then open it.
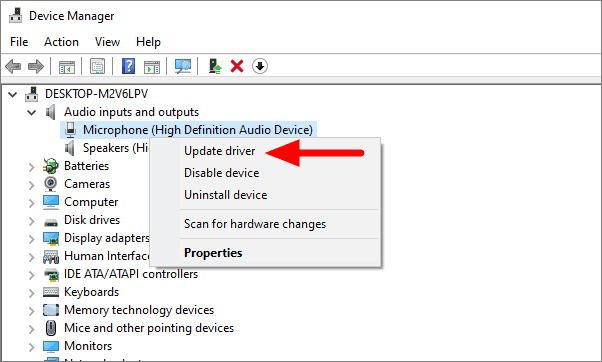
Double-click on ‘Audio inputs and outputs’ to access the drop-down menu. In the drop-down menu, right-click on the mic you face issues with, and click on ‘Update driver’.
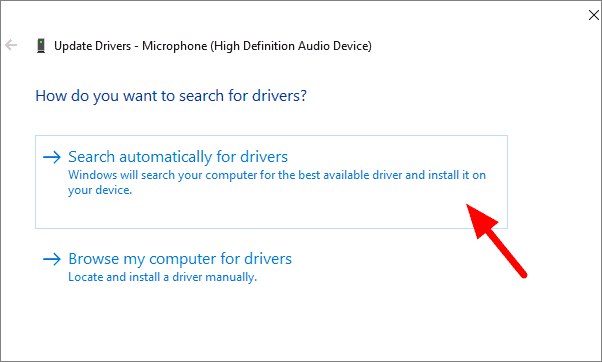
It is recommended that you allow Windows to search for drivers. Therefore, select the first option.
Windows will now search for driver updates, and if available, update the driver.
Troubleshooting Audio Issues
Windows 10 troubleshooter can also help fix mic sensitivity issues. To run the troubleshooter, right-click on the Windows icon at the left corner of the Taskbar and then select ‘Settings’.

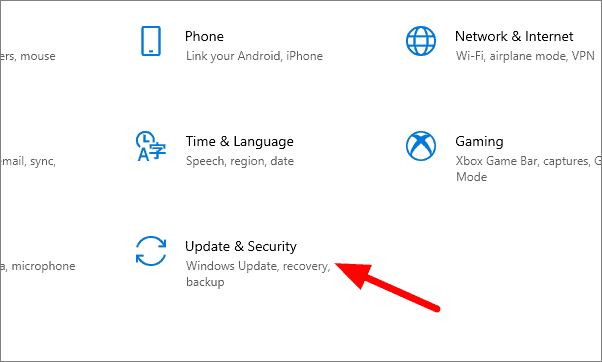
In Settings, click on the last option, i.e., ‘Update & Security’.
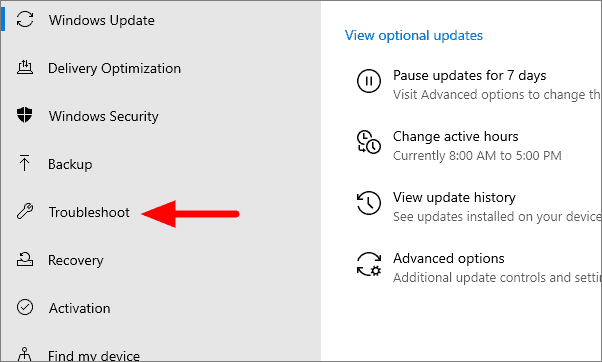
In the ‘Update & security’ window, click on ‘Troubleshoot’ option on the left-side panel.
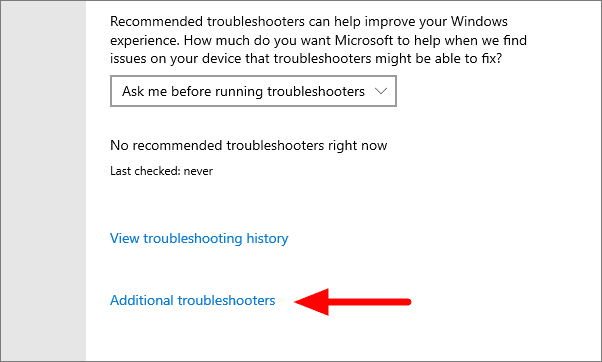
If the various troubleshooting options are not displayed here on your system, click on ‘Additional troubleshooter’.
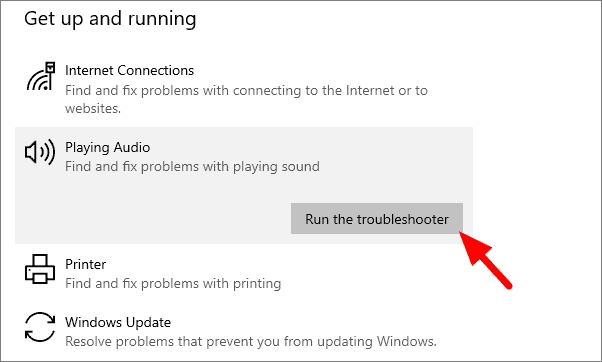
Click on ‘Playing Audio’ under Get up and running and then select ‘Run the troubleshooter’. If troubleshooting options are displayed on the last window in your system, you can similarly run the troubleshooter from there.
The troubleshooter will run and check for any issues with the audio and fix them.
Now, we have understood how to fix mic sensitivity as well as other audio issues. If you are facing audio issues with your microphone, you can now easily fix it.


