How to Fix ‘Please wait for the gpsvc’ Screen in Windows 11
Discover simple and effective solutions to resolve the GPSVC service issue in Windows 11 and get your system back on track.
Discover simple and effective solutions to resolve the GPSVC service issue in Windows 11 and get your system back on track.
by Parth Sawhney
The ‘Please wait for the GPSVC’ screen error in Windows 11 can be quite disruptive, especially since it may occur during startup, shutdown, or when switching user profiles. This issue is tied to the Group Policy Client Service (GPSVC), which is responsible for applying administrative policies to all users on a computer. If this service malfunctions or if the associated system files become corrupted, you might find yourself unable to access your PC. Thankfully, there are several methods you can use to resolve this problem and get your system back to normal.
Since this error often prevents you from accessing your system through the usual means, you’ll need to boot your PC in Safe Mode first. Safe Mode loads only essential drivers and services, allowing you to troubleshoot without interference from third-party applications.
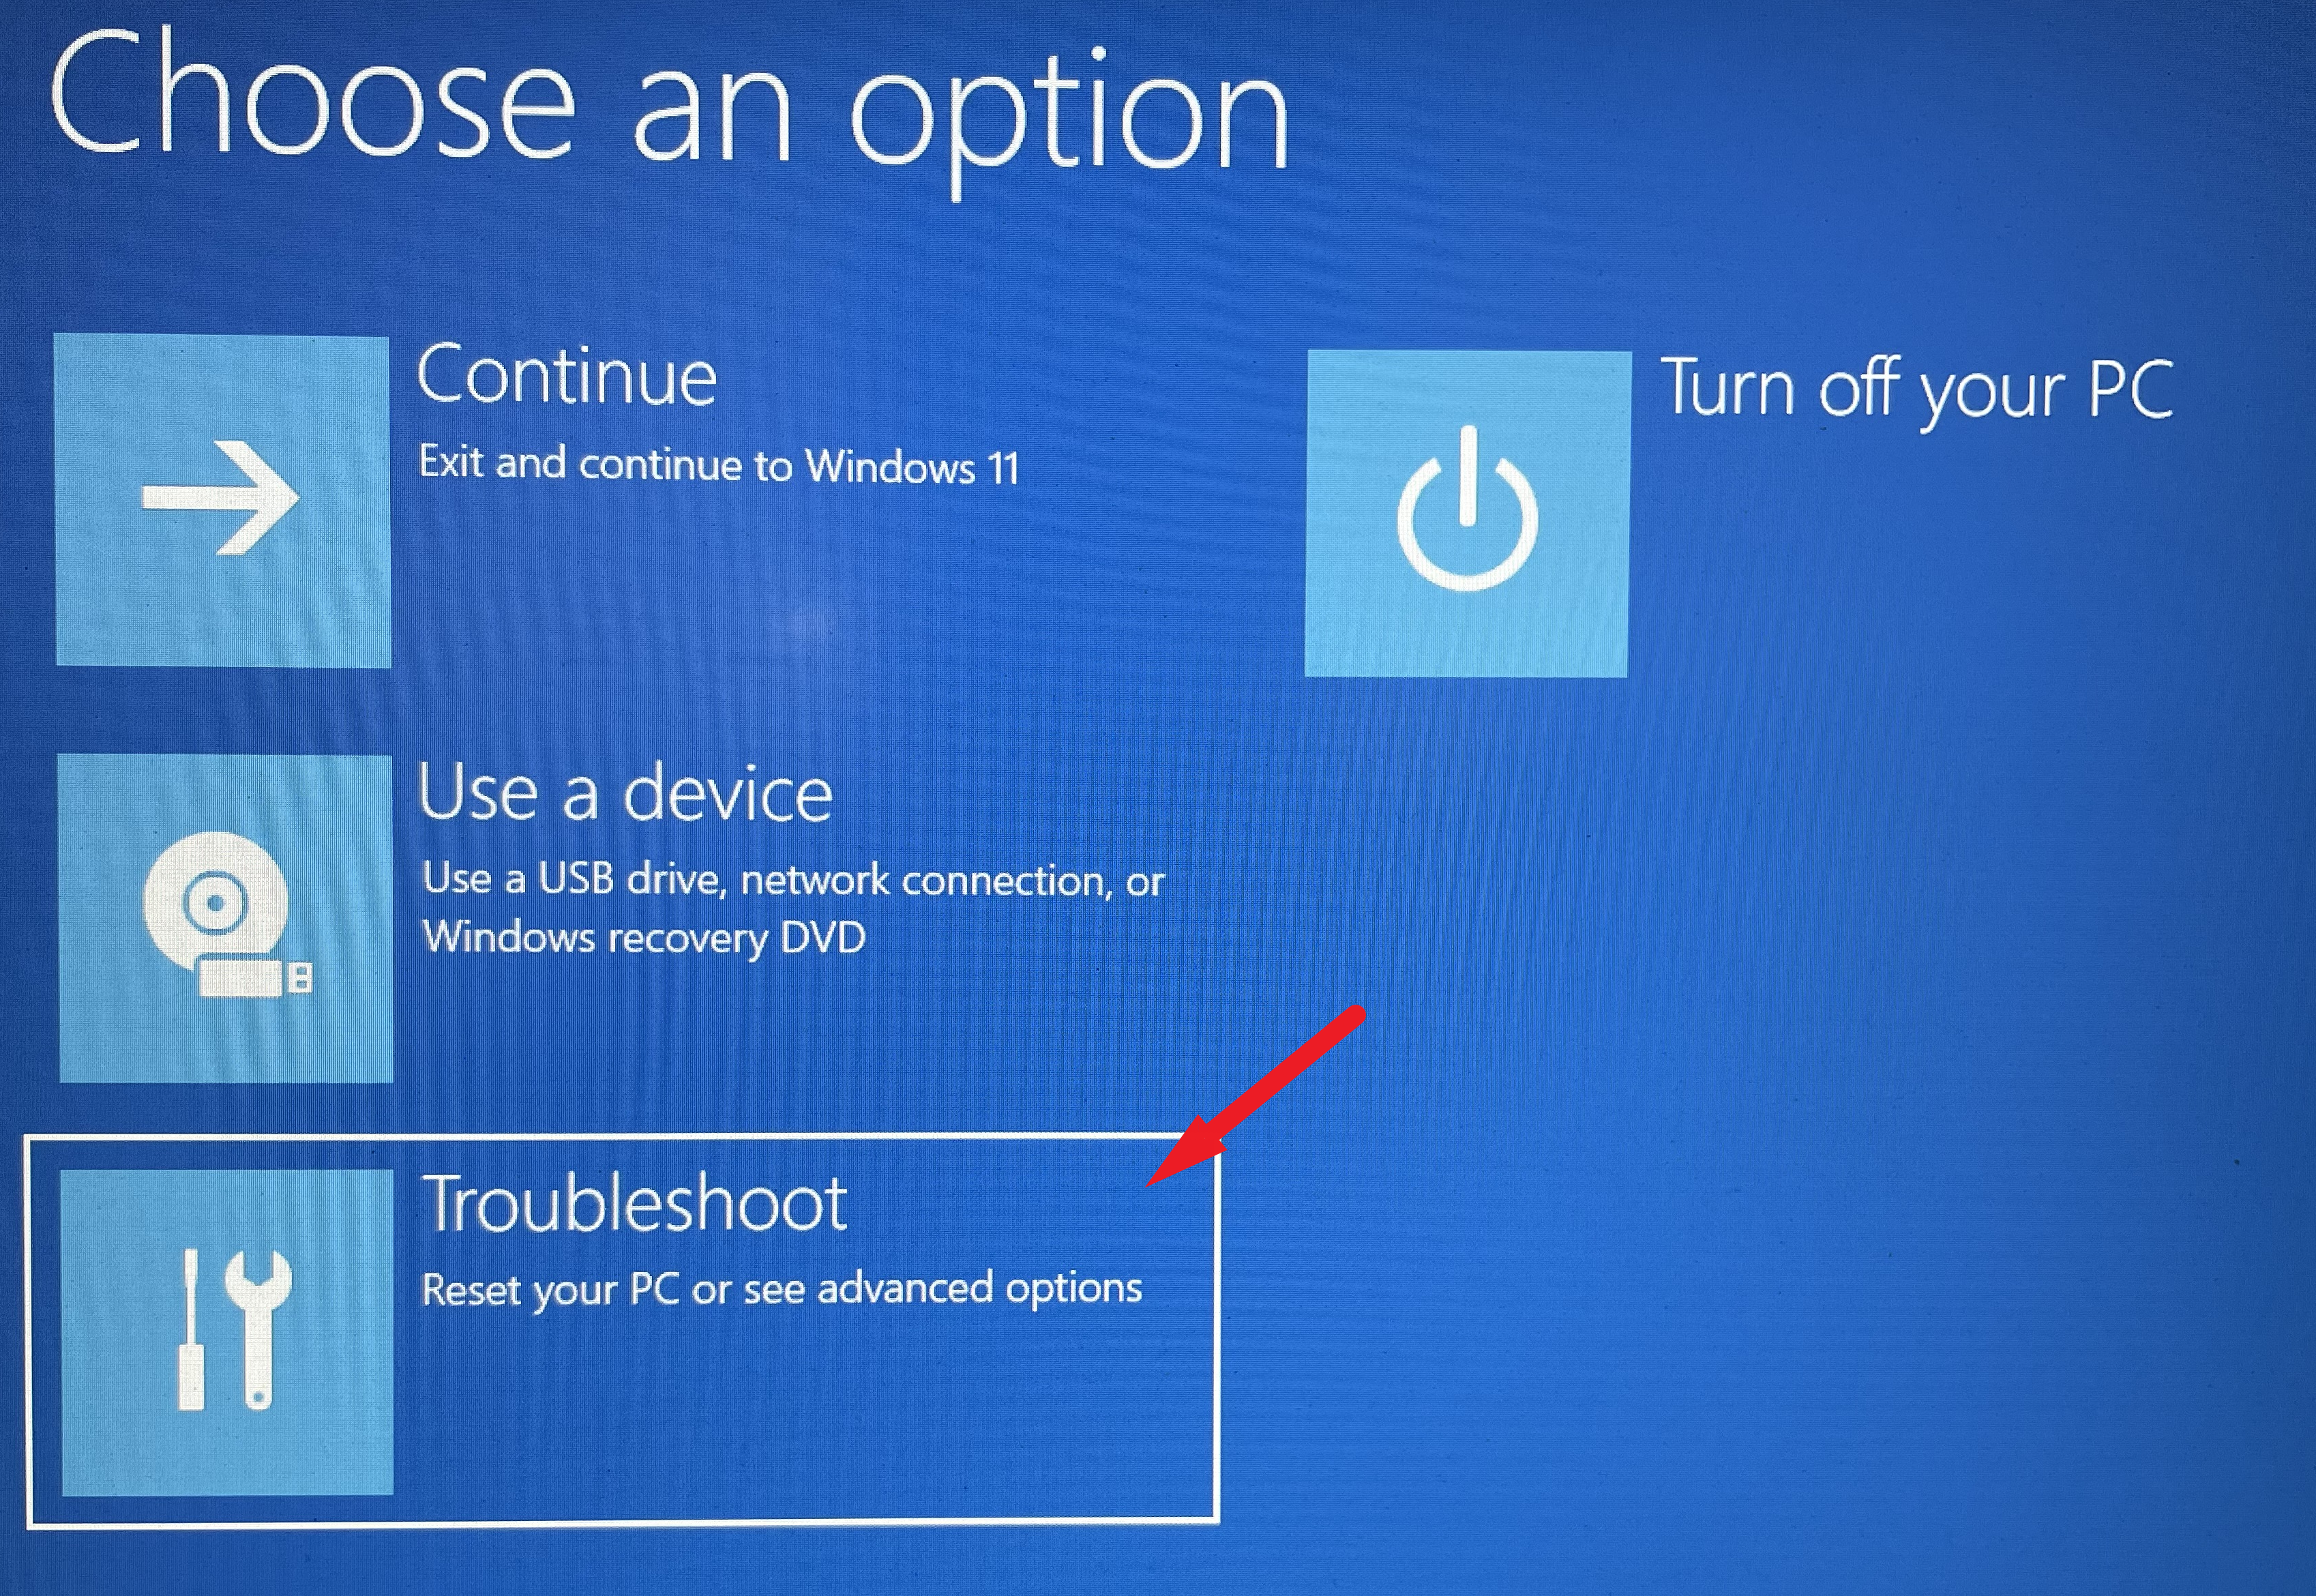
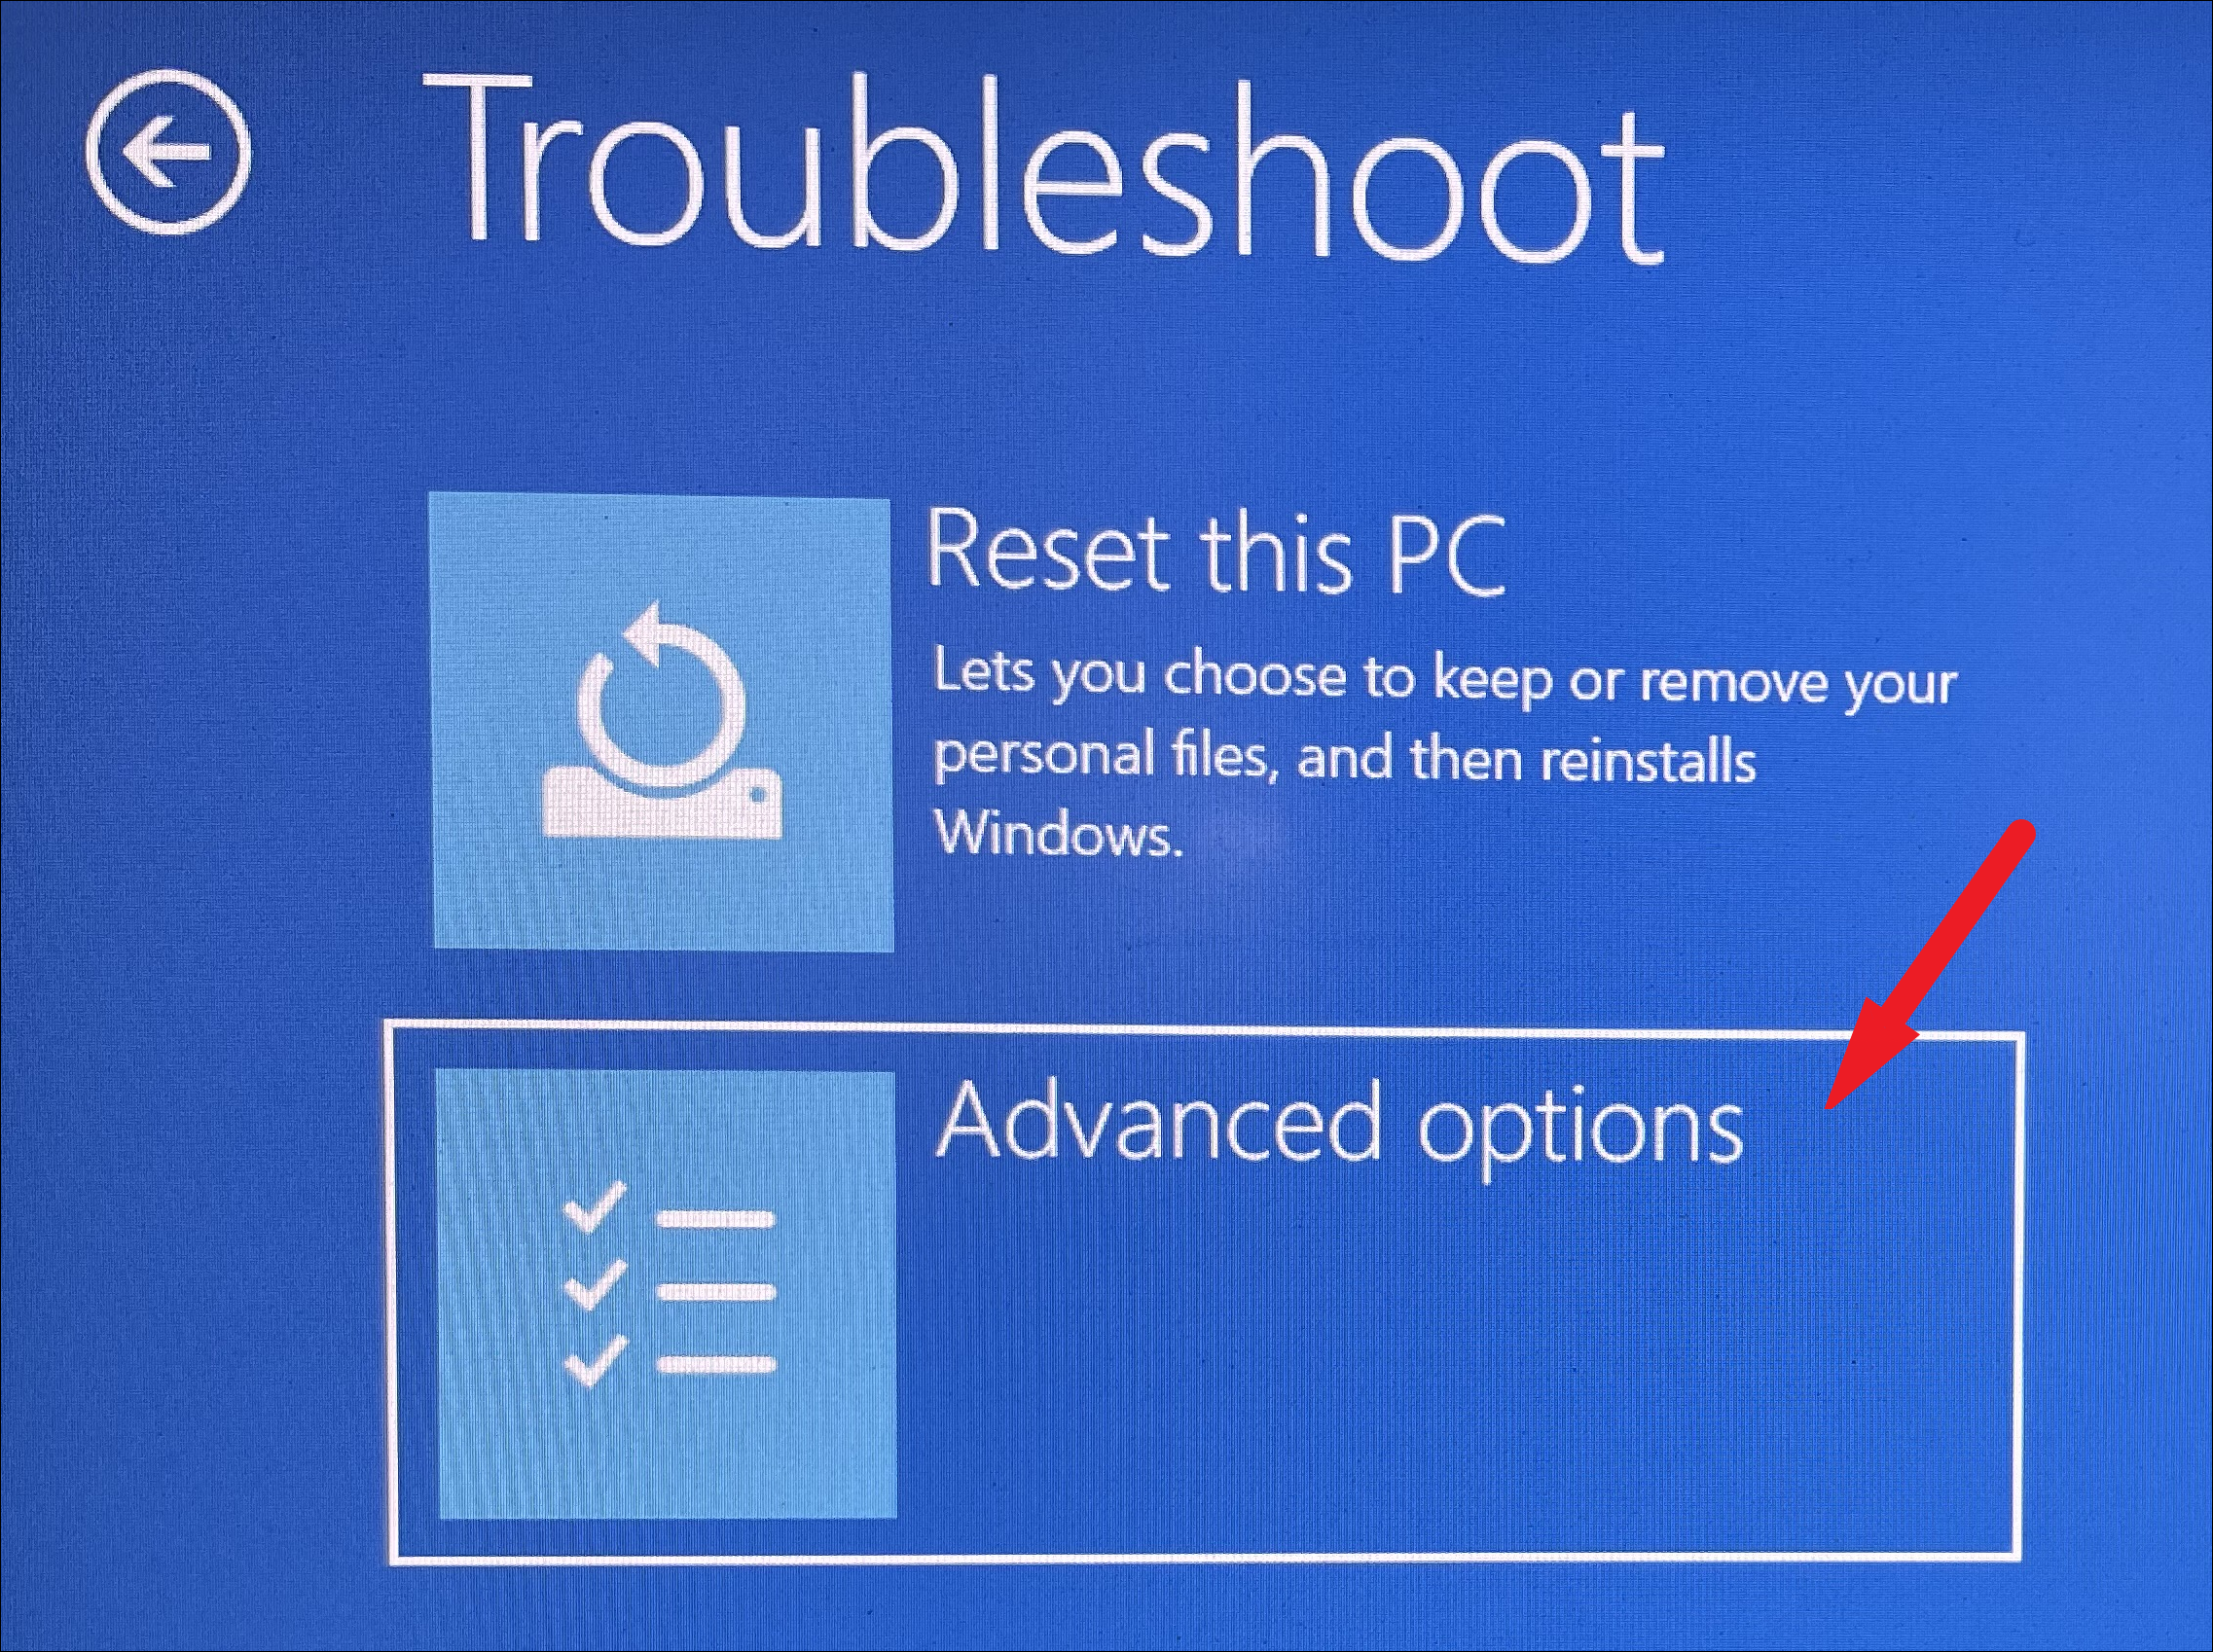
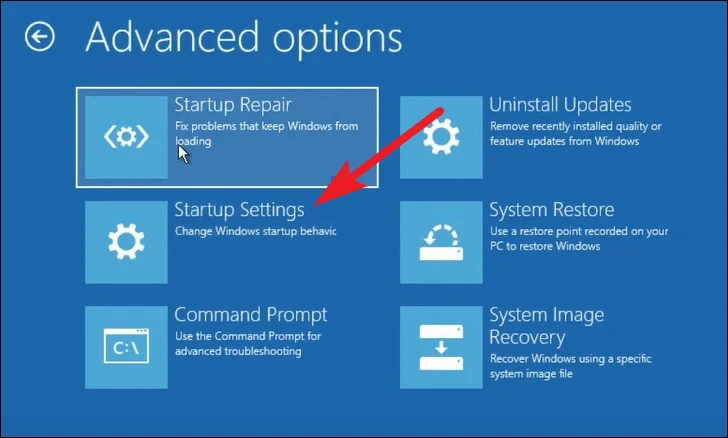
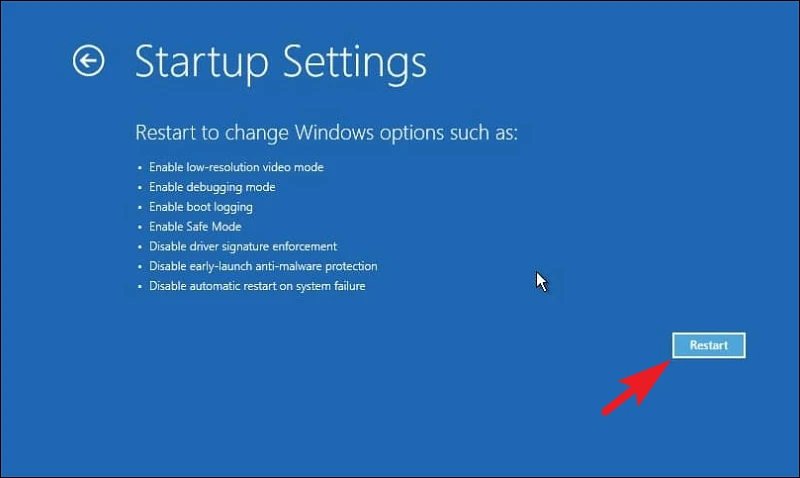
Boot Your PC into Safe Mode
To begin troubleshooting, you’ll need to start your PC in Safe Mode. Here’s how you can do it:
Turn on your computer, and as soon as it begins to boot, press and hold the power button for about 10 seconds to force a shutdown. If you’re using a desktop computer, you can also disconnect the power supply. Repeat this process three times.
On the Startup Settings screen, press the number corresponding to ‘Enable Safe Mode with Networking’ (usually number 5). This option allows you to access the internet while in Safe Mode.
Note: To connect to the internet in ‘Safe Mode with Networking’, you might need to use a LAN cable, as Wi-Fi drivers may not be loaded.
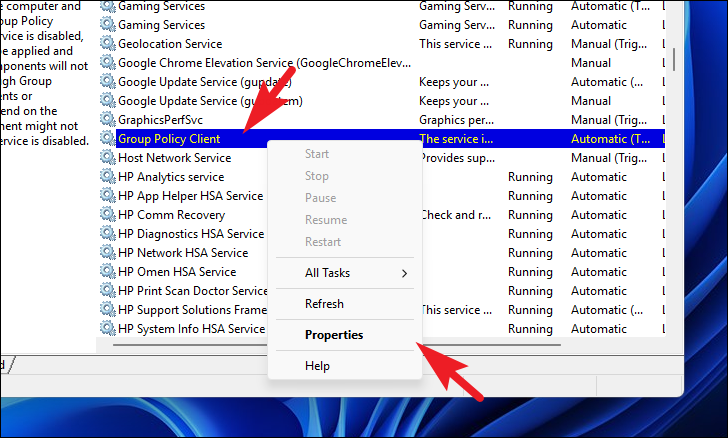
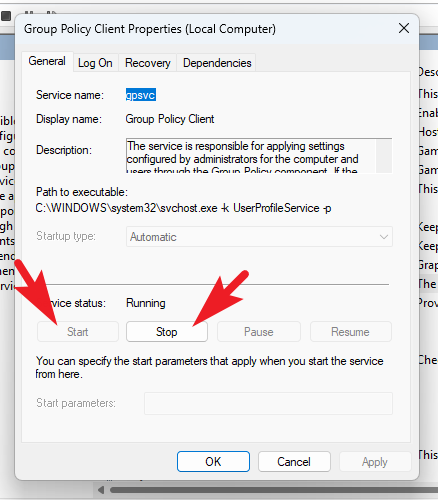
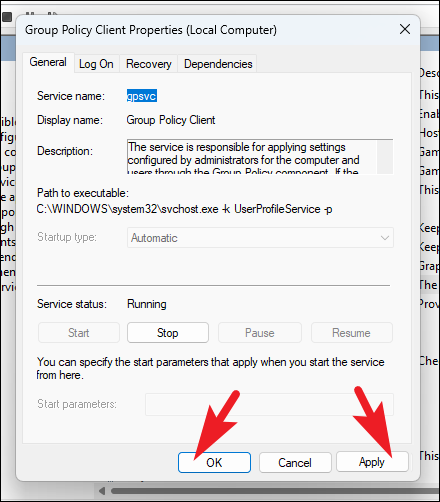
1. Restart Group Policy Service
Often, the GPSVC error can be resolved by simply restarting the Group Policy Client Service, especially if a deadlock or interference caused it to malfunction. Restarting this service can quickly restore its functionality.
Restart your computer normally to see if the issue has been resolved.
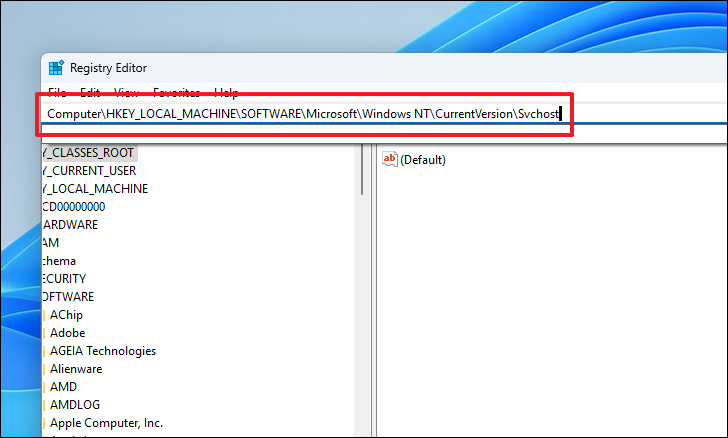
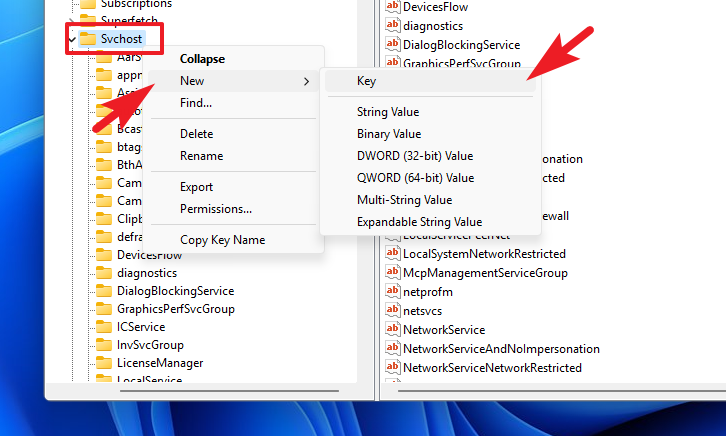
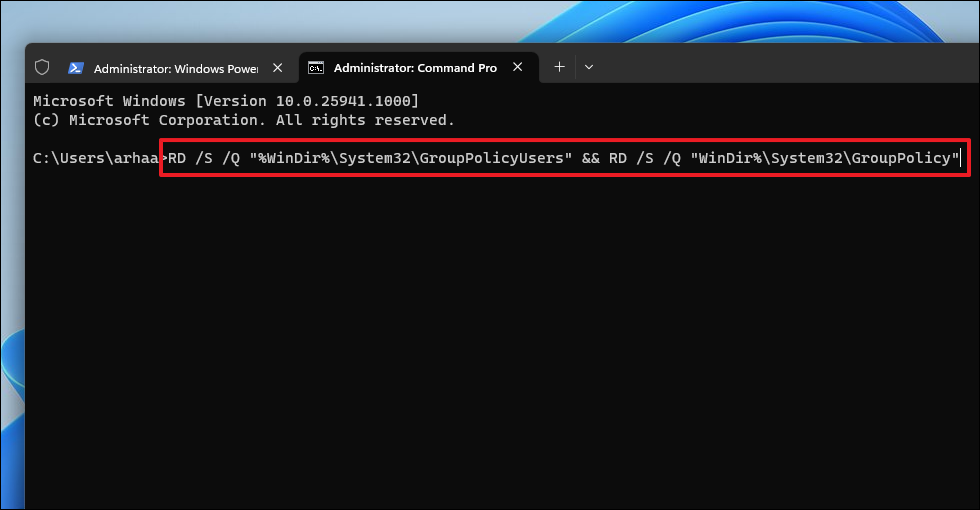
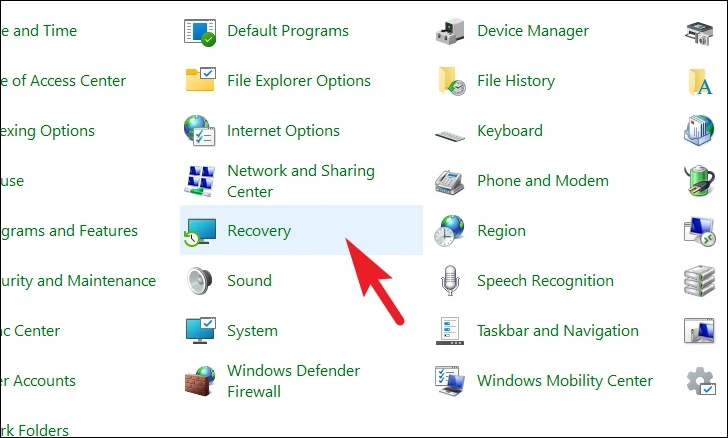
2. Modify the GPSVC Registry File
Corruption or misconfiguration in the registry settings related to GPSVC can cause this error. Modifying the registry entries for GPSVC might help fix the problem.
Caution: Editing the registry can be risky. It’s recommended to back up your registry before making changes.
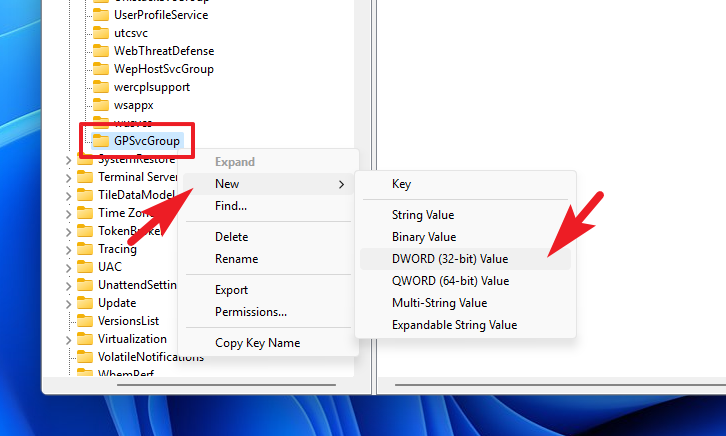
With ‘GPSvcGroup’ selected, right-click in the right pane, hover over ‘New’, and select ‘DWORD (32-bit) Value’. Name this value AuthenticationCapabilities.
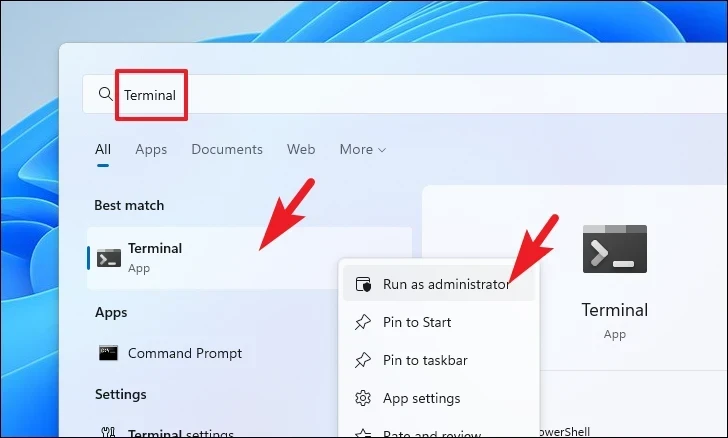
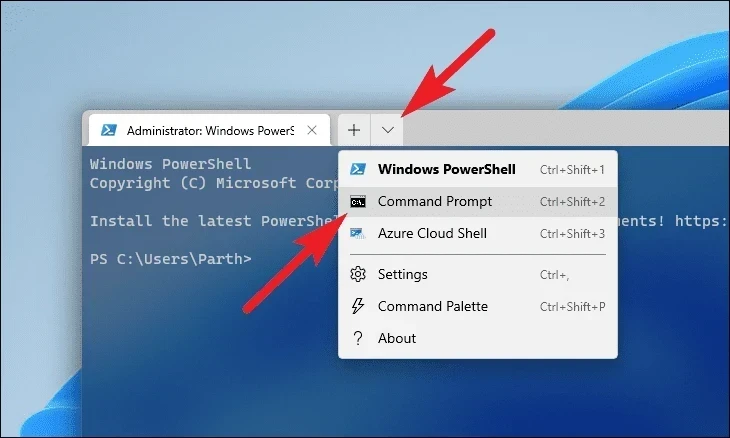
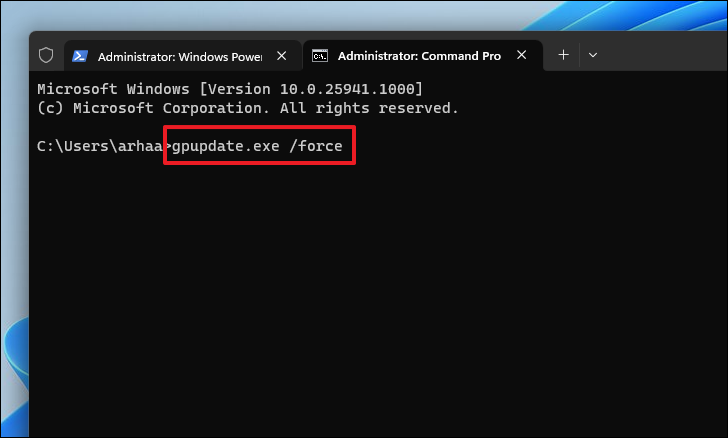
Open the Command Prompt with administrative privileges. Press Win + X and select ‘Windows Terminal (Admin)’. If prompted by User Account Control, click ‘Yes’.
Restart your computer to see if the issue persists.
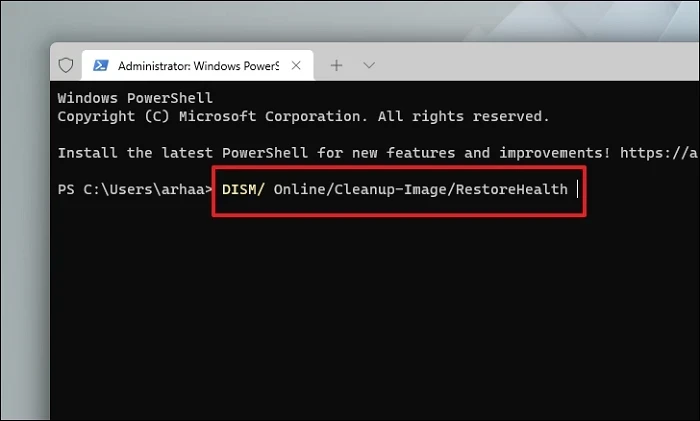
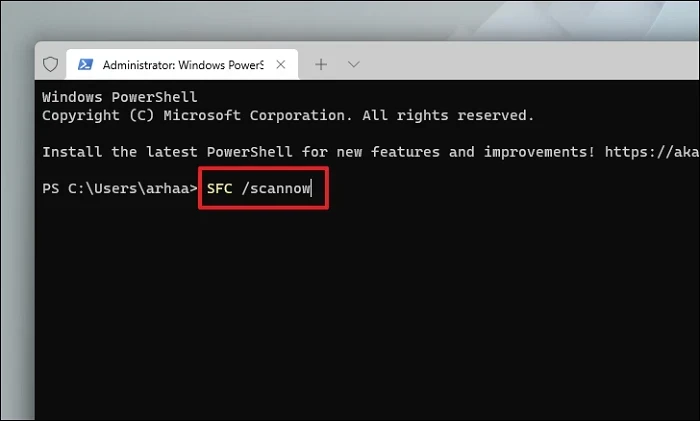
4. Run SFC and DISM Scans
System File Checker (SFC) and Deployment Image Servicing and Management (DISM) are built-in tools that can repair corrupted or missing system files. Running these scans can fix issues related to system file corruption.
After the scans are complete, restart your computer and check if the error is resolved.
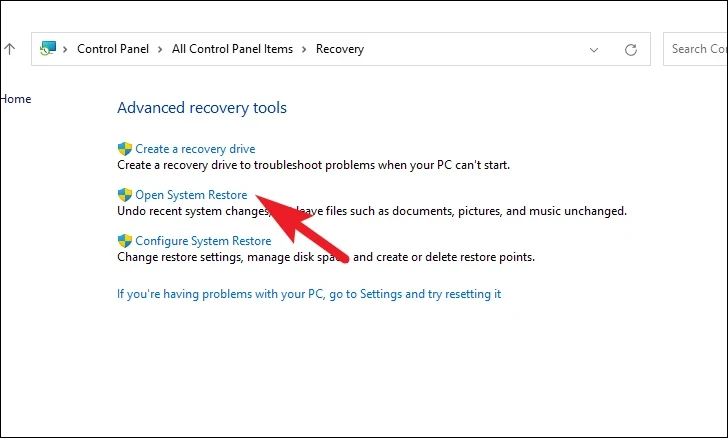
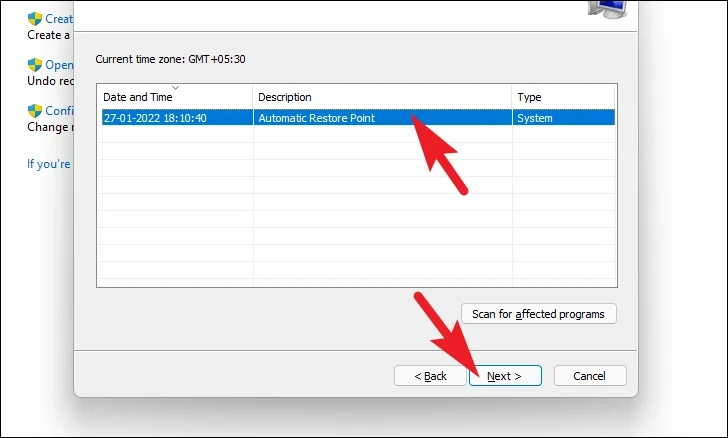
5. Perform a System Restore
If you’ve previously created a system restore point, reverting your system to that state can fix the GPSVC error, especially if recent changes caused the issue.
Click ‘Next’, then ‘Finish’ to start the restoration process. Your computer will restart, and the system will be restored to the chosen point.
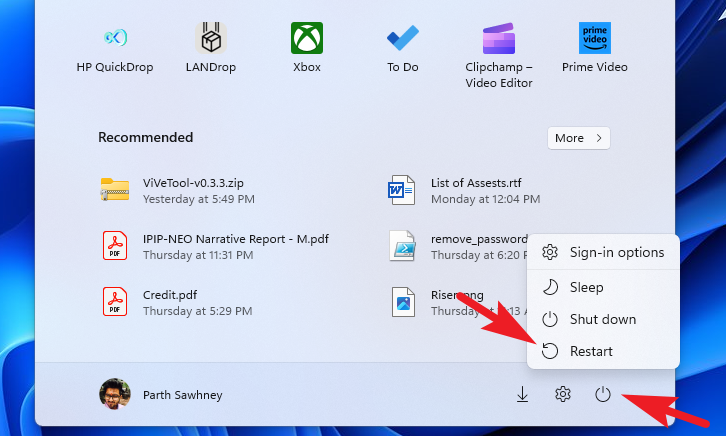
6. Restart Your PC
Sometimes, the simplest solutions are the most effective. A regular restart can resolve temporary glitches or service deadlocks that might be causing the GPSVC error.
Click on the ‘Start’ menu, select the ‘Power’ icon, and choose ‘Restart’.
Once your PC restarts, check if the error persists.
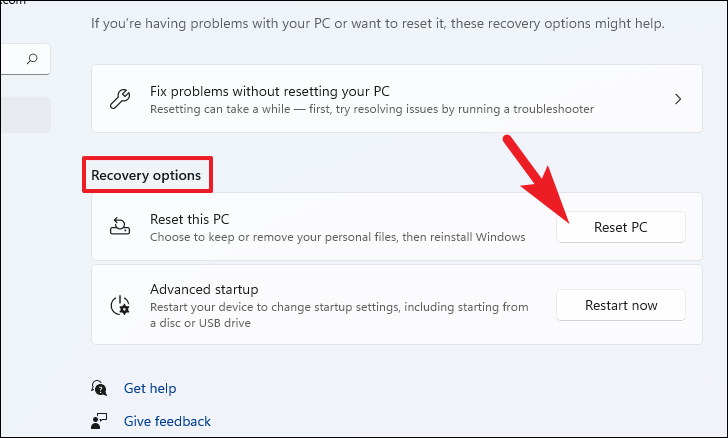
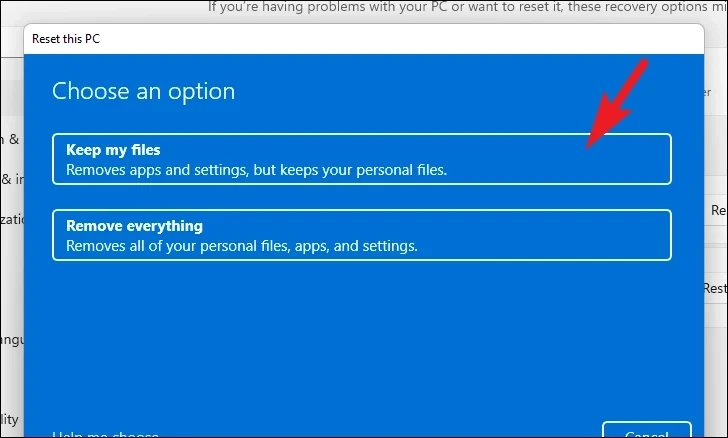
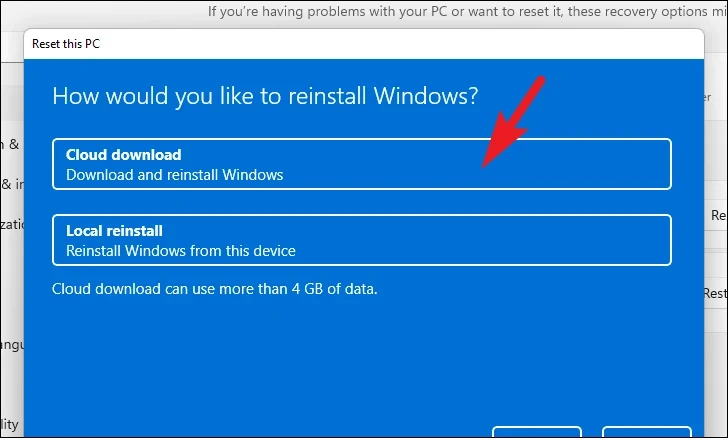
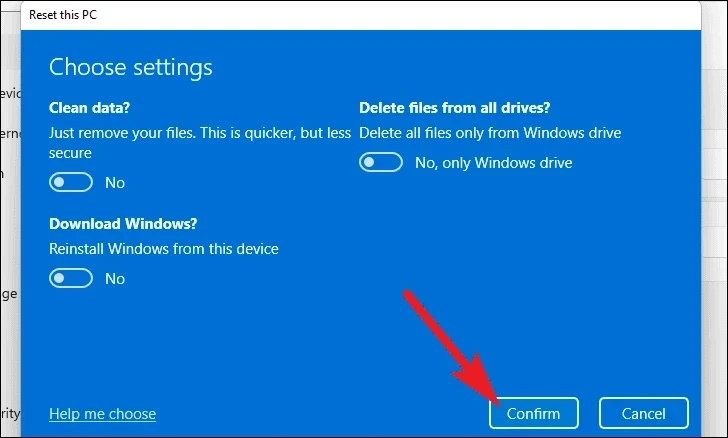
7. Reset Your PC
If none of the above methods have resolved the issue, resetting your PC might be the next best step. This process reinstalls Windows but allows you to keep your personal files.
Click ‘Next’, then ‘Reset’ to begin the reset process. Your PC will restart several times during this process.
Wait for the reset to complete, after which your system should be free of the GPSVC error.
Encountering the ‘Please wait for the GPSVC’ error can be disconcerting, but with the methods outlined above, you should be able to resolve the issue and regain full access to your Windows 11 PC.