Not being able to update your Windows can prove fatal for your computer as it deprives it of important security updates, drivers, and other critical components.
As reported by many users, this error kicks in when you try to install the update on your computer, and it gets stuck. The only way left is to invoke a force restart that rolls back the update progress.
Thankfully, as the issue is well documented, there are several methods you can try to fix the issue on your own. However, before you dive in deep, we recommend you glance at what could be the root causes of this issue to understand it better.
Common Culprits Behind the Error
- Corrupted Update Components
- Corrupted Update Files
- Disable System Update Services
- Third-party apps/services interference
- Insufficient storage space
1. Run Update Troubleshooter
The first and foremost step is to run the troubleshooter to ensure there are no system and/or configuration issues with the system.
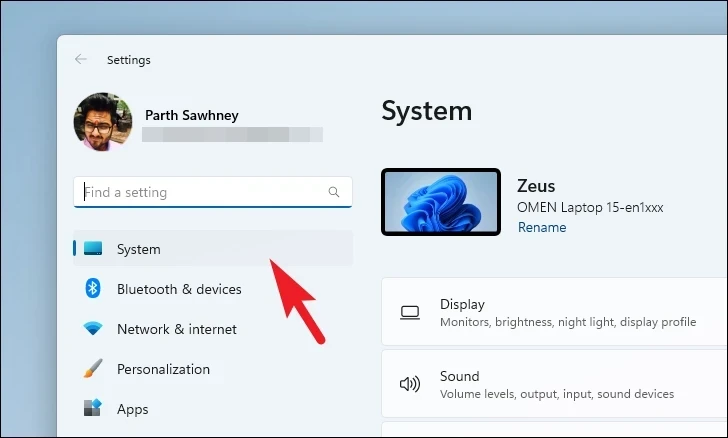
After that, make sure you have selected the ‘System’ tab from the left sidebar.
Next, from the right section, click on the ‘Troubleshooter’ tile.
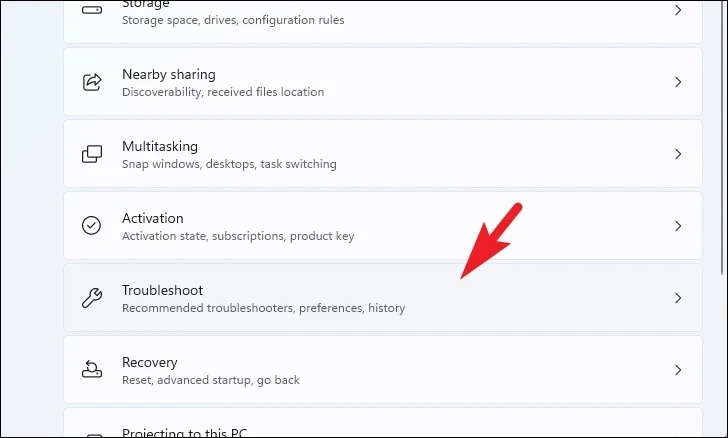
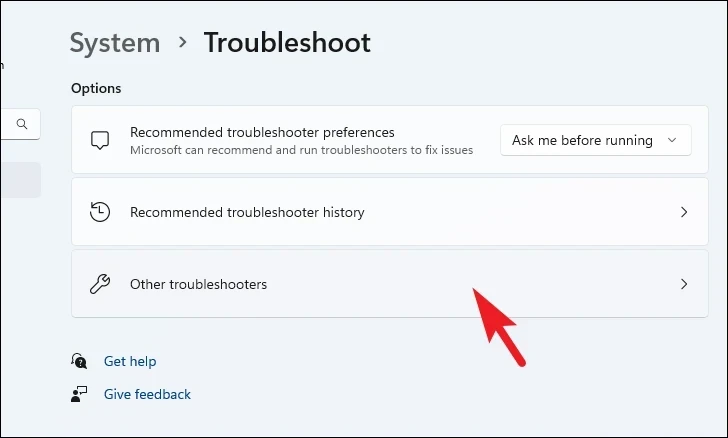
Afterward, click on the ‘Other troubleshooters’ tile to proceed.
Now, locate the ‘Windows Update’ tile and click on the ‘Run’ button to commence the troubleshooting.
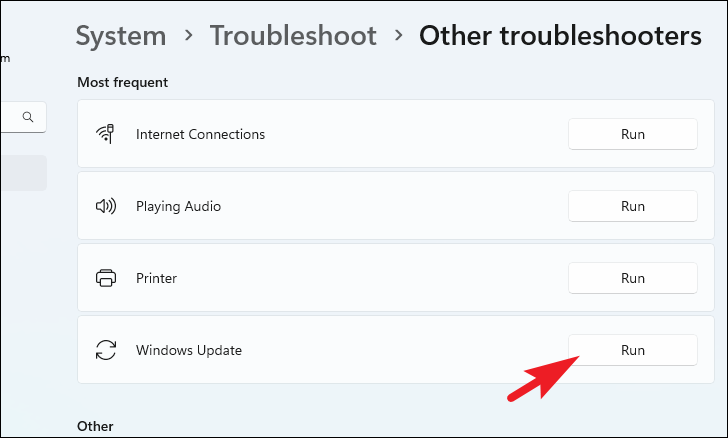
Once the troubleshooting is completed, you can see the list of problems and suggestions to fix them. To understand the problem deeply, click the ‘View Detailed Information’ option.

2. Reset Windows Update Services
Windows Update services run silently in the background to ensure all the updates are delivered correctly to your system. However, sometimes, a third-party app or service causes hindrances to their functionality.
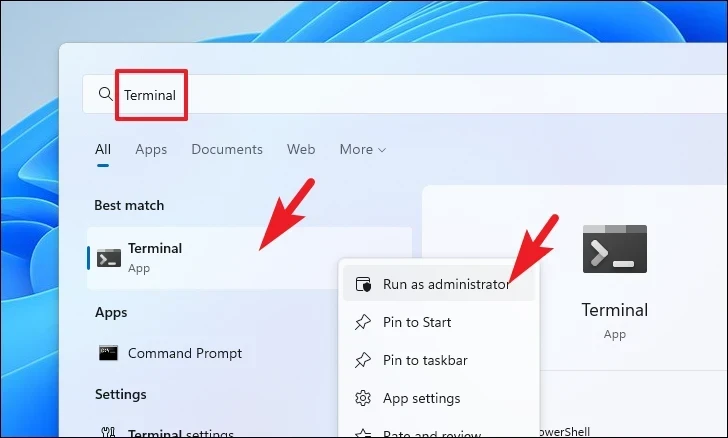
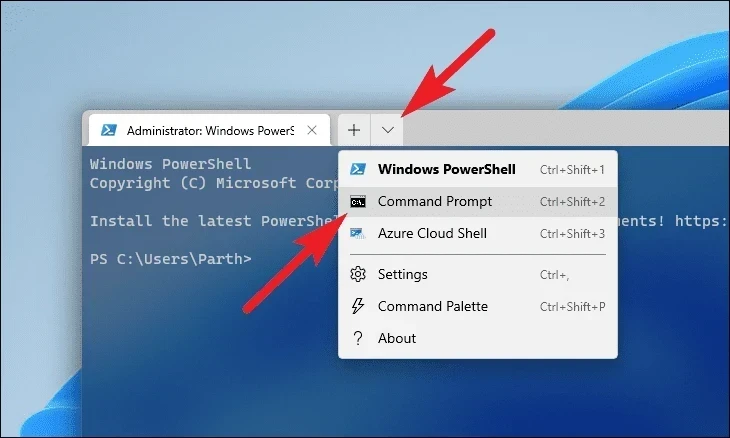
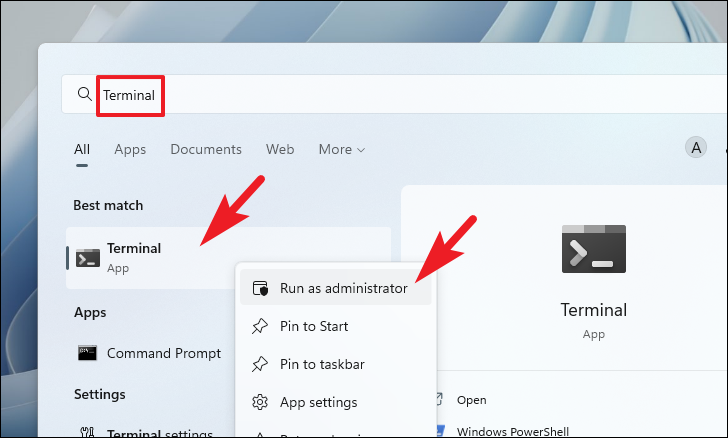
Now, head to the Start Menu and type Terminal. Then, right-click on the tile and select the ‘Run as administrator’ option.
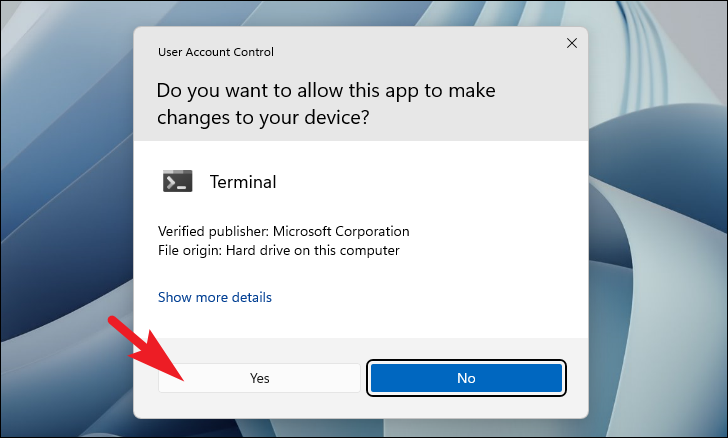
Next, a UAC (User Account Control) window will appear on your screen. If you are not logged in as an admin, provide credentials for one. Otherwise, click on the ‘Yes’ button.

After that, click on the ‘chevron’ icon and select the ‘Command Prompt’ option.
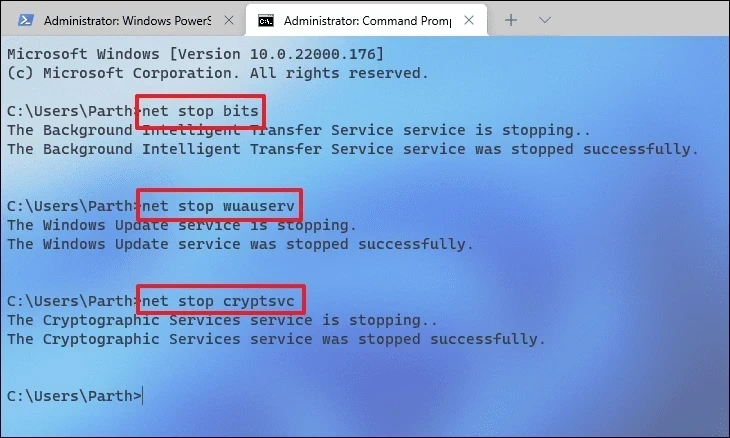
After that, type or copy and paste the below-mentioned command to stop the currently running update service. Ensure you press Enter after you insert each command separately to execute them all.
net stop bits
net stop wuaserv
net stop cryptsvc
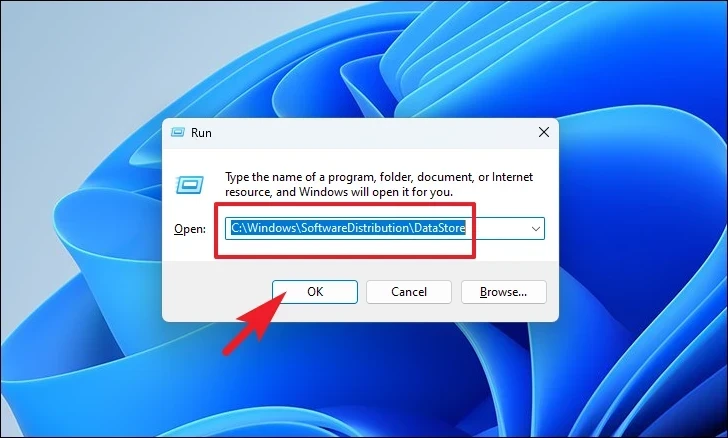
After that, press the Windows+R keys together on your keyboard to open the Run Command utility. Then, type or copy and paste the below-mentioned address path and click on the ‘OK’ button to proceed.
C:\Windows\SoftwareDistribution\DataStore
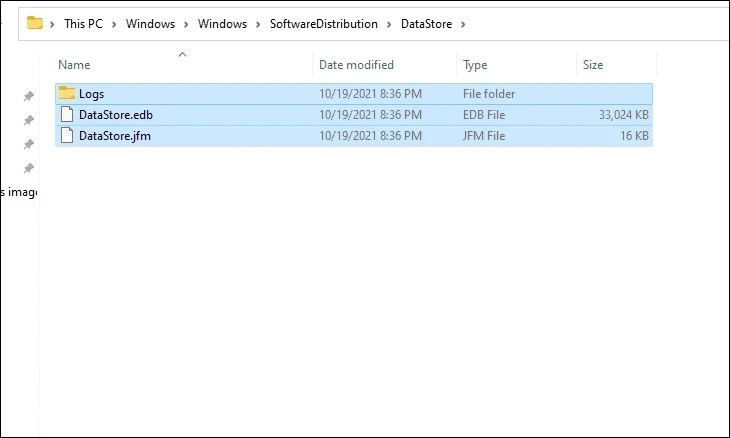
Then, press the Ctrl+A keys to select all the files and folders, and then press the Shift+Delete keys to permanently delete all the files.
3. Run SFC and DISM
Since the issue involves corrupted or damaged system files, it is recommended to run the DISM and SFC scans, as DISM will fix the image used to diagnose the problems present on your system, and SFC will check and repair your machine.
First, you will need to run the DISM (Deployment Image Servicing and Management) process, and once that is completed, you will have to run SFC (System File Checker) to check the integrity and errors of all system files.
To run DISM on your system, head to the Start menu and type ‘Terminal’ to search for it. Then, from the search results, right-click on the ‘Terminal’ tile and select the ‘Run as administrator’ option.
A UAC (User Account Control) window will appear on your screen. If you are not logged in with an admin account, enter the credentials for one. Otherwise, click the ‘Yes’ button on the window to proceed.
Next, on the Terminal window, type or copy and paste the below-mentioned code and hit Enter on your keyboard to execute the command.
DISM/Online/Cleanup-Image/RestoreHealth
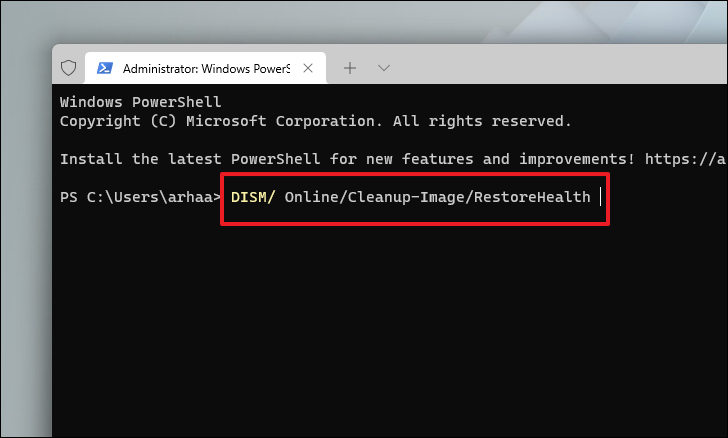
The DISM command may take up to several minutes, depending on your internet connection speed. It may also appear stuck at times and is normal command behavior. Wait patiently till the execution of the command is completed.
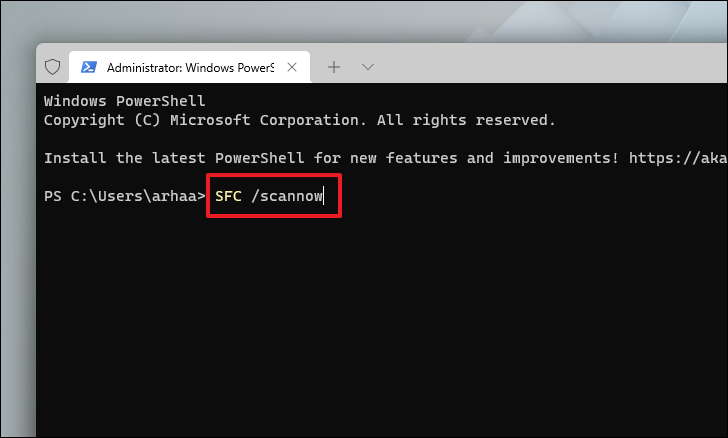
Once completed, type or copy and paste the below-mentioned command to invoke the SFC (System File Checker) that will scan your currently installed Windows image and fix the damaged or corrupted files using the one you downloaded in the previous step.
SFC /scannow
Once the SFC command is finished executing, head to the Start Menu and restart your PC. After the restart, try to upgrade again to check if the issue is still present.
4. Try to Upgrade in ‘Clean Boot’ Environment
A third-party service or software might often interfere with the Windows installation process. You can eliminate this issue by running the installation in a clean boot environment where only essential Microsoft services are running.
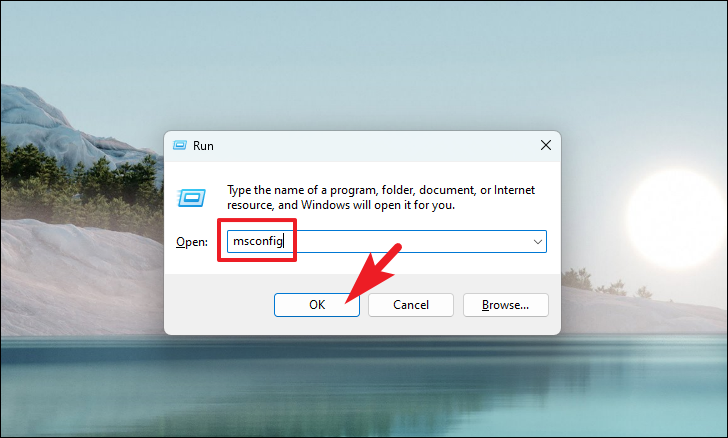
First, press the Windows+R keys together on your keyboard to bring up the Run command utility. Then, type msconfig and hit Enter on your keyboard to proceed.
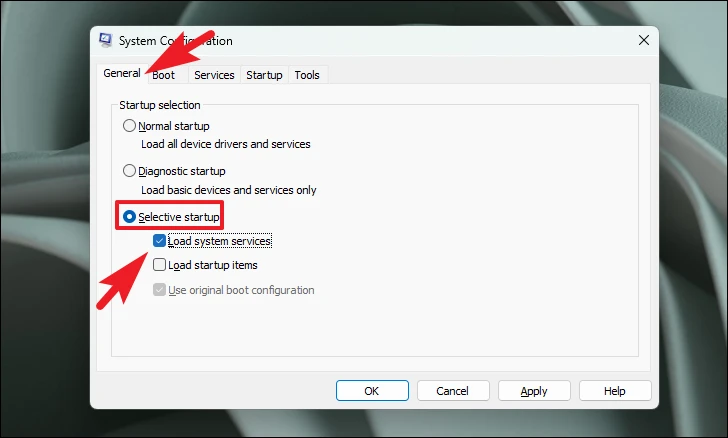
After that, click on the ‘Selective startup’ option and then click to select the ‘Load system services’ option.
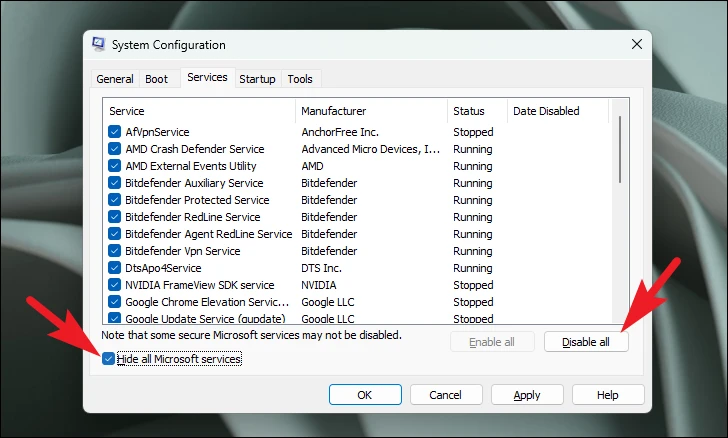
Then, click on the ‘Services’ tab and click on the checkbox preceding the ‘Hide all Microsoft services’ option. Then, click the ‘Disable all’ button to disable all but Microsoft services.
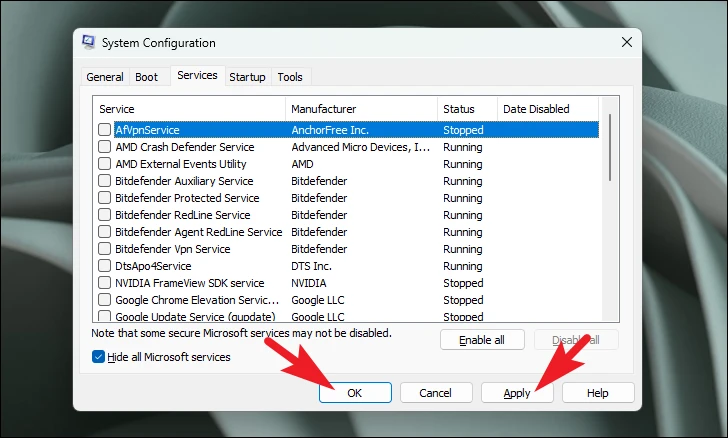
Then, click the ‘Apply’ button to apply the changes and click the ‘OK’ button to close the window.
Now, restart your PC from the Start Menu. The PC will start in clean boot mode. Then, try to run the update once again.
5. Disable Third-Party Anti-Virus Software
If you have third-party anti-virus software installed on your system, temporarily disable it. Third-party antivirus software can often block Windows updates, and they might be the ones causing all the mayhem.
While at it, temporarily disable other services like VPN, Firewall, and your anti-virus so nothing can interfere with the Windows Update service.
Try to update your system after disabling everything listed above. If the update is successful, you can enable all the services you previously disabled. Otherwise, enable those services and move on to the next method.
6. Free Up Space Using Clean Up Recommendation
Clean-up recommendations help you remove unnecessary files from your system. Manu times, an update is not downloaded due to low storage space on your system. Cleaning the clutter will help resolve the issue if you are running low on space.
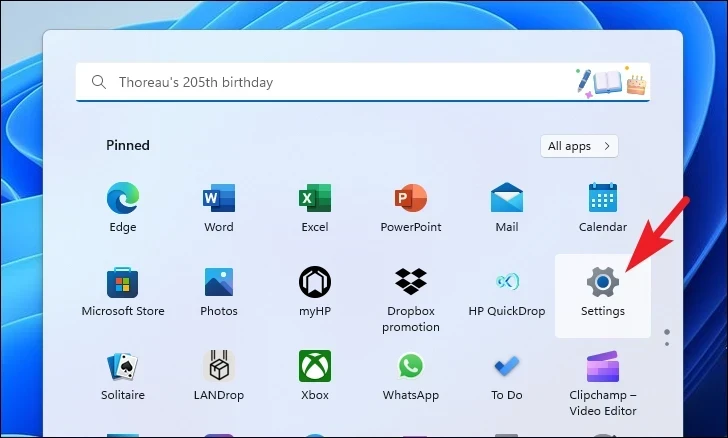
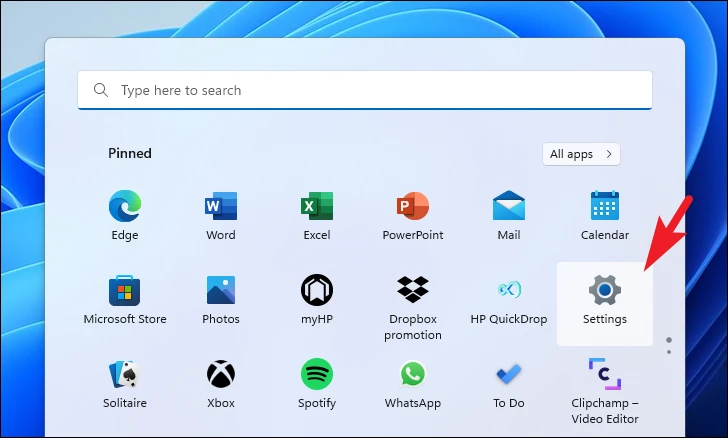
First, head to the Start Menu and click on the ‘Settings’ tile to continue. Alternatively, press the Windows+I keys together on your keyboard to open the app.
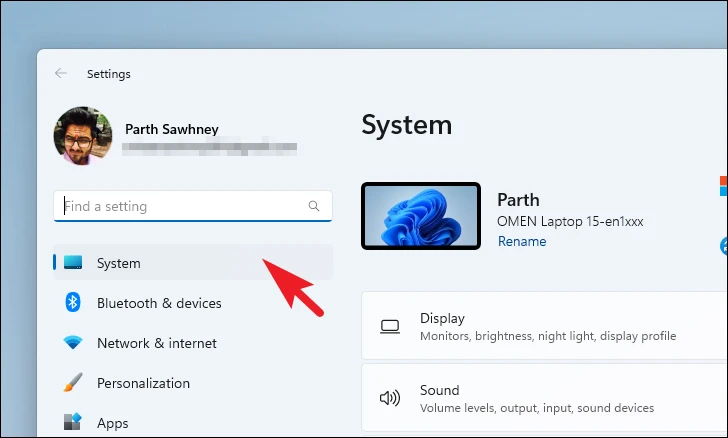
Now, from the Settings window, make sure you have selected the ‘System’ tab present on the left sidebar.
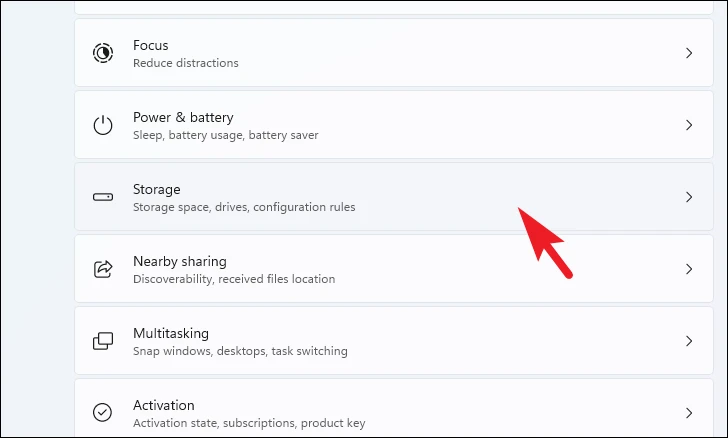
Next, from the right section of the window, scroll down to locate and click on the ‘Storage’ tile.
After that, from the ‘Storage’ settings page, scroll down to locate and click on the ‘Cleanup recommendations’ tile.
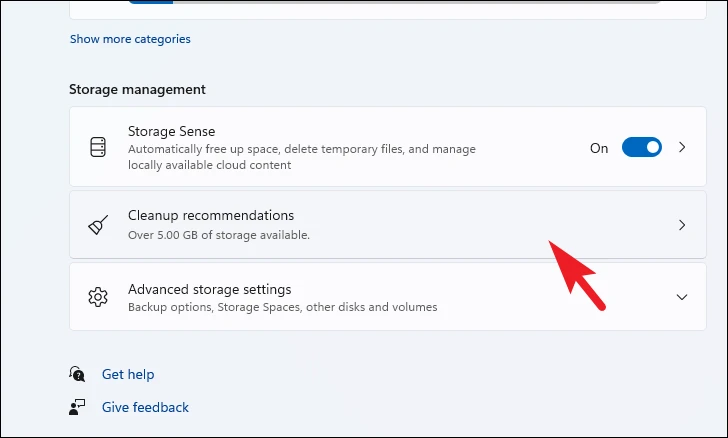
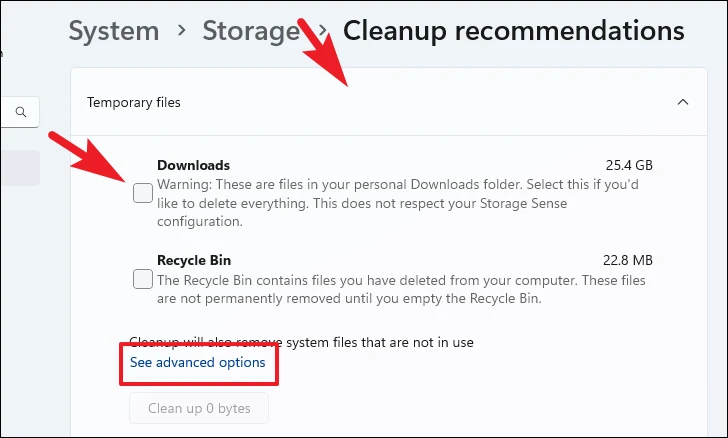
Now, on the ‘Cleanup recommendations’ page, click on the ‘Temporary files’ tile to expand the section. Then, select the categories of files by clicking on the checkbox preceding each listing. If you wish to select more categories of temporary files, click on the ‘See advanced options’ button. Once you have selected your preferred categories, click the ‘Clean up’ button at the end of the section to clean up select files and free up memory on your Windows 11 device.
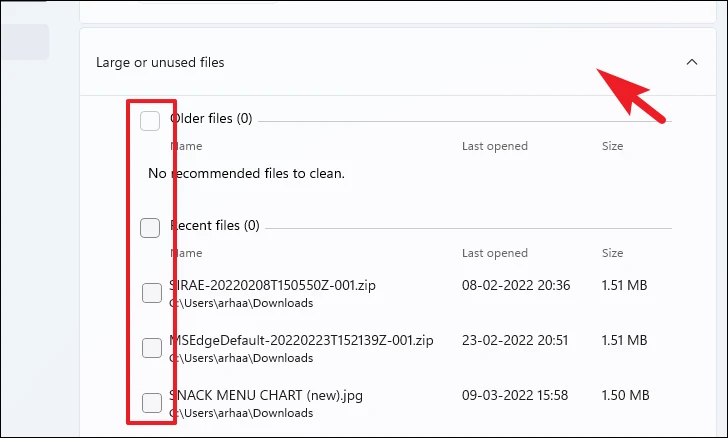
Similarly, click on the ‘Large & unused files’ tile to expand the section. All your unused and very large files will be listed in the section. Review each folder and select it by clicking on the checkbox preceding each list item.
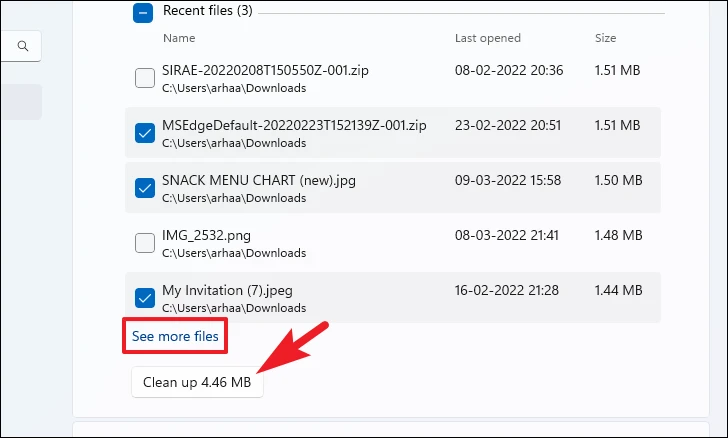
If you wish to expand the list of files you can remove to free up the space on your computer, click the ‘See more files’ option. Once you have selected the required files, click the ‘Cleanup’ button to delete those files permanently from your system.
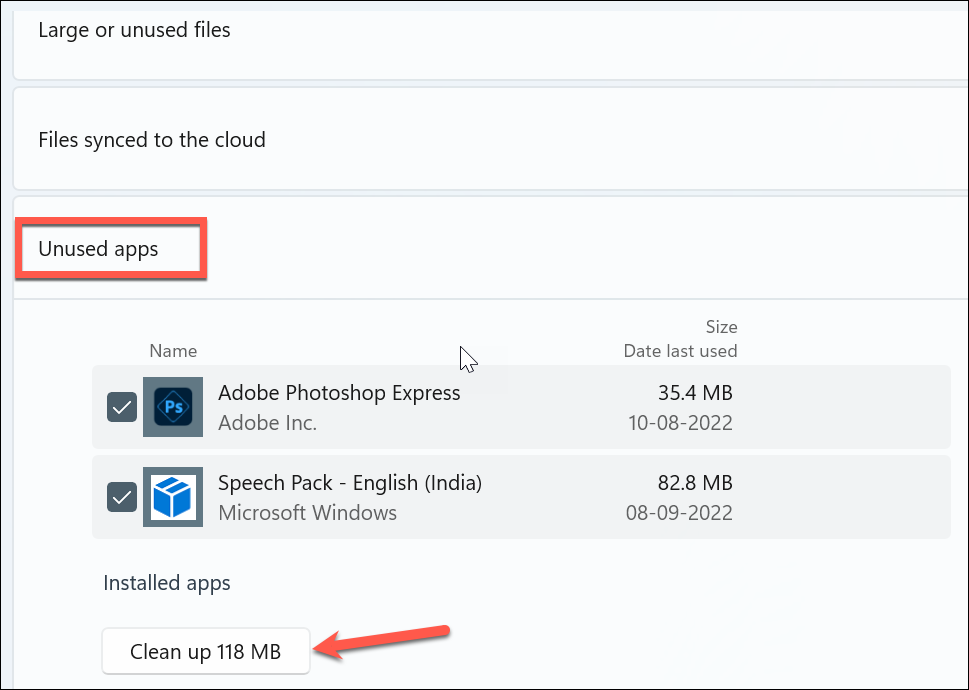
After that, click on the ‘Unused apps’ tile to expand the section. Next, if any apps are in the list, select them by clicking on the checkbox preceding each item and then click on the ‘Clean up ‘ button to remove those apps and their data from your system.
6. Manually Download & Install Updates
Downloading Windows 11 update packages manually is as plain sailing as it gets once you know where to look for them.
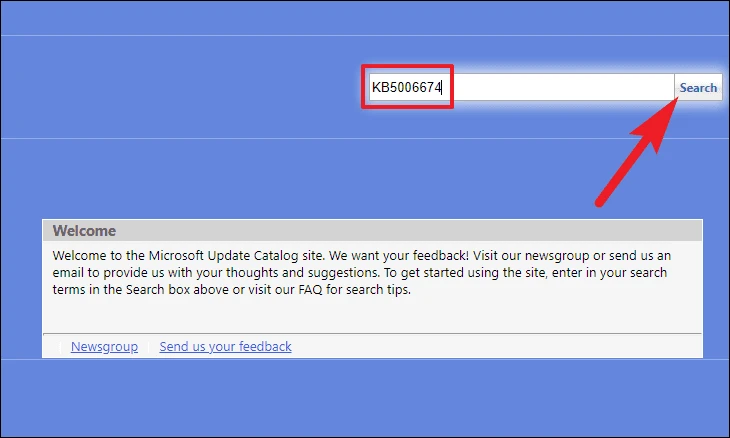
To do so, head to the official Microsoft Catalogue website catalog.update.microsoft.com. Then, enter the KB (Knowledge Base) number of the Windows update you wish to download in the ‘search’ bar present on the page and hit Enter on your keyboard or click the ‘Search’ button.
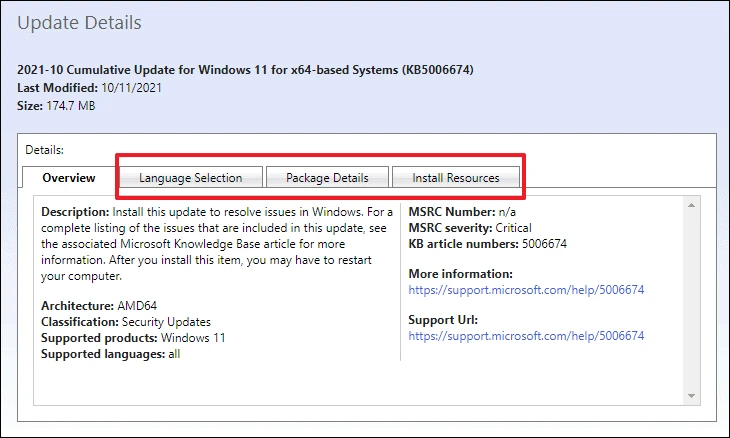
All the available downloads for the searched KB number will be populated in a list on the web. To get more information on a particular update package, click on its tile. This will open a separate browser window on your screen.

You can also get information on ‘Installation Resources,’ ‘Package details,’ and the Languages the package supports by clicking on their respective tabs.
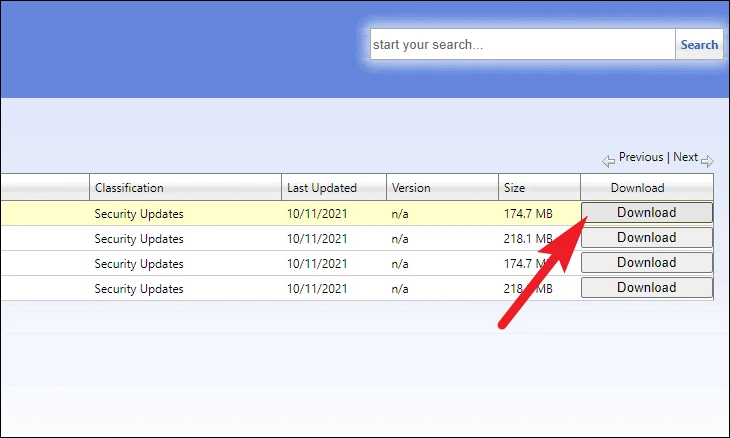
Once you have identified which package you wish to download, click on the ‘Download’ button on the far right edge of an individual package row. This will open a separate window on your screen.
After that, right-click on the link under the update package title and choose the ‘Save link as’ option from the context menu.
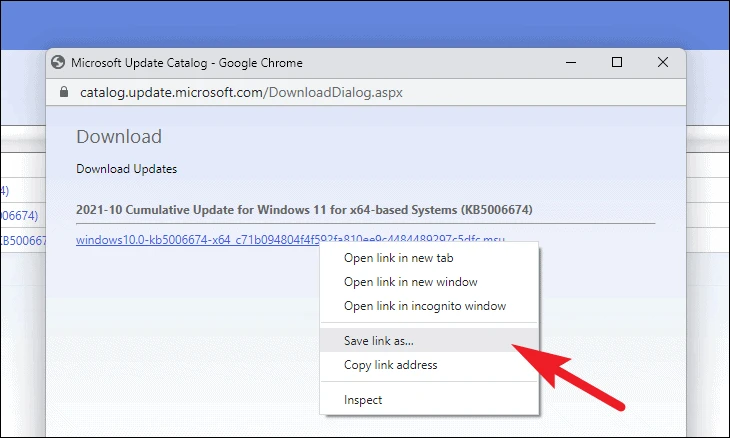
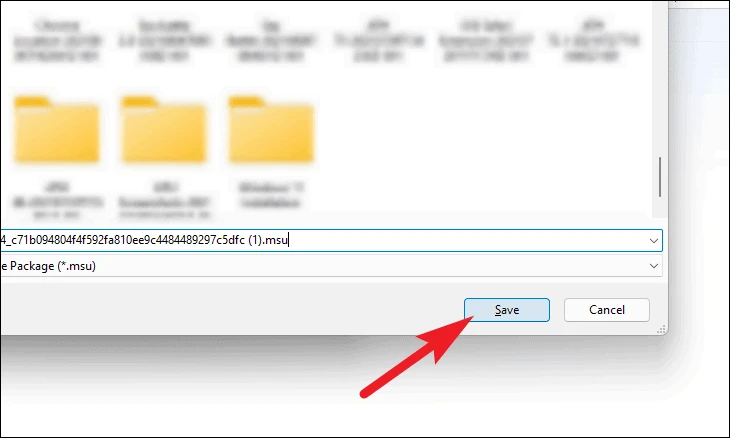
Then, choose your desired directory on the system and click on the ‘Save’ button.
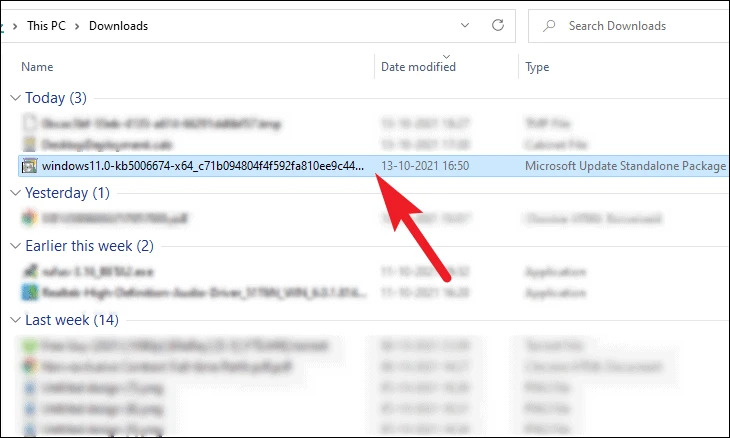
To install the downloaded package, double-click on it to run the installer.
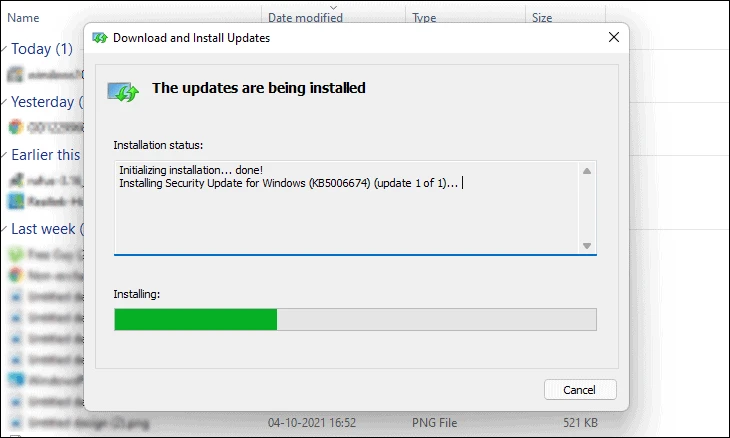
The Windows Update Standalone installer will prepare the system for installation, which might take a few minutes or so.

Once the update is ready to install, a prompt will appear on the screen to confirm the installation. Click on the ‘Yes’ button to start installing.

You should now see the update package being installed on your system. it might take a few minutes to install.
Once installed, you will see a message stating so on the window. Depending on the type of update, you might be prompted to restart your machine.
Windows Update error is not common but easily resolvable using the above methods.