Encountering errors on Windows 11 can be frustrating, especially when they disrupt your workflow. One such error is the ‘Video TDR Failure’, which often leaves users puzzled due to its technical nature. This error is commonly linked to issues with the graphics card or display driver. In this guide, we’ll explore effective methods to resolve the ‘Video TDR Failure’ error so you can get your system back to optimal performance.
1. Update the Graphics Driver
An outdated or corrupt graphics driver is a common cause of the ‘Video TDR Failure’ error. Updating the driver can often resolve the issue quickly.
Update Graphics Driver Using Device Manager
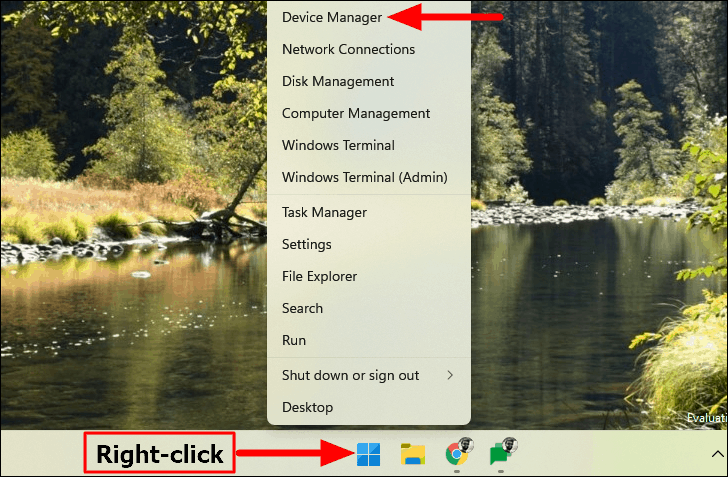
- Right-click the
Starticon on the Taskbar or pressWINDOWS+Xto open the Quick Access menu. Select Device Manager from the list.
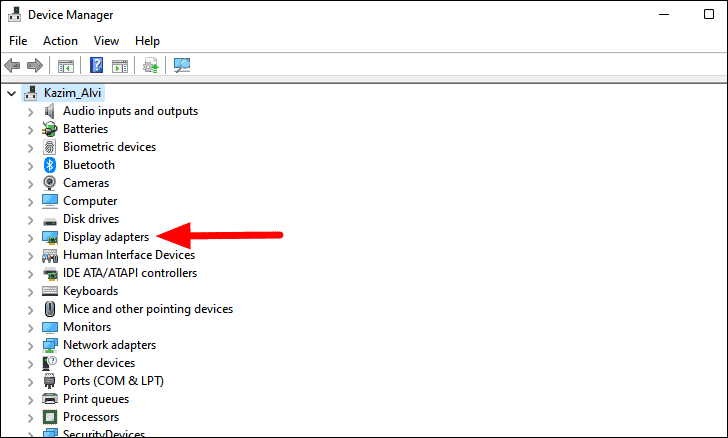
- In the Device Manager window, double-click Display adapters to expand the category.
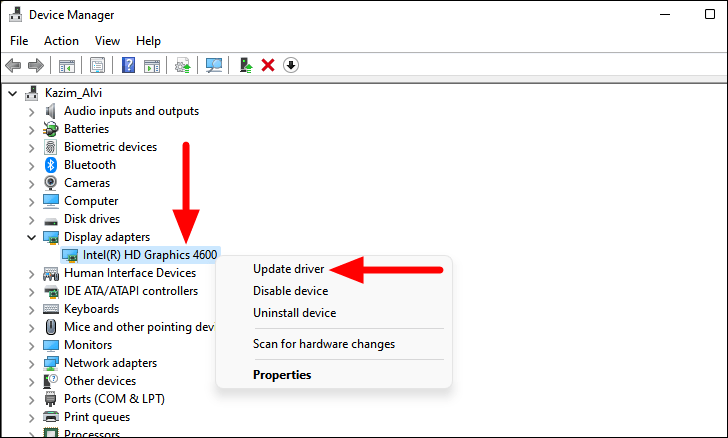
- Right-click your graphics adapter and select Update driver from the context menu.
- Choose Search automatically for drivers. Windows will search your system and the internet for the latest driver software.
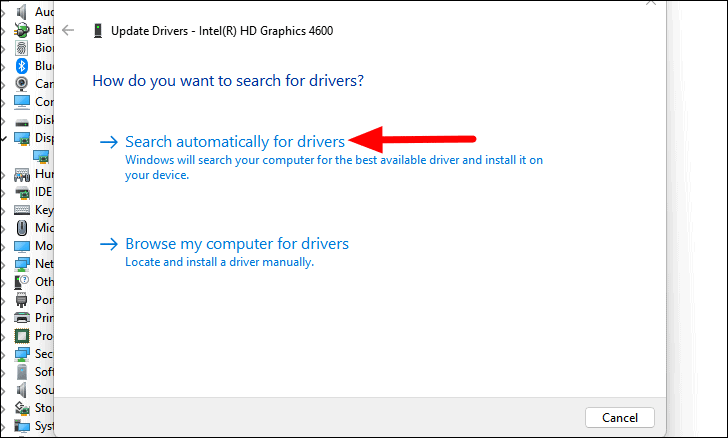
If Windows finds a new driver, it will install it automatically. Restart your computer and check if the error persists.
Update Graphics Driver with Windows Update
- Right-click the
Starticon or pressWINDOWS+Xand select Settings.
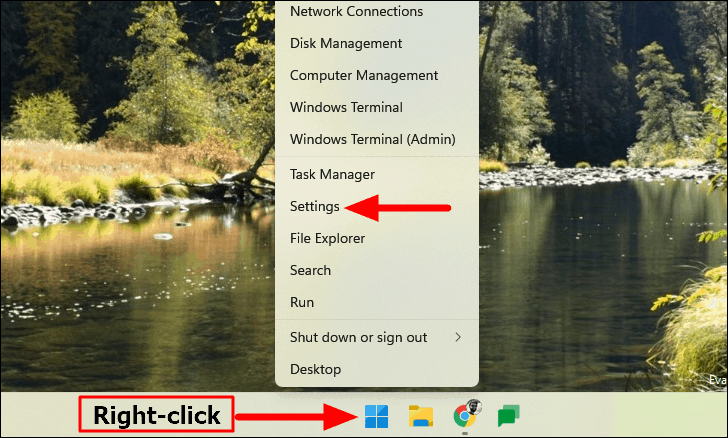
- In the Settings app, select Windows Update from the left sidebar.

- Click on Advanced options.
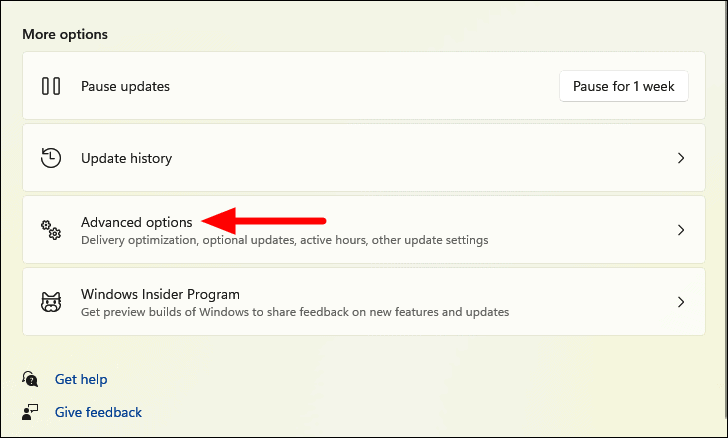
- Under Additional options, select Optional updates.
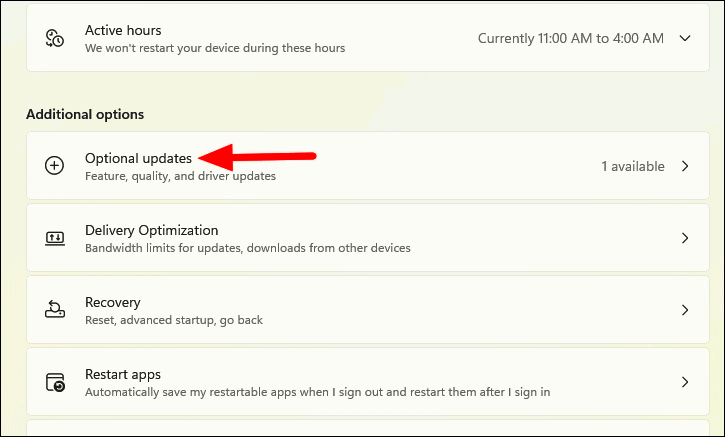
- Expand the Driver updates section, check for a graphics driver update, select it, and click Download & install.
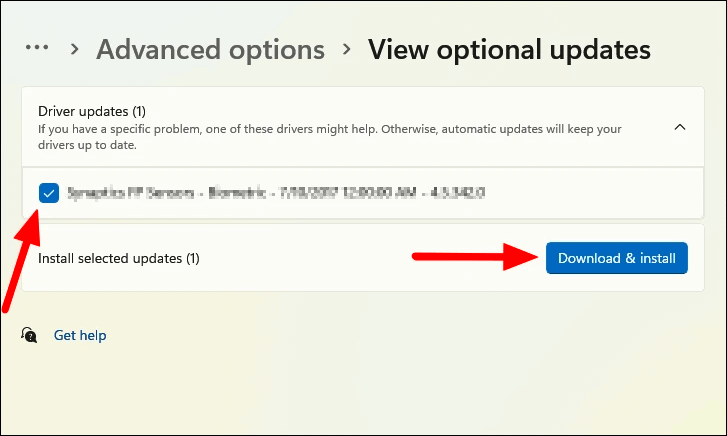
After installation, restart your system to apply the changes.
Download Graphics Driver from Manufacturer’s Website
If no updates are found through Windows Update or Device Manager, you can download the latest driver directly from the manufacturer’s website.
- Identify your graphics card model:
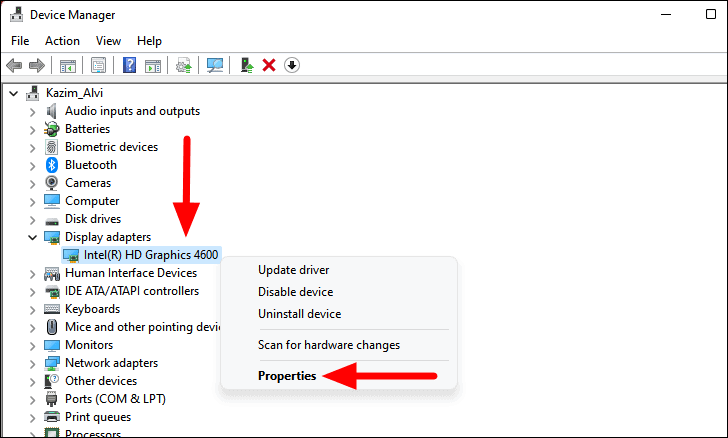
- Open Device Manager and expand Display adapters.
- Right-click your graphics adapter and select Properties.
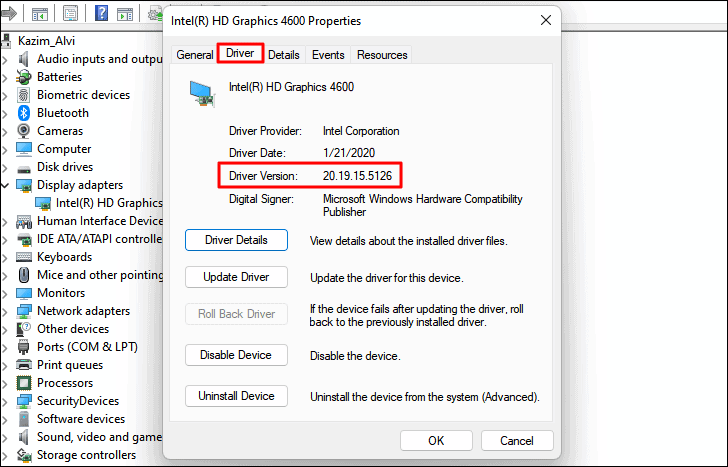
- In the Driver tab, note the Driver Version.
- Visit the manufacturer’s website to download the latest driver:
Download and install the appropriate driver for your system. Follow the installation prompts, and restart your computer afterward.
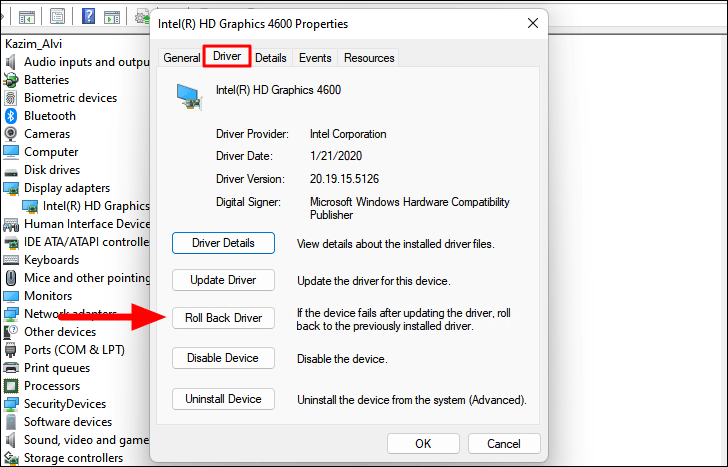
2. Roll Back Graphics Driver to Previous Version
If the error started occurring after a recent driver update, rolling back to the previous version might resolve the issue.
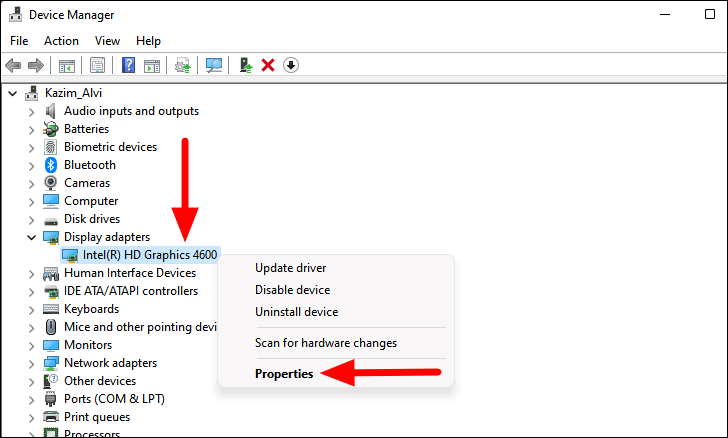
- Open Device Manager and expand Display adapters.
- Right-click your graphics adapter and select Properties.
- In the Driver tab, click on Roll Back Driver.
- Select a reason for rolling back and click Yes to confirm.
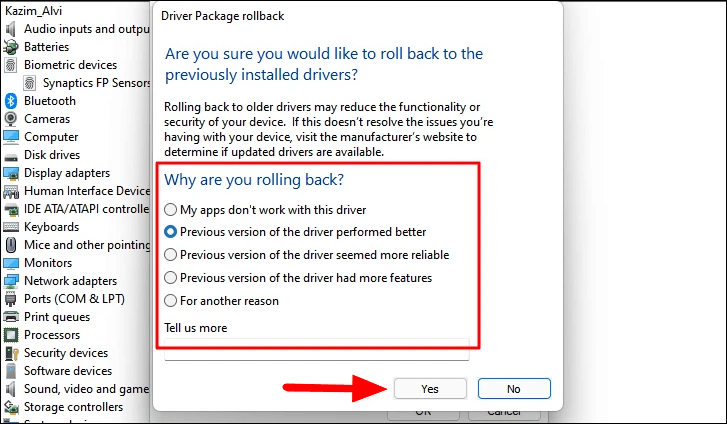
After rolling back, restart your system to see if the error is resolved.
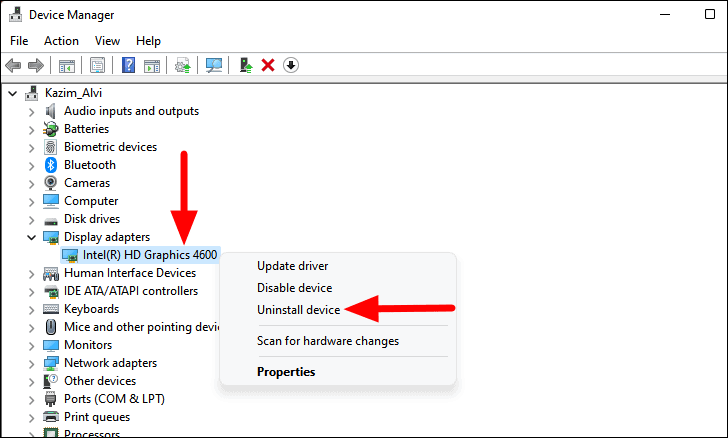
3. Reinstall the Graphics Driver
Reinstalling the graphics driver can fix corruption issues that might be causing the error.
- Open Device Manager and expand Display adapters.
- Right-click your graphics adapter and select Uninstall device.
- Check the box for Attempt to remove the driver for this device and click Uninstall.
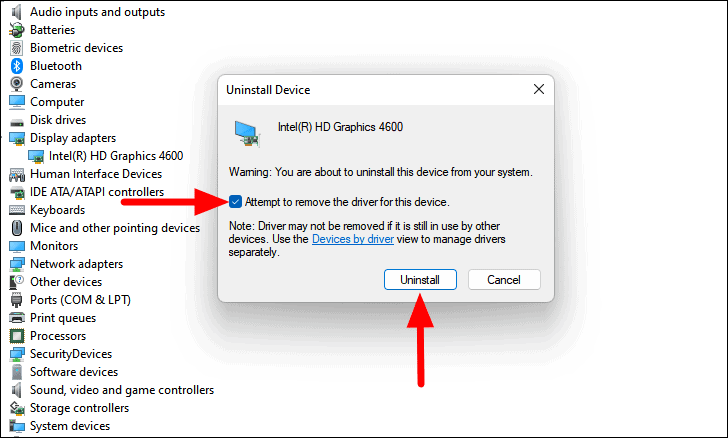
- Restart your computer. Windows will automatically reinstall the default graphics driver.
Verify if the error persists after reinstalling the driver.
4. Disable the Secondary Graphics Driver
If your system has multiple graphics cards, conflicts between them can cause the error. Disabling the secondary driver might help.
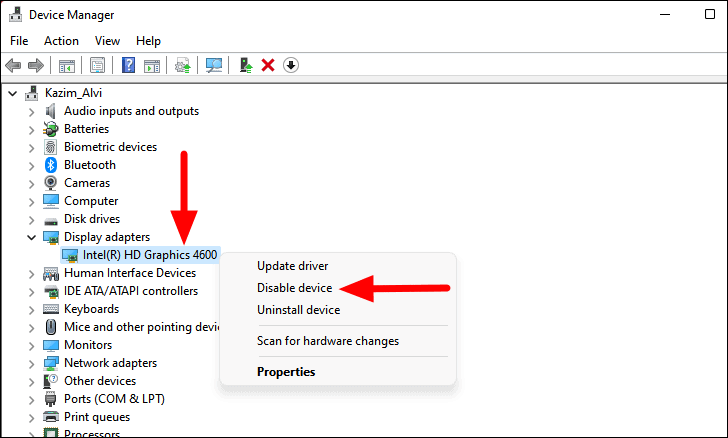
- Open Device Manager and expand Display adapters.
- Right-click the secondary graphics adapter and select Disable device.
After disabling, restart your system to check if the problem is resolved.
5. Reconfigure Power Settings
Adjusting power settings can sometimes fix the ‘Video TDR Failure’ error by preventing the graphics card from entering a low-power state.
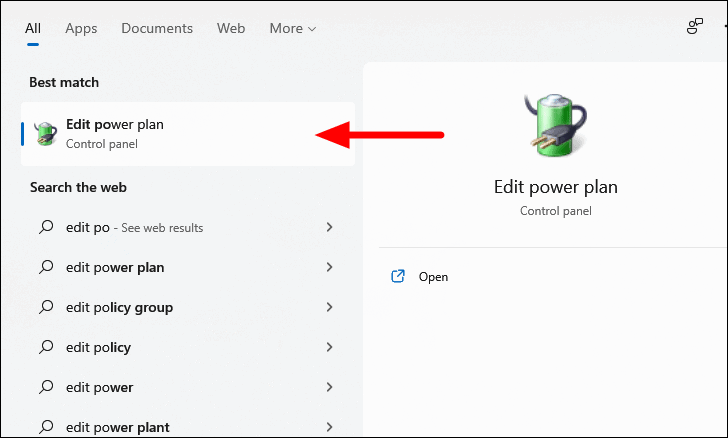
- Press
WINDOWS+Sto open the search bar. Type Edit power plan and select it.
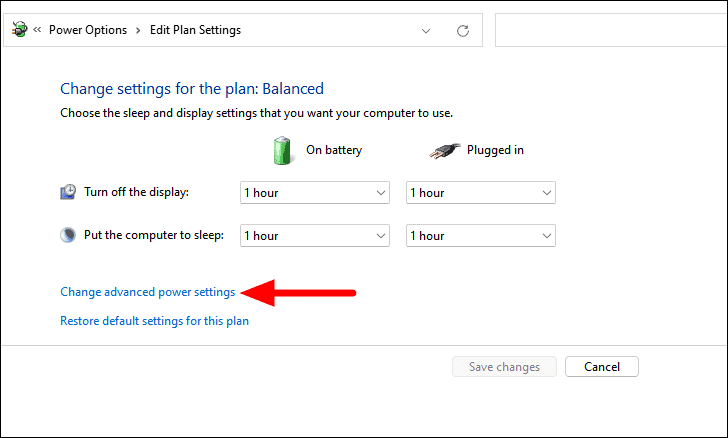
- Click on Change advanced power settings.
- Expand PCI Express, then expand Link State Power Management.
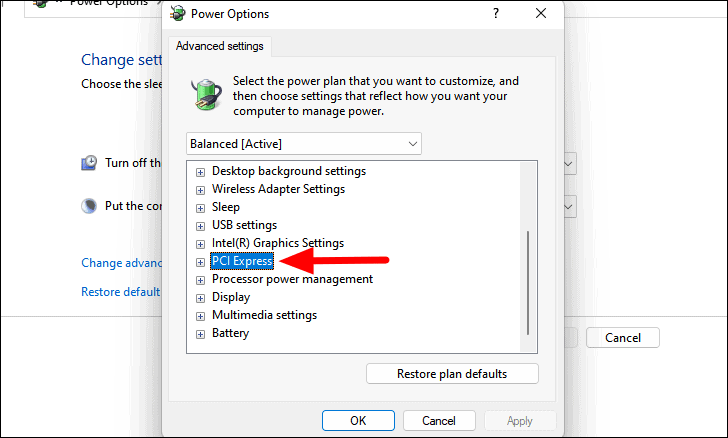
- Set both On battery and Plugged in options to Off, then click OK.
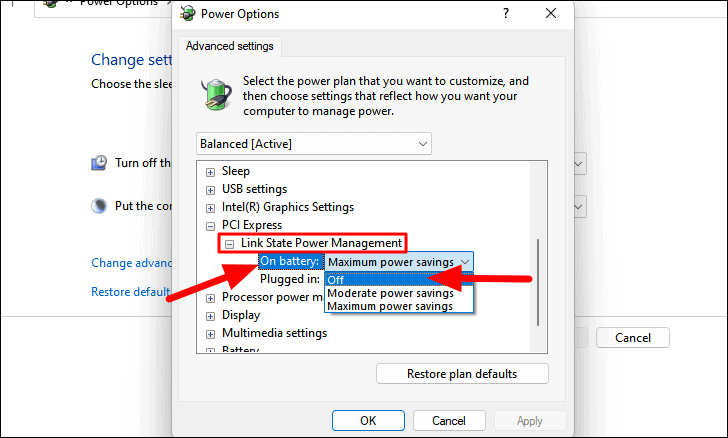
Restart your computer to apply the changes.
6. Set the Refresh Rate to 120 Hz
Higher refresh rates can sometimes cause instability. Reducing the refresh rate to 120 Hz may help.
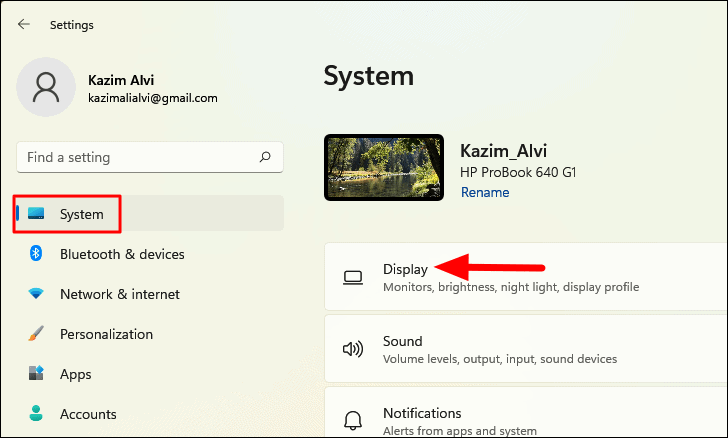
- Open Settings by pressing
WINDOWS+I. Select Display under the System tab.
- Scroll down and click on Advanced display.
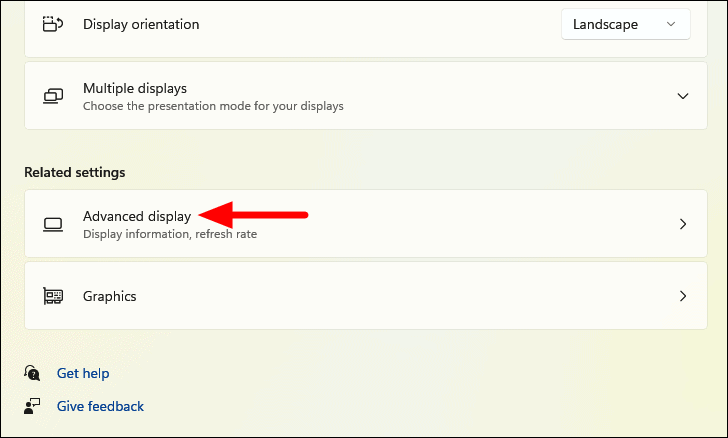
- Use the dropdown menu under Choose a refresh rate to select 120 Hz.
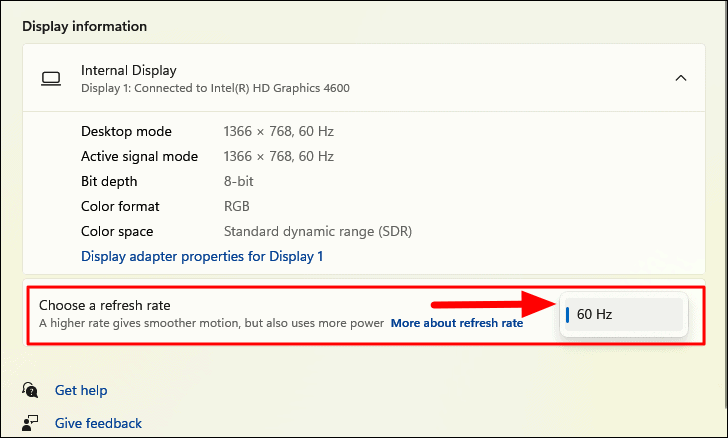
After changing the refresh rate, reboot your system and check for the error.
7. Run Startup Repair
Startup Repair can fix issues that prevent Windows from loading correctly, including the ‘Video TDR Failure’ error.
- Open Settings and select System from the left sidebar.
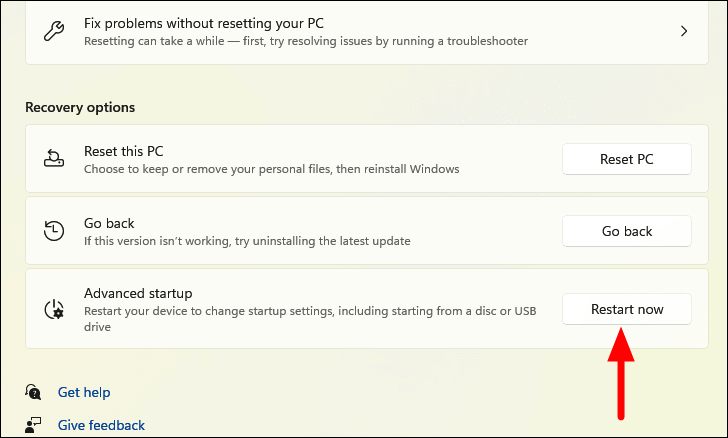
- Click on Recovery.
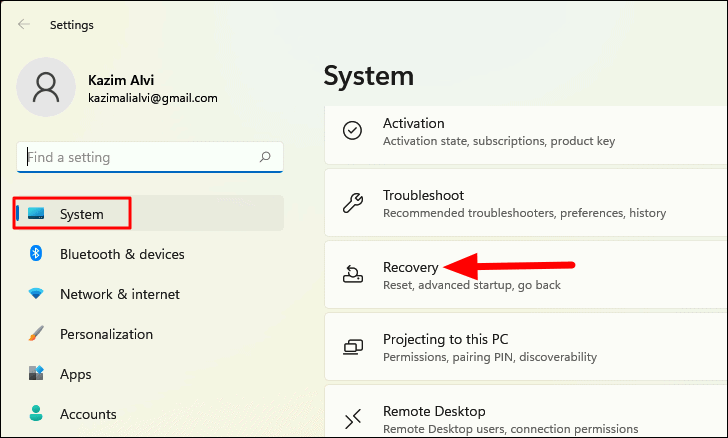
- Under Advanced startup, click Restart now.
- Your PC will restart to a blue screen with options. Select Troubleshoot.
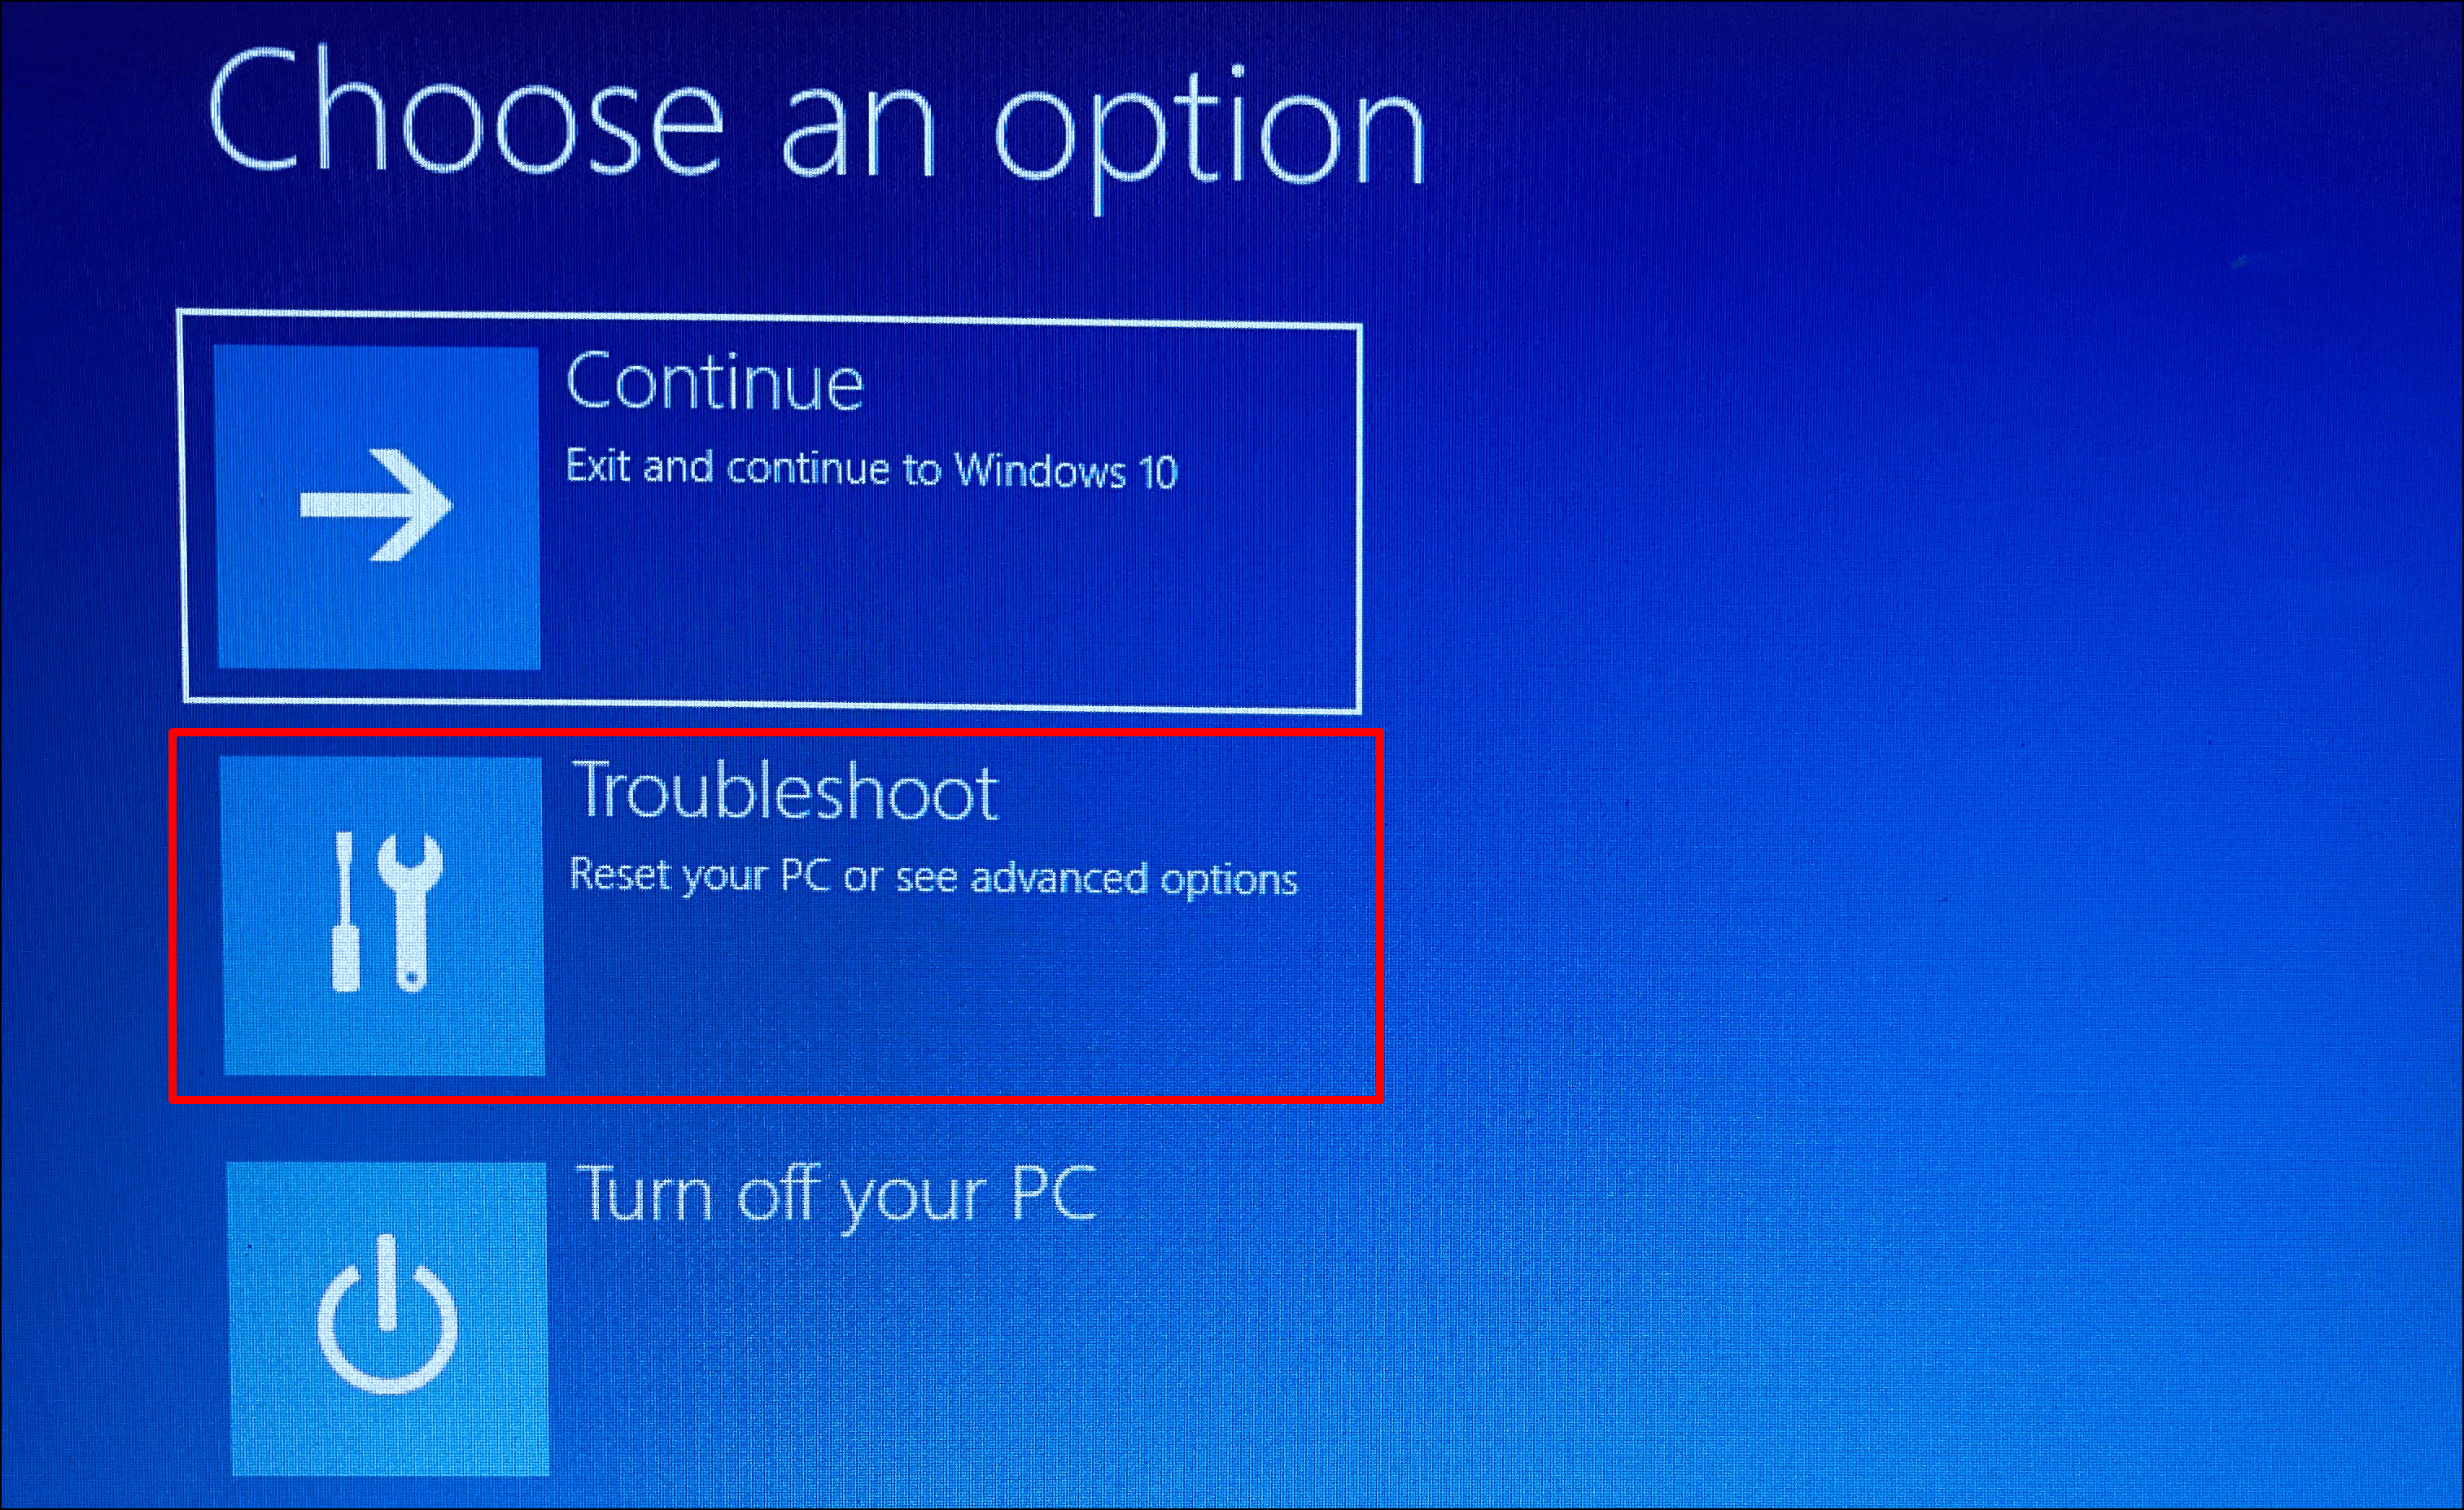
- Click on Advanced options, then select Startup Repair.
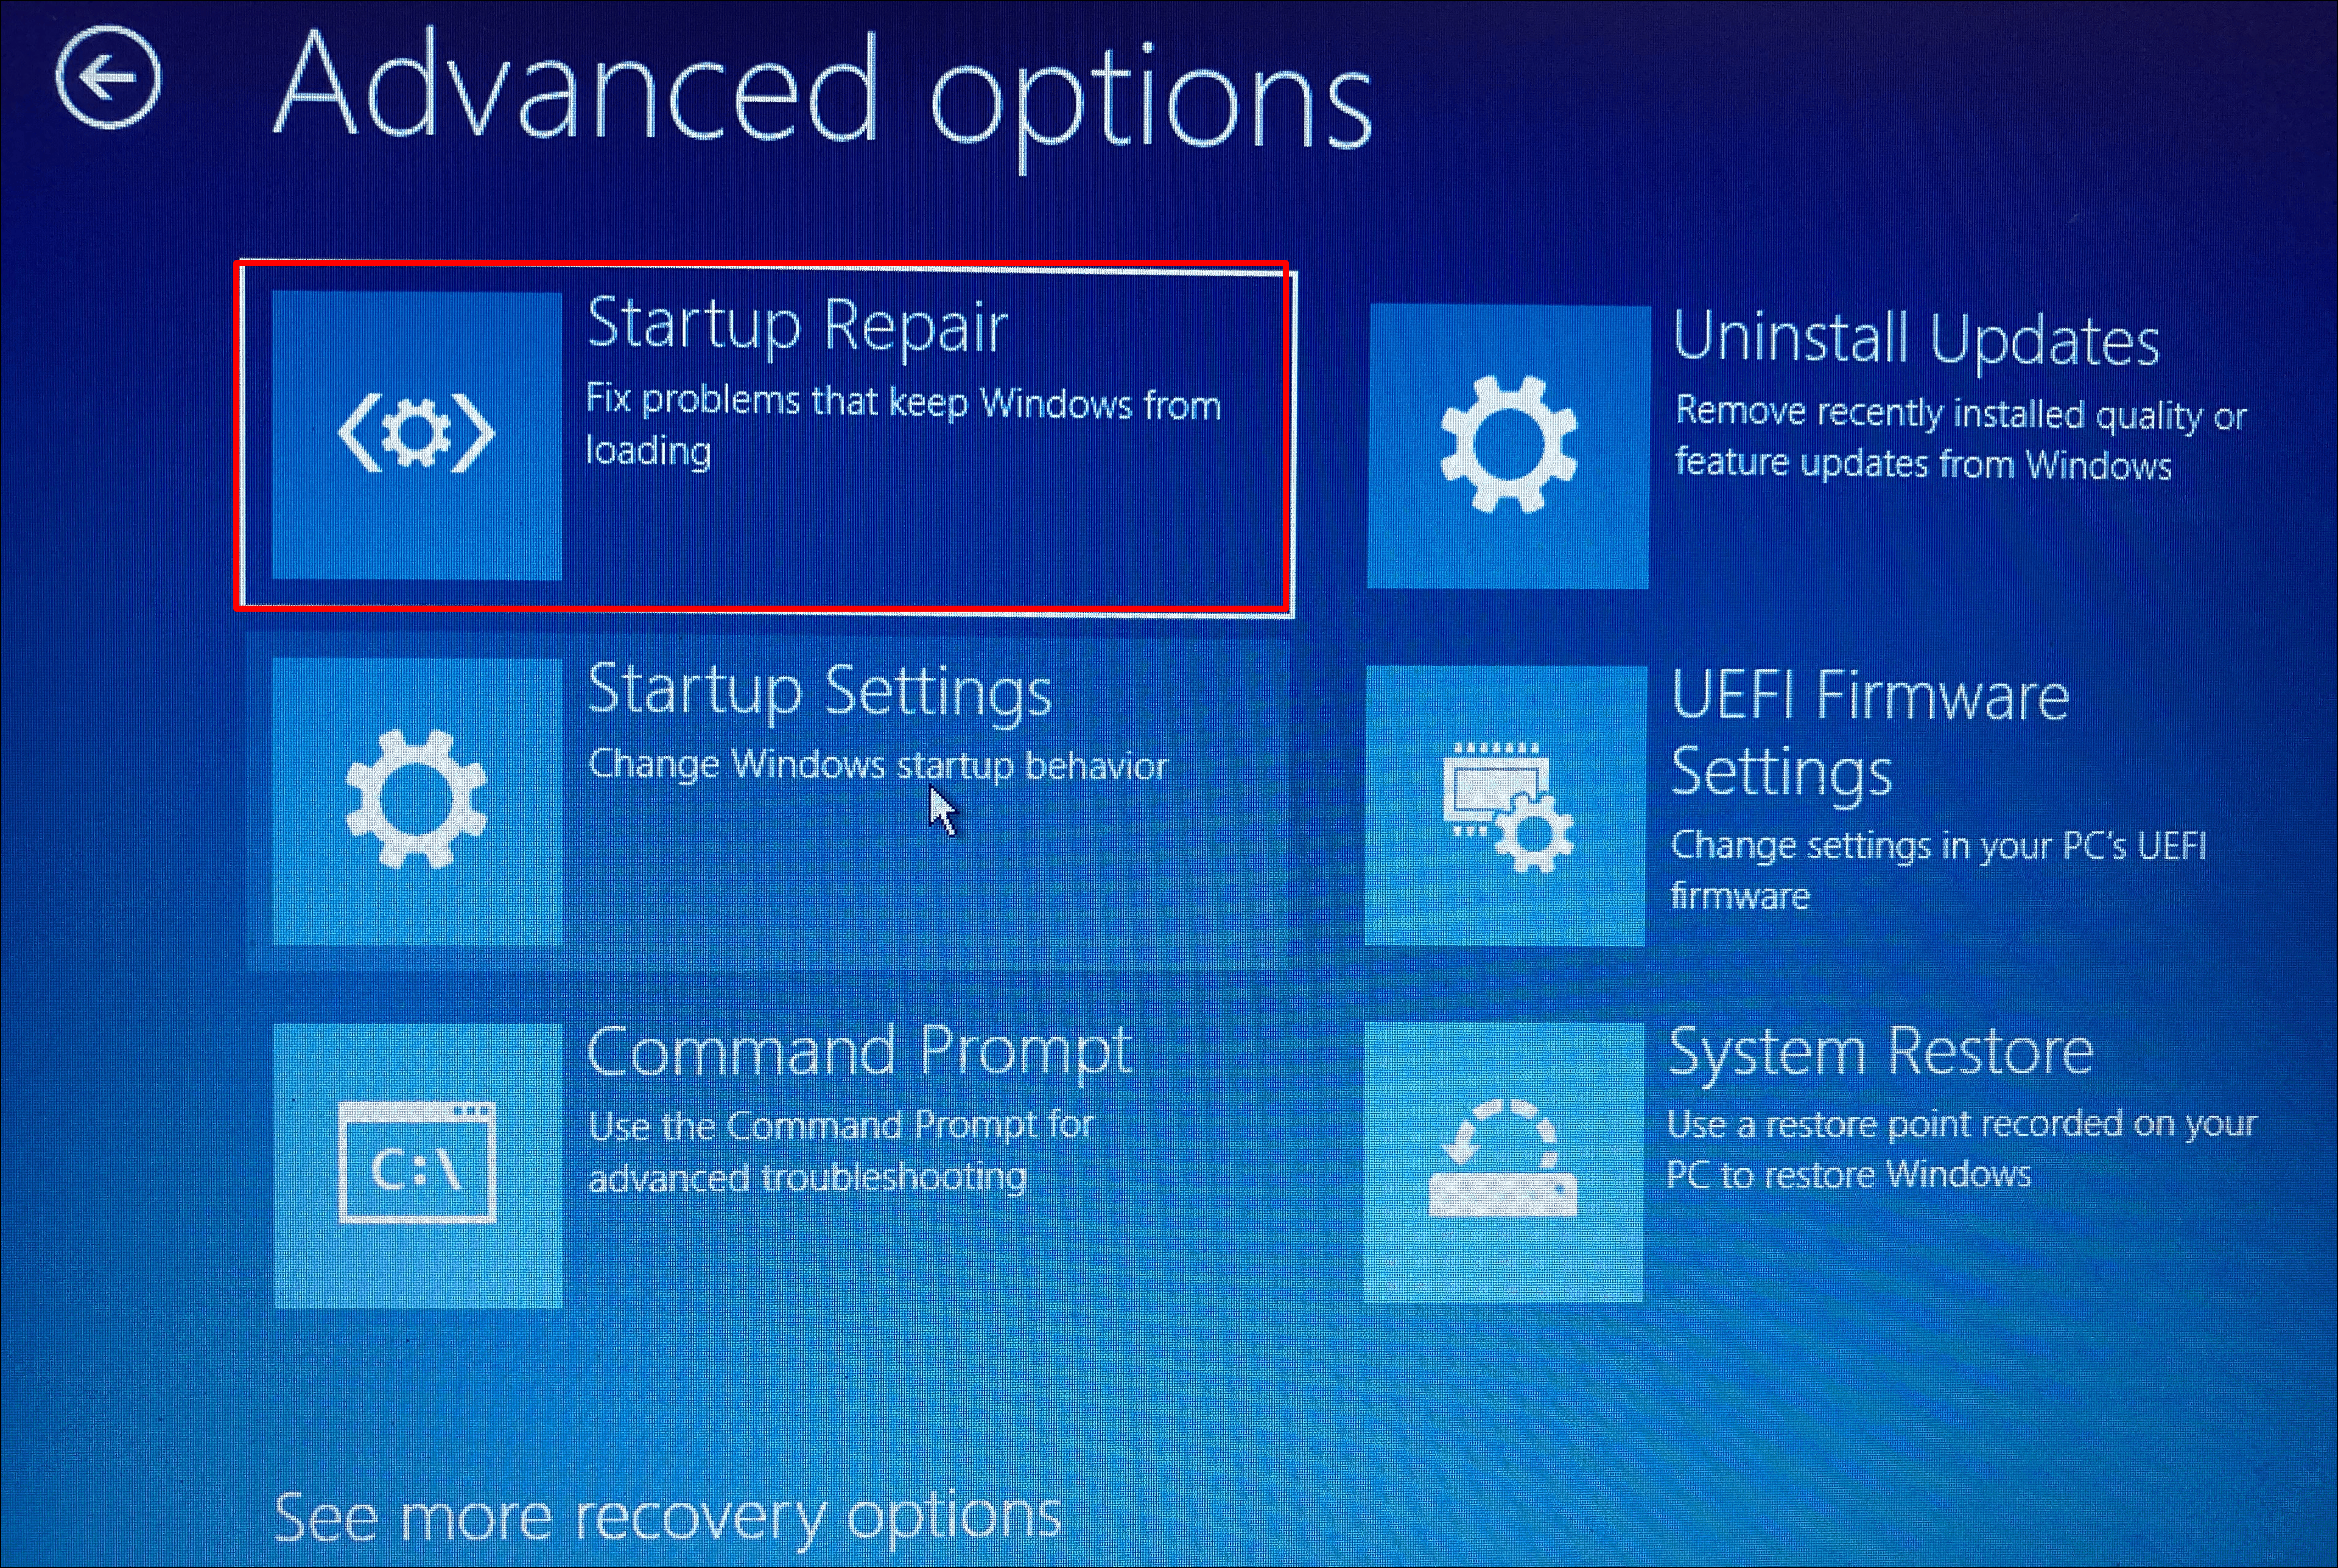
Windows will diagnose and attempt to repair any startup issues. This process may take several minutes.
8. Run System File Checker (SFC) Scan
The SFC scan can detect and repair corrupted system files that might be causing the error.
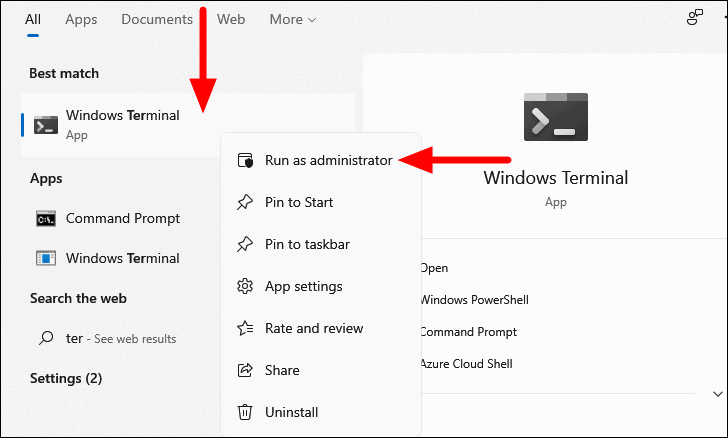
- Press
WINDOWS+Sand type Windows Terminal. Right-click it and select Run as administrator.
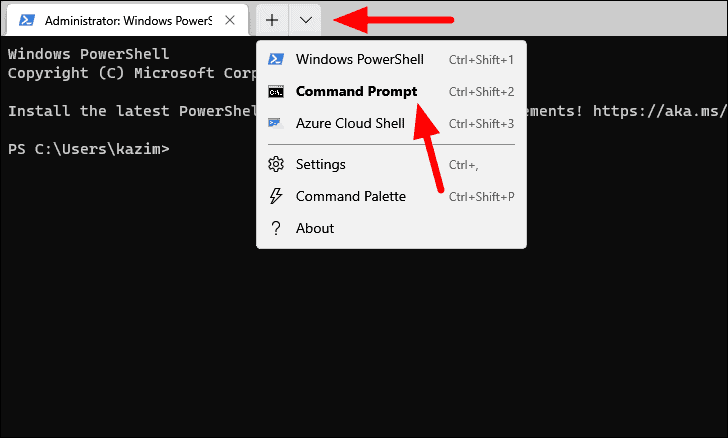
- In Windows Terminal, open Command Prompt by clicking the dropdown arrow and selecting Command Prompt.
Type the following command and press ENTER:
sfc /scannow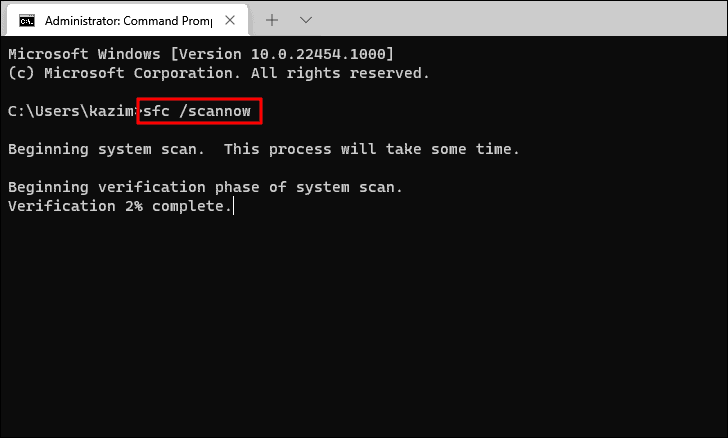
Wait for the scan to complete and follow any on-screen instructions if issues are found.
9. Clean Hardware Components
Overheating due to dust accumulation can cause hardware failures. Cleaning your system’s internal components can help.
- Shut down your computer and disconnect all cables.
- Open the case carefully.
- Use compressed air to remove dust from fans, graphics cards, RAM, and other components.
- Ensure all components are securely connected before reassembling.
After cleaning, power on your computer to see if the error has been resolved.
10. Check for Hardware Issues
If none of the software fixes work, the ‘Video TDR Failure’ error might be due to faulty hardware.
- Test your graphics card on another computer if possible.
- Inspect for any physical damage or overheating signs.
- Consider seeking professional help to diagnose and replace faulty components.
By following these methods, you should be able to resolve the ‘Video TDR Failure’ error on your Windows 11 system. Regular maintenance and updating drivers can help prevent such issues in the future.


