How to Fix Windows 11 Update Error Code 0xc00000f0
Sure fixes that'll eradicate this error that's preventing you from updating to Windows 11
Sure fixes that’ll eradicate this error that’s preventing you from updating to Windows 11
by Parth Sawhney
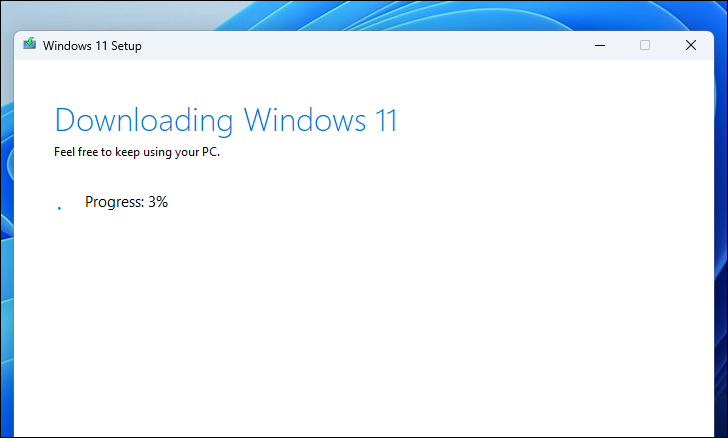
Encountering the error code 0xc00000f0 when upgrading from Windows 10 to Windows 11 can be frustrating, especially when the installation stalls at 79% or 99% for hours. This problem affects users running Windows 10 versions 21H2 and 22H2. Below are several methods to fix this error and upgrade your PC successfully.
1. Fresh install Windows 11
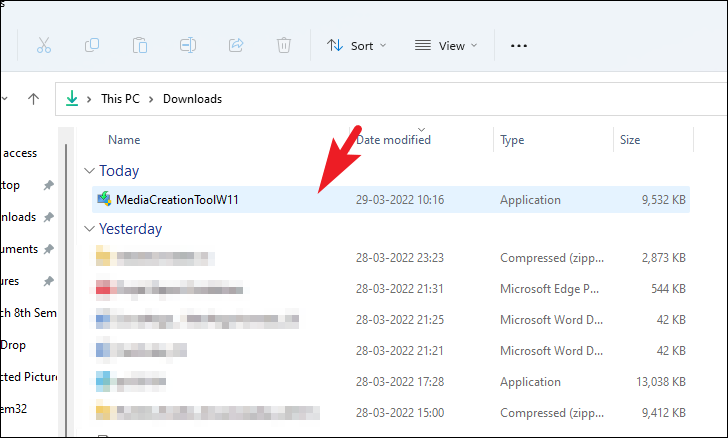
If the usual troubleshooting steps haven’t worked, performing a fresh installation of Windows 11 might resolve the error. Creating a bootable media using the Media Creation Tool allows you to install Windows 11 from scratch.
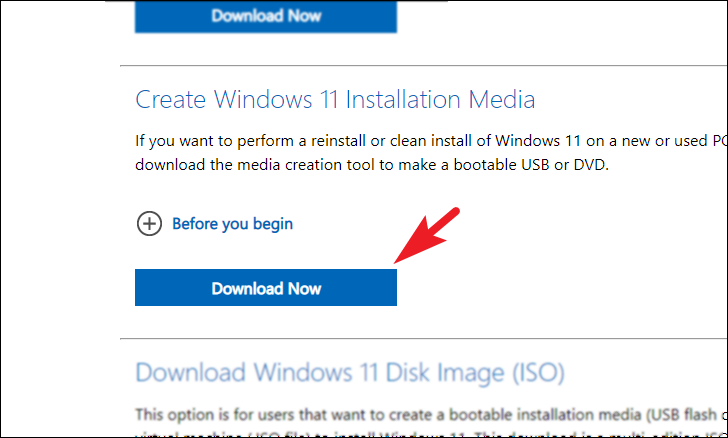
Go to the Windows 11 Download page. Under the ‘Create Windows 11 Installation Media’ section, click on the ‘Download Now’ button to download the Media Creation Tool.
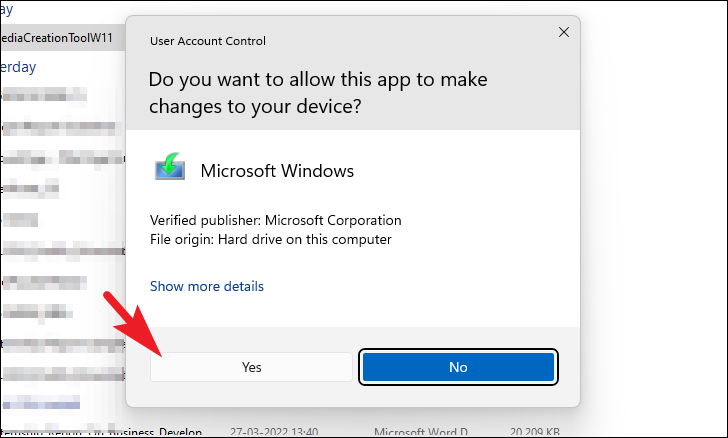
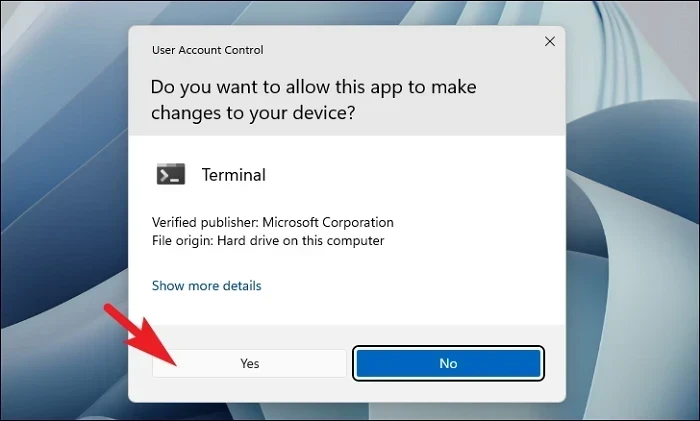
A User Account Control (UAC) prompt will appear. If you’re not logged in as an administrator, enter the admin credentials. Otherwise, click ‘Yes’ to proceed.
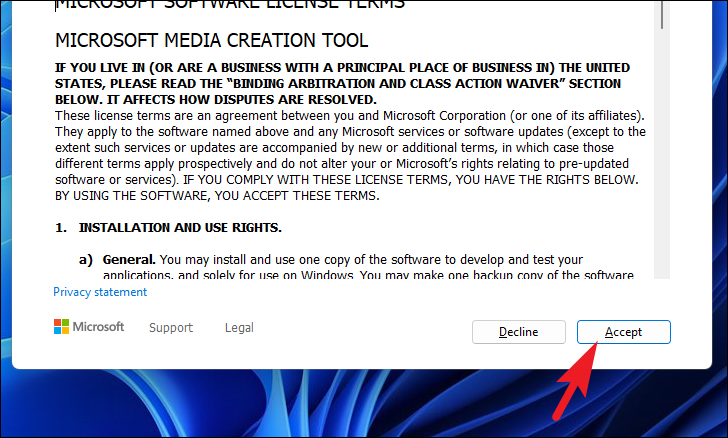
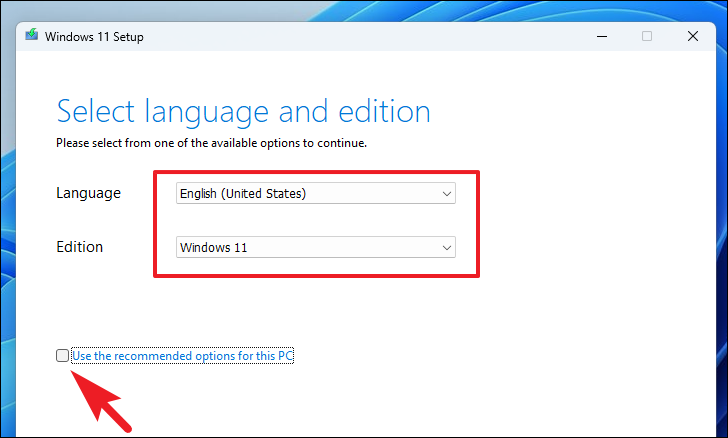
The tool will automatically detect the appropriate language and edition for your PC. Ensure the ‘Use the recommended options for this PC’ checkbox is selected, then click ‘Next’.
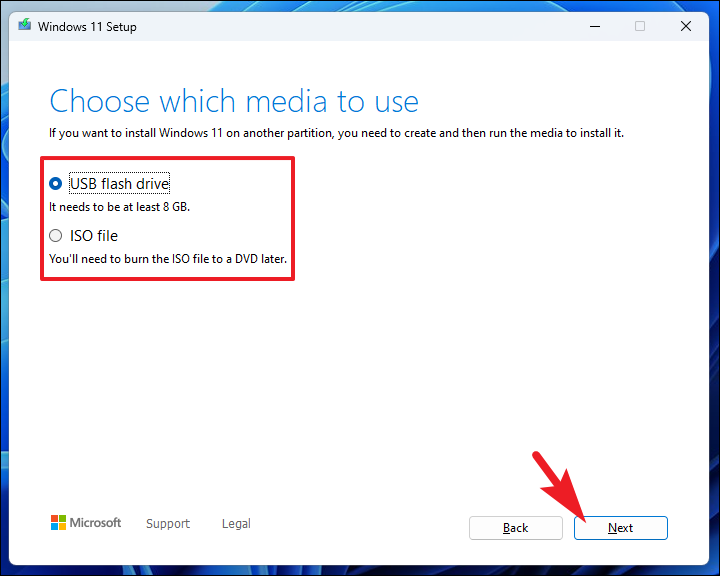
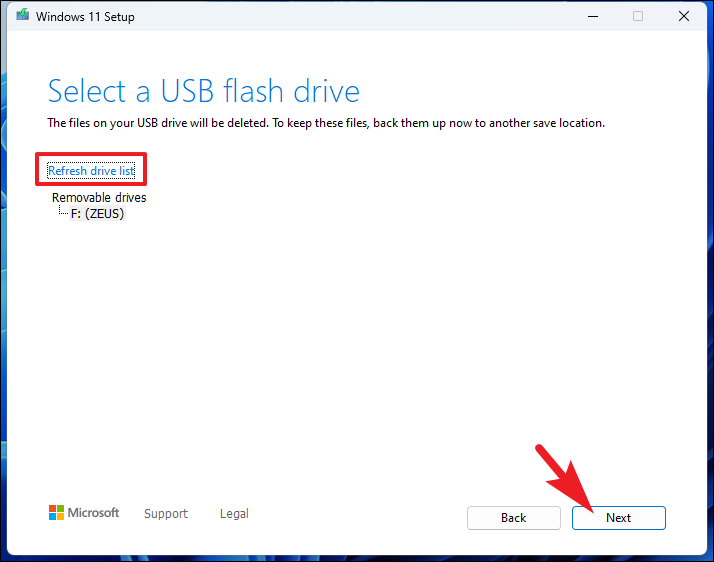
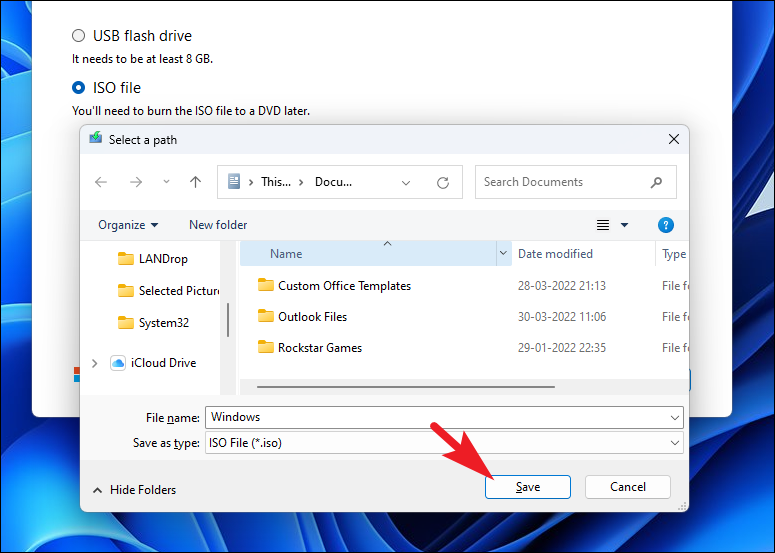
Choose ‘USB flash drive’ if you have a USB drive to create a bootable media. If you prefer to create a DVD later, select ‘ISO file’. Click ‘Next’ to continue.
Once the download or creation of the bootable media is complete, proceed to install Windows 11 by booting from the USB drive or DVD and following the on-screen instructions.
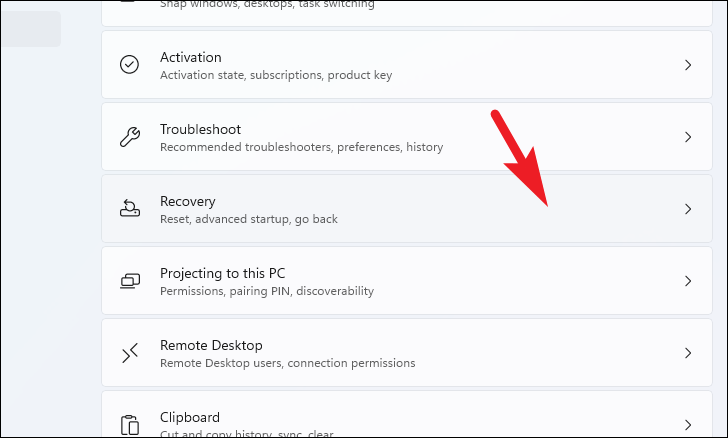
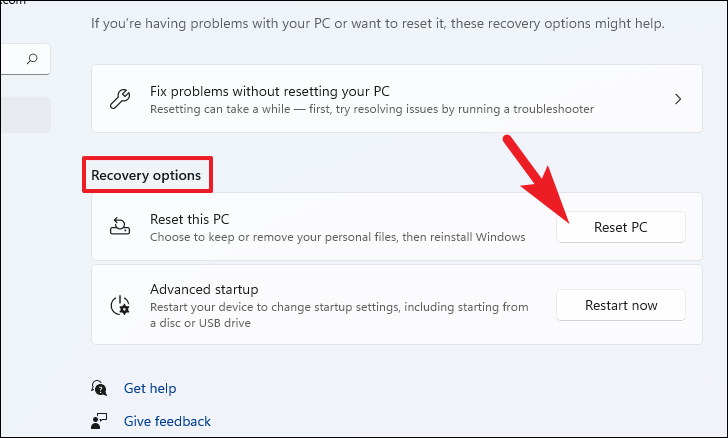
2. Reset your PC
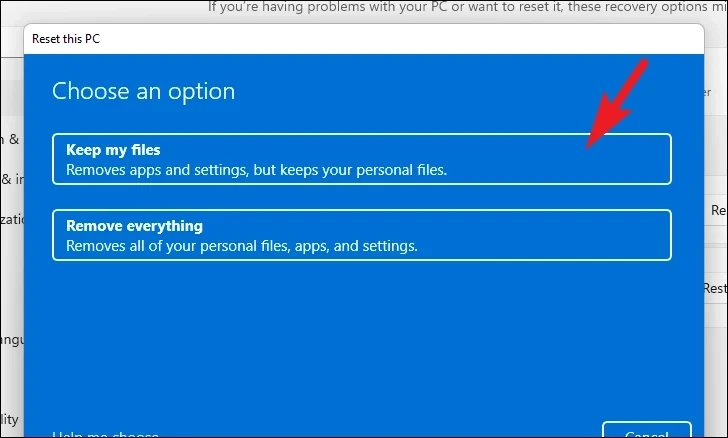
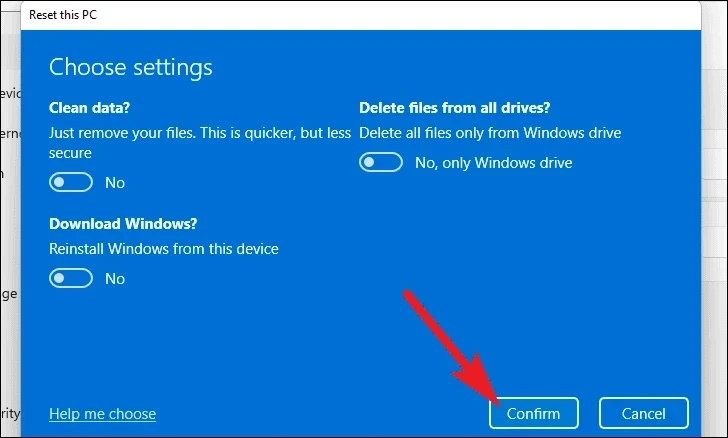
If the error persists, resetting your PC may help by reinstalling Windows without affecting your personal files. This can fix missing or damaged system files related to the upgrade.
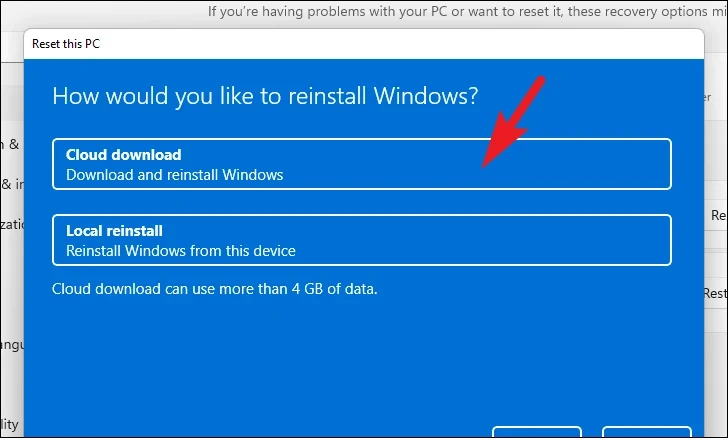
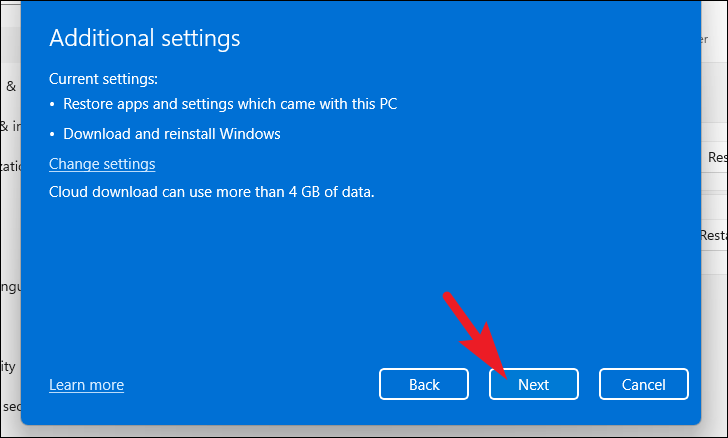
Choose ‘Cloud download’ to obtain a fresh copy of Windows from the internet. Note that this requires an active internet connection and will download around 4 GB of data.
Note: ‘Cloud download’ requires an internet connection and may use over 4 GB of data.
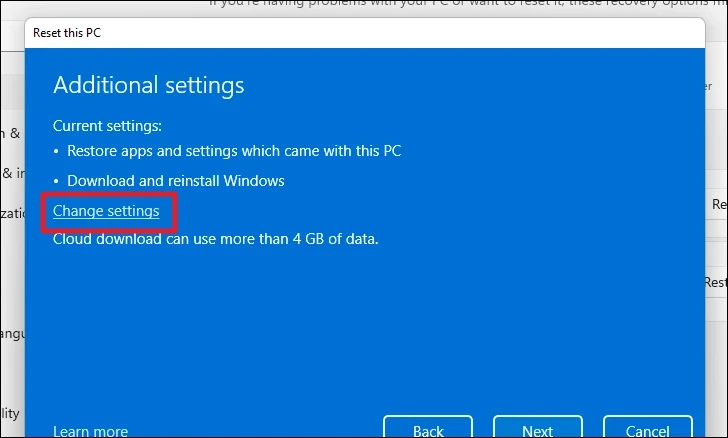
In the settings, you can choose whether to restore preinstalled apps and switch between ‘Cloud download’ and ‘Local reinstall’. After making any changes, click ‘Confirm’.
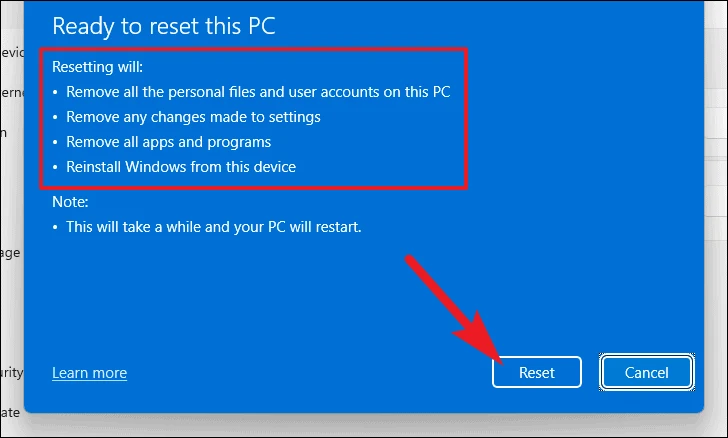
Review the information on what will happen during the reset. When ready, click ‘Reset’ to begin the process. Your computer will restart several times during the reset.
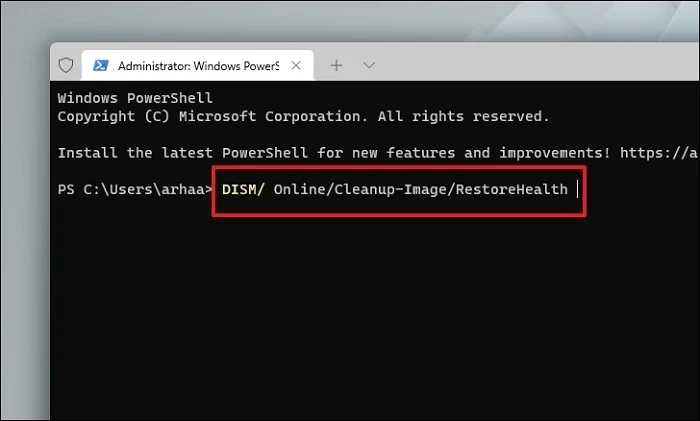
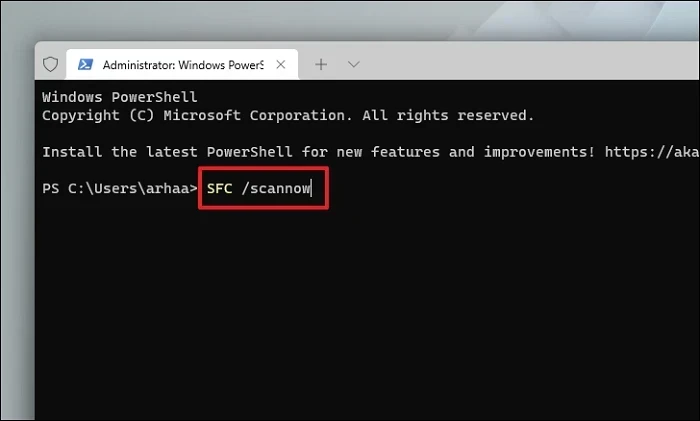
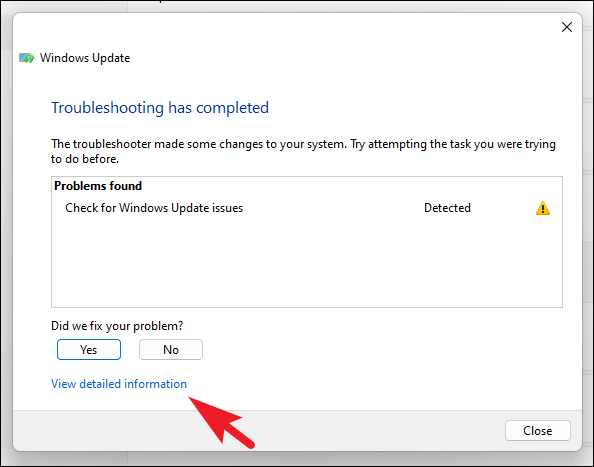
3. Run SFC and DISM
Corrupted system files can cause upgrade errors. Running the System File Checker (SFC) and Deployment Image Servicing and Management (DISM) tools can repair these files.
The troubleshooter will scan for issues and attempt to fix them. Once completed, you can view more details by clicking ‘View detailed information’. Try updating your system again to see if the error has been resolved.
By following these methods, you should be able to resolve the error code 0xc00000f0 and successfully upgrade to Windows 11.