
Windows 11 introduced significant design changes, including a centered taskbar that houses the Start Menu and quick-access icons. While these updates aim to enhance the user experience, some familiar features, like accessing the Task Manager via a right-click on the taskbar, are not readily available to all users. With the recent “Moment 1” update for Windows 11 22H2, Microsoft added the ability to open the Task Manager by simply right-clicking on the taskbar. If this option isn’t appearing for you, there are ways to enable it manually.
Enable Task Manager Option Using Registry Editor
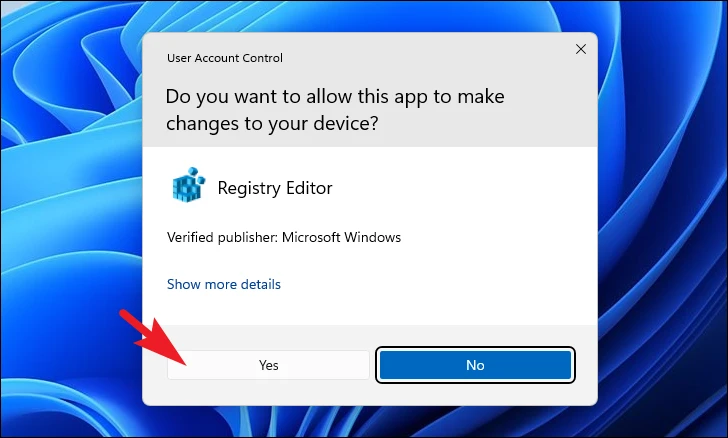
If you prefer not to use third-party tools, you can modify the Windows Registry to enable the Task Manager option on the taskbar context menu. Be sure to follow these steps carefully to avoid any system issues.
Registry Editor in the search bar. Click on the ‘Registry Editor’ app from the search results to launch it.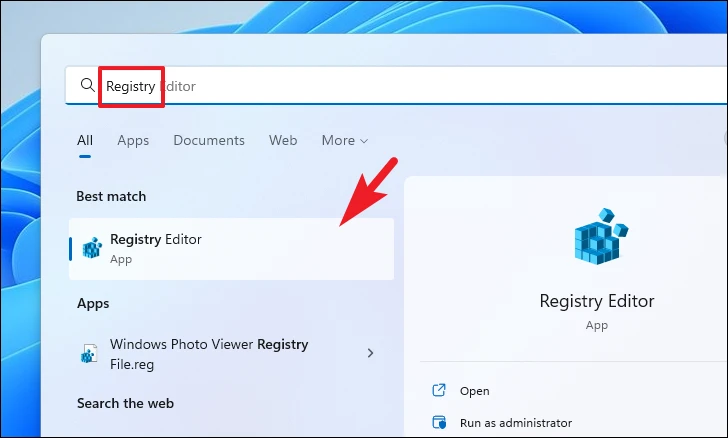
HKLM\SYSTEM\CurrentControlSet\Control\FeatureManagement\Overrides\4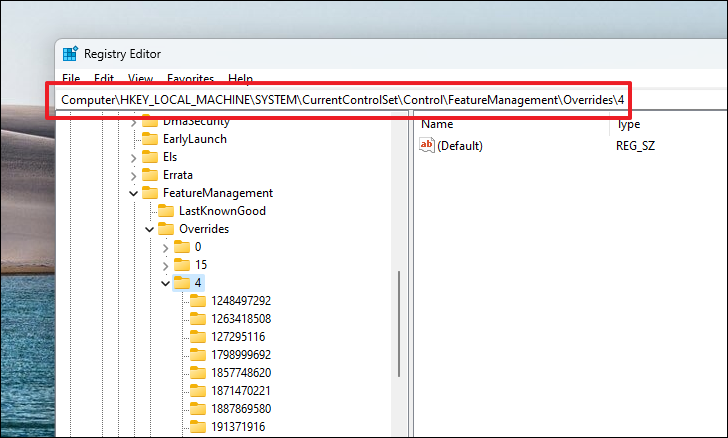
4 key in the left pane, select New, then click on Key. Name the new key 1887869580.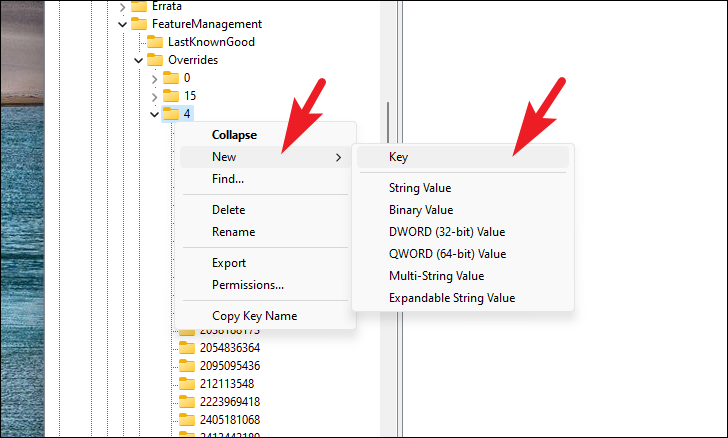
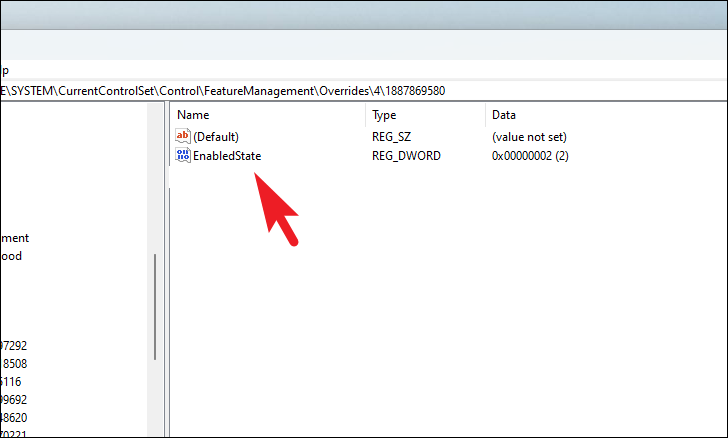
New, and select DWORD (32-bit) Value. Name this value EnabledState and press Enter.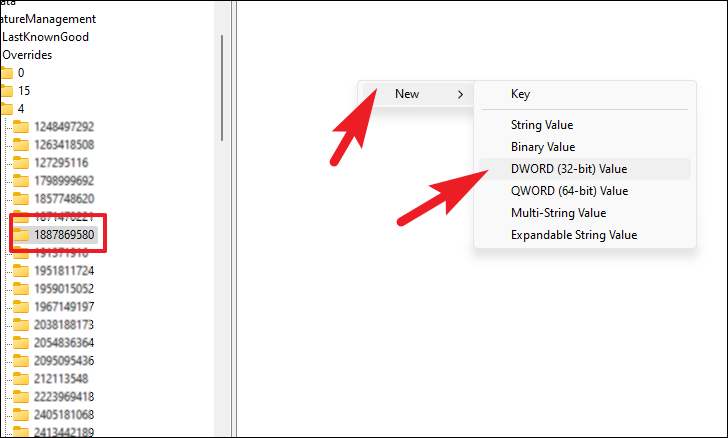
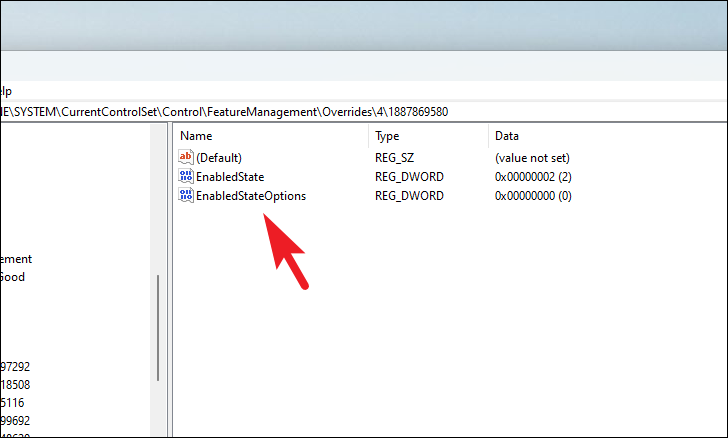
New, and choose DWORD (32-bit) Value. Name this value EnabledStateOptions and press Enter.
After your system restarts, right-click on the taskbar. You should now see the ‘Task Manager’ option available in the context menu.

Enable Task Manager Option Using Vive Tool
Alternatively, you can use the open-source Vive Tool to enable the Task Manager option on the taskbar. This method involves downloading the tool and running a command in the Command Prompt.
.zip file to download it.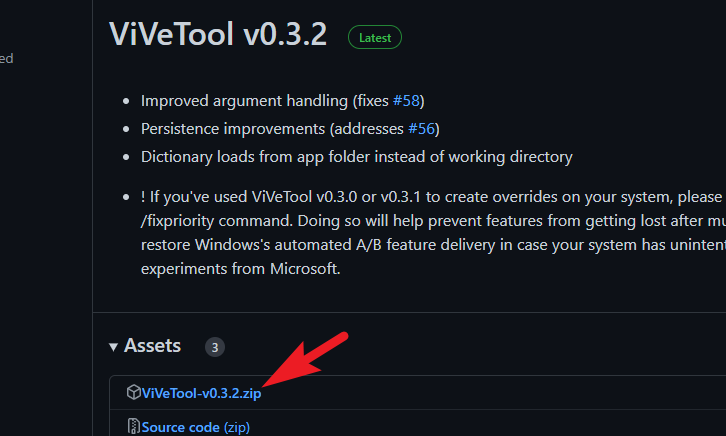
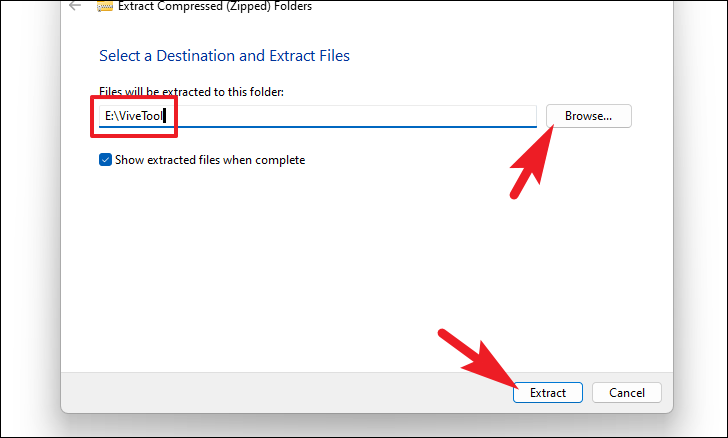
.zip file, and select Extract All.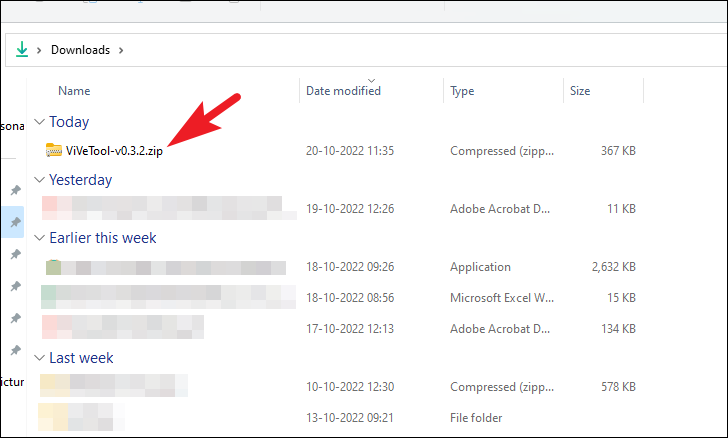
Terminal, right-click on the ‘Terminal’ app, and select Run as administrator.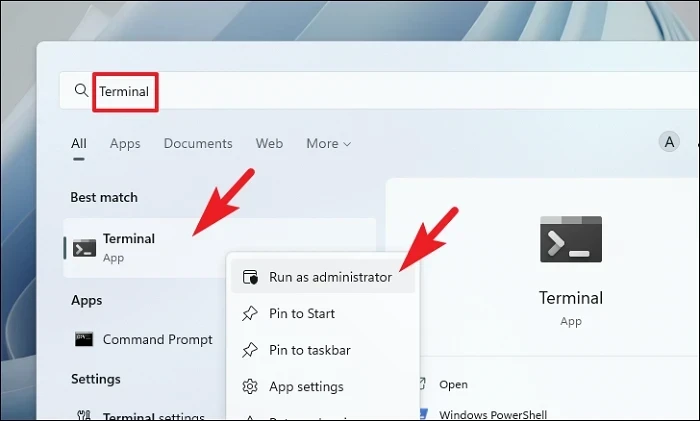
Command Prompt to open a new tab with Command Prompt.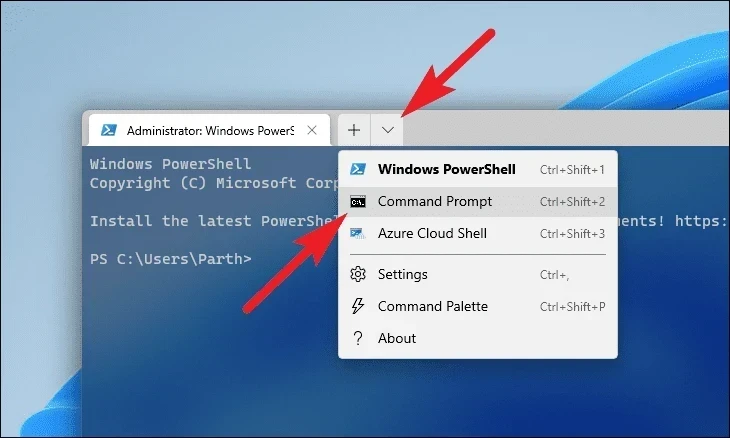
Note: Replace <extracted folder path> with the actual path you copied earlier.
cd <extracted folder path>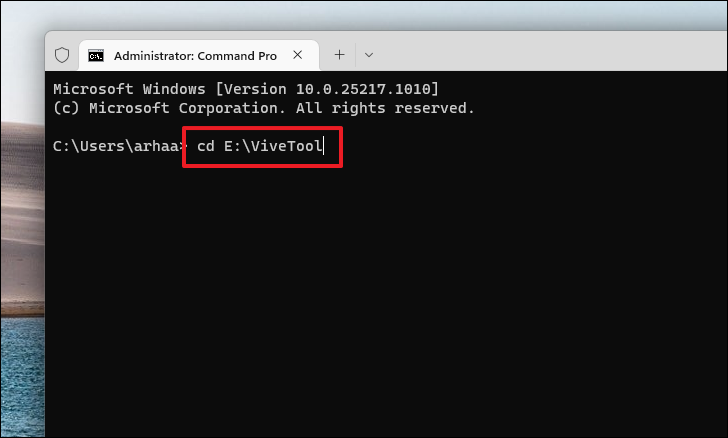
vivetool /enable /id:36860984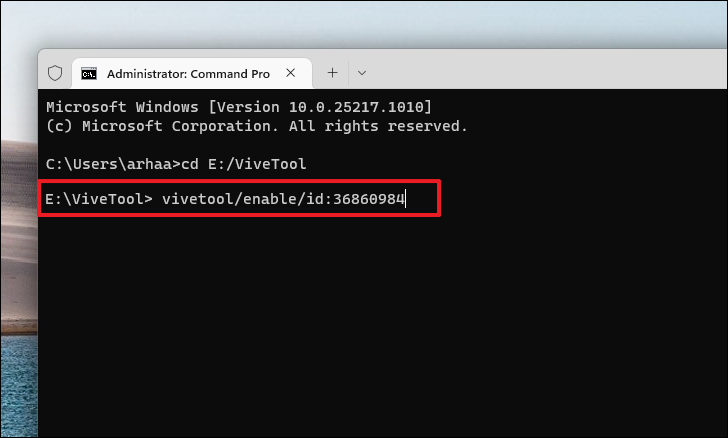
After restarting, right-click on the taskbar to see the newly added ‘Task Manager’ option in the context menu.
Verify You Have the Moment 1 Update Installed
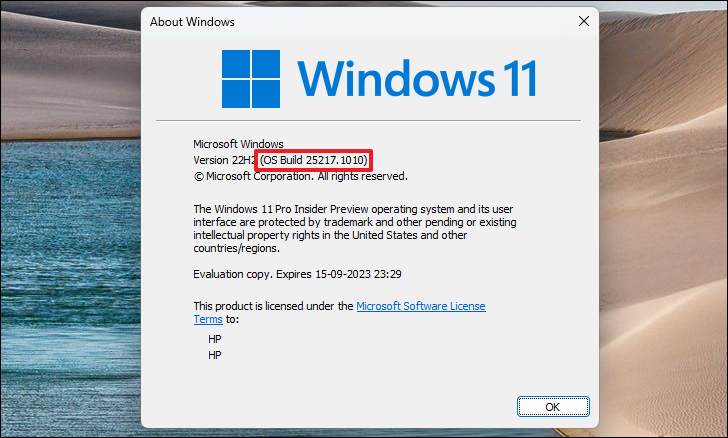
Before attempting these methods, it’s crucial to ensure your system is updated to the Moment 1 update for Windows 11 22H2.
winver in the search bar. Press Enter or click on the ‘winver’ run command to open the About Windows window.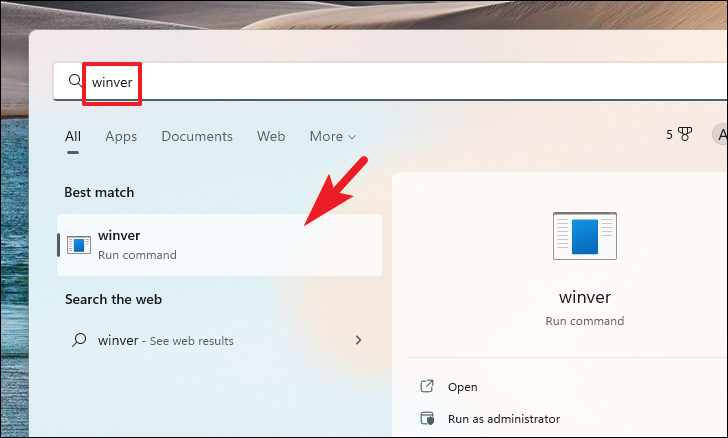
By following these methods, you can manually enable the convenient Task Manager option in the taskbar’s right-click context menu in Windows 11. This feature allows for quicker access to the Task Manager, streamlining your workflow.


