Windows 11 provides a variety of ways to control and customize notifications, ensuring that you receive only the alerts you need. By mastering these settings, you can minimize distractions and focus on what’s important.
Use Focus Assist to Silence Notifications
Focus Assist is a feature that allows you to suppress notifications during specific times or activities, such as presentations, gaming, or working hours. It helps you stay concentrated by limiting interruptions.
Enable Focus Assist from Action Center
You can quickly turn on Focus Assist using the Action Center:
- Click on the group of icons (Network, Sound, and Battery) located at the far right of the taskbar next to the time and date, or press
Windows+Ato open the Action Center. - In the Action Center, find and click the moon icon representing ‘Focus assist’.
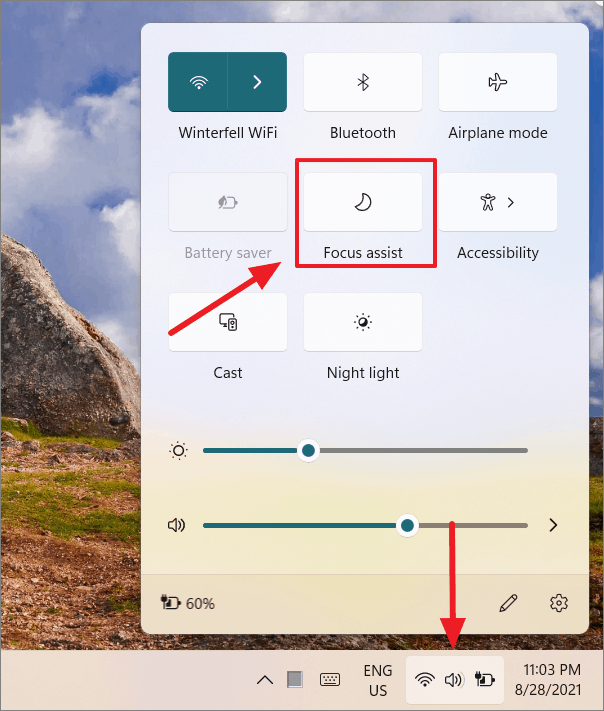
- Clicking once activates ‘Priority only’ mode, allowing only notifications from your prioritized list.
- Clicking again switches to ‘Alarms only’ mode, hiding all notifications except alarms.
- Clicking a third time turns off Focus Assist.

Configure Focus Assist Settings
For more control over Focus Assist:
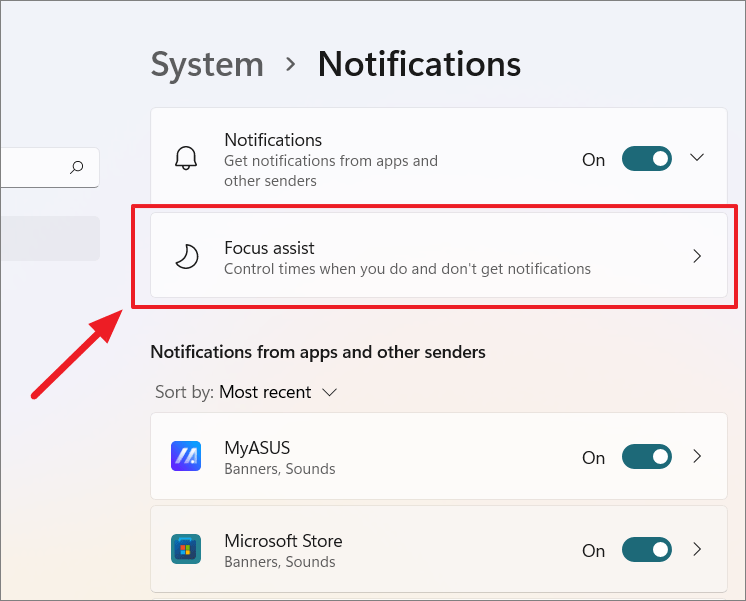
- Open Settings by pressing
Windows+Iand select System, then click on Notifications. - In the Notifications settings, click on Focus assist.
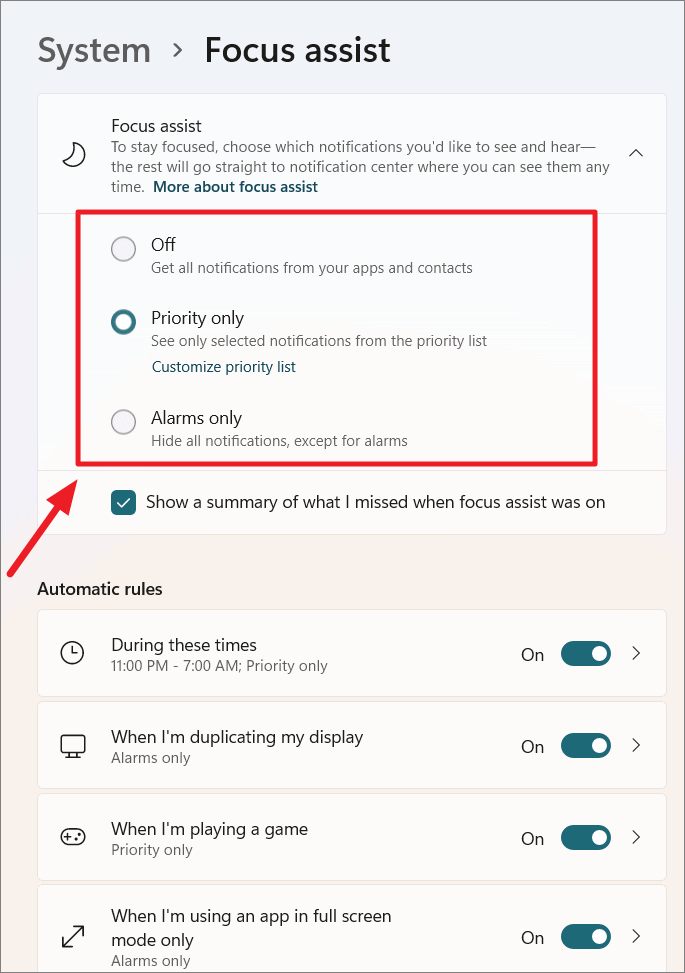
- Choose between Priority only or Alarms only modes.
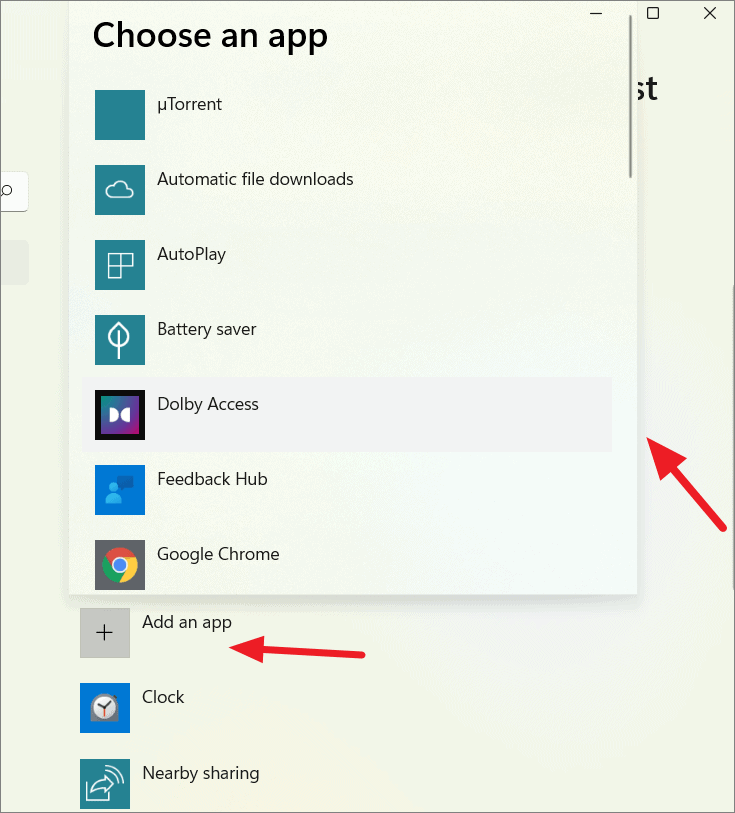
- Click on Customize priority list under ‘Priority only’ to specify which notifications are allowed.
- Add or remove apps and contacts to your priority list as needed.
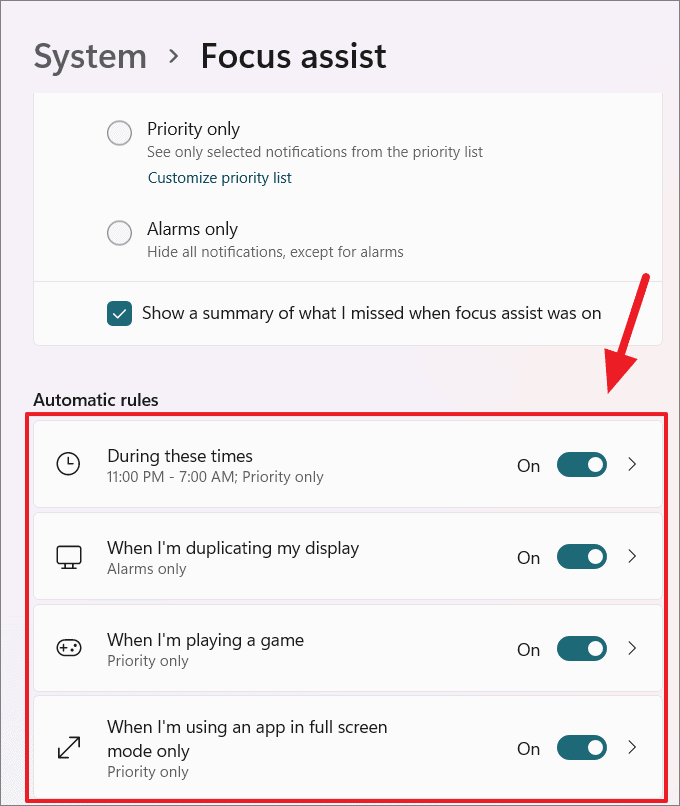
Set Automatic Rules for Focus Assist
Automate Focus Assist based on your activities:
- In the Focus assist settings, scroll down to the Automatic rules section.
- Toggle on options like During these times, When I’m duplicating my display, or When I’m playing a game.
- Click on an option to customize it further, such as setting specific times or choosing the focus level.
Turn Off Notifications for Specific Apps
If particular apps are causing distractions, you can disable their notifications while keeping others enabled.
Disable Notifications via Settings
- Open Settings by pressing
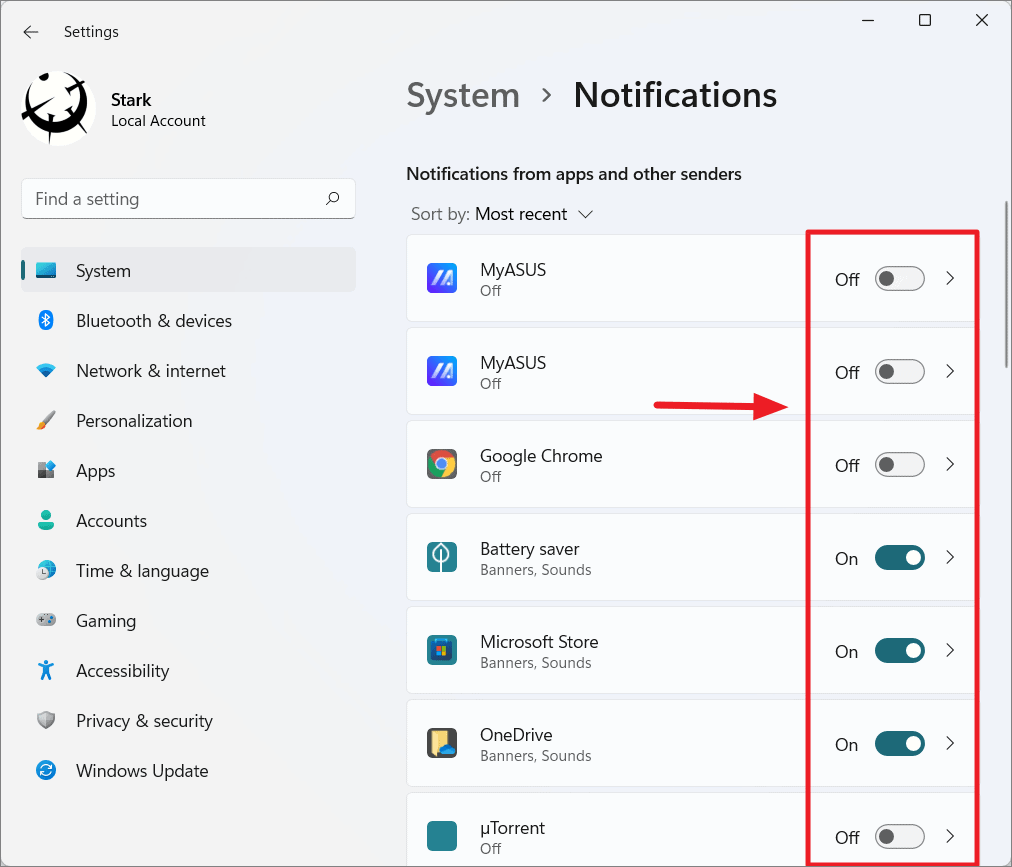
Windows+Iand select System, then click on Notifications. - Scroll down to the Notifications from apps and other senders section.
- Find the app for which you want to disable notifications and toggle it off.
Disable Notifications from Notification Center
Alternatively, turn off notifications directly from a notification:
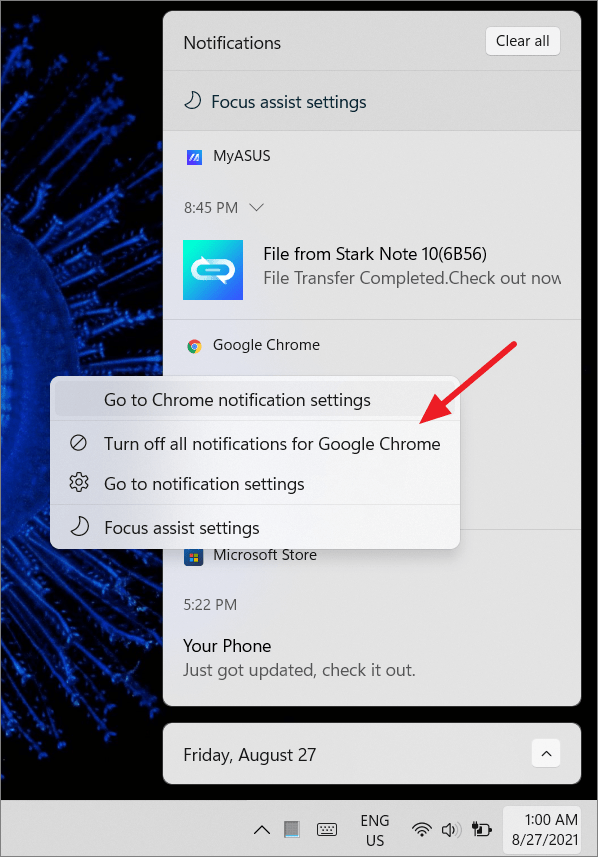
- Click on the Date and Time icon at the far right of the taskbar or press
Windows+Nto open the Notification Center. - Find a notification from the app you wish to disable.
- Click the three-dot menu on the notification and select Turn off all notifications for [App Name].
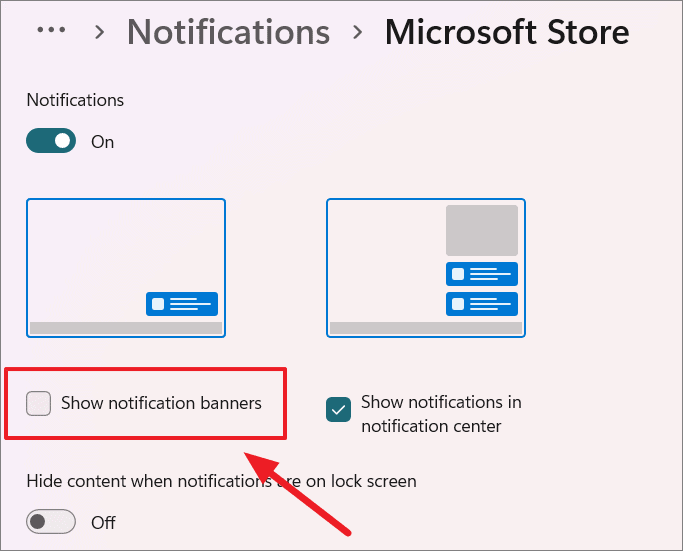
Manage Notification Banners
Notification banners appear briefly in the lower-right corner of your screen. If you prefer to check notifications at your convenience without interruptions, you can disable these banners.
- Open Settings by pressing
Windows+I, select System, and click on Notifications. - Under Notifications from apps and other senders, click on the app whose banners you want to disable.
- Uncheck the box labeled Show notification banners.
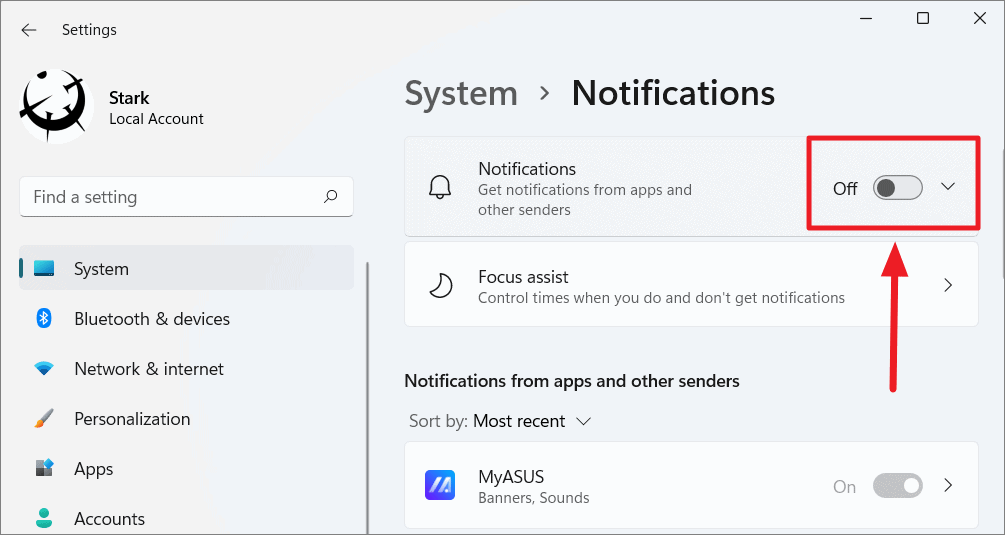
Turn Off All Notifications
To eliminate all notifications and minimize distractions:
- Open Settings by pressing
Windows+I, select System, and click on Notifications. - Toggle off the switch next to Notifications at the top of the page.
Customize Lock Screen Notifications
For privacy, you may want to hide notification content on your lock screen.
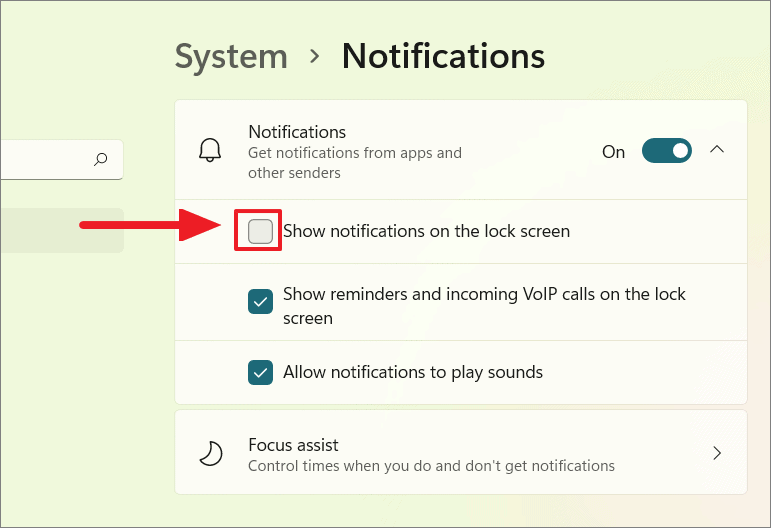
Disable All Lock Screen Notifications
- Open Settings, select System, and click on Notifications.
- Expand the Notifications section by clicking the dropdown arrow.
- Uncheck the box labeled Show notifications on the lock screen.
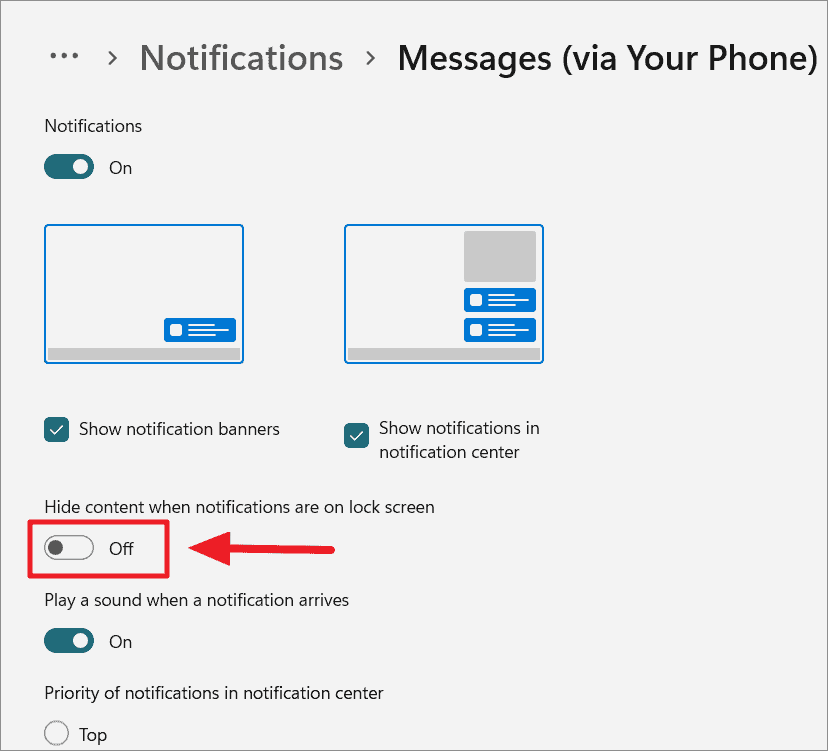
Disable Lock Screen Notifications for Specific Apps
- In the Notifications settings, scroll to Notifications from apps and other senders.
- Click on the app for which you want to hide lock screen notifications.
- Toggle on Hide content when notifications are on lock screen.
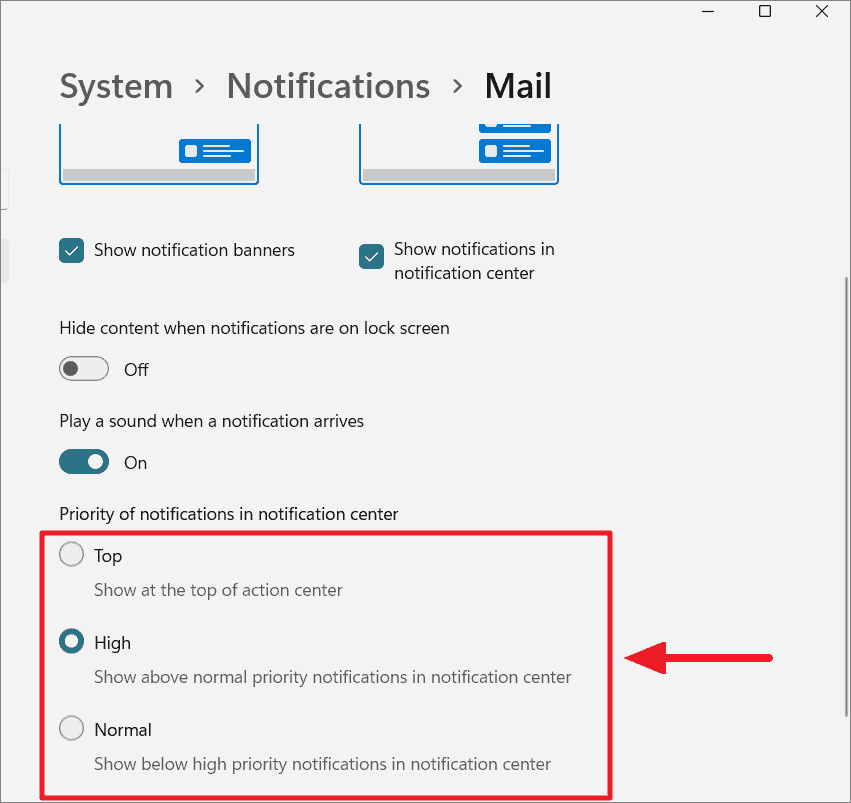
Adjust Notification Priority
Ensure that important notifications appear at the top of your Notification Center by setting their priority.
- In Settings, go to System > Notifications.
- Under Notifications from apps and other senders, click on the desired app.
- Under Priority of notifications in notification center, select Top, High, or Normal.
Disable Suggested Notifications
If you prefer not to receive tips or suggestions from Windows, you can turn off these notifications.
- Open Settings, select System, and click on Notifications.
- Scroll to the bottom and uncheck the boxes next to Offer suggestions on how I can set up my device and Get tips and suggestions when I use Windows.

Change Notification Display Duration
By default, notifications disappear after 5 seconds. You can adjust this duration to give yourself more time to read them.
- Open Settings and select Accessibility, then click on Visual effects.
- Click the dropdown next to Dismiss notifications after this amount of time and select your preferred duration.

Turn Off Notification Sounds
To mute the sounds that accompany notifications:
- Open Settings, select System, and click on Notifications.
- Expand the Notifications section by clicking the dropdown arrow.
- Uncheck the box labeled Allow notifications to play sounds.

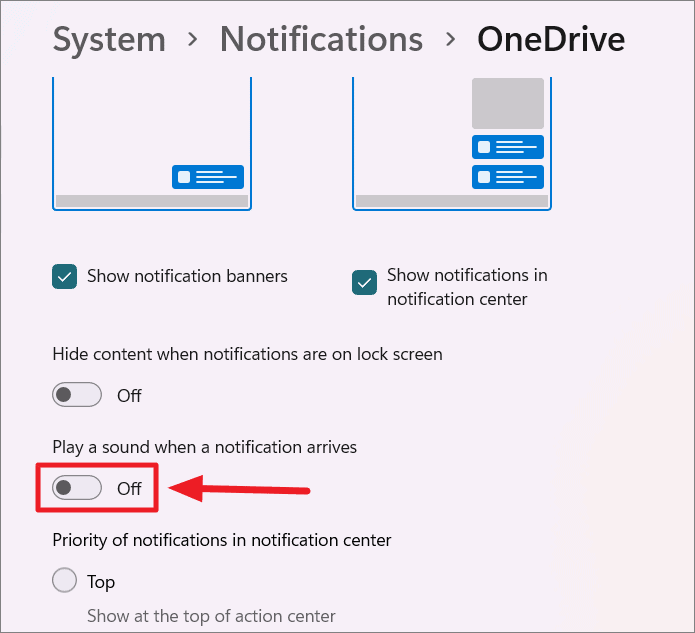
Mute Notification Sounds for Specific Apps
- Under Notifications from apps and other senders, click on the app you wish to mute.
- Toggle off Play a sound when a notification arrives.
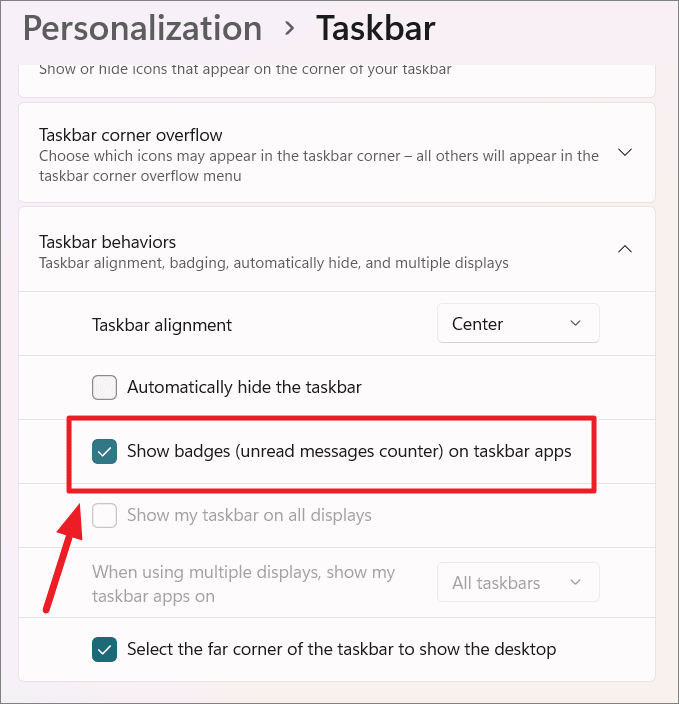
Show or Hide Notification Badges on Taskbar Icons
Notification badges show the number of unread alerts on app icons in the taskbar.
- Open Settings and select Personalization, then click on Taskbar.
- Click on Taskbar behaviors to expand the section.
- Check or uncheck Show badges (unread messages counter) on taskbar apps as desired.
By customizing your notification settings in Windows 11, you can create a more focused and personalized computing experience that suits your needs.


