
If you are a videographer or edit videos, you know the importance of merging videos. For any major event, small videos are shot individually and merged to form the final one.
It is fairly easy to merge videos in Windows 10. Some users prefer third-party applications, but Windows’ own ‘Photos’ app does it seamlessly and easily. We will guide you through the whole process.
Merging Videos using Windows Photos App
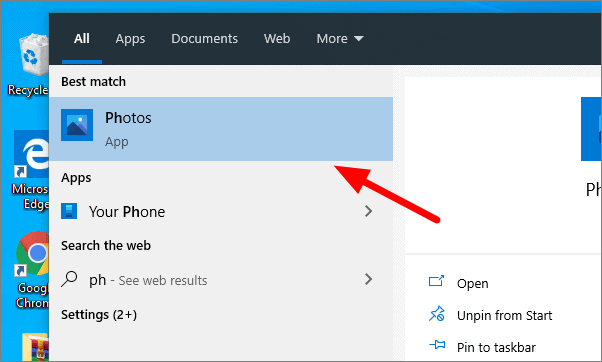
Search for the ‘Photos’ app in the Start Menu and then click on it.
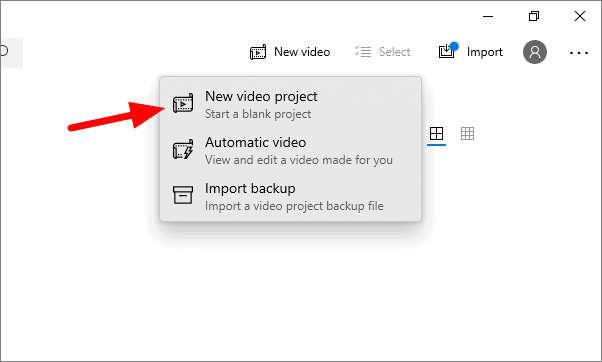
Click on ‘New video’ at the top of the screen.

From the drop-down menu, select ‘New video project’.
You can now set a name for your video. After entering a name, click ‘OK’.

You can now start working on your new video. To merge videos, click on ‘Add’ and select the appropriate option. If the videos you want to merge are on your computer, click on ‘From this PC’.

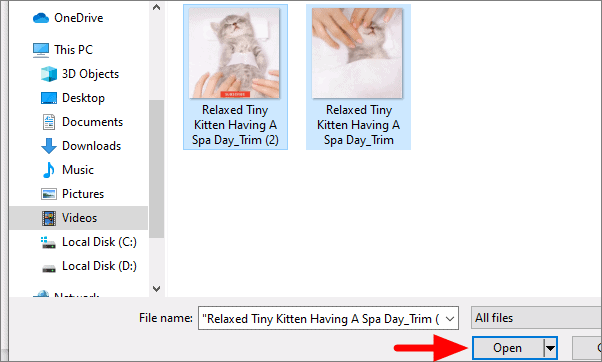
On the popup window, locate your video and select them. To select mutliple videos at once, hold the CTRL key and select all the videos you want to merge. Click on ‘Open’ after you select the videos.
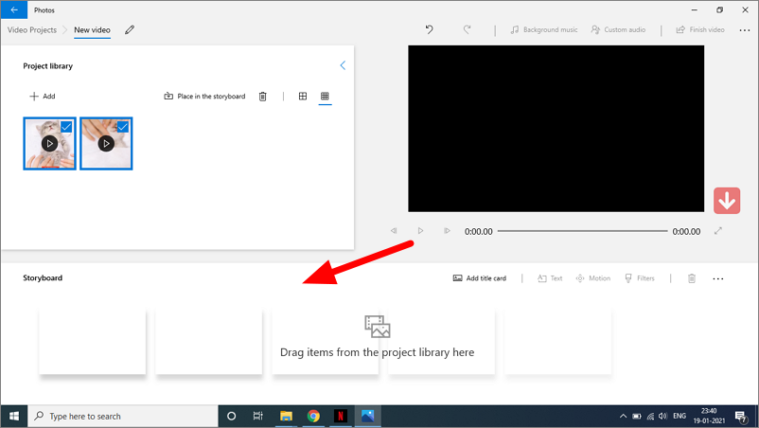
The videos you have selected are now visible on the app. Drag the videos from ‘Project library’ and drop them under the ‘Storyboard’ section. To drag the videos, hold the left mouse button and move them. Release the left mouse button when you have moved the videos to the destination.
Now click on ‘Finish video’ at the top right corner of the screen.

Select the video quality by clicking on the drop-down menu.
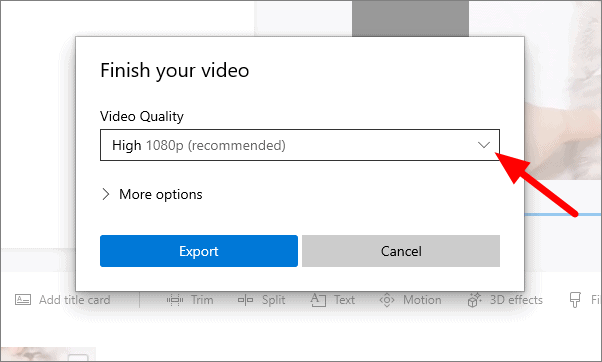
The photos app only gives you three options for video quality. Select the appropriate option and click on ‘Export’.

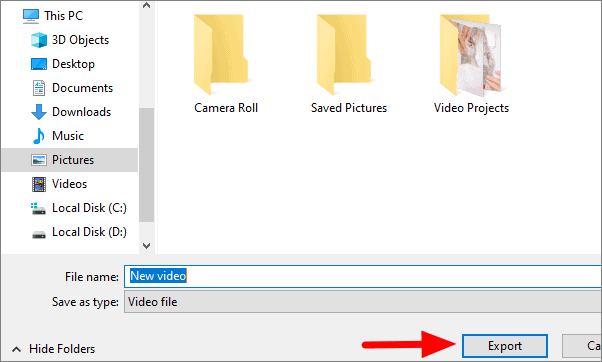
Chose the location where you want to save the video and click on ‘Export’.
The next screen will display the status.
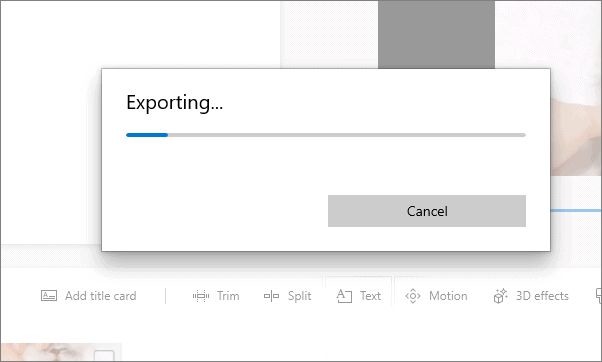
Once the export is finished, you can play the merged video. You can similarly merge as many videos as you want using the Windows Photos app.


