Having a clean and organized desktop can enhance your productivity and provide a clutter-free workspace. One way to achieve this on Windows 11 is by removing desktop icons and accessing them elsewhere. However, the Recycle Bin icon is a staple on the desktop and cannot be pinned directly to the taskbar by default. This guide will show you how to pin the Recycle Bin to the taskbar, keeping your desktop neat while still having quick access to it.
Creating a Recycle Bin shortcut
To pin the Recycle Bin to the taskbar, you'll first need to create a desktop shortcut for it.
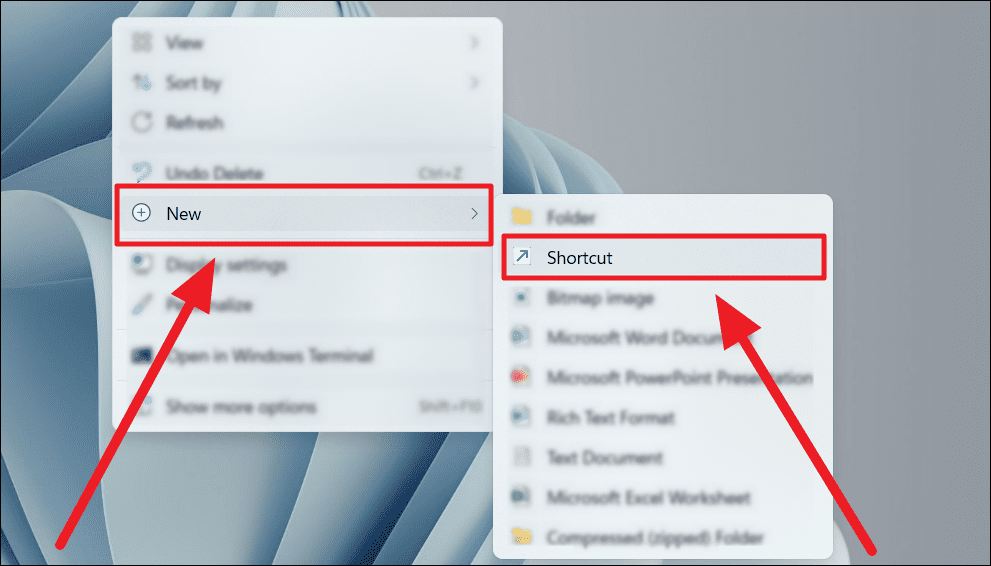
Step 1: Right-click on an empty space on your desktop, hover over New, and select Shortcut from the submenu.
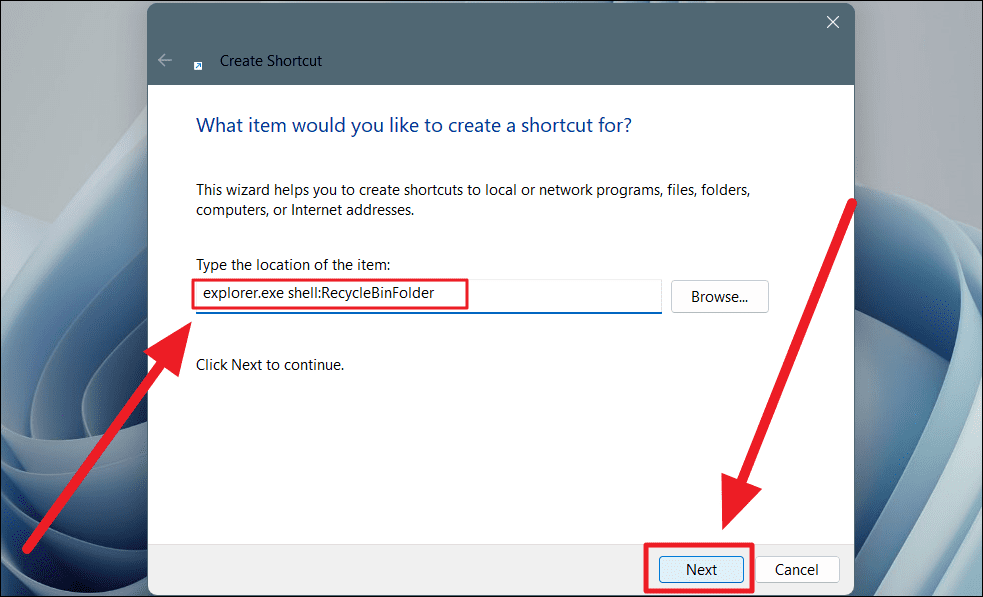
Step 2: In the 'Create Shortcut' window that appears, type or copy-paste the following location into the 'Type the location of the item' field:
explorer.exe shell:RecycleBinFolderThen, click on the Next button.
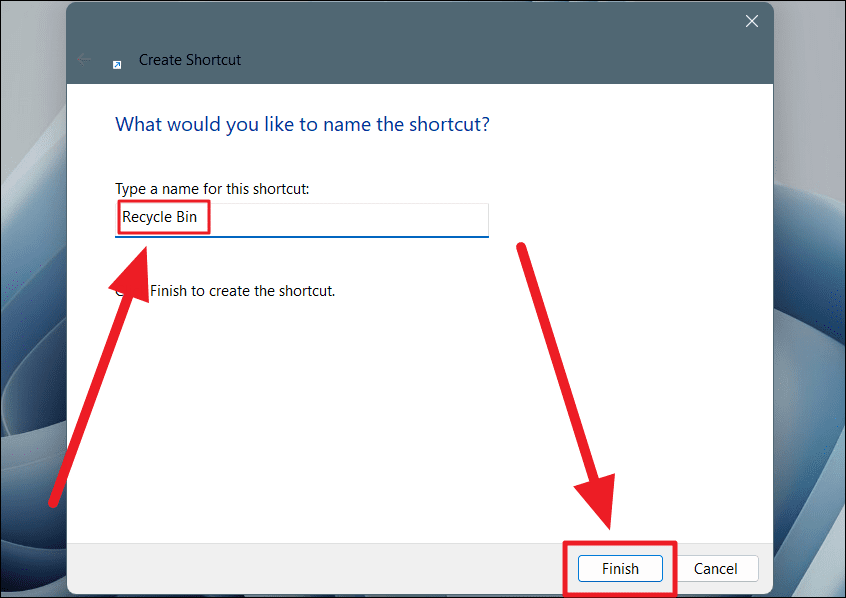
Step 3: Enter Recycle Bin as the name for this shortcut in the 'Type a name for this shortcut' field, and click on Finish.
Customizing the shortcut
Now that you've created the shortcut, it's time to make it look like the Recycle Bin icon.
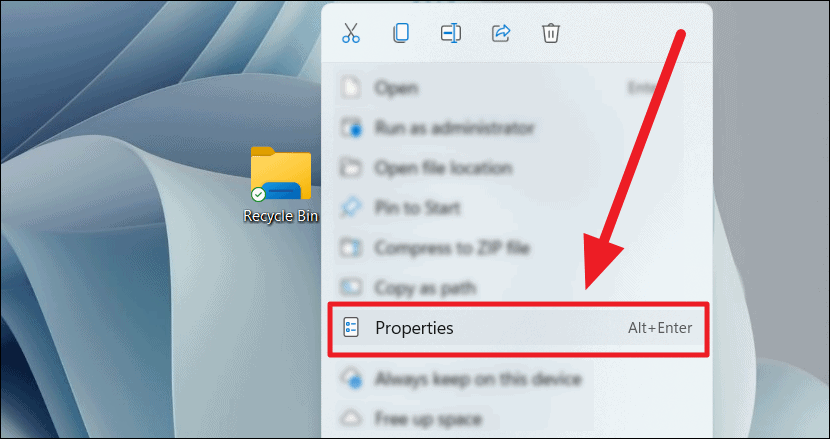
Step 4: Right-click on the new 'Recycle Bin' shortcut on your desktop and select Properties from the context menu.
You can also select the shortcut and press Alt + Enter to open the properties window.
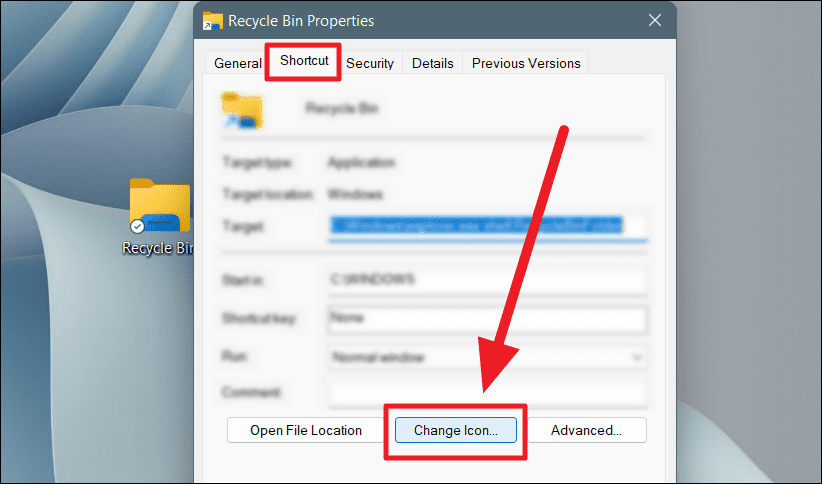
Step 5: In the 'Shortcut' tab of the properties window, click on the Change Icon button.
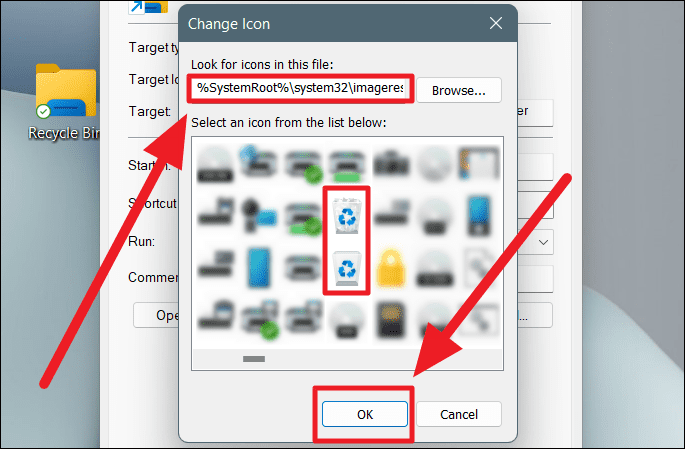
Step 6: A 'Change Icon' window will appear, displaying a list of icons. By default, the Recycle Bin icon may not be visible. In the 'Look for icons in this file' field, type or copy-paste the following path and press Enter or click OK:
%SystemRoot%\system32\imageres.dll
Step 7: Scroll through the list of icons until you find the Recycle Bin icons. There should be two versions: one empty and one filled. Select the icon you prefer and click OK.
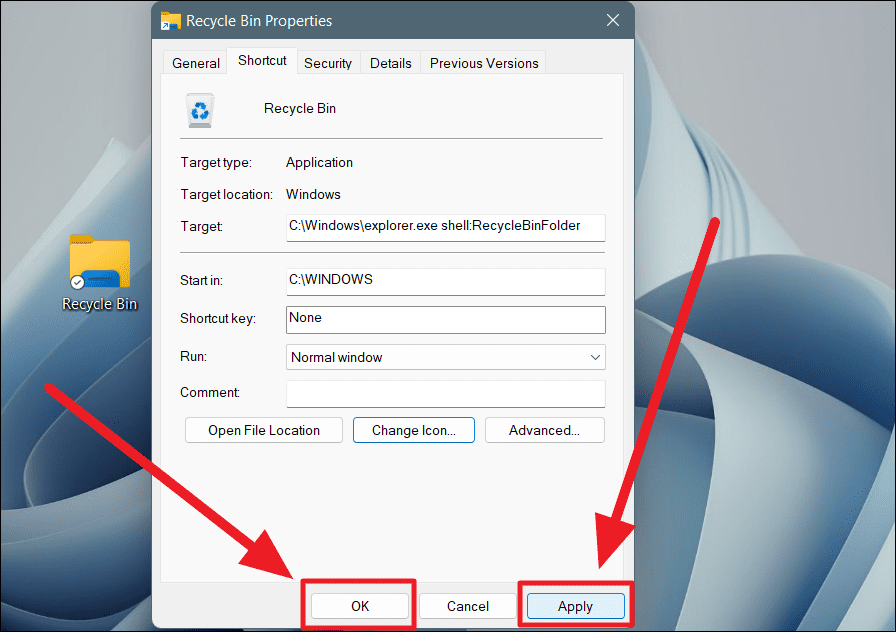
Step 8: Back in the properties window, click on Apply to save the changes, and then click OK to close the window.
You should now see the new shortcut on your desktop with the Recycle Bin icon.
Pinning Recycle Bin to the taskbar
With the customized shortcut ready, you can now pin it to the taskbar.
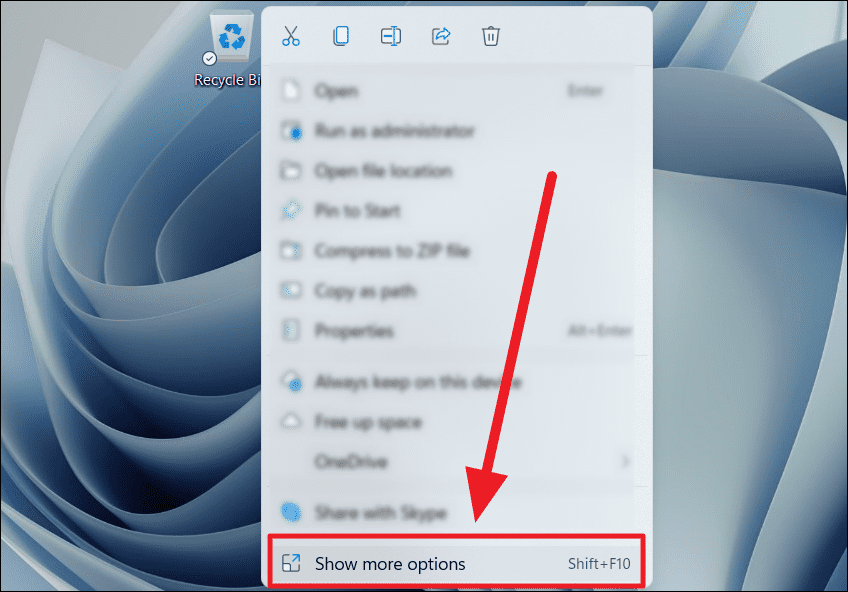
Step 9: Right-click on the 'Recycle Bin' shortcut and select Show more options.
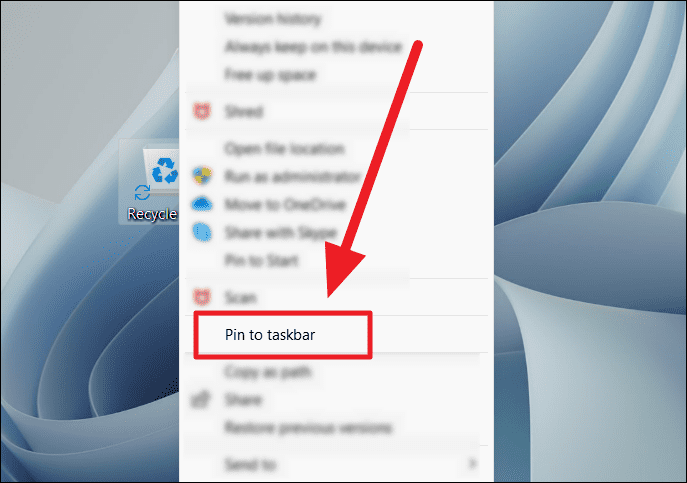
Step 10: In the expanded context menu, click on Pin to taskbar.
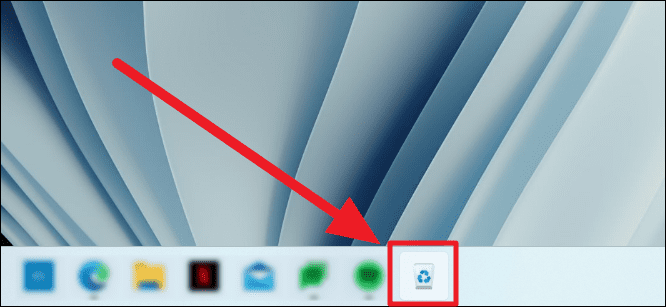
The Recycle Bin icon should now appear on your taskbar.
Unpinning Recycle Bin from taskbar
If you decide to remove the Recycle Bin icon from your taskbar later, it's straightforward to do so.
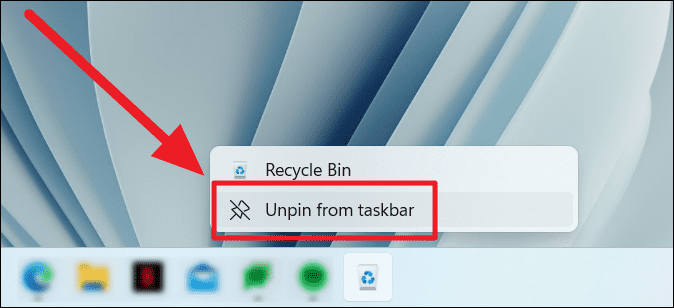
Step 1: Right-click on the Recycle Bin icon in the taskbar.
Step 2: Select Unpin from taskbar from the context menu.
The icon will be removed from your taskbar.
Removing the original Recycle Bin from the desktop
Now that you have the Recycle Bin accessible from the taskbar, you might want to remove the original icon from your desktop to keep it clutter-free.
Unlike other icons, the Recycle Bin cannot be deleted from the desktop by simply selecting and deleting it. Here's how to remove it:
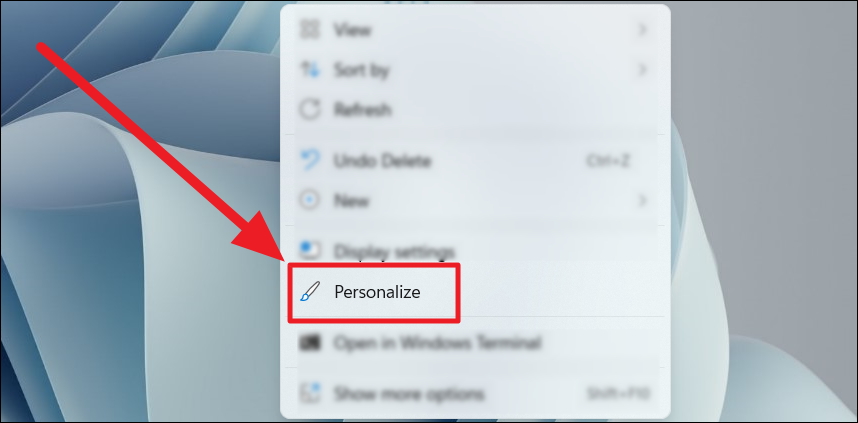
Step 1: Right-click on an empty area of your desktop and select Personalize.
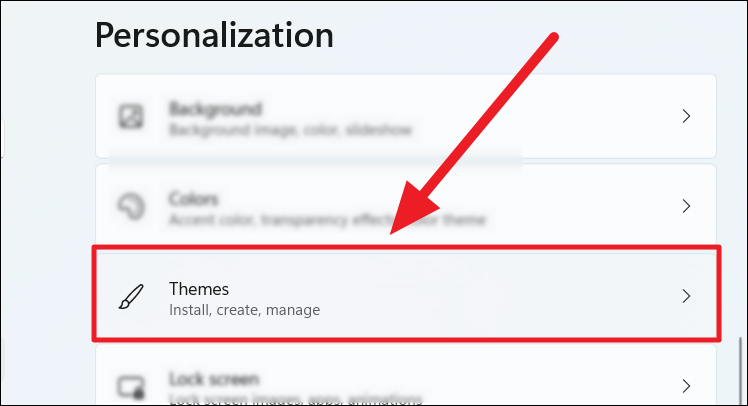
Step 2: In the 'Settings' window, click on Themes.
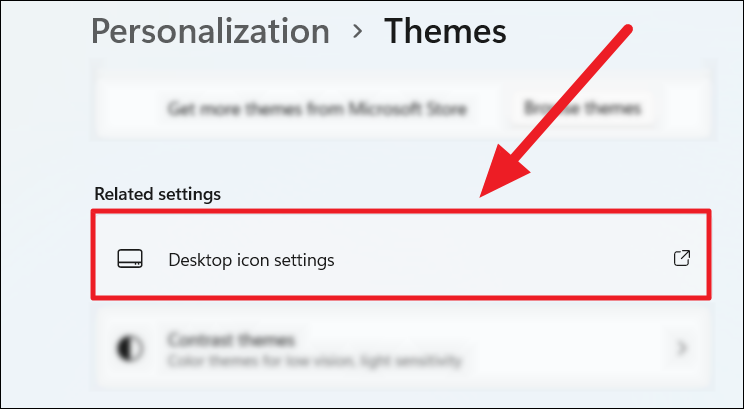
Step 3: Scroll down to the 'Related Settings' section and click on Desktop icon settings.
Step 4: In the 'Desktop Icon Settings' window, uncheck the box next to Recycle Bin.
Step 5: Click on Apply, then OK to save the changes and close the window.
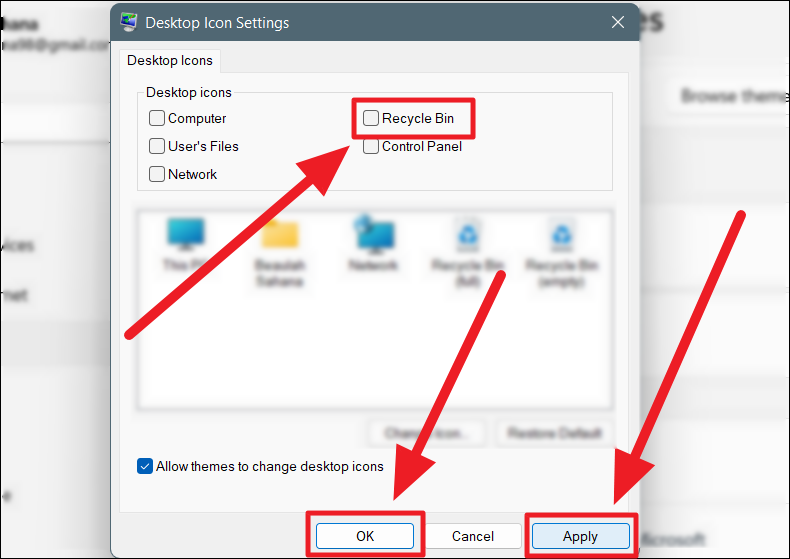
The Recycle Bin icon will now be removed from your desktop, keeping it clean, while you can still access it from the taskbar.
By following these steps, you can keep your Windows 11 desktop tidy and still have quick access to the Recycle Bin via the taskbar.

