
Having trouble with your audio on Windows 11 can be a frustrating experience, especially when your speakers or microphone stop responding. Reinstalling the audio driver often resolves these issues by fixing corrupt or missing files. This guide will walk you through several methods to reinstall your audio driver and get your sound back up and running.
Manually Installing the Audio Driver in Windows 11
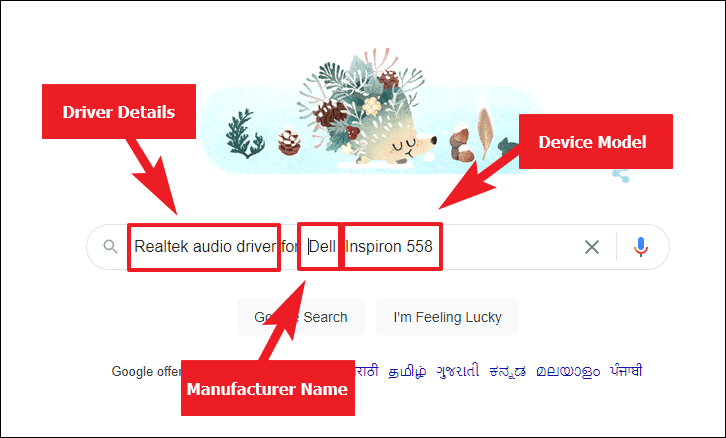
In some cases, Windows might not automatically detect and install the missing audio driver. Manually downloading and installing the driver from your device manufacturer’s website ensures you have the correct and most up-to-date driver for your hardware.

.EXE or a compressed .ZIP folder..EXE file, navigate to your download location and double-click the file to launch the installer. Follow the on-screen instructions to complete the installation.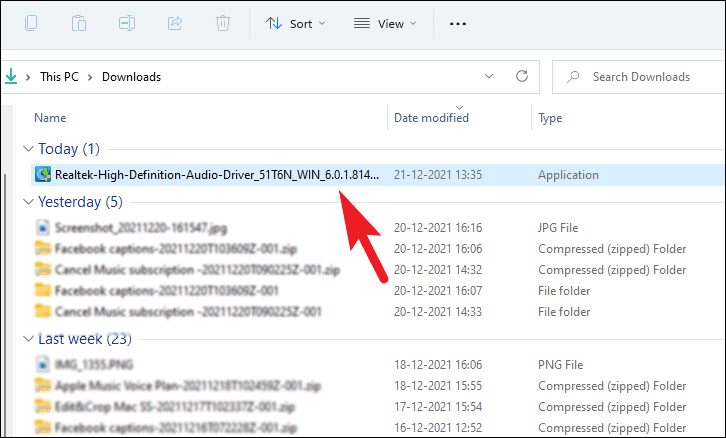
.ZIP file, right-click on it and select ‘Extract All’ to unzip the contents. Open the extracted folder, find the .EXE installer file, and double-click it to start the installation process.
After the installation finishes, restart your computer to apply the changes and verify that your audio devices are functioning correctly.
Using Device Manager to Reinstall Audio Drivers
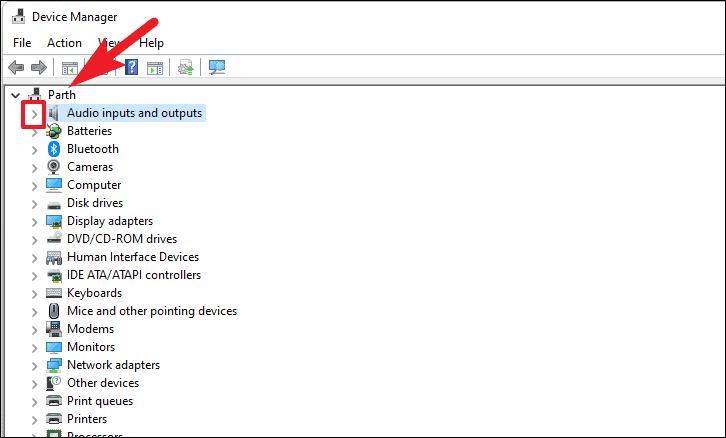
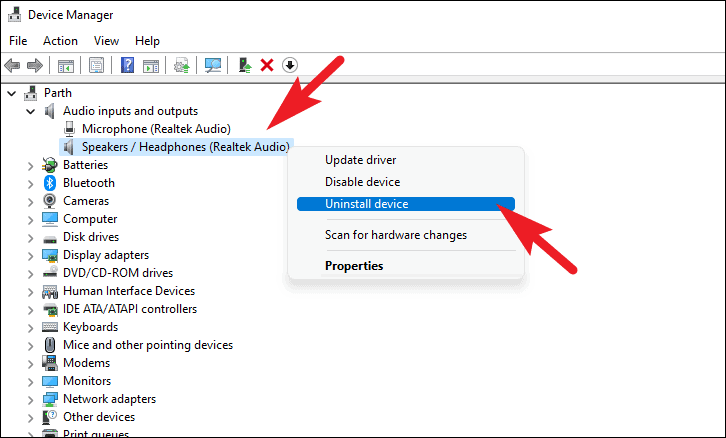
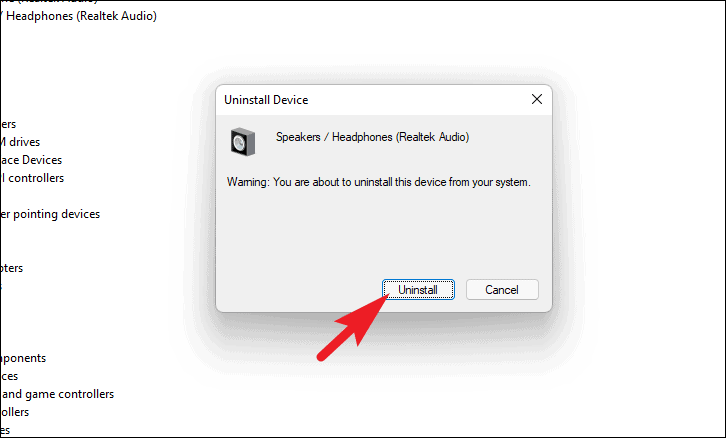
The Device Manager is a built-in Windows tool that lets you manage hardware drivers. Uninstalling and reinstalling the audio driver through Device Manager can resolve issues caused by corrupt or outdated drivers.
Device Manager in the search bar. Select ‘Device Manager’ from the search results to open it.
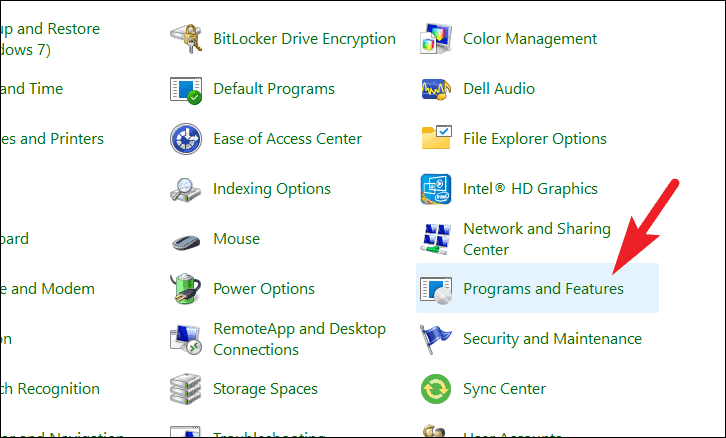
Uninstalling the Audio Driver via Control Panel
The Control Panel provides another method to uninstall your audio driver. This approach is useful if you prefer using the traditional Windows interface for managing programs and features.
Control Panel, and select it from the search results.

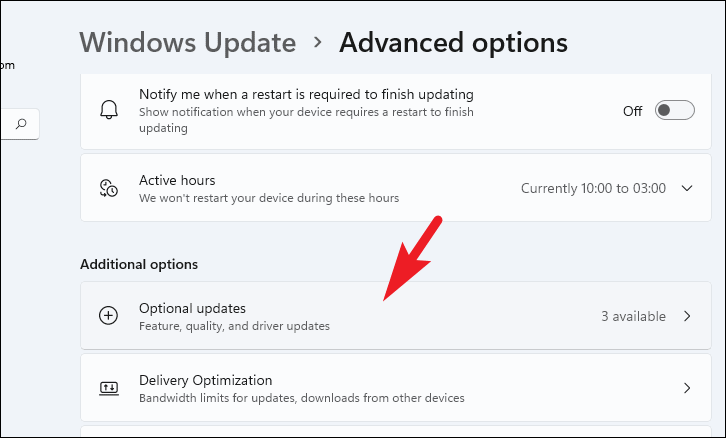
Installing Audio Driver Through Windows Update
Windows Update can sometimes categorize driver updates as optional. Installing these updates can help resolve audio issues without the need to manually search for drivers.
Windows + I.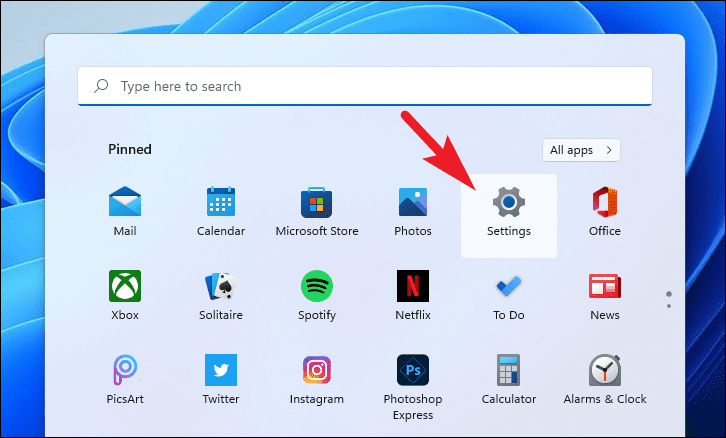
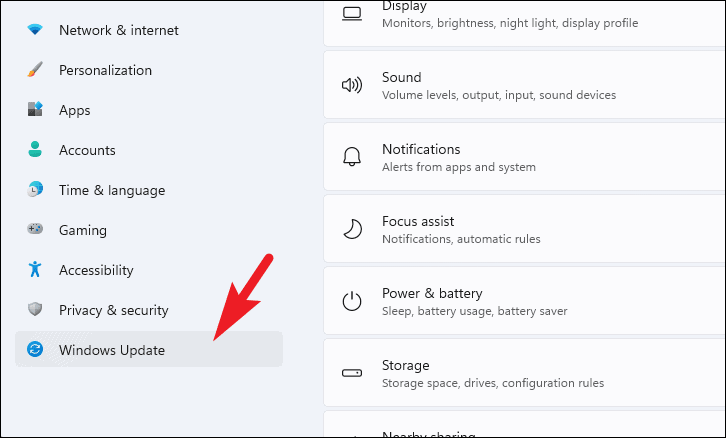

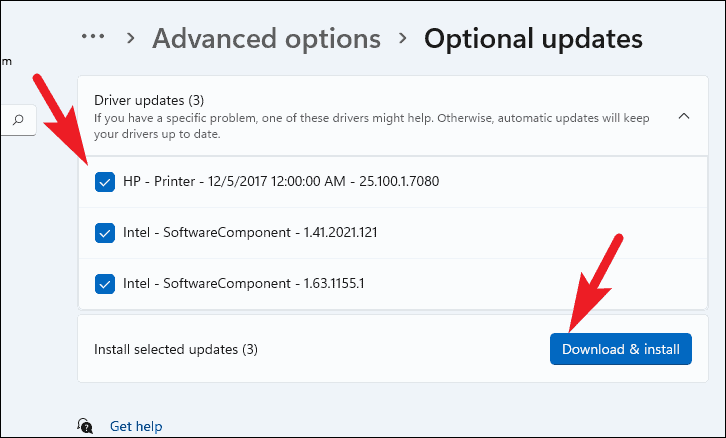
After the updates have been installed, restart your computer to ensure the new driver is properly applied.
By following these methods, you should be able to reinstall your audio driver and fix any sound-related problems on your Windows 11 PC. If issues persist, consider contacting your device manufacturer’s support for additional assistance.


