Many new computers come equipped with Windows 11 Home edition, which is suitable for standard users and everyday tasks. However, professionals and business users may find the Home edition lacking in advanced features that enhance productivity and security. Upgrading to Windows 11 Pro unlocks functionalities such as Remote Desktop, BitLocker Drive Encryption, Group Policy management, and more.
Below, we’ll explore the key differences between Windows 11 Home and Pro editions and provide detailed instructions on how to upgrade to the Pro edition.
Windows 11 Home vs Pro Edition
Choosing between Windows 11 Home and Pro depends on your specific needs. The Home edition is designed for general consumers, while the Pro edition targets professionals and businesses requiring advanced security and management tools. The following table highlights the main differences between the two editions:
| Feature | Windows 11 Home | Windows 11 Pro |
|---|---|---|
| Set up OS with a local account | No | Yes |
| Join Microsoft Azure Active Directory (AD) | No | Yes |
| Support for Active Directory | No | Yes |
| Microsoft Remote Desktop | Client only | Yes |
| BitLocker device encryption | No | Yes |
| Hyper-V | No | Yes |
| Join a Domain | No | Yes |
| Assigned Access | No | Yes |
| Group Policy | No | Yes |
| Mobile device management (MDM) | No | Yes |
| Windows Sandbox | No | Yes |
| Windows Hello | Yes | Yes |
| Device encryption | Yes | Yes |
| Firewall and network protection | Yes | Yes |
| Parental controls/protection | Yes | Yes |
| Secure Boot | Yes | Yes |
| Find my device | Yes | Yes |
| Windows Security | Yes | Yes |
| Windows Information Protection | No | Yes |
| Enterprise State Roaming with Azure | No | Yes |
| Dynamic Provisioning | No | Yes |
| Windows Update for Business | No | Yes |
| Kiosk mode setup | No | Yes |
| Snap Layouts | Yes | Yes |
| Internet protection | Yes | Yes |
| Maximum supported RAM | 128 GB | 2TB |
| Maximum no. of CPUs | 1 | 2 |
| Maximum no. of CPU cores | 64 | 128 |
| Microsoft Edge | Yes | Yes |
| OneDrive | Yes | Yes |
| Multiple Desktops and Snap | Yes | Yes |
| Upgradable to Enterprise Edition | No | Yes |
While both editions share core features, the Pro edition provides additional capabilities that are essential for business environments and advanced users. If you find that the Home edition lacks certain features you require, upgrading to Windows 11 Pro may be the solution.
Note that upgrading from Windows 11 Home directly to the Enterprise edition is not supported without performing a clean installation. This guide focuses on upgrading from the Home edition to the Pro edition without reinstalling the operating system.
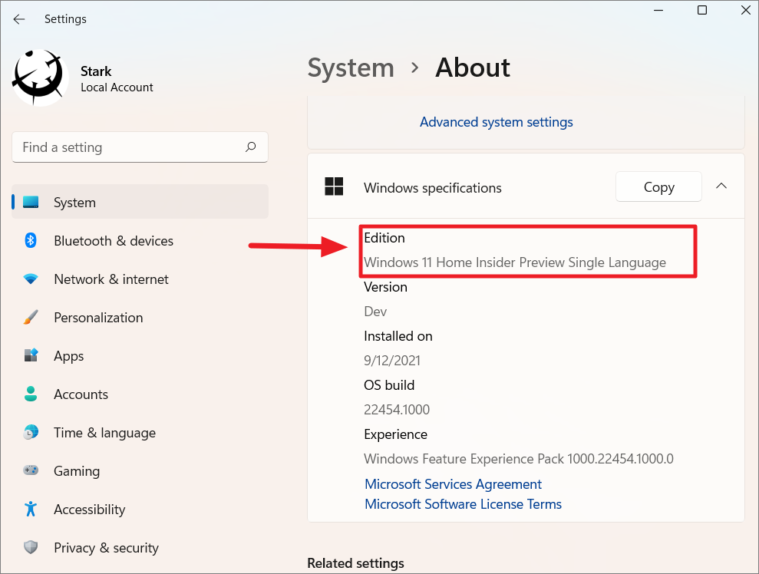
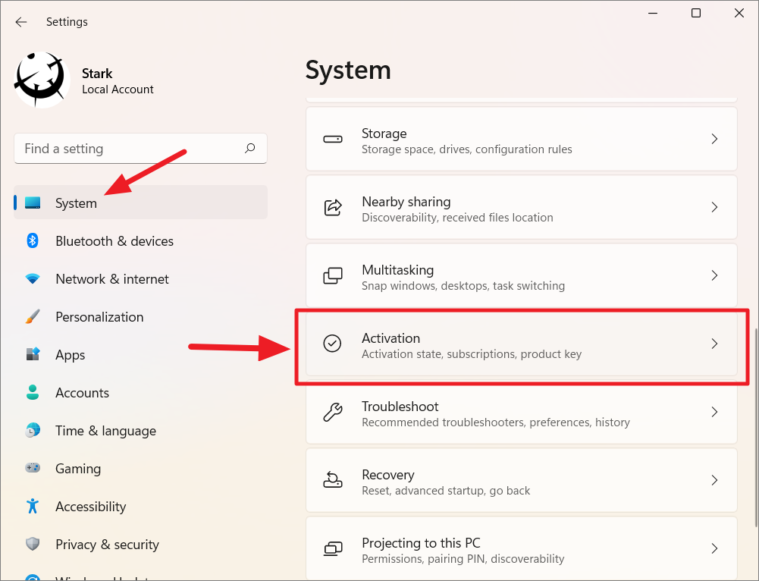
Checking Your Windows 11 Edition
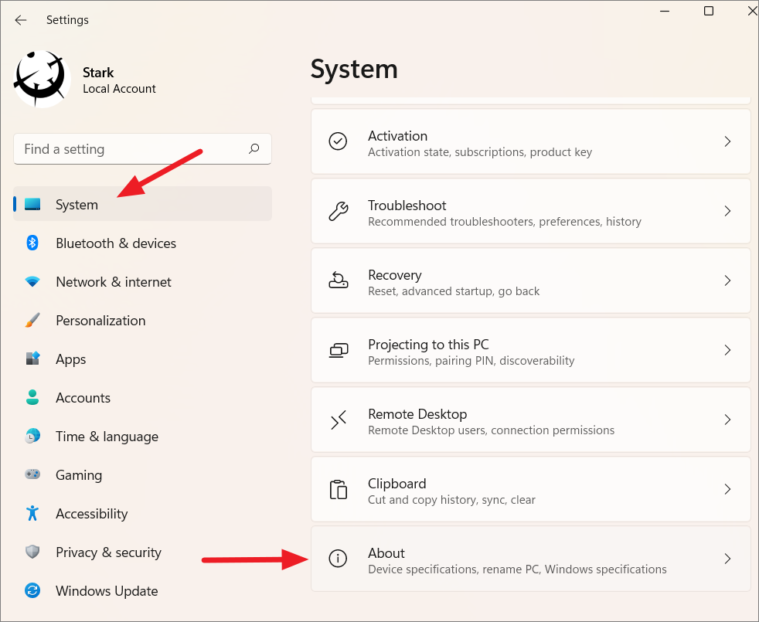
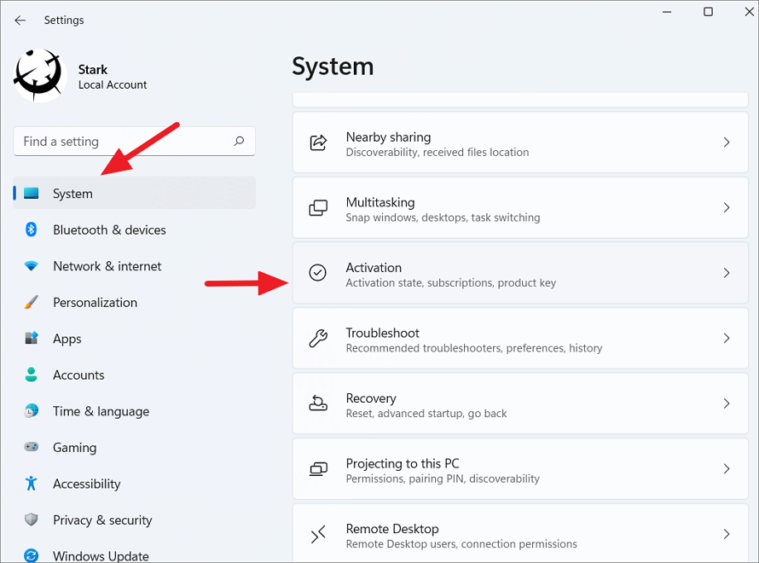
If you’re unsure which edition of Windows 11 you’re currently using, you can easily check this information in the Settings app.
Windows+I to open the Settings app.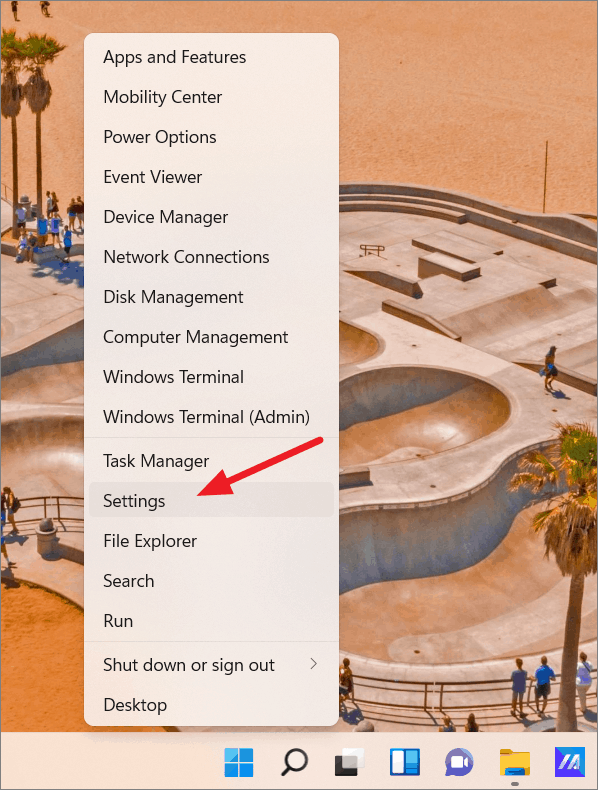
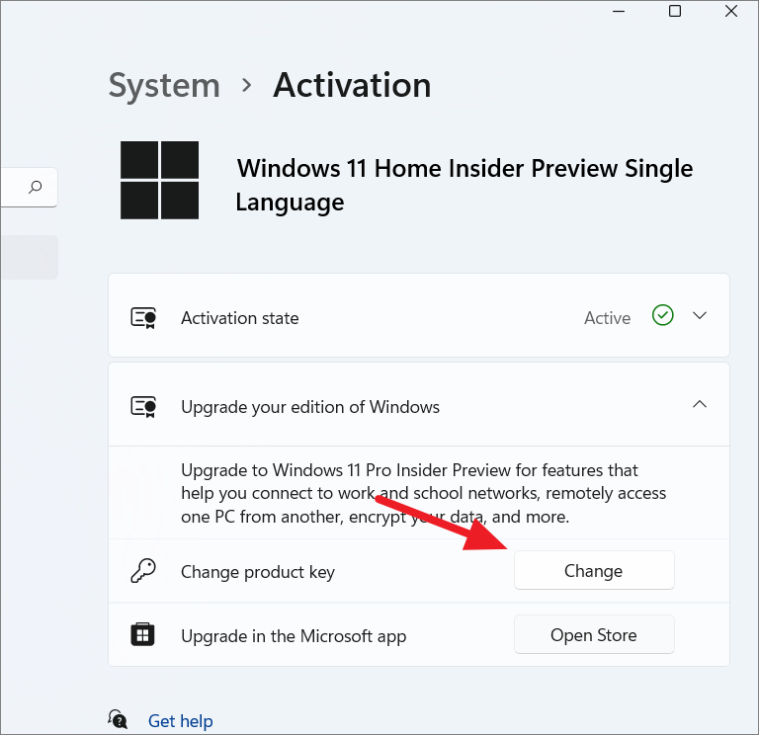
Before proceeding with the upgrade, ensure you have a valid product key or a digital license for Windows 11 Pro. Alternatively, you can purchase the upgrade through the Microsoft Store.
Upgrade Windows 11 Home to Pro with Product Key
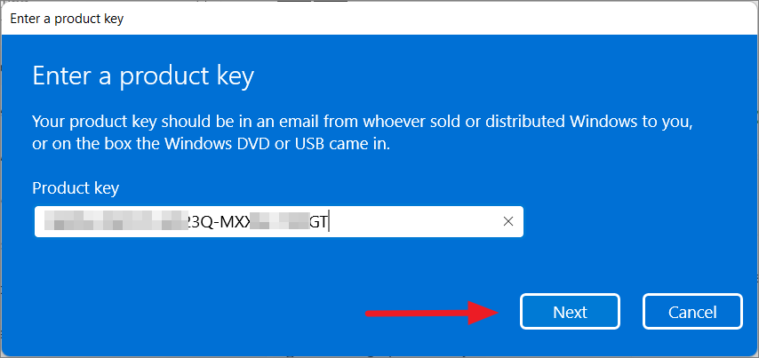
If you already have a valid Windows 11 Pro product key or a Windows 10 Pro product key, you can upgrade directly by entering the key in the Settings app. This method allows you to upgrade without purchasing a new license, provided you have a transferable product key.
Windows+I.
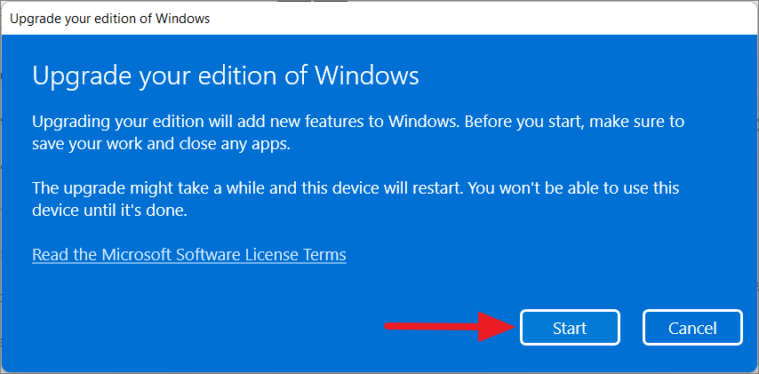
The system will now upgrade to Windows 11 Pro. Once the process is complete, your PC will restart automatically to apply the changes. If it doesn’t restart on its own, reboot your computer manually.
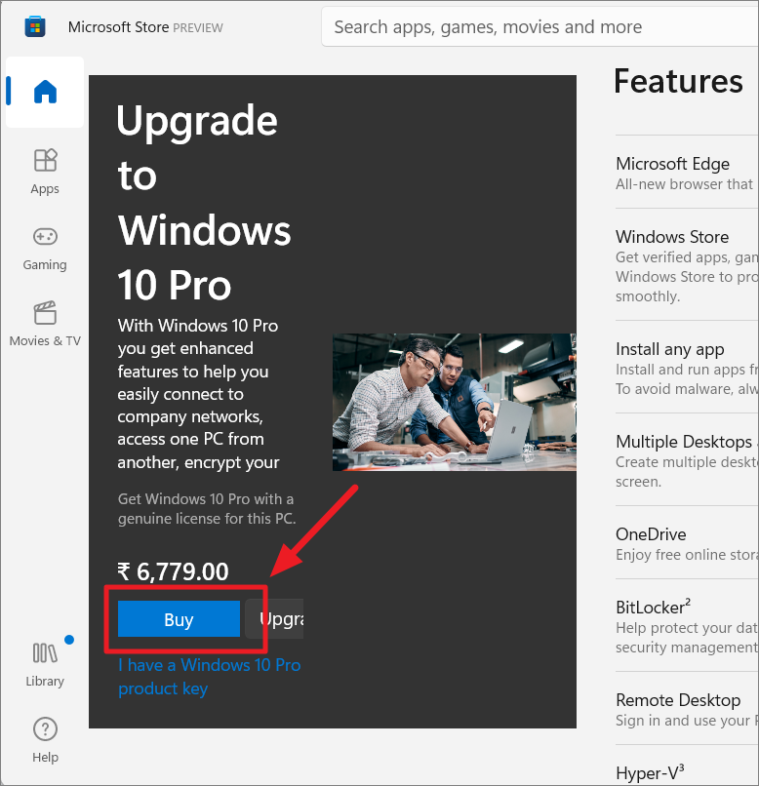
Upgrade Windows 11 Home to Pro via Microsoft Store
If you don’t have a Pro product key, you can purchase the upgrade through the Microsoft Store. This method involves buying a digital license for Windows 11 Pro, which will cost around $99, though prices may vary by region and currency.

Upgrade Windows 11 Home to Pro using Command Prompt
You can also upgrade to Windows 11 Pro using the Command Prompt if you have a valid product key. This method is a bit more technical but can be useful in certain scenarios.
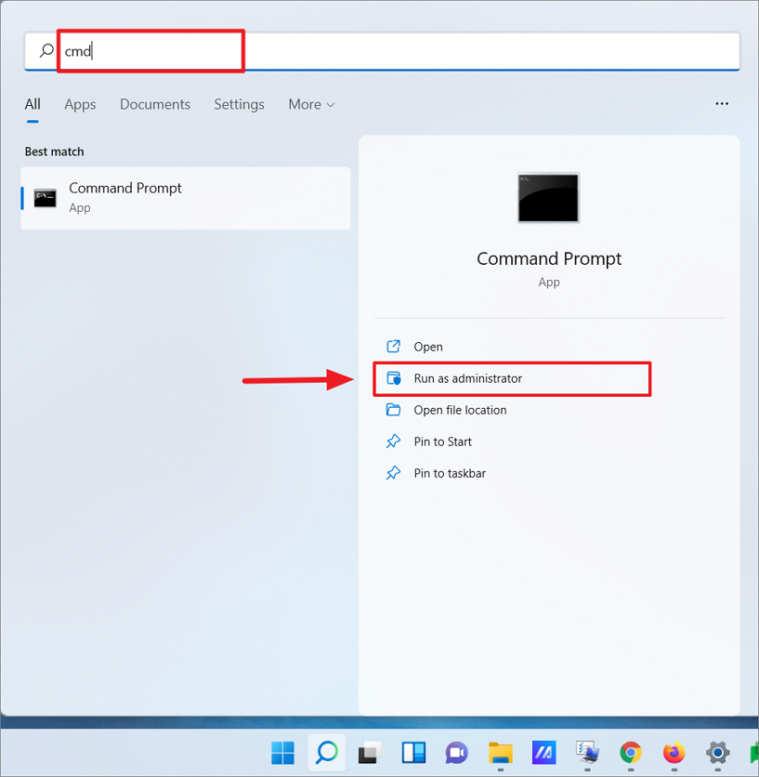
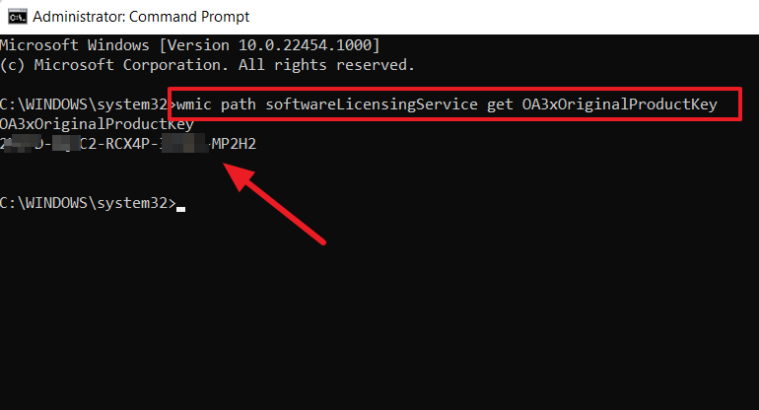
Finding Your Windows 11 Product Key
If you need to retrieve your current Windows 11 product key before proceeding, you can do so using the Command Prompt.
wmic path softwareLicensingService get OA3xOriginalProductKeyThis command will display your original product key. Make sure to note it down and keep it in a safe place.
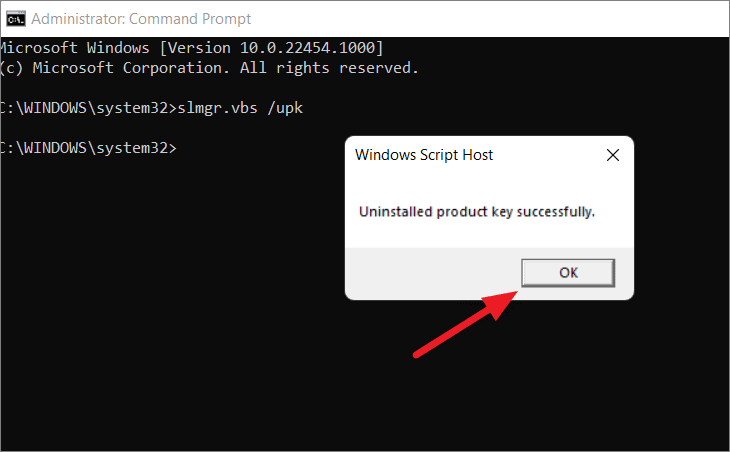
Upgrading Using Command Prompt
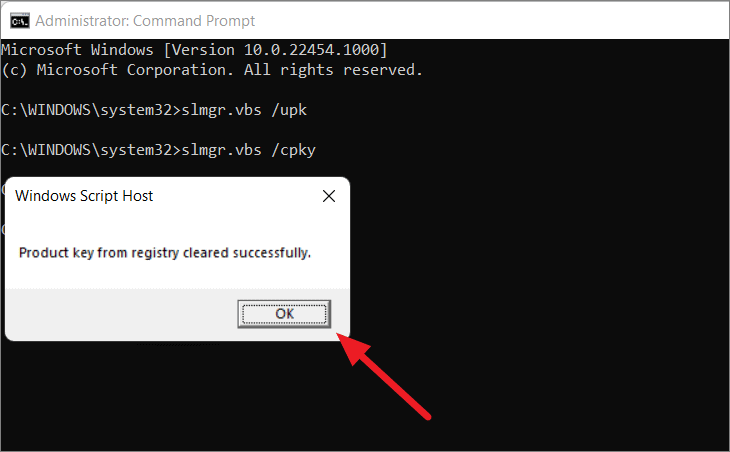
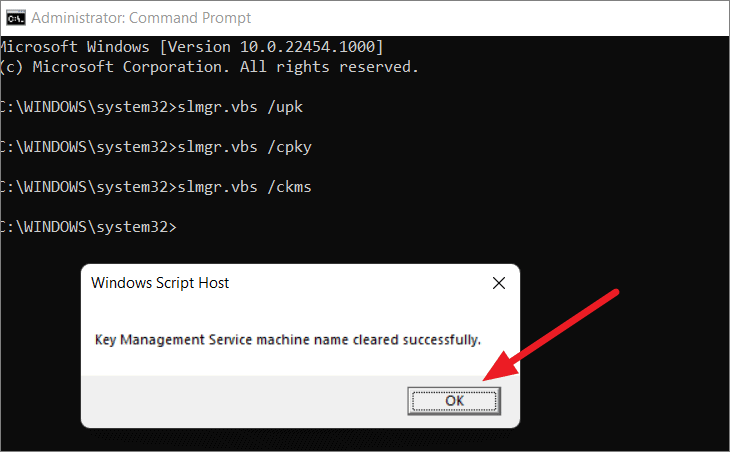
Enter:slmgr.vbs /upkThis command uninstalls the current product key. A confirmation message will appear.
slmgr.vbs /cpkyA confirmation message will appear indicating that the product key has been cleared from the registry.
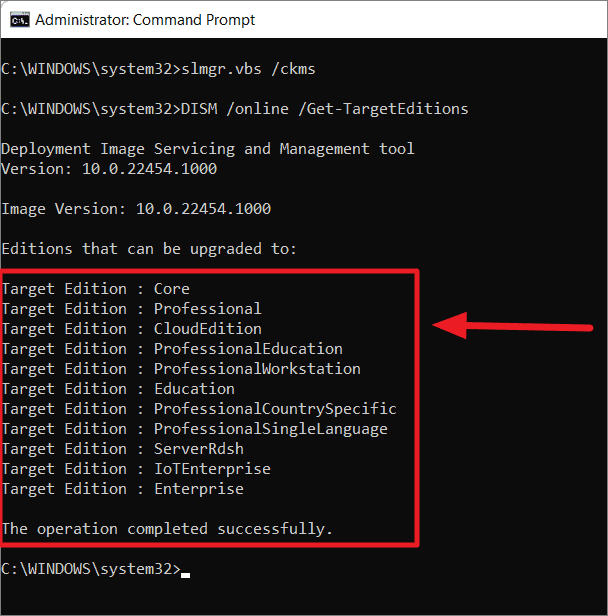
slmgr.vbs /ckmsThis command clears any KMS server settings.
DISM /online /Get-TargetEditionsThis will display a list of Windows editions that you can upgrade to. Ensure that “Professional” is listed.
YOUR-PRODUCT-KEY with your actual Windows 11 Pro product key):sc config LicenseManager start= auto & net start LicenseManager
sc config wuauserv start= auto & net start wuauserv
changepk.exe /productkey YOUR-PRODUCT-KEY
exit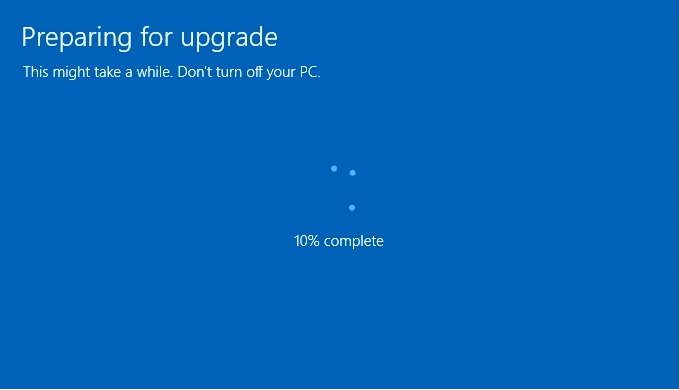
If you ever need to revert to Windows 11 Home, you can remove the Pro product key using the commands above and re-enter your original Home edition product key. Note that your system will automatically activate the Home edition if you have a digital license stored in your hardware.
By following these methods, you can upgrade your Windows 11 Home edition to the Pro edition, unlocking advanced features and functionalities suited for professional and business use.


