A comprehensive guide to viewing photos as a slideshow on Windows 11 catering to every requirement.
A comprehensive guide to viewing photos as a slideshow on Windows 11 catering to every requirement.
by Parth Sawhney
Viewing your photos as a slideshow can enhance the experience of reminiscing over memories or displaying images for others. Windows 11 offers multiple ways to create and view slideshows, whether on your desktop, lock screen, or using various applications. This guide will walk you through different methods to set up a photo slideshow on your Windows 11 computer.
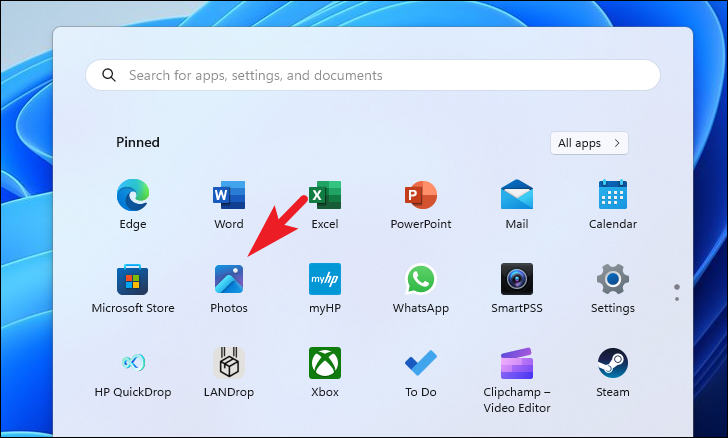
1. Run a Slideshow Using the Photos App
The Photos app on Windows 11 provides a convenient way to view your images as a slideshow, especially when showcasing them on an external display. You can immediately start a slideshow with selected images or organize them into a folder for easy access.
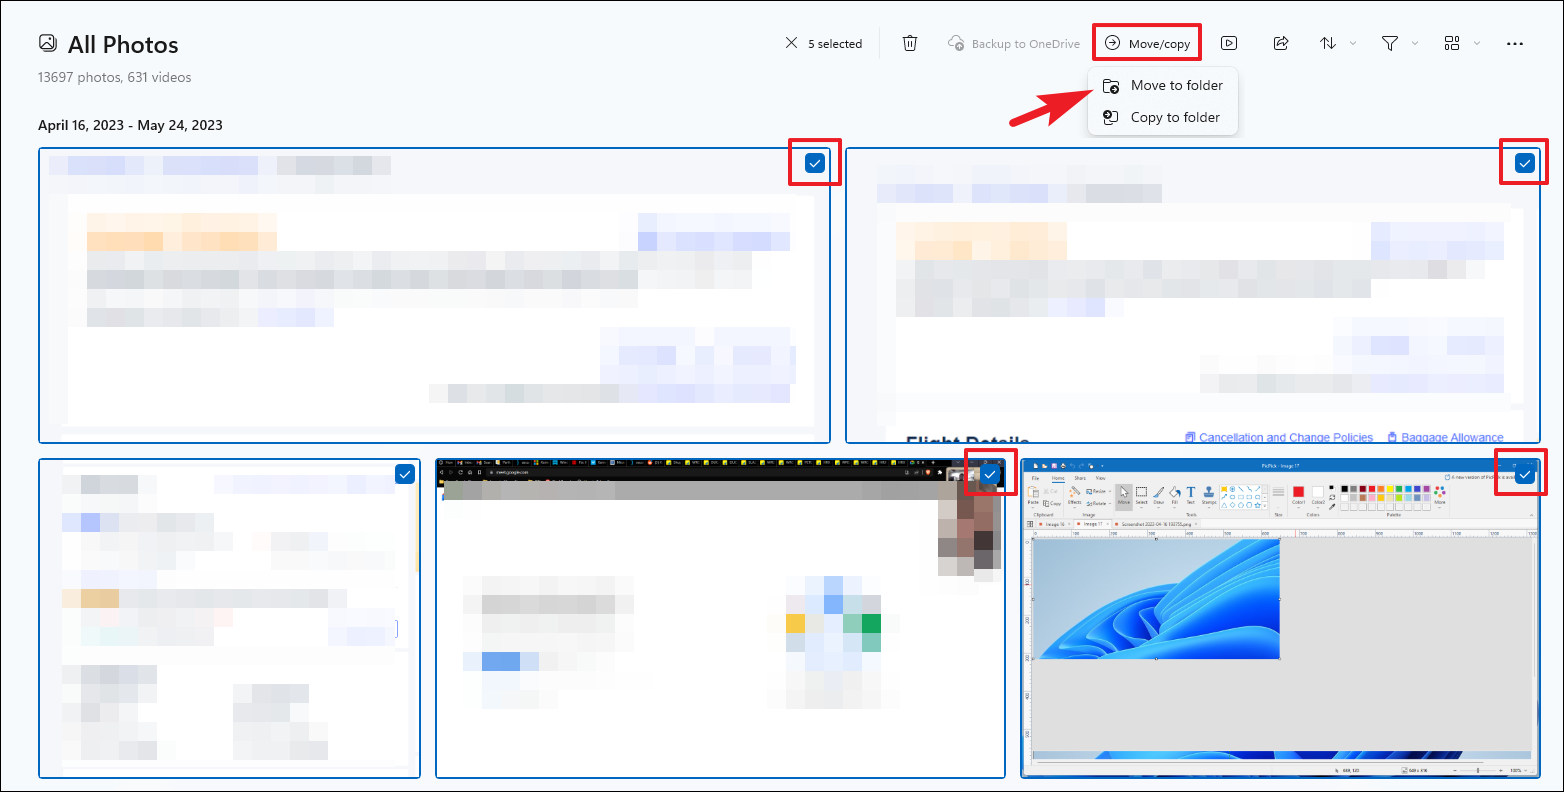
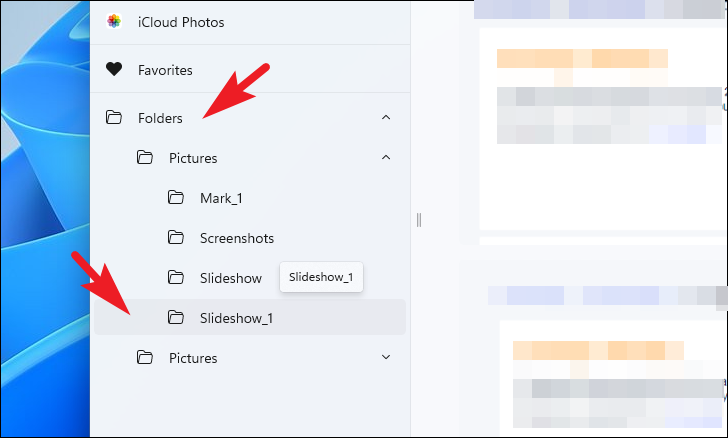
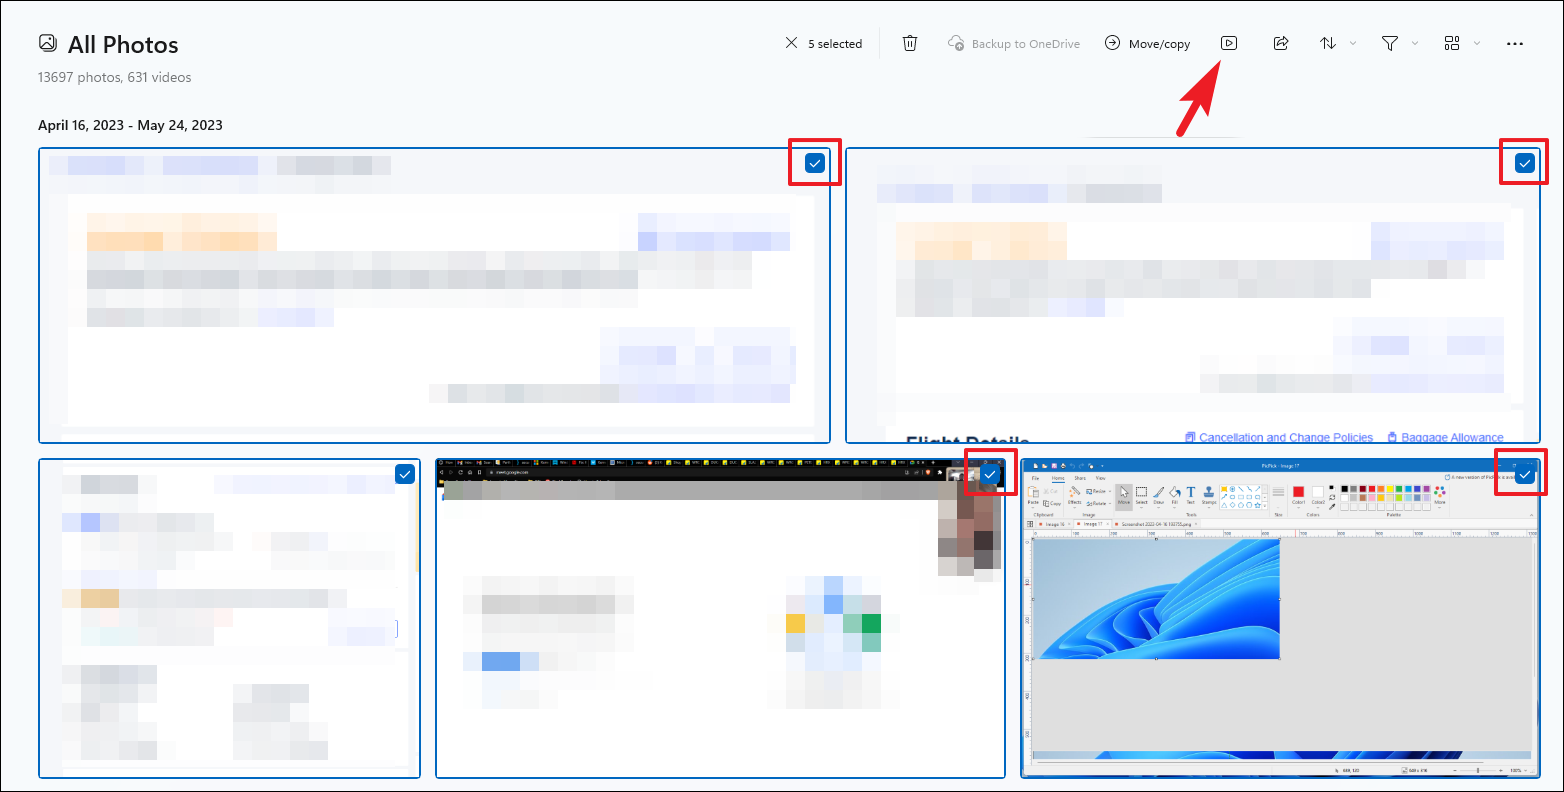
To create a folder with selected pictures, go to the ‘All Photos’ tab. Select the images you want to include in your slideshow by checking the boxes on each photo or by holding the Ctrl key while clicking on multiple images. After selecting the desired photos, click on the ‘Move/Copy’ button in the ribbon menu and choose ‘Move to a folder’.
Note: You can select photos using the checkboxes or by holding down the Ctrl key while clicking on individual thumbnails.
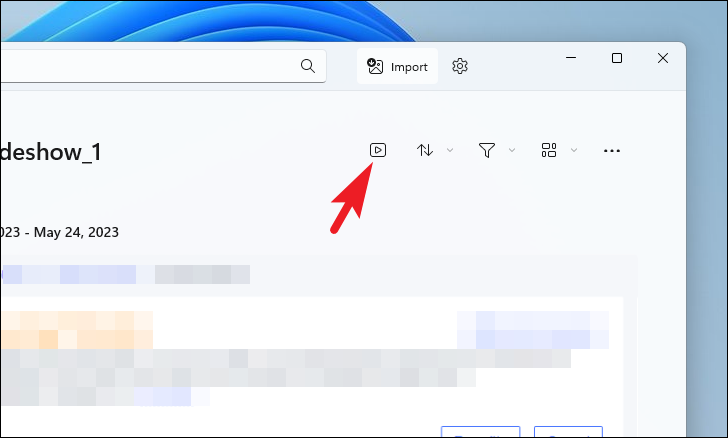
Start the slideshow by clicking on the ‘Start Slideshow’ button or by pressing F5 on your keyboard.
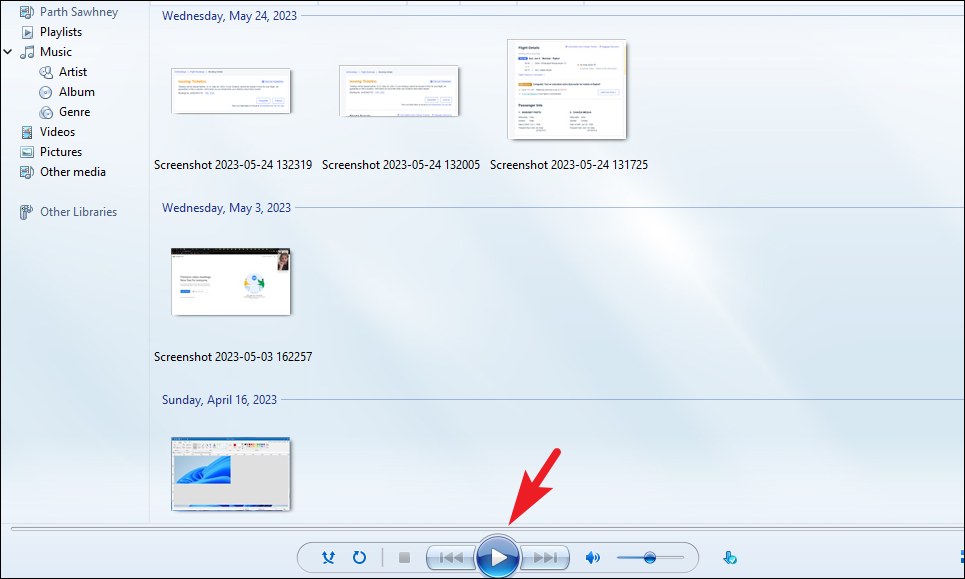
If you prefer to run a slideshow without creating a folder, simply select the images you wish to view and click on the ‘Start slideshow’ button in the ribbon menu.
During the slideshow, background music will play by default. To mute it, click on the ‘Sound’ icon on the floating bar. You can also customize animations, transitions, loops, and music themes by clicking on the ‘Music’ icon.
2. Set Up a Slideshow Using Windows Media Player
Windows Media Player, still included with Windows 11, can be utilized to play a slideshow of your images. Ensure all the photos you’d like to include are placed in a single folder for easy access.
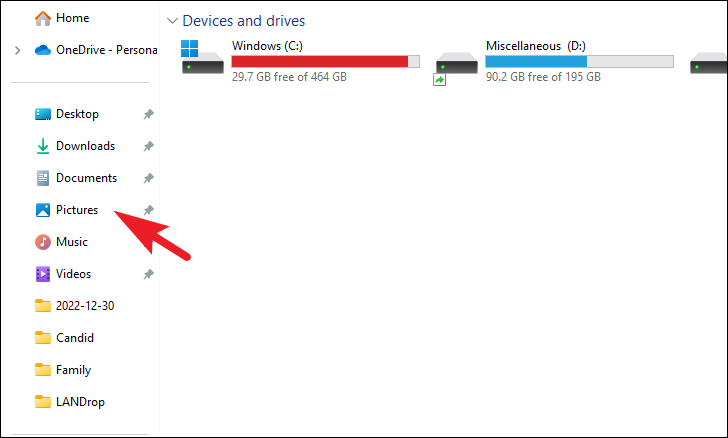
Open File Explorer and navigate to your ‘Pictures’ directory. If it’s not pinned in the sidebar, you can enter the following path in the address bar and press Enter:
C:\Users\<your username>\Pictures
Note: Replace <your username> with your actual Windows username.
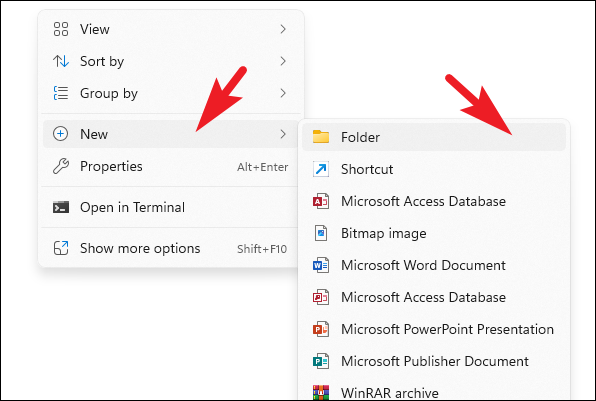
Create a new folder by right-clicking in the blank space, selecting ‘New’, and then ‘Folder’. Give the folder a relevant name and move all the desired images into this folder.
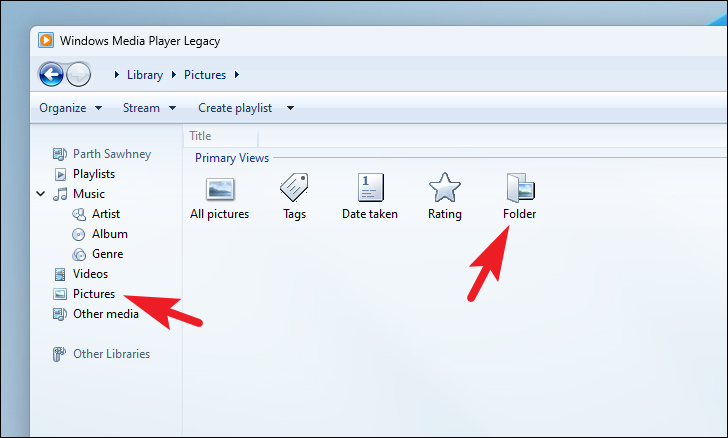
If prompted, choose ‘Recommended Settings’ to proceed. On the main interface, click on the ‘Pictures’ tab on the left sidebar, then select the ‘Folder’ option on the right.
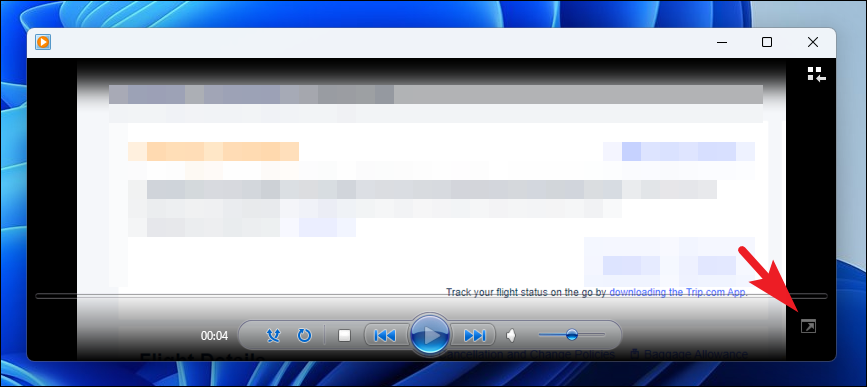
If the slideshow doesn’t start in full-screen mode, click on the ‘Fullscreen’ icon located at the bottom right corner.
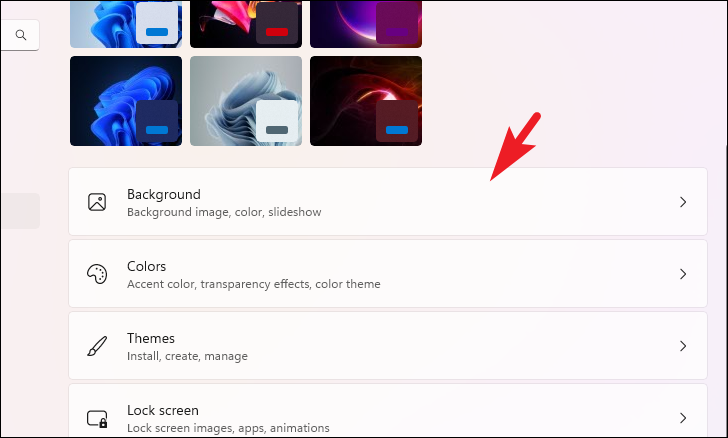
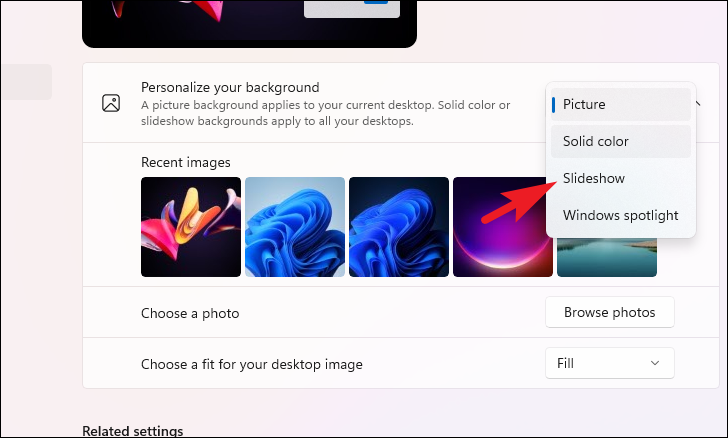
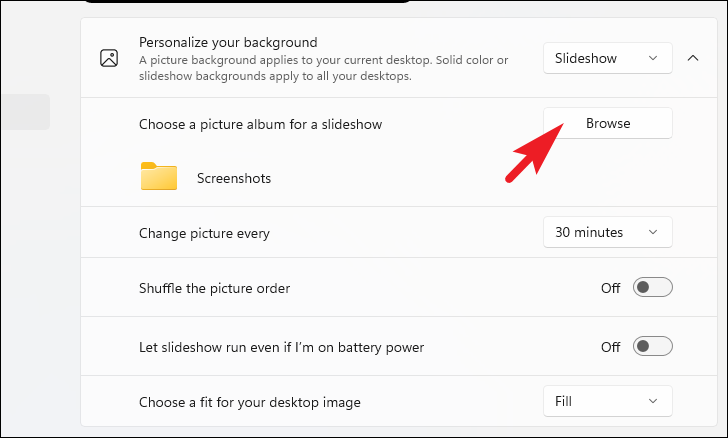
3. Set Up a Slideshow as Desktop Wallpaper
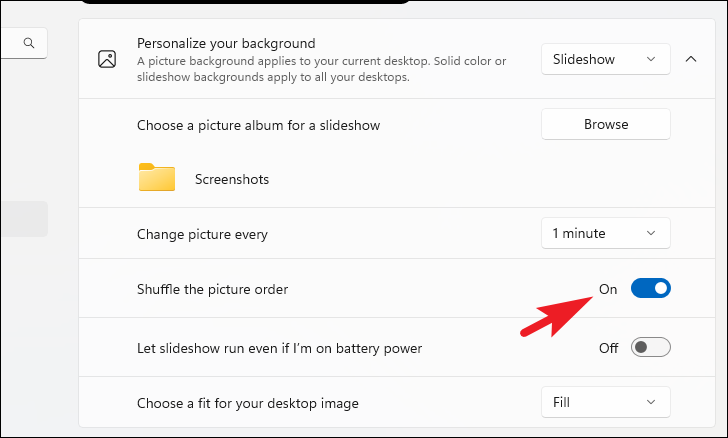
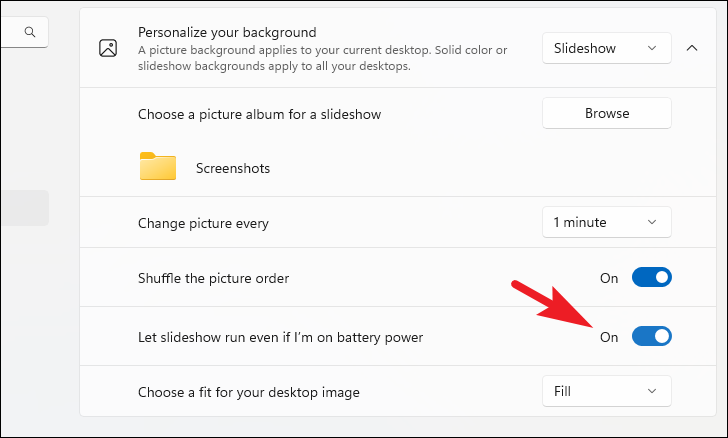
Setting a slideshow as your desktop wallpaper allows you to enjoy your favorite images right on your desktop background. Before starting, ensure all the images you want in the slideshow are stored in a single folder, as Windows allows selecting only one folder for the slideshow.
By default, the slideshow pauses when your device is on battery power. To allow it to continue, turn on the option ‘Let slideshow run even if I’m on battery power’.
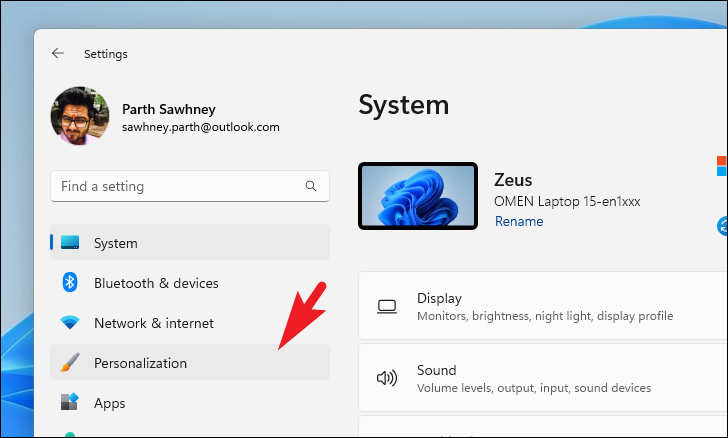
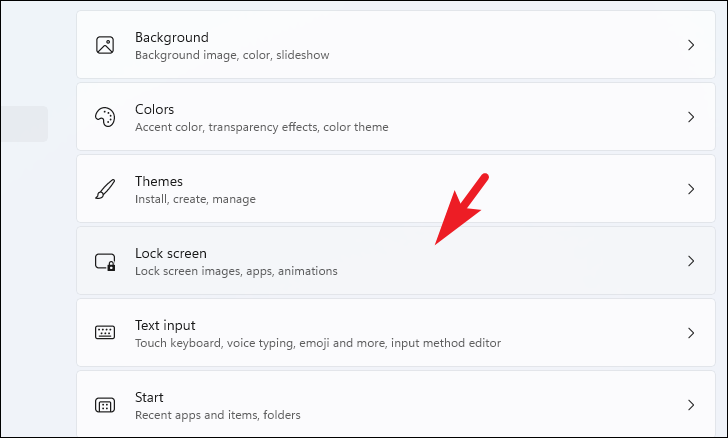
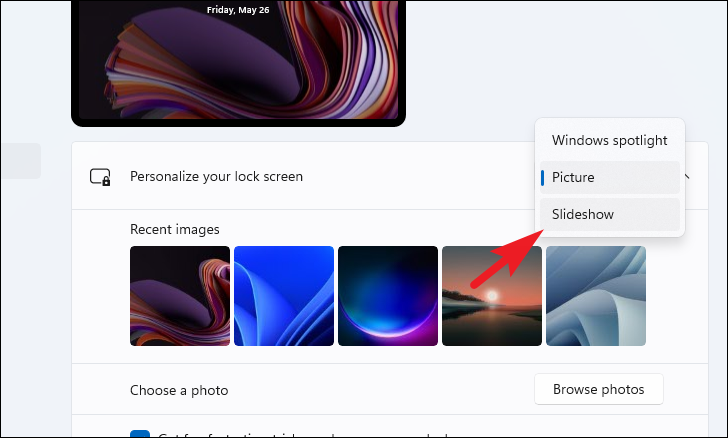
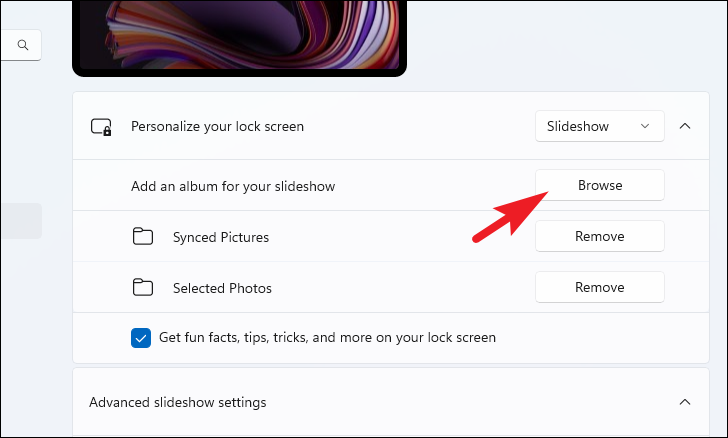
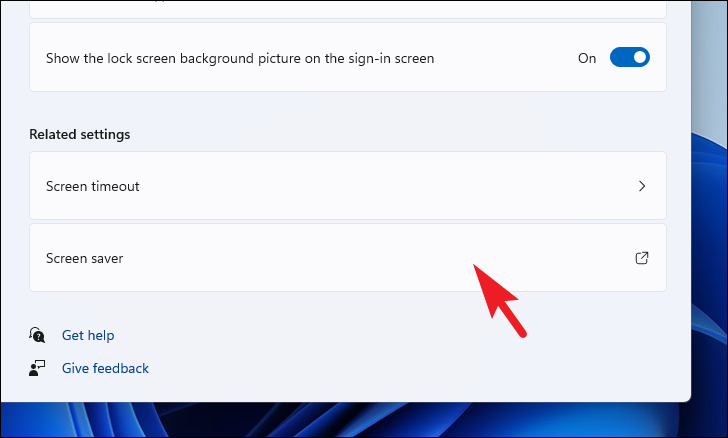
4. Set Up a Slideshow as Lock Screen
You can personalize your lock screen by setting a slideshow of your favorite images. Make sure all the pictures you want to include are stored in one or more folders.
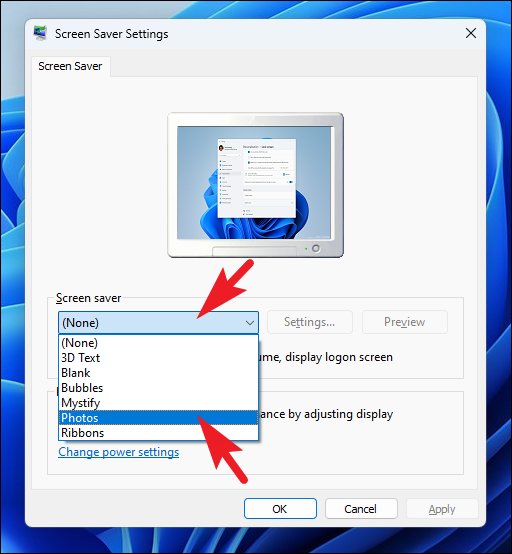
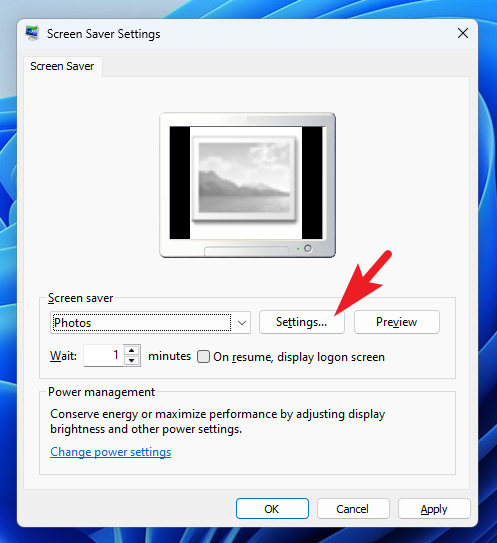
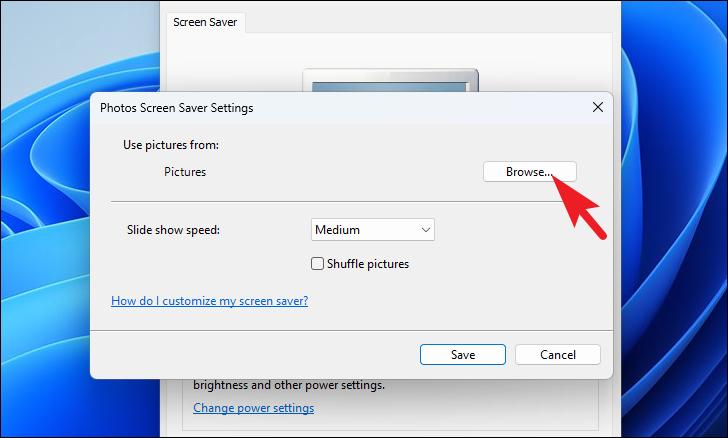
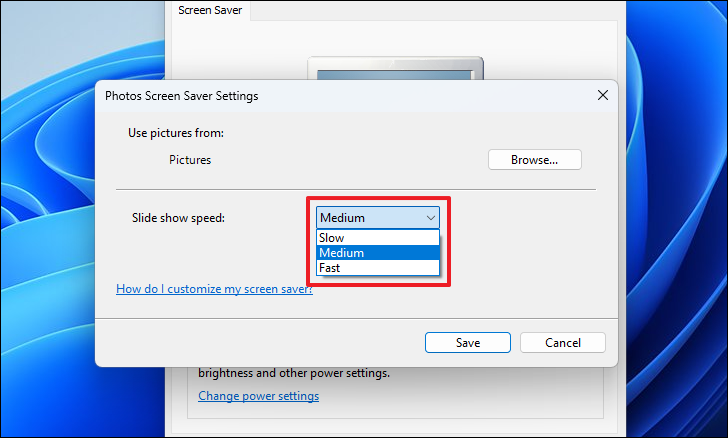
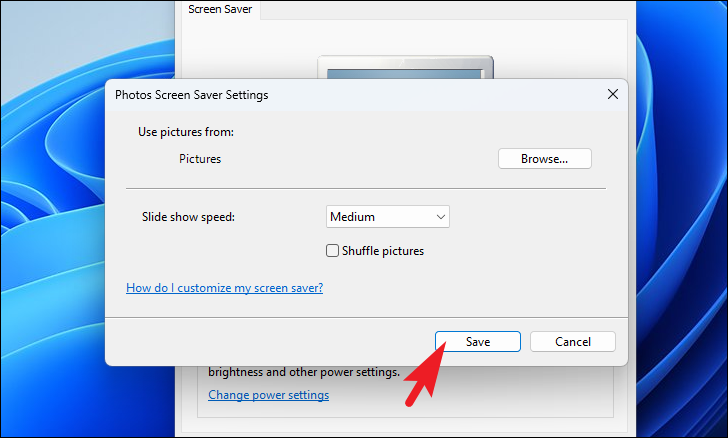
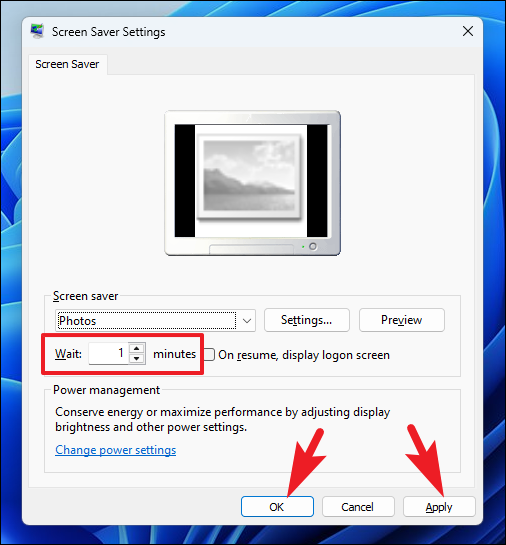
Back in the Screen Saver Settings window, set the ‘Wait’ time (the period of inactivity before the screensaver starts). Click ‘Apply’ and then ‘OK’ to save your settings.
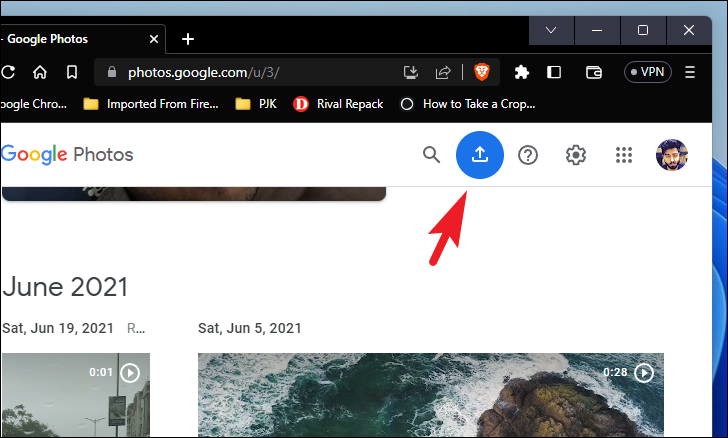
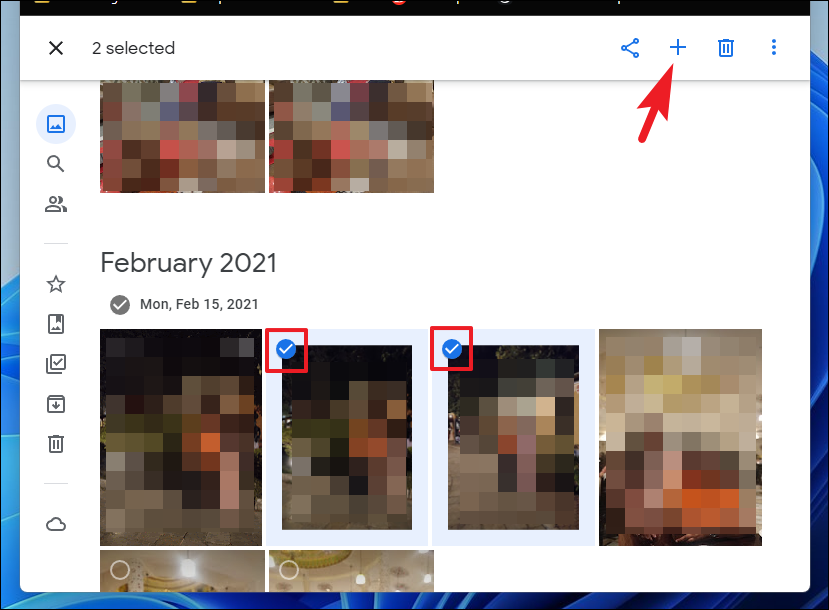
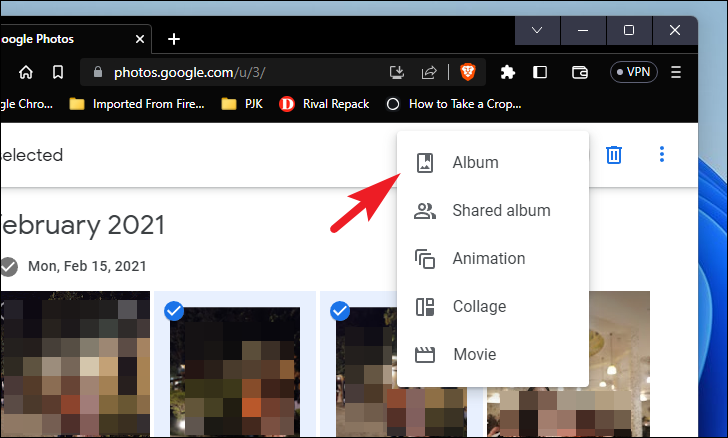
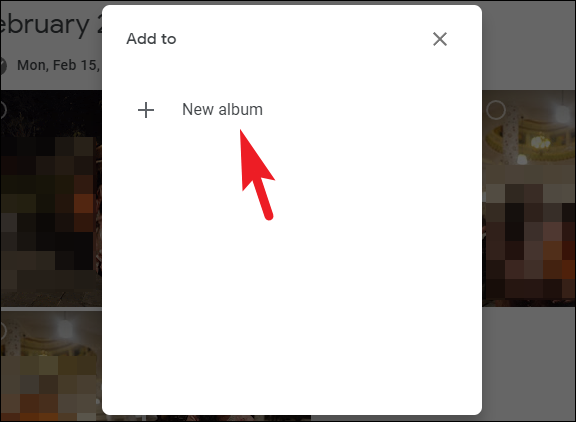
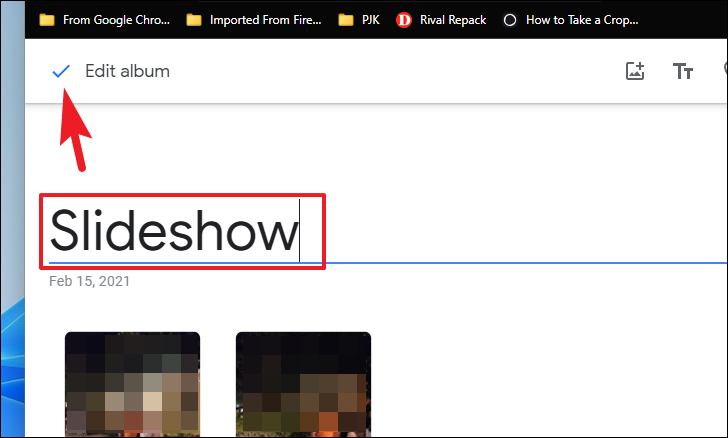
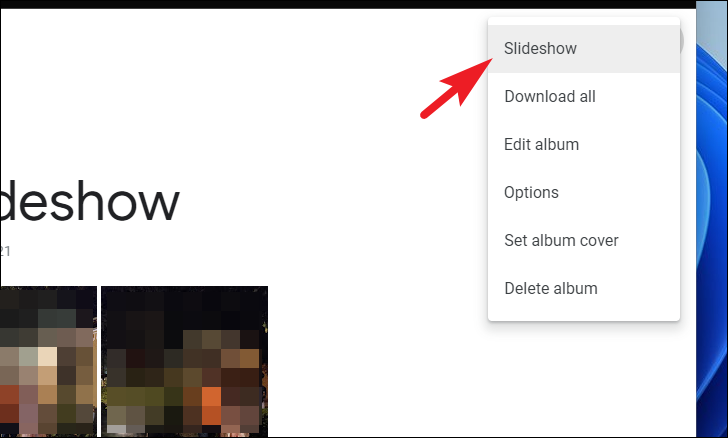
6. Set Up a Slideshow Using Google Photos
If you prefer using an online solution or don’t have access to the built-in Windows apps, you can create a slideshow using Google Photos through your web browser.