


Tiel, the Acolyte is one of the first Shells you can pick up in Mortal Shell 2, and also one of the easiest to get killed in. The health pool is small, the recovery windows are tight, and standing in melee range to trade swings will end a run fast. The payoff is a Shell that can delete an enemy in a couple of exchanges, provided you build it around Shadow Strike instead of raw weapon damage.
Quick answer: Equip Axe and Dagger with the Untarnished Seal, spend early Shell points into Escalation, Poison Burst, Deathmark, and Nightstride, then loop Shadow Strike to stack 10 Poison on a target and detonate it before dashing back out.
The Shadow Strike loop this build runs on
Everything Tiel does hangs off one rhythm. You enter Shadowed, close the gap, land a Shadow Strike, apply your status stacks, detonate them, and then Shadow Dash back out before the enemy can answer. You are not looking for long combos here.
The stacking part is what makes it hit hard. A fully invested Escalation makes Shadow Strike apply 10 Poison stacks on its own, and Poison Burst turns those stacks into a second chunk of damage the moment they pop. Deathmark layers 10 Fragile stacks on top, which increases the damage the target takes from your weapon hits. Against a boss you can hold Shadowed a little longer before committing, so the strike lands with everything already set up.
Shadow Dash is the defensive half. It is not just a dodge, and once Nightstride is invested it becomes considerably easier to trigger, deals Stagger Damage, and lets you reset into stealth rather than eat a follow-up swing.
Shell ability priority for Tiel
You will not have 40 Shell points early, so the order matters more than the final spread. Start with two levels in Escalation, then two into Poison Burst and two into Nightstride. Add two levels of Deathmark next so Shadow Strike starts landing critical hits reliably. Once Shadow Clone unlocks, put two levels into it and then go back and finish maxing the earlier picks.
| Ability | Max level | What it does |
|---|---|---|
| Escalation | 3 | Shadow Strike damage up to 165%, and inflicts 10 Poison stacks |
| Deathmark | 3 | +23% Critical Hit chance and +20% Critical damage on Shadow Strike, plus 10 Fragile stacks |
| Nightstride | 4 | Shadow Dash window +45%, 300% Stagger Damage, 50 damage |
| Poison Burst | 3 | Each detonated Poison stack deals 6 damage; the target also emits a Poisonous cloud |
| Ambush | 3 | 150% damage, plus 25% and 120% Critical Hit damage |
| Shadow Clone | 3 | Shadow Dash leaves a clone that applies 2 Poison stacks to attackers, survives 5 strikes, and bursts into a 5-second Poisonous cloud |
Shadow Clone is worth the detour because it does two jobs at once. It baits attacks away from a Shell that cannot afford to be hit, and it keeps applying Poison while you are repositioning.
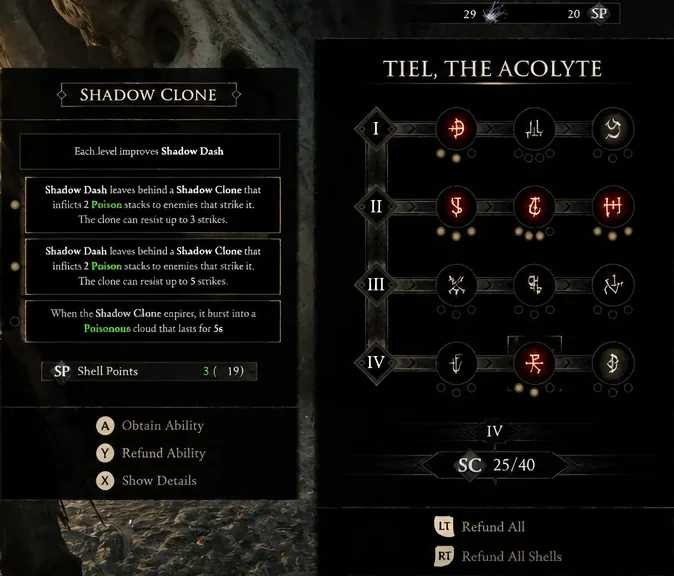
There is a second viable point spread if you would rather chase guaranteed critical hits than Poison detonations. That version leans on Critical Role at level 3 for guaranteed Critical Strikes after a Shadow Strike, with one point each in Escalation, Lasting Legacy, Deathmark, and Nightstride, and two in Seal Affinity. Lasting Legacy extends how long you stay invisible through Shadow stacks, and Seal Affinity feeds you Shadow stacks when a Guard or Parry fails, which is a useful safety net on a Shell this fragile.
Best weapon and sidearm for Tiel
Axe and Dagger is the melee pick, and it is not close. The attack speed and short animations match a Shell that wants to strike and leave, and the faster swings mean quicker procs and quicker Resolve recovery. Heavier weapons lock you into recovery frames that Tiel simply cannot pay for.
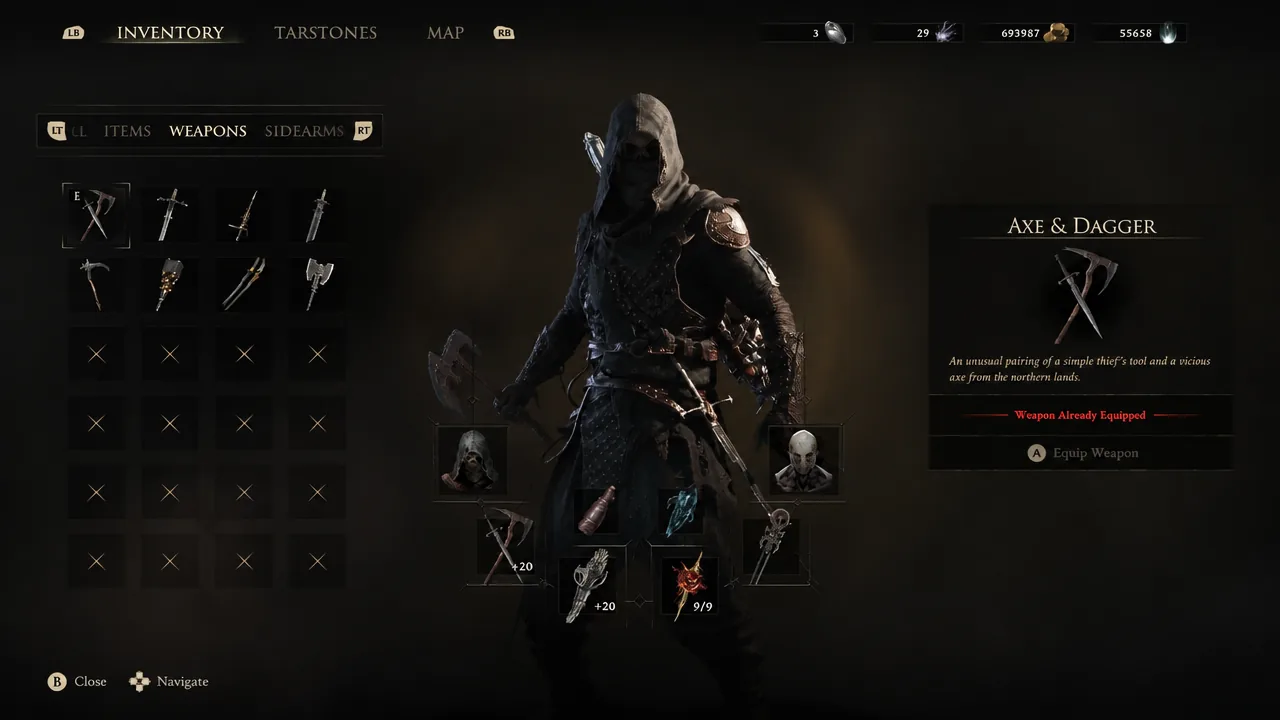
For the sidearm, the choice depends on which half of the build you are leaning into. The Caged Hystrix carries a Poison Infusion effect that stacks directly into the detonation plan. The Salvaged Trebuchaxe goes the other way, trading consistency for a heavy charged shot that pairs with guaranteed crits for a single large burst at range.
| Slot | Pick | Why |
|---|---|---|
| Melee | Axe and Dagger | Fast attacks and short animations that fit the strike-and-dash rhythm |
| Sidearm (Poison) | Caged Hystrix | Poison Infusion feeds the stacks you detonate |
| Sidearm (Crit) | Salvaged Trebuchaxe | Charged burst damage from a safe distance |
Tarstones to equip on Tiel
Tarstones are the buff items you slot to push a Shell in a specific direction, and for Tiel that direction is either more Poison or more critical damage. Hag Stone is the anchor for the Poison version, since at level 3 the Sidearm Poison infusion becomes permanent instead of running out after a handful of shots. Strange Remnant is a strong companion pick because its chaining projectiles spread damage across a group.
| Tarstone | Type | Effect at level 3 |
|---|---|---|
| Hag Stone | Infusion | Poison infusion on your Sidearm becomes permanent for 20 Resolve |
| Arbiter’s Prize | Infusion | Bloodcurse infusion on your Weapon becomes permanent for 30 Resolve |
| Strange Remnant | Ability | 15 Resolve for chaining projectiles dealing 40 damage across up to 4 targets |
| Auspicious Stone | Support | +18% Critical Chance on melee attacks |
| Headsman’s Stone | Support | +100% Critical Damage on melee attacks |
| Deadeye Stone | Support | +40% Critical Damage on ranged attacks |
| Retribution Stone | Support | Riposte damage increased by 50% |
| Splitting Stone | Combat | Sidearm fires 4 projectiles per shot at 50% damage each, no extra Resolve |
Splitting Stone deserves a note of caution. Firing four projectiles at half damage is excellent when you want to spread Poison across a pack, and much worse when you need one heavy hit to land on a boss.
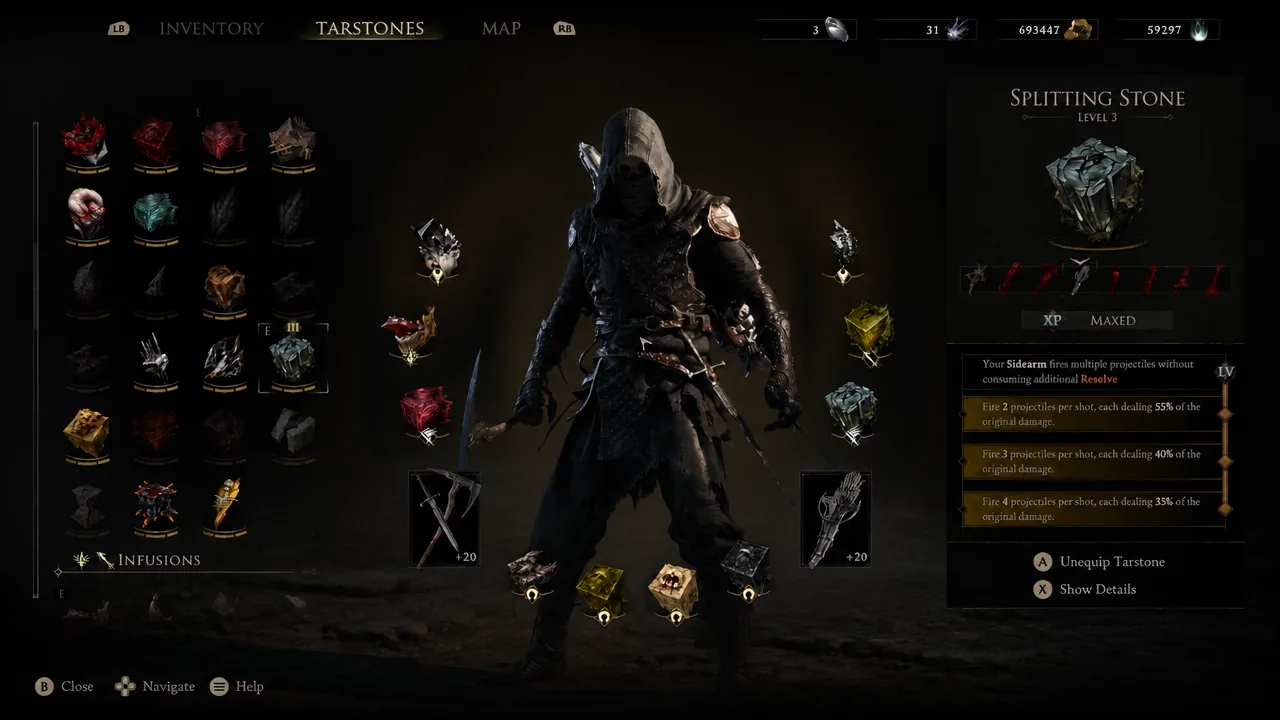
If you are running the crit variant instead, swap toward Deadeye Stone and Retribution Stone for ranged critical and Riposte damage, with Wounding Stone, Arbiter’s Prize, and Acolyte’s Stone on the primary weapon and Corroded Stone plus Tarred Fragment on the sidearm. Common Moonshine as your active item helps recover Resolve, and Sheephead Totem cuts enemy max health.
Best Seal for Tiel
Use the Untarnished Seal. It lets you block incoming attacks with your weapon, and a correctly timed block triggers a Perfect Guard that deals Break Damage. On a Shell with this little health, having a defensive option that is not purely a dodge matters, and the Break Damage is genuinely useful against aggressive bosses that never give you a clean stealth reset. Other Seals work if your playstyle differs, but this is the safe default.
Where the build falls apart
The most common failure is treating Tiel like a normal melee Shell. If you stay in range after the Shadow Strike lands, the Poison detonation will not save you from the counterattack. Disengage immediately.
The second is spreading Shell points too thin. Poison Burst does nothing meaningful without Escalation supplying the stacks, and Deathmark’s crit chance is wasted if Shadow Strike is not your main damage source. Pick one of the two damage paths and finish it before touching anything else.
You will know the loop is working when a single Shadow Strike takes a visible chunk off an enemy and then a second chunk lands a beat later as the Poison pops, with a cloud lingering on the target. If that second chunk never appears, your Poison stacks are not being applied, which usually means Escalation is still under-invested.
Built this way, Tiel stops being the fragile early-game Shell you tolerate and becomes a genuine assassin. The trade is that you have to keep moving, and the moment you get greedy, the low health pool collects.





