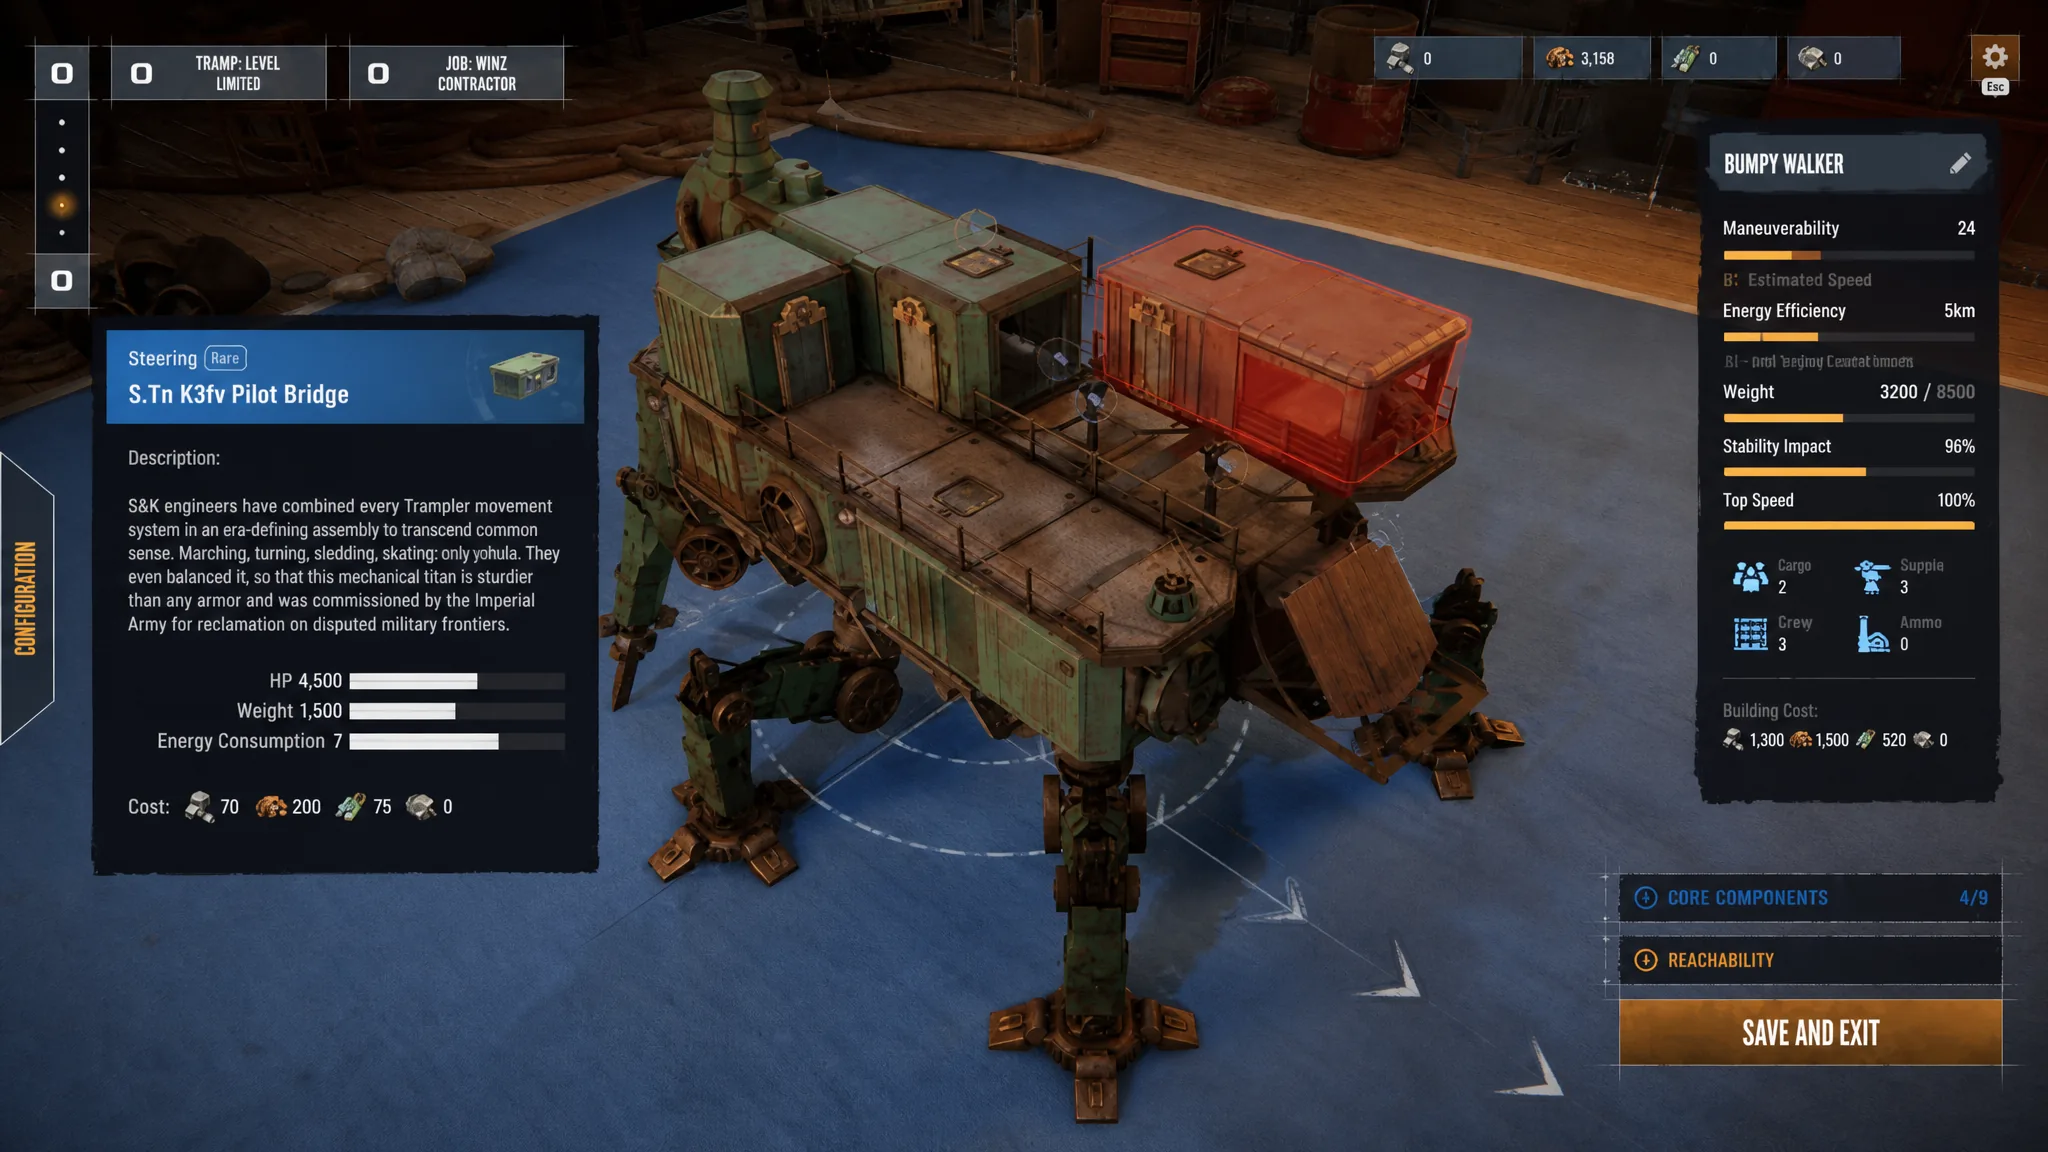
Your Trampler is the whole game in SAND: Raiders of Sophie. It is your transport, your storage, your spawn point, and your biggest gun, so the way you bolt it together matters as much as how you pilot it across the dunes. Three build archetypes dominate the Early Access scene, and each one answers the same question differently: do you want to win the fight, run from it, or hold a line with your crew?
Quick answer: Run the Iron Dreadnought (heavy armor, dual Heavy Autocannons plus Flak Artillery) if you fight to win, the Dune Runner (light micro-chassis, single reactor, rear boosters) for fast solo extractions, and the Outpost (triple-deck storage, crew spawn beds, perimeter turrets) for coordinated squads.
The weight trade-off behind every build
Before you pick a chassis, understand the single rule that shapes all three setups. Armor and weapons raise your health pool, but they also add mass, and mass drops your walking speed across terrain. A heavily plated machine with a weak engine becomes a slow, easy target for nimble raiders. Every build below is a deliberate position on that armor-versus-speed line.
One thing stays constant no matter what you build. The Reactor powers your movement and your weapons, and enemies aim for it first because destroying it is the fastest way to disable your Trampler. Place it in the center of the hull and wrap it in interior plating, using outer rooms as a buffer against boarders and explosive damage. Lose the Reactor and you lose everything still loose in your cargo hold.
| Build | Focus | Best for |
|---|---|---|
| Iron Dreadnought | Heavy armor and firepower | Players who want to win firefights |
| Dune Runner | Speed and stealth | Solo and duo fast extractions |
| The Outpost | Squad utility | Coordinated teams holding ground |
Iron Dreadnought: heavy armor and firepower
This is the brawler. The Iron Dreadnought is built around a reinforced central core, dual heavy gun platforms on either flank, and an extended cargo bay, balancing storage against enough plating to survive boarding attempts and drawn-out PvPvE encounters. It can absorb direct cannon fire and shrug off the kind of pressure that destroys lighter machines.
For weapons, mount Heavy Autocannons on the platforms to chew through enemy exterior armor with sustained fire, then add Flak Artillery for close range. The Flak clears swarms of Upiors and blasts boarding players off your deck before they reach the steering controls. The trade is mobility. All that armor and artillery drags your terrain speed down, so you will not outrun trouble; you have to outlast it.
Dune Runner: speed and stealth for solo runs
The Dune Runner gives up almost all of its defense for raw movement. It uses a lightweight micro-chassis, a single compact reactor, minimal storage, and rear engine boosters so you can sprint to high-tier loot zones and extract before heavy squads close in. If you would rather avoid a prolonged fight than win one, this is the frame for you.
Arm it light and plan your escape routes before you drop. With so little plating, a single sustained exchange against a heavier Trampler will end badly, so your real defense is never being where the heavy crews expect you. Keep the Reactor protected anyway, but treat speed and positioning as your armor.
The Outpost: squad utility and mobile fortress
The Outpost is a team build, designed as a persistent forward base rather than a duelist. It packs triple-deck storage, multiple crew spawn beds, and perimeter turret mounts, which let a full squad respawn, restock, and hold a position through long expeditions. Pair the turret mounts with Flak Artillery so the deck stays defended when boarders or Upiors swarm in.
This setup only pays off with coordination. One player cannot run the spawns, the turrets, and the steering at the same time, so a disorganized group will struggle while a tight crew turns the Trampler into a fortress they can always fall back to.
Weapons and attachments to match each build
Your mounted weapons decide how fast you strip enemy plating and disable their core. The three workhorse options below cover armor damage, area damage, and precision, and each pairs cleanly with a specific attachment.
| Weapon | Role and range | Best attachment |
|---|---|---|
| Heavy Autocannon | Armor damage, medium to long | Reinforced Gun Shield (protects exposed gunners) |
| Flak Artillery | Area-of-effect, short to medium | High-Capacity Ammo Drum (cuts reloads by 40%) |
| Sniper Cannon | Critical component hits, extreme range | Thermal Tracking Scope (highlights hidden Reactors) |
The Heavy Autocannon belongs on the Iron Dreadnought’s gun platforms, where its sustained fire grinds through exterior armor blocks. Flak Artillery earns its slot on the Outpost’s perimeter turrets and on any build expecting boarders. The Sniper Cannon reloads slowly but stays accurate enough to snipe an enemy Reactor across the dunes, and the Thermal Tracking Scope tells you exactly where that Reactor is hiding.
How to pick the right one
Choose the build that fits how you actually play, not the one with the biggest stat sheet. A heavy chassis is wasted on a player who prefers quick in-and-out runs, and a stealth frame folds under pressure if you fight as a squad. Match the frame to your habit first, then layer weapons on top.
Note: SAND: Raiders of Sophie is in Steam Early Access, where balance values shift between updates, so treat any “best” label as provisional and expect to retune your blueprint after major patches. Because your saved blueprints stay in the orbital hangar even when a Trampler is destroyed, you can rebuild a favorite configuration as long as you have the materials, so it is worth saving a tuned version of whichever build matches your dunes. You can wishlist or track the game on its official website.