


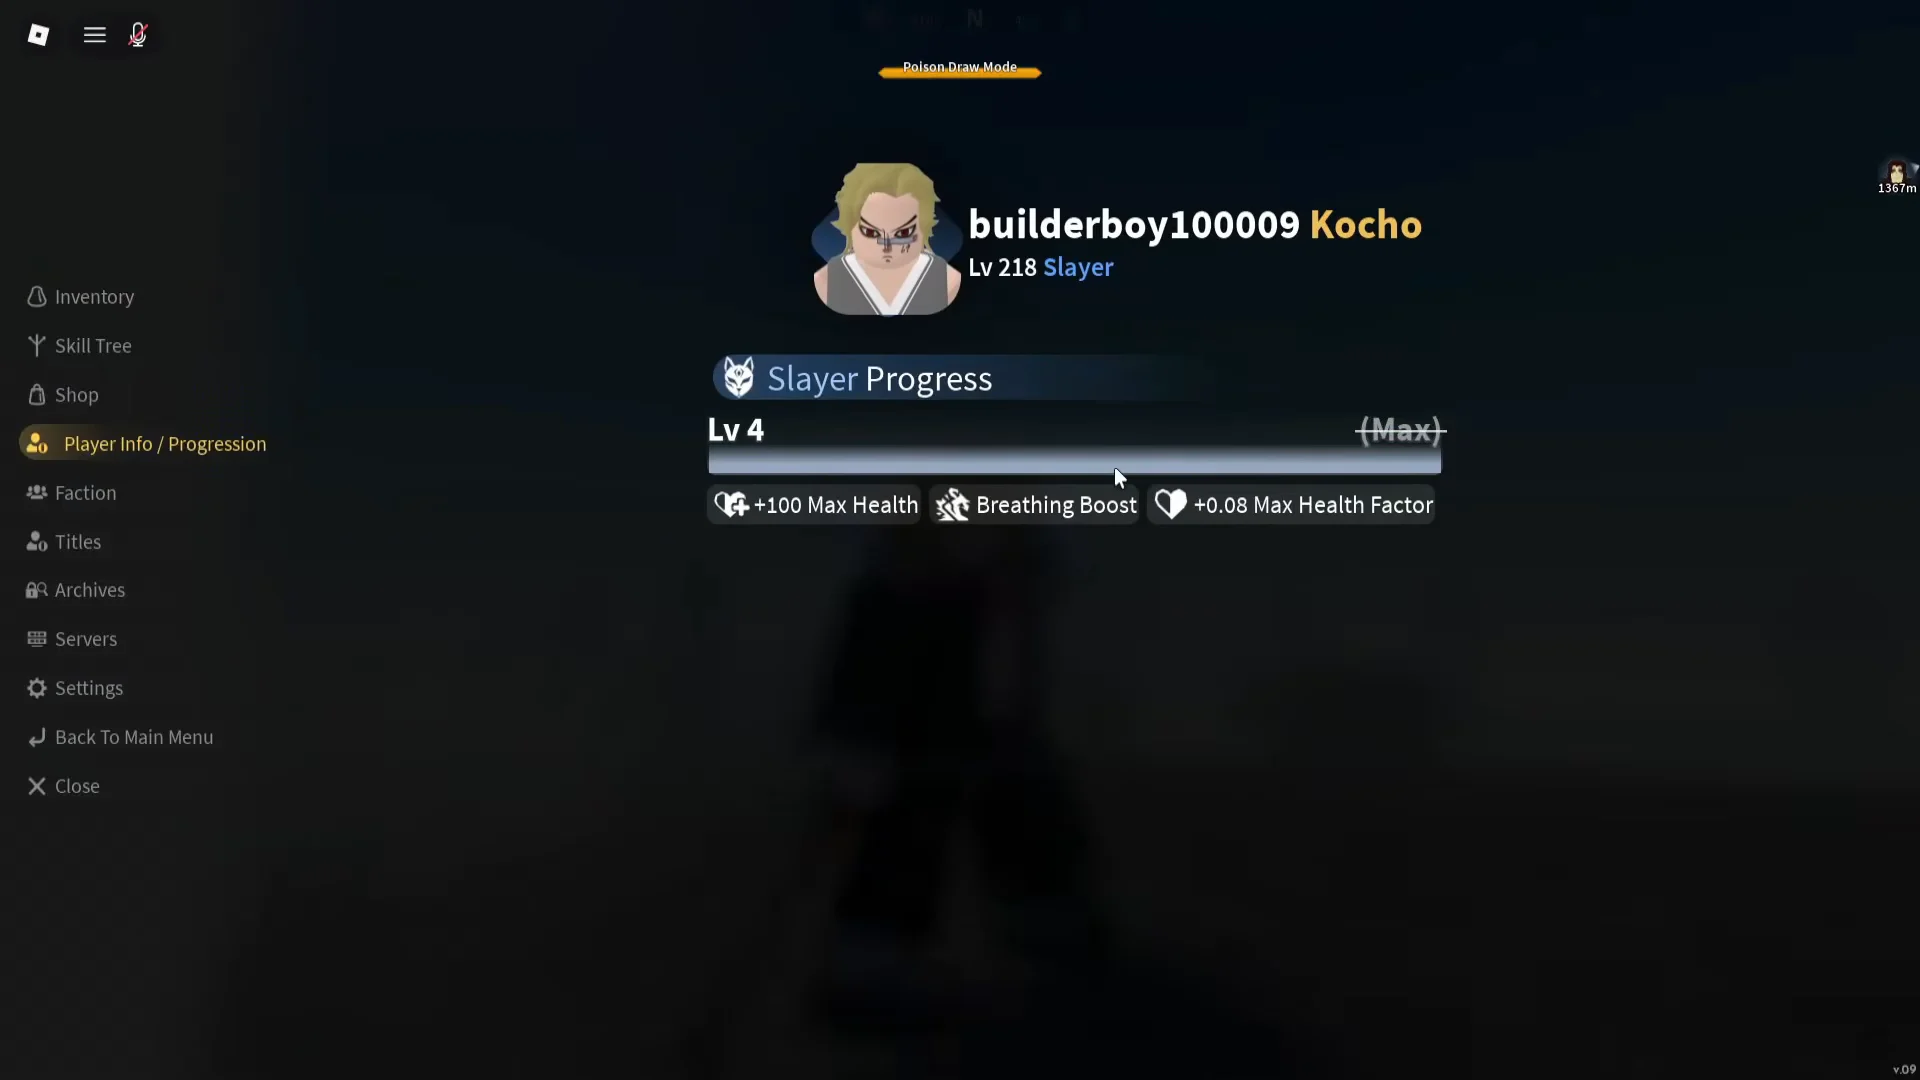
In Slayers 2, Breathing Boost is the hidden Slayer skill. It surrounds your character with a golden aura and increases movement speed for a brief burst. No trainer teaches it, and it appears on neither a drop table nor a shop menu. The skill activates as soon as the Slayer Progress bar shows Lv 4 (Max), making the unlock a gourd-blowing grind at the Butterfly Estate.
Quick answer: Finish Ren’s lost Nichirin quest at the Butterfly Estate, then buy and blow 37 Large Gourds at 8,800 Wen each. Slayer Progress hits Lv 4 and Breathing Boost fills your N slot.
Breathing Boost requirements and total cost
Slayer Progress only exists once you are a full Demon Slayer, so Final Selection has to be behind you before any of this applies. Entry to Final Selection opens at level 45, though around level 60 is a far more comfortable place to attempt it solo. Ren’s own errand, the one that opens the gourd shop, is gated at level 75.
- Final Selection cleared and Mizunoto rank earned.
- Level 75, the requirement for Ren’s quest.
- Ren’s gourd shop unlocked at the Butterfly Estate.
- Roughly 325,000 Wen banked for a clean run from zero.
| Detail | Value |
|---|---|
| Slayer Progress per Large Gourd | +300 |
| Large Gourd price | 8,800 Wen |
| Gourds needed from zero | 37 |
| Total Wen from zero | ~325,000 |
| Unlock threshold | Slayer Progress Lv 4 (Max) |
| Skill slot | N |
| Active duration | ~15.20 seconds |
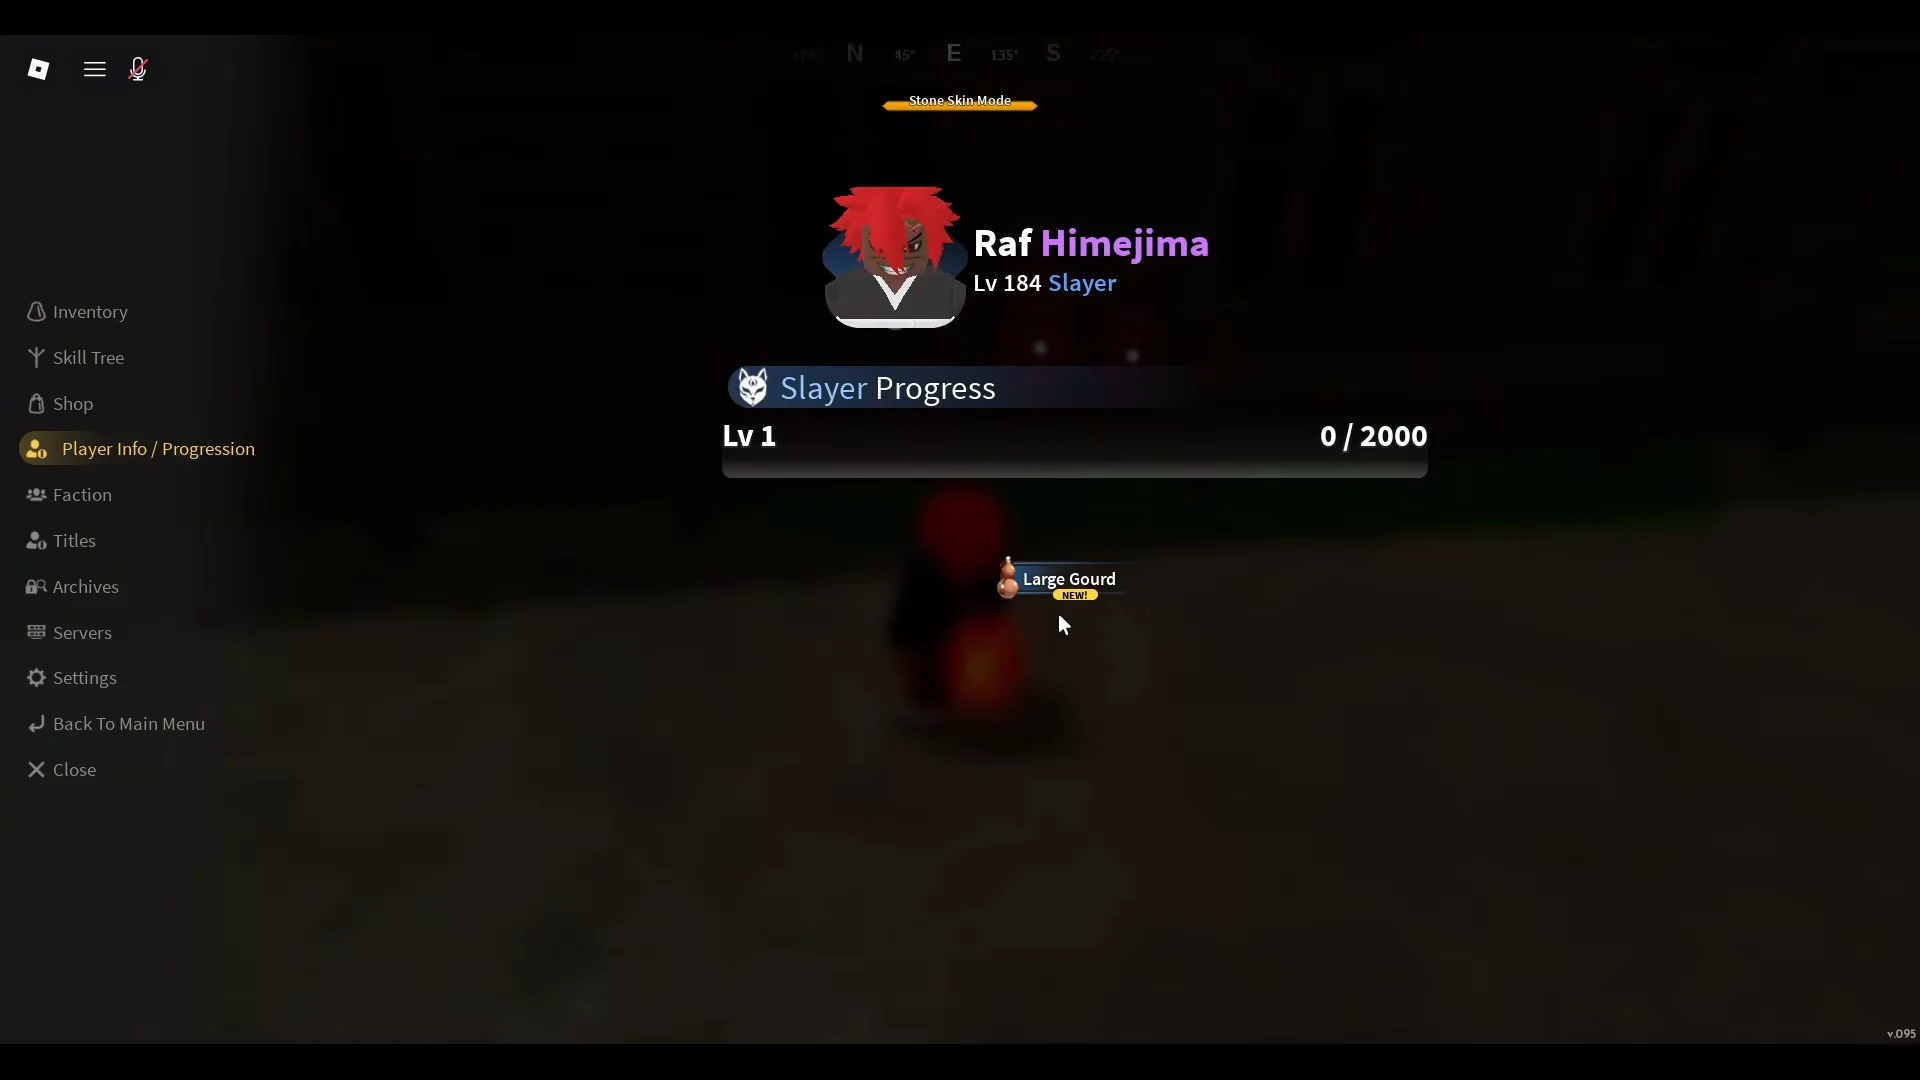
The 37-gourd figure assumes an empty bar. If you have already banked progress from earlier levels, your count drops accordingly. Lv 1 starts you at 0/2000, and Lv 3 runs to 7,000, so check your current number before you decide how much Wen you need.
If Wen is holding you up, retrieve Ginzo’s Jewelry Box from his residence; that home is in the Village Hidden in the Mist, and the item unlocks Ginzo at Mistfall Harbor. He purchases loot and coin items, making him the best option for covering a gourd bill this large.
What each Slayer Progress level gives you
The progress toward the cap also provides permanent stats at every level, so you are not paying only for one movement skill. Reaching Lv 3 grants +25 Max Stamina, +75 Max Health, and +0.07 Max Health Factor. At the Lv 4 cap, you receive +100 Max Health and +0.08 Max Health Factor.
This is why the 325,000 Wen should be judged in two parts. The health and stamina gained along the bar are the lasting value, while Breathing Boost becomes the extra benefit after the bar reaches its maximum.
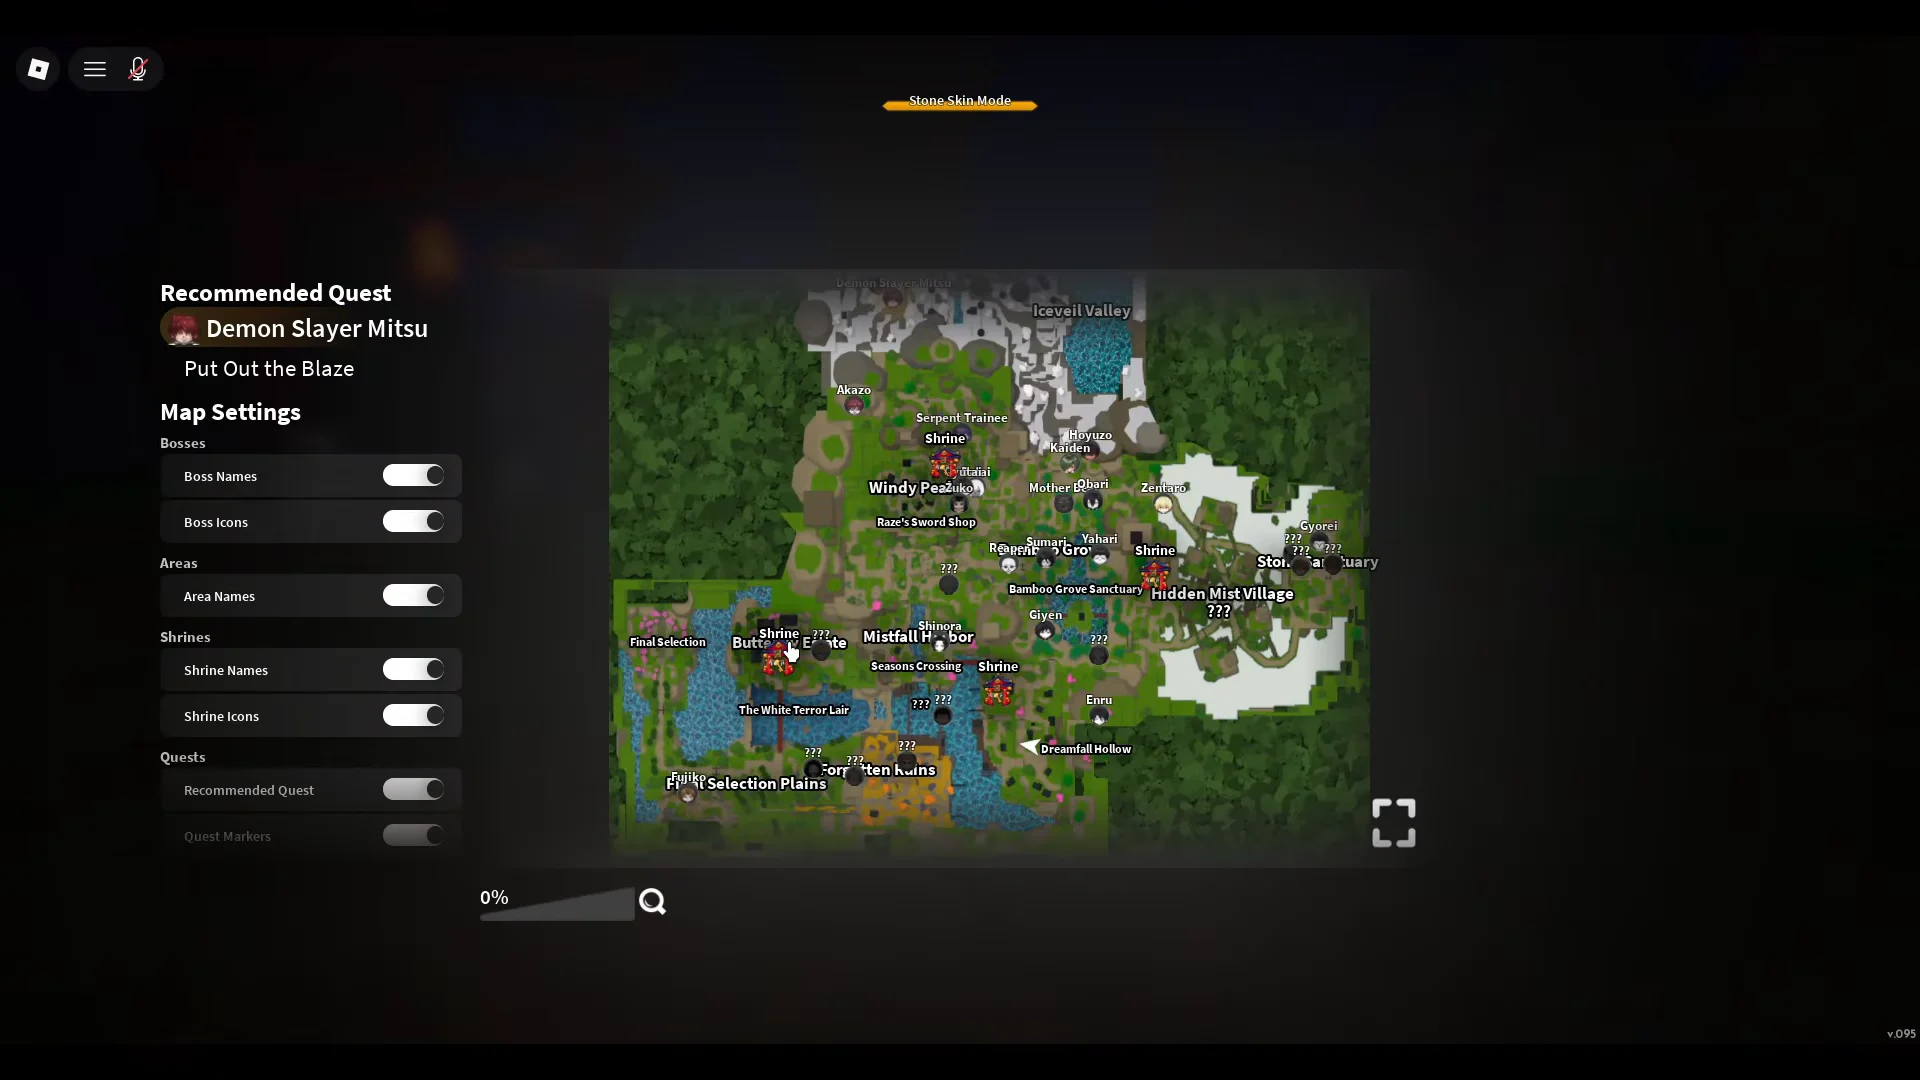
Unlock Ren’s gourd shop at the Butterfly Estate
Ren will not sell you a single gourd until you return the Nichirin blade he lost. The errand is short, but it involves a cliff drop and a river crossing, so expect a few minutes of travel.
How to max Slayer Progress with Large Gourds
Buy Large Gourds and nothing else. The smaller versions exist, but their progress per use is low enough that they turn a twenty-minute job into an afternoon.
How to use Breathing Boost and confirm the unlock
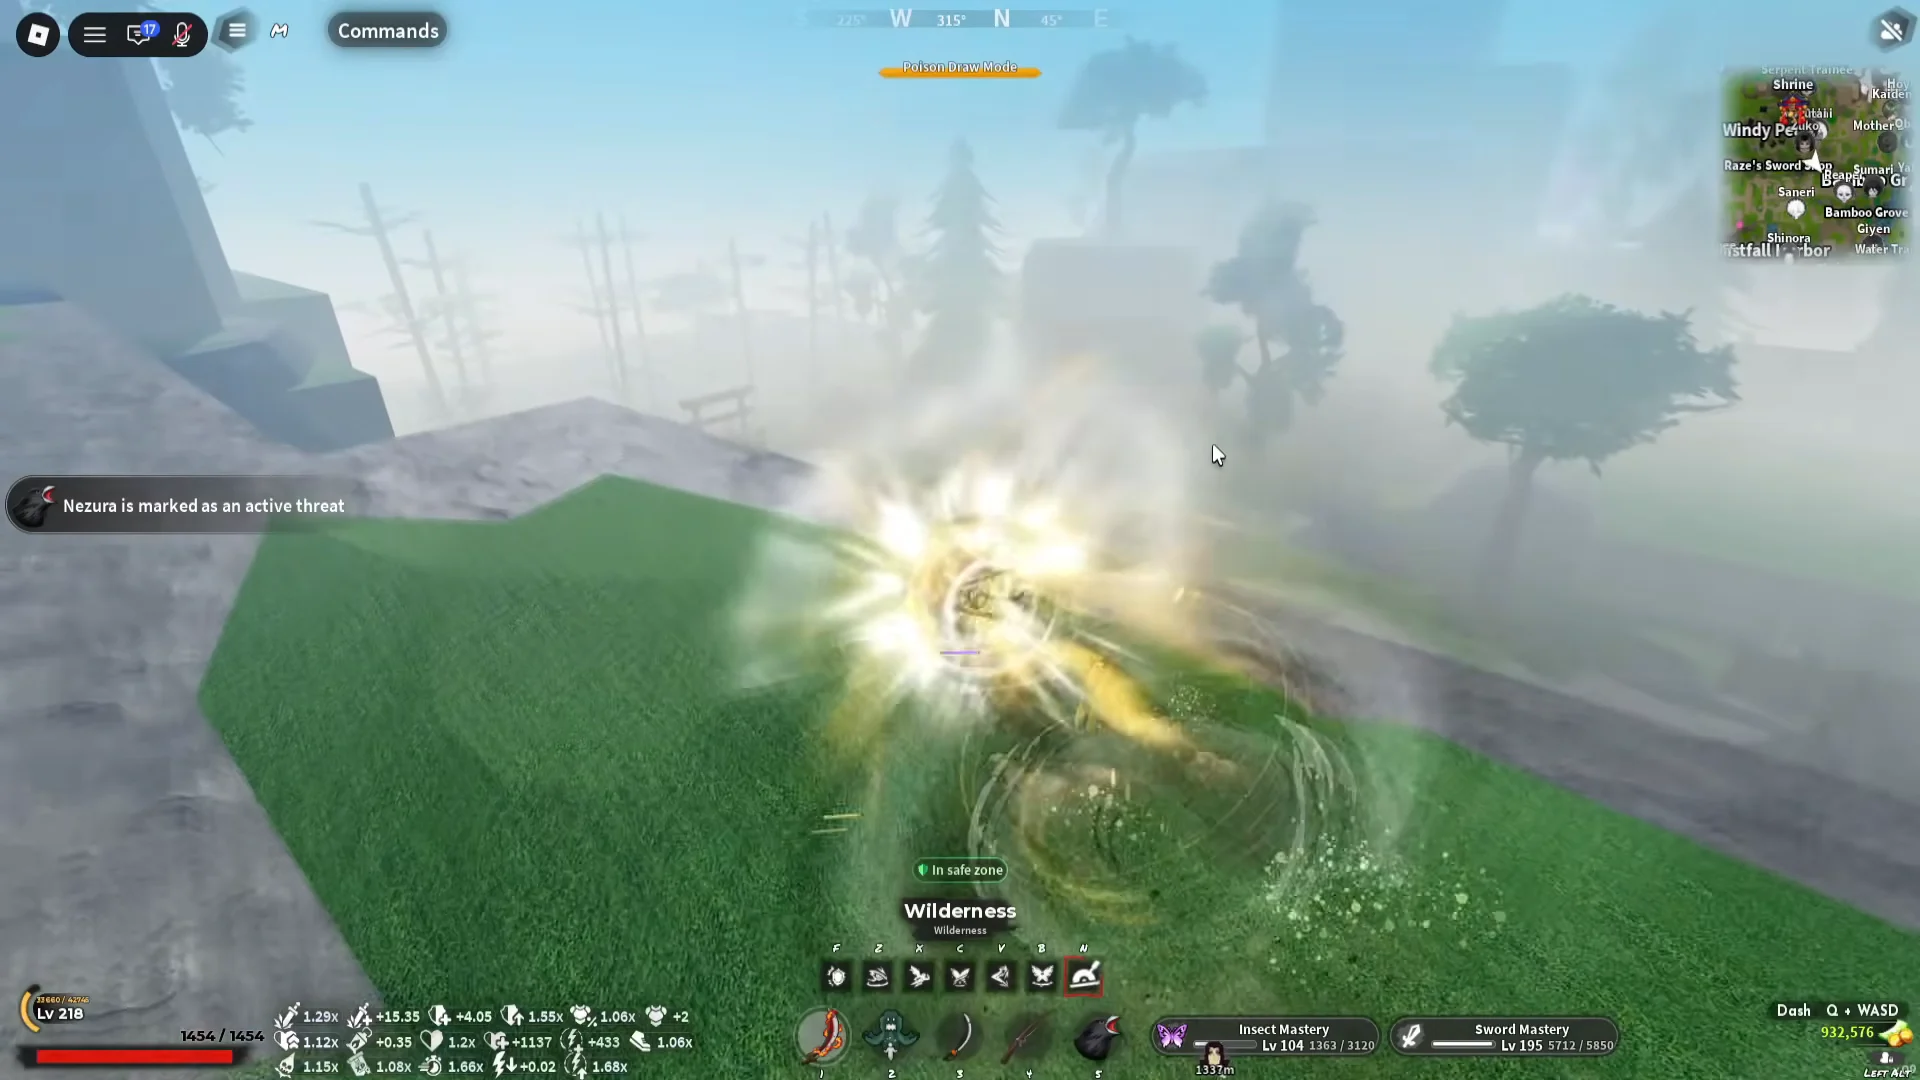
Breathing Boost is placed automatically into the breathing hotbar slot labelled N, and it also appears among your innate skills in the Skill Tree. Equip your katana and press N to activate it.
The result appears at once: a golden-yellow swirl surrounds your character, and movement speed rises for roughly 15.20 seconds. Seeing both this effect and Lv 4 (Max) on the Slayer Progress bar confirms the unlock.
A blank N slot means Slayer Progress has not reached its cap. Go back to the Progression screen and verify your level instead of the raw point total, since the last few hundred points are easy to misread.
Breathing Boost vs a horse for map travel
Timed over the same route, Breathing Boost does not beat a standard horse as a way of crossing the map. The buff runs out after about 15 seconds and then enters cooldown, while a Horse Mount from Bamboo Grove costs 15,000 Wen and keeps going.
Where it earns its slot is in short bursts: closing gaps between landmarks, and chasing opponents in PvP where a mount is not an option. Treat it as a burst tool layered on top of the permanent stat gains, not as a replacement for a mount.
The gourd route costs roughly 325,000 Wen against a 15,000 Wen horse. If pure travel speed is your only goal, buy the horse first and treat Slayer Progress as a later health-and-stamina investment.
Getting to the Slayer rank first
If Slayer Progress does not appear in your menu at all, you have not cleared Final Selection yet. You need to be Human and at least level 45, and the event starts at the top of each hour in the area toward the bottom-left of the map, so arrive early rather than on the minute.
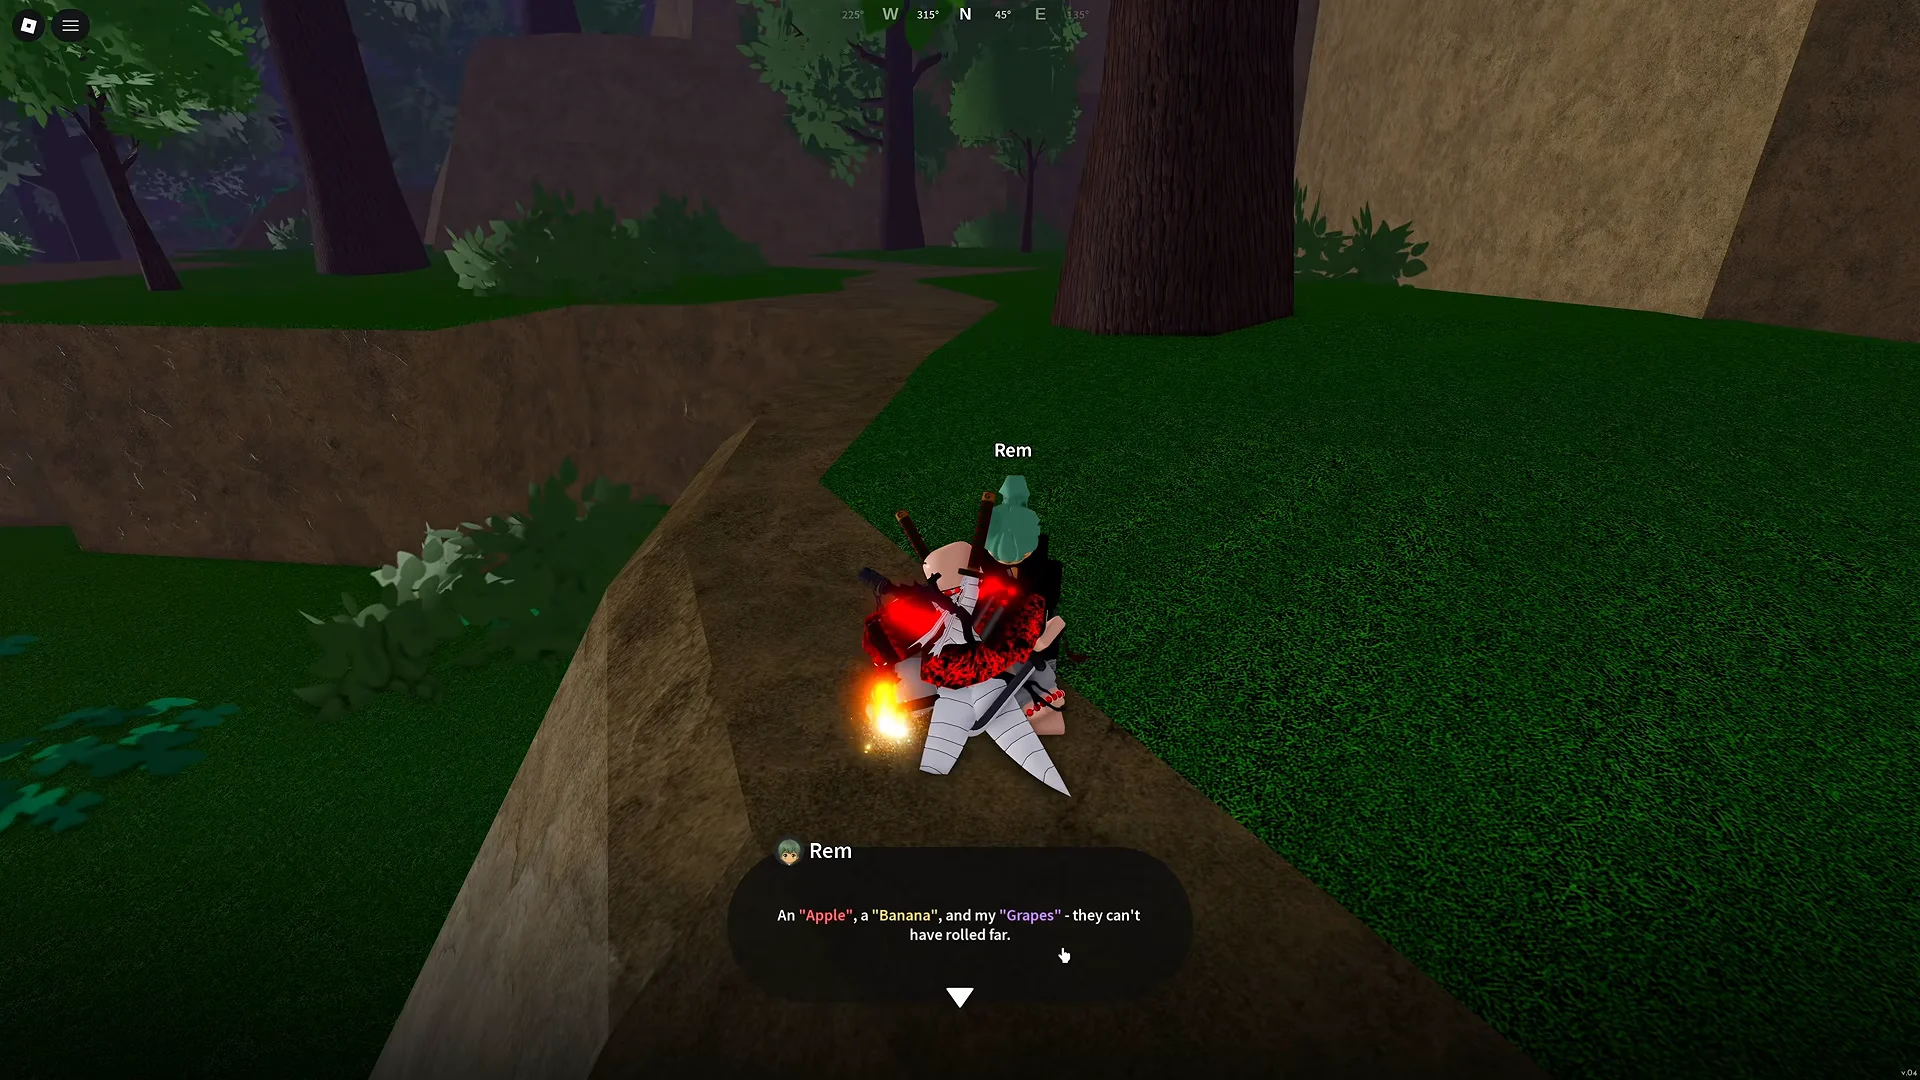
The exam runs as a chain of short objectives handed out by separate NPCs. Rem opens it with three fruits to collect: speak to her before picking anything up, then return once you have the Apple, Banana, and Grapes.
From there the chain moves through Vael’s five Lesser Demons, Klien’s missing katana and a 25 Cash bandage from Rika, and Mizuto’s hunt for Lost, which carries around 790 Health and is the first real wall at level 45. A parkour dungeon follows, giving you 6 minutes and 3 Health per attempt. Failing it does not eject you from Final Selection, so use early runs to learn the jumps.
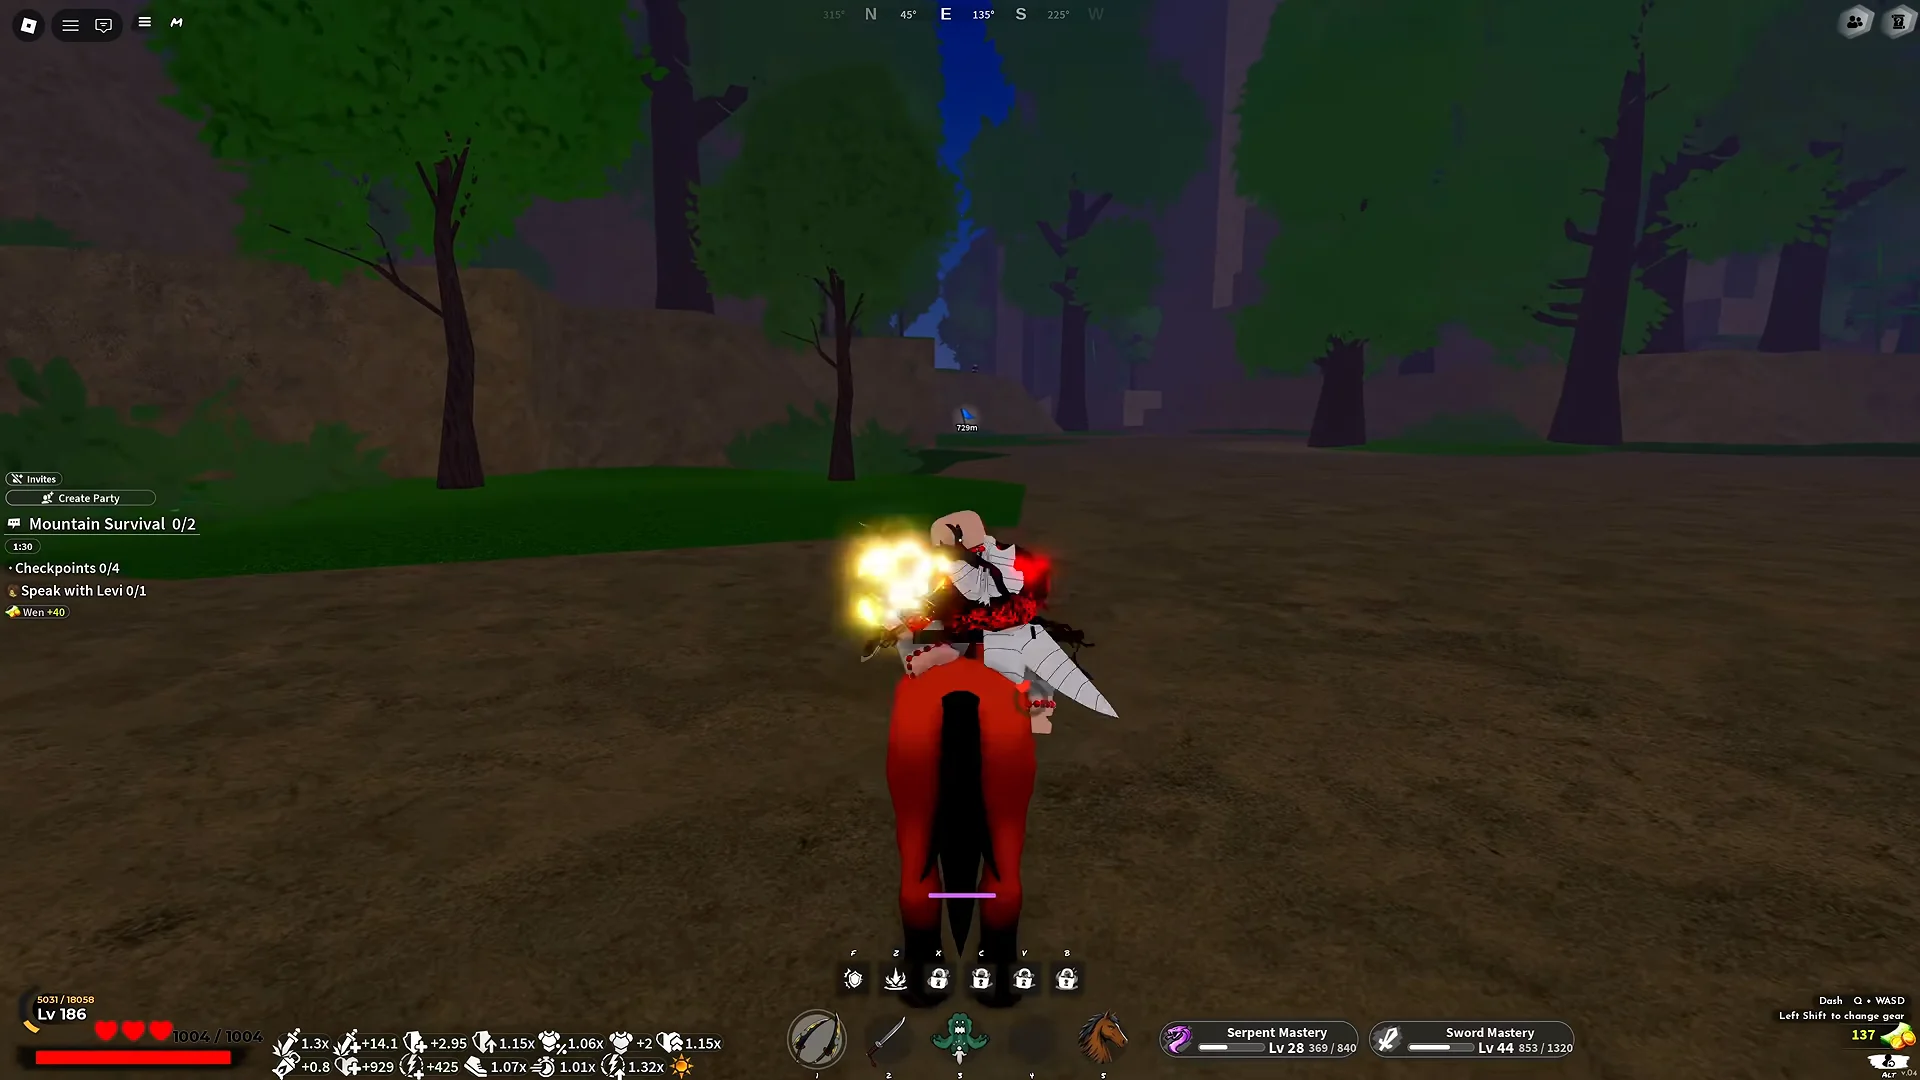
Lavato’s time trial sends you between checkpoints across the mountain before the timer expires, which is where a horse genuinely pays off. Levi then asks you to hold a zone and rescue a civilian before the finale.
The Hand Demon closes it out. Weaker enemies spawn during the fight, and clearing those adds before returning to the boss is the difference between a clean kill and a trip back to spawn. Beat it and you are a Slayer, with a Crude Iron Ingot and your Kasugai Crow in hand, and the Slayer Progress bar finally visible in Player Info.
Codes
The following codes work: Sorryforshutdown, Release26, PointsReset, EVILARTSPIN5. Open the code-entry menu in-game, type a code exactly as displayed, and confirm it to collect the reward.





