

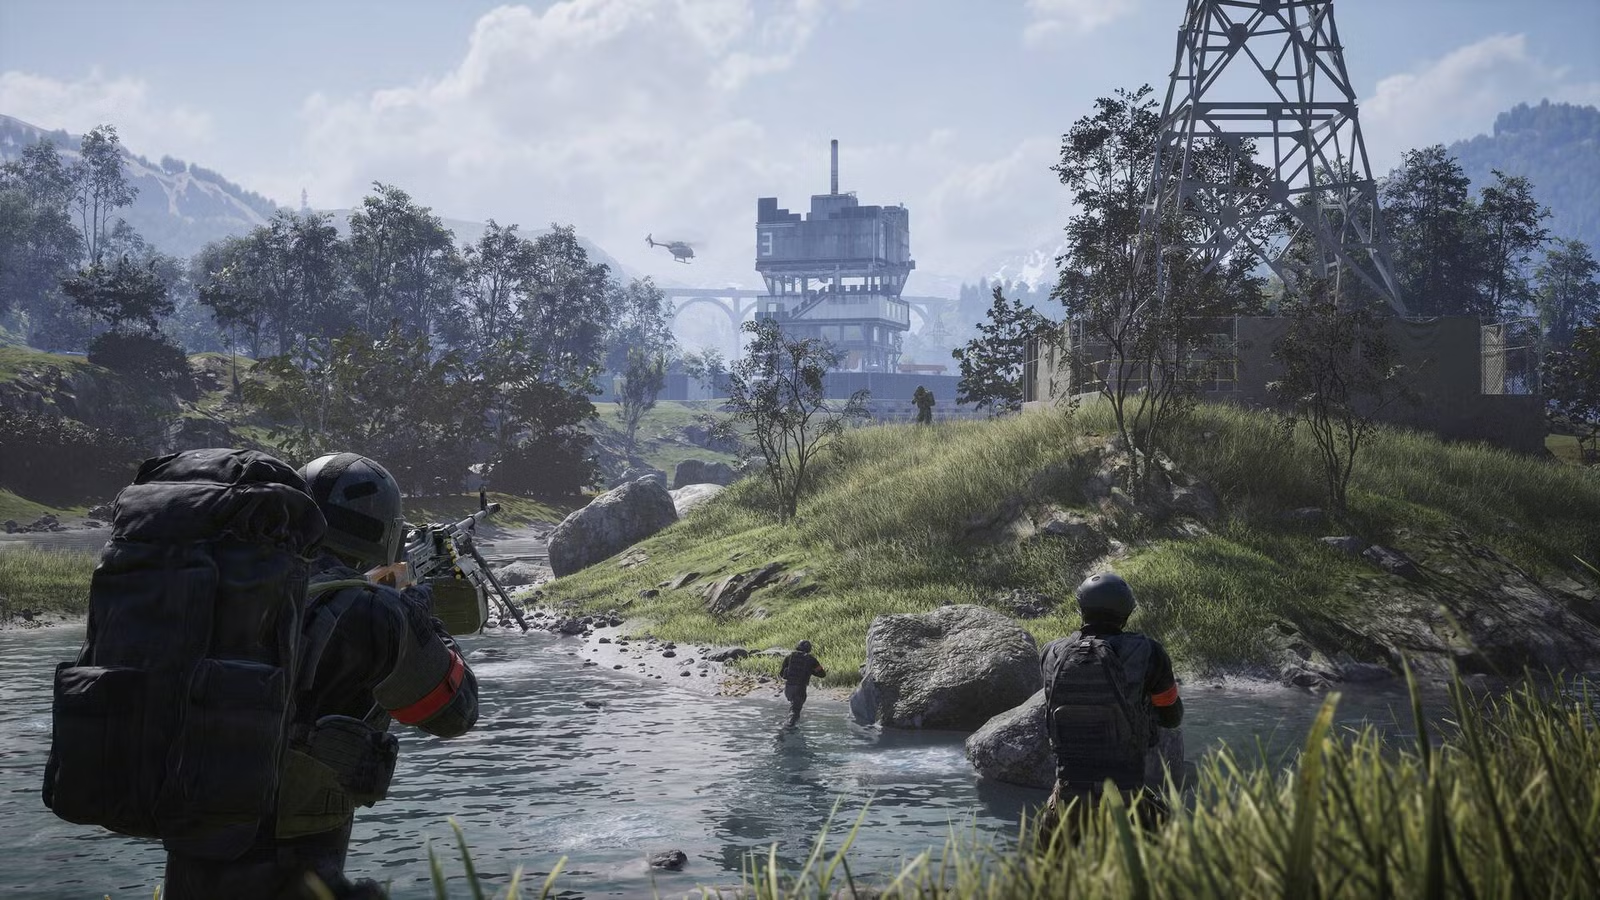
Ozeti moves the fighting to Western Europe: a wooded river basin built around a hill town, with low buildings strung along one road, a walled football stadium at one end and a church looking down from the high ground above. Orchard, dry field parcels and scattered pine fill the space between, and the river cuts across the south. Cover is thick once you are inside the town and terracing, and close to absent on the open approaches, so simply reaching the fight is the hard part. The battlefield runs 16.32 km across, but only a small circle of it is ever contested at once.
Quick answer: The objective rotates through three of Ozeti’s four play areas — Default, Church and River, each with an equal chance of being picked. The fourth, Farmland, never comes up. Put more of your faction inside the 85-metre control zone than the other two teams to hold it, chase the roaming hot zone for double value, and capture drill towers to pull the code. First faction to 100 match points wins.
The play-area rotation
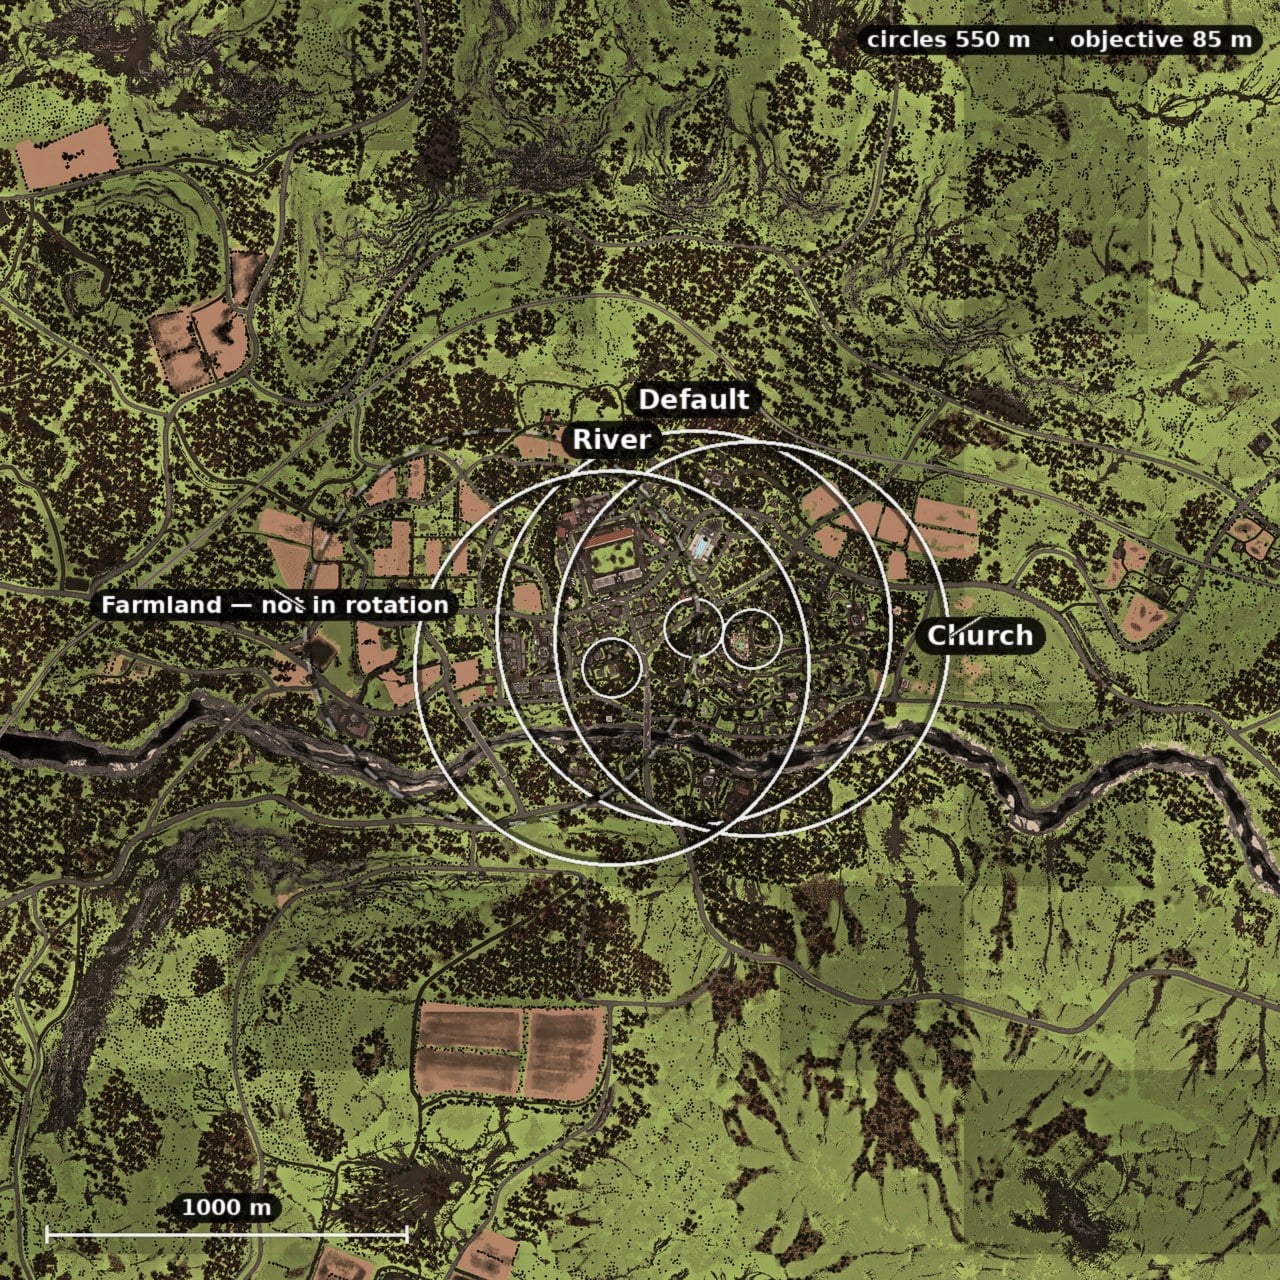
Ozeti defines four play areas but only rotates the objective through three of them. Each live area has the same odds of being chosen, and all four possible positions sit close together — no more than 693 metres apart at the extremes — so every match is decided inside a small slice of the map. Each play area is a 550-metre circle, with the actual scoring zone an 85-metre bubble inside it.
| Play area | Where it sits | In rotation | Named ground regions |
|---|---|---|---|
| Default | East of the middle | Yes | 36 |
| Church | East of the middle | Yes | 28 |
| River | North-west of the middle | Yes | 29 |
| Farmland | West of the middle | No | 23 |
Default
Default is the busiest of the three live zones and the one you will see most. It reaches east of the map’s centre and pulls in the widest spread of ground, with nine pockets of residential streets, six bands of the terraced hillside climbing toward the church, four stands of pine forest, a pair of farm plots, two rows of shops, the apartment blocks and their garages, the church top itself, a lumberyard, a pool, and the whole football stadium with its frontage, garages and car parks. All four of the map’s drill towers fall inside its radius, which is why the race for the code usually starts here. Expect the town interior to be the decider and the stadium end to be the loudest flank.
Church
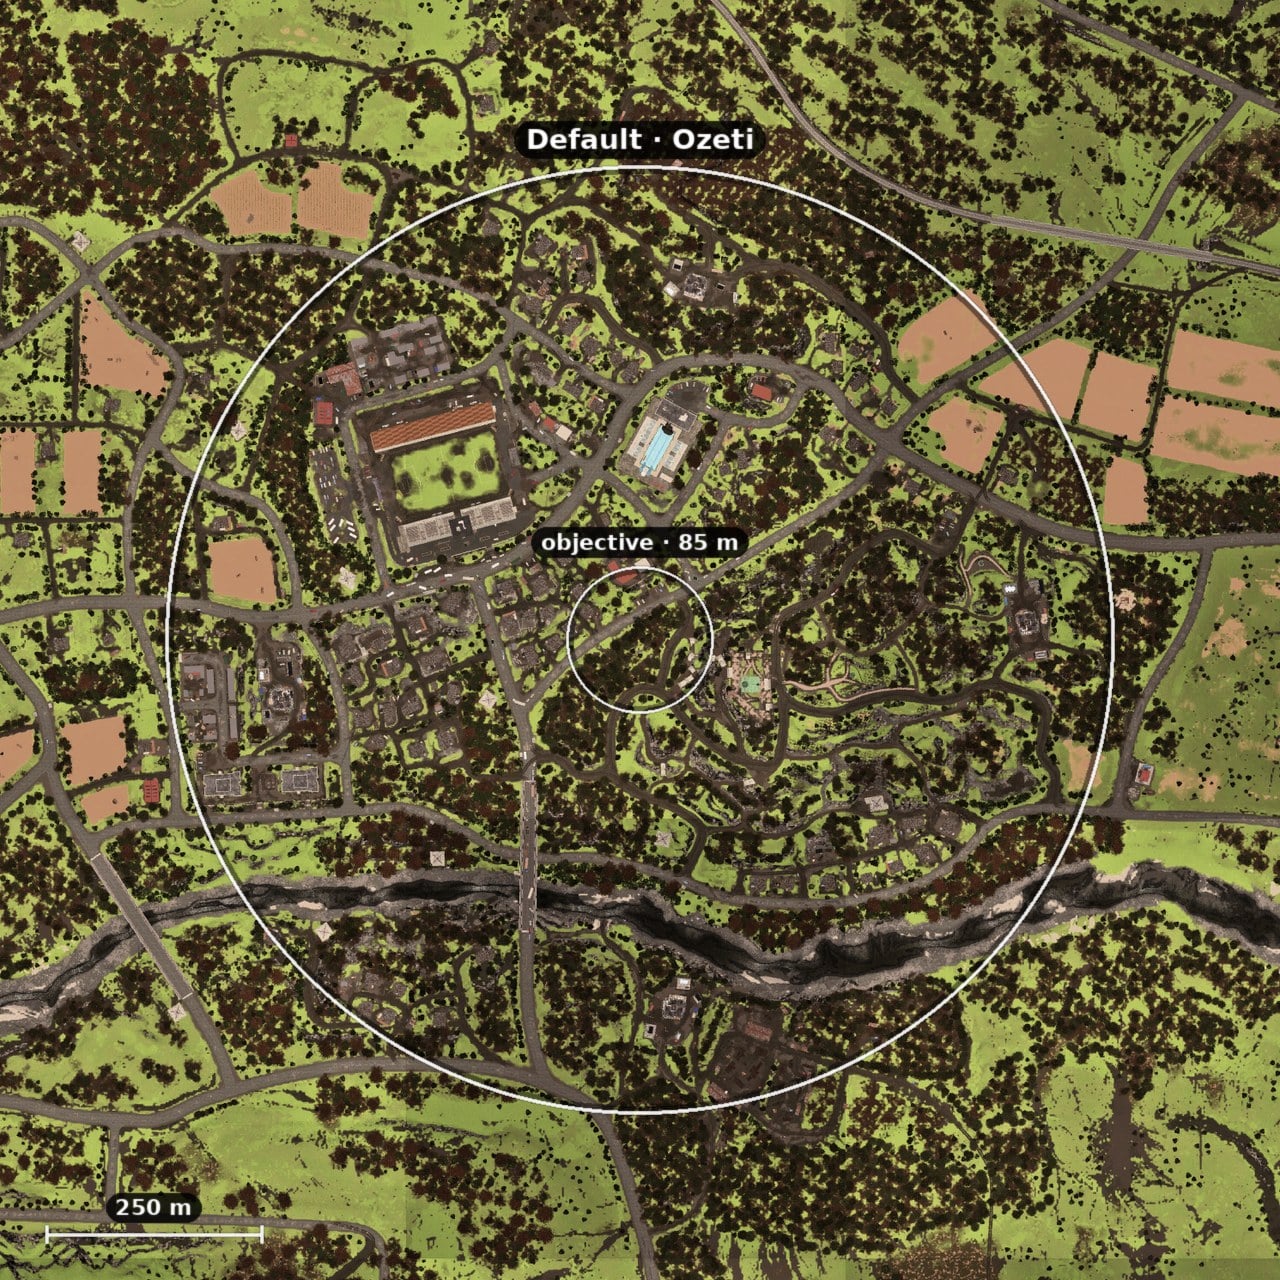
Church throws the objective onto the high ground east of the middle, right beneath the building it takes its name from. Eight residential pockets, six bands of the hillside under the church, three drill towers, two stands of forest and two shop rows sit inside it, along with a single farm plot, the church top, a lumberyard, a pool, and the stadium’s front and parking. The elevation does the work here, so the team that holds the climb and the sightlines it opens tends to hold the zone. Take the approach seriously — the open ground below the terracing is exposed.
River
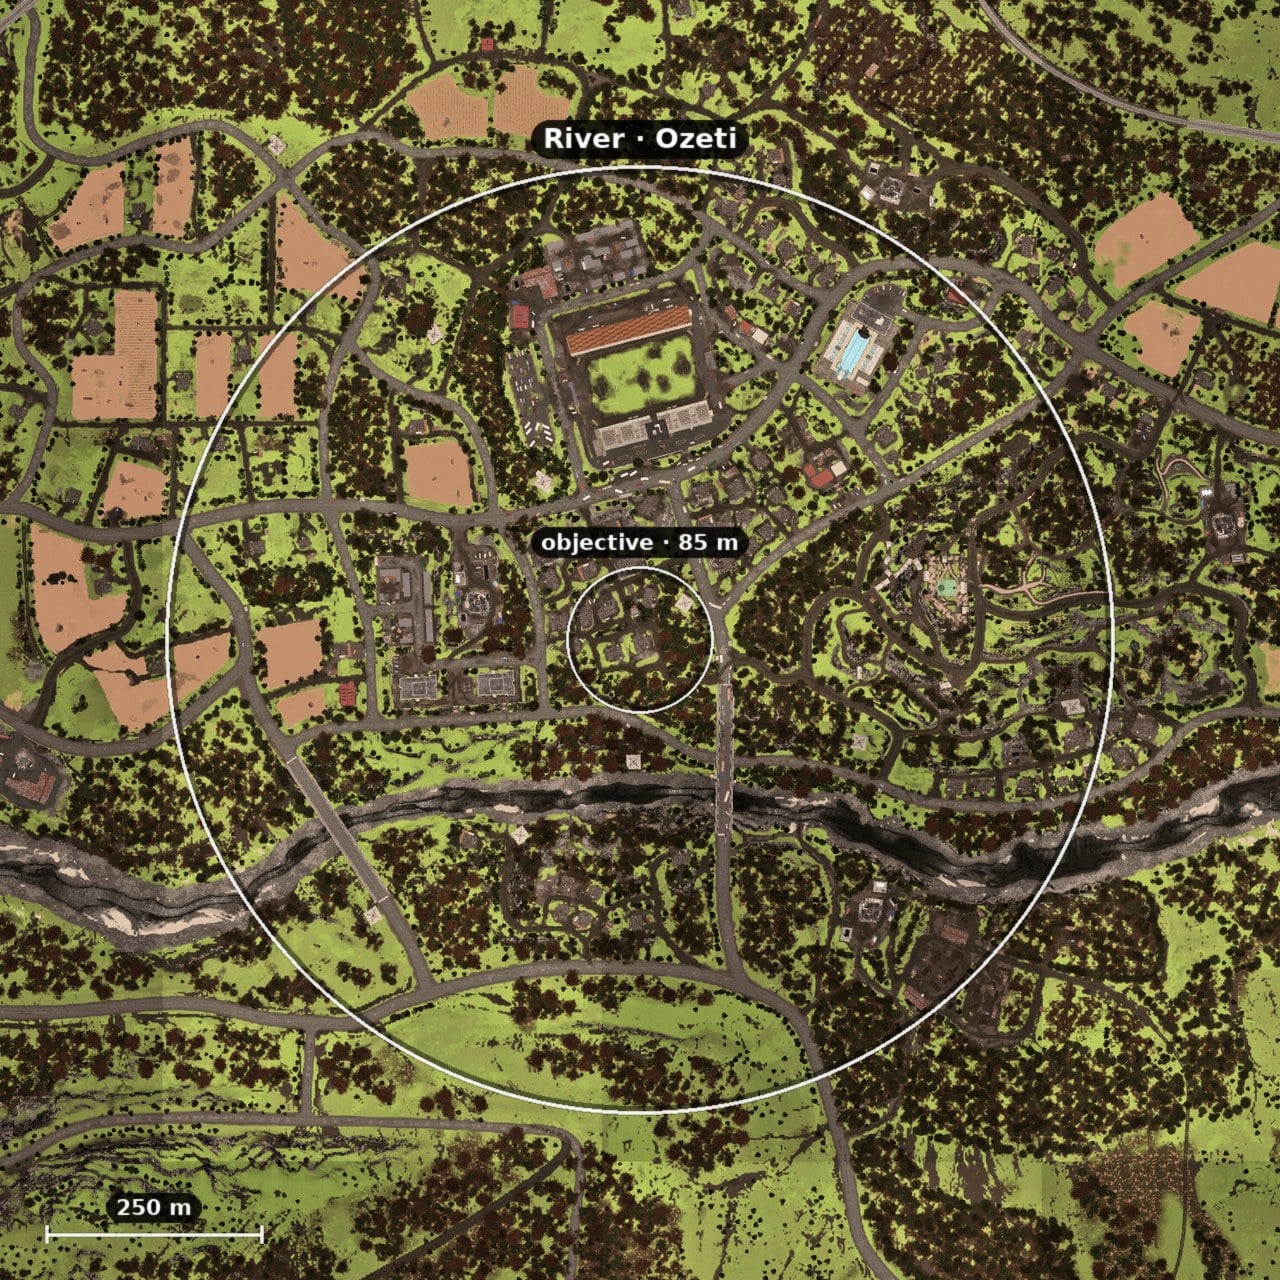
River drops the objective north-west of the centre, tighter and greener than the other two. Inside its radius you get seven clusters of residential streets, four steps of the church hillside, three patches of forest, two farm plots, two shop rows, the apartments and garages, the church top, a lumberyard, a pool, and the stadium frontage, with two drill towers to fight over rather than four. Fewer towers means fewer code sources, so contesting the pair that are here matters more than it does in Default. Treelines and the river line give the cover, and they also give recon somewhere to sit.
Farmland (out of the rotation)
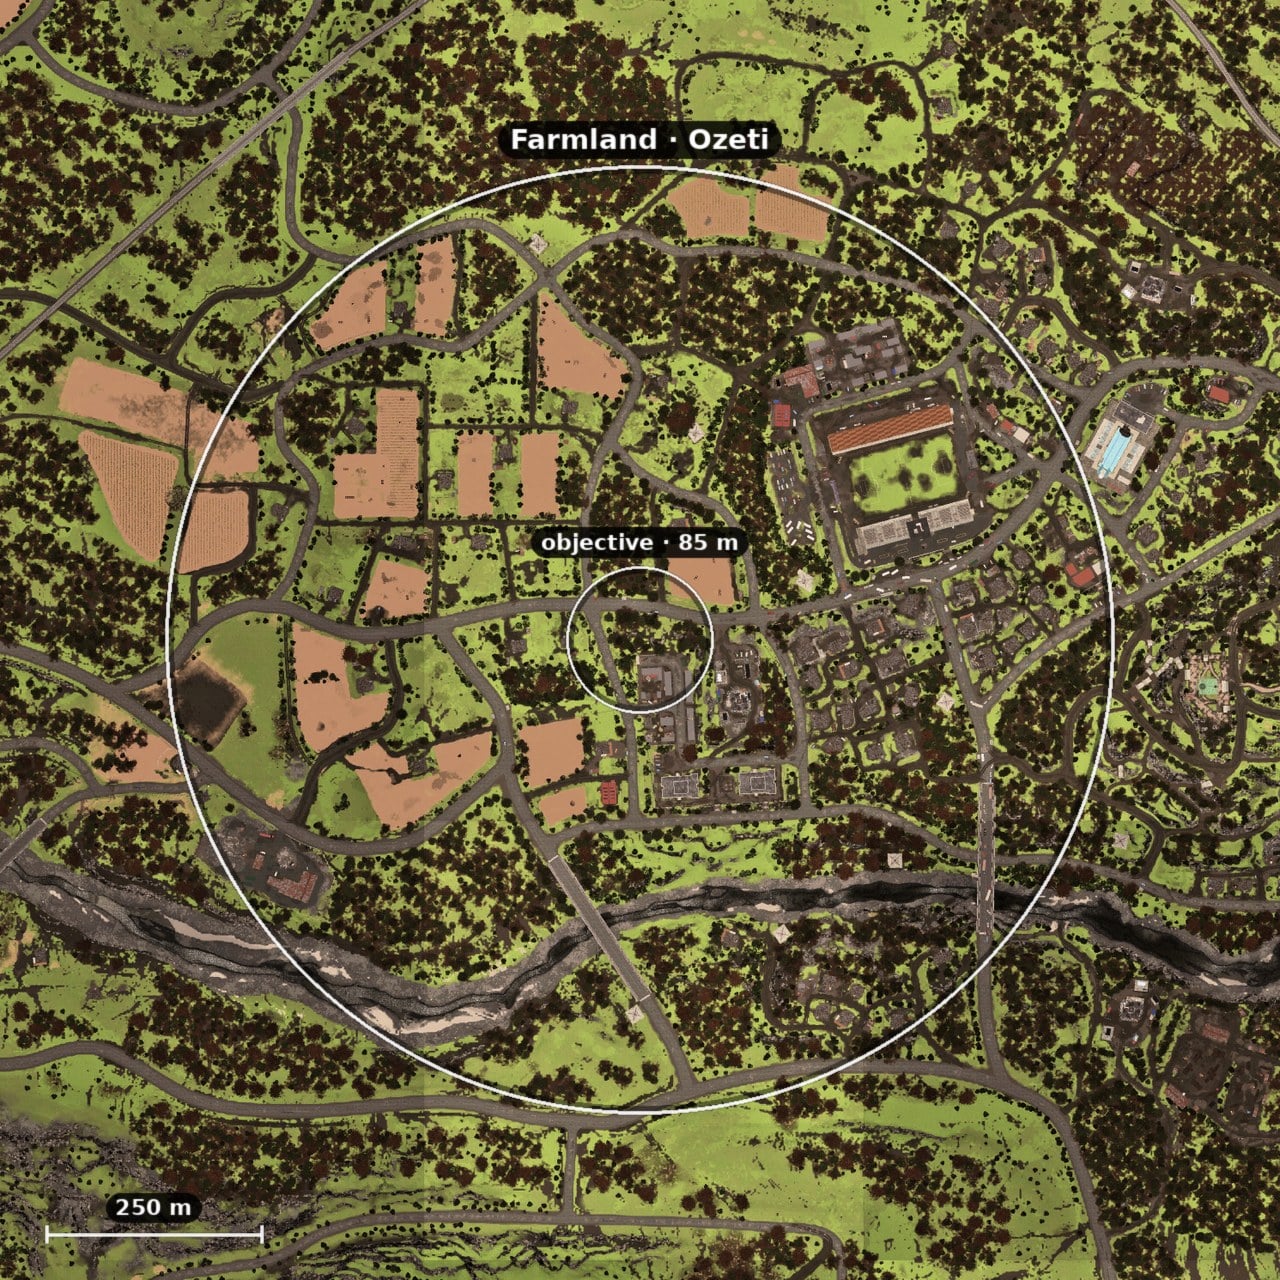
Farmland is the odd one out. It is a fully defined zone west of the centre, but the objective never rotates onto it, so you will only ever cross it in transit. The ground leans rural, with six farm plots, four stands of forest, four residential pockets, the apartment blocks and garages, a strip of industrial ground, a row of shops, a single drill tower, and the stadium with its frontage, garages and parking. Knowing what it holds is still useful, because a covered line through it can shorten the trip to whichever live zone you are heading for.
The objective, the hot zone and the towers
The Control Zone is the whole point of a match. Every player standing inside it adds one to their team’s faction count, and the team with the highest total holds the zone. Hold it while the tick bar fills and your faction banks a match point. Battles pit three 33-player factions against each other — Lonestar, Valkyra and Manticore — and the first to reach 100 match points wins. Kills help, but bodies inside the circle are what actually score.
The Hot Zone is a smaller area that roams around inside the Control Zone. Every player standing in it counts as two toward the faction count and earns extra cash for teamplay actions, which makes it the most valuable ground on the map at any given moment. Because it shifts during the match, holding it is a moving problem rather than a fixed defence, and it drags the heaviest fighting toward one corner at a time.
Drill towers are the lever a team can pull. You capture one from inside it, and each capture reveals a digit of a longer key code. Collect all the digits, activate the tower, and you can swing the outcome of a match. Their roofs also spawn randomised useful equipment, so climbing for loot is an option, though it puts you in the open and in enemy sightlines. Default covers all four towers, Church three and River two, so which zone the objective picks changes how many are in reach.
Planning the approach
Getting there is the part Ozeti punishes. There is no respawn countdown — when you go down you come back at Headquarters, and the travel time back to the fight is the real cost of dying. Budget for transport the way you budget for your loadout, and agree a drop-off point with your driver or pilot before you buy anything, so the squad can leave the vehicle together and push the objective as a group.
Once you are close, a few habits keep you scoring rather than dying on the way in:
- Do not take the most direct line into the zone by default. If enemy recon are holding sightlines or setting traps, an alternative route through cover is safer.
- Recheck the hot zone the moment you arrive. It moves, so the most valuable patch of the objective may not be where it was when you set off.
- Watch what you say. Both friendly and enemy players hear you in local chat, which can be a liability or a tool depending on how you use it.
- Use the ping wheel to call for ammo, healing, backup or a pickup, and check the mini-map for downed allies and faction requests you can answer for extra cash.
The short version: for Ozeti: learn the three zones the objective can land on, know that Farmland is only ever a corridor, and treat the town interior, the church hillside and the towers as the ground that decides matches. Get bodies into the circle, keep them there while the tick bar fills, and let the hot zone and the code do the rest.





