Cisco Webex is a great app to select as your go-to video conferencing app. It’s Cisco, so you know it’s secure, and your private information is safe. And it even offers a free account currently.
But Webex is not just good because it’s secure, or easy-to-use. It has a lot of features that make the experience worthwhile. But when starting to use a new app, it can take a lot of time to discover everything it has to offer. And some features are buried so deep, a lot of people never uncover them. But that’s not going to be you. We have compiled a list of all the tips and tricks a Webex user needs to know to use the app to its full potential.
Use Virtual Backgrounds
Bored or embarrassed of your real background while attending video calls from home? Webex now supports virtual backgrounds and background blur for meetings from the desktop app. You need to be using the Webex version 40.7 or higher for the feature to be available. So, if you’ve been on the older version, you’ve missed this gem of a feature.
You can set a virtual background from the preview window before joining the meeting or during the meeting itself. Click on the ‘Change Background’ button on the preview screen and select a background from the menu.
To change the background during the meeting, click on the ‘More options’ icon on your self-view window and then select ‘Change virtual background’ from the menu.
Conduct Polls During a Meeting
During a Webex meeting, you can also host polls and collect the responses from other meeting participants in real-time. But the panel for polls has to be added to a meeting first. And because of that, a lot of people never even find out about the existence of this feature in Webex.
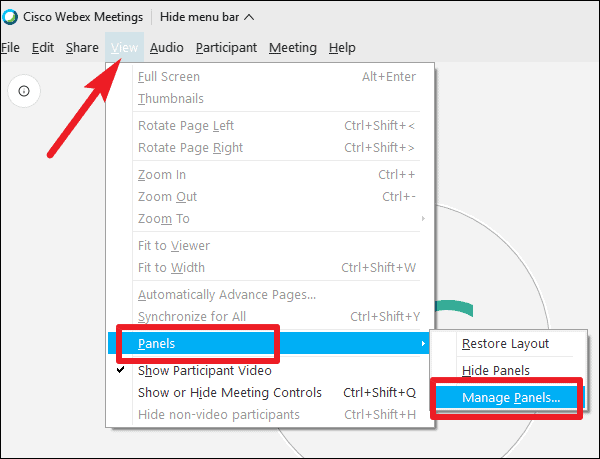
To add polling to a meeting, go to the Menu Bar in the meeting window and click on the ‘View’ option. Then, go to ‘Panels’ in the menu, and select ‘Manage Panels’ from the sub-menu.
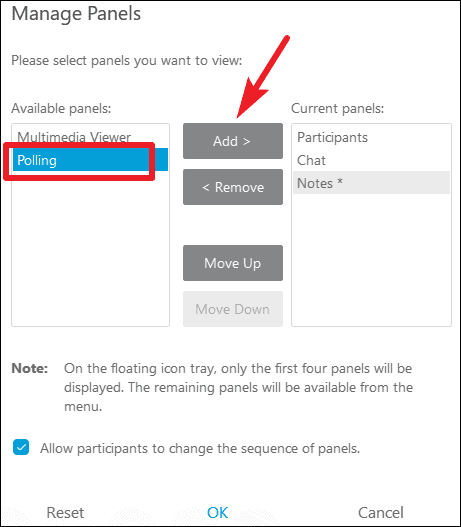
Now, select ‘Polling’ from under the ‘Available Panels’ area and click on the ‘Add’ button to move it to the ‘Current Panels’. Finally, click ‘OK’ to save the changes.
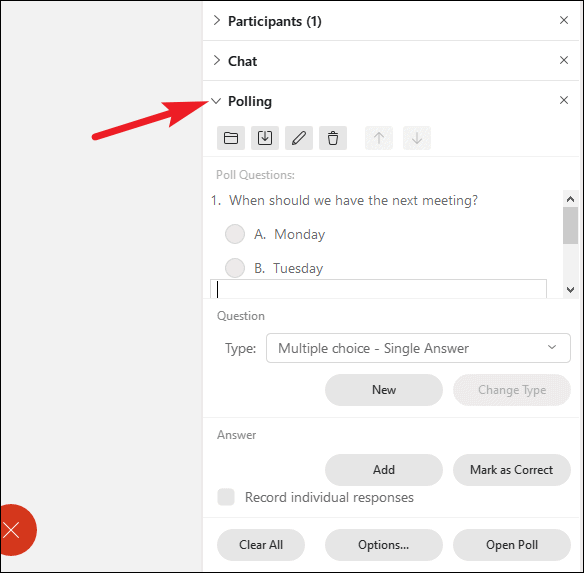
The panel for Polling will appear on the right side of the meeting window where the panels for participants, chats, etc., appear. From there, you can add questions and conduct polls with meeting participants.
View Meeting Reports
Webex has special meeting reports that allow you to keep track of everything about your meetings, including but not limited to attendance, usage, duration, email addresses of the participants, and much more. You can view, export, and even print these reports.
This feature is especially useful for teachers who otherwise have to manually keep checking which students are present in the meeting. Using these reports, you can even track when someone joined and left the meeting. But as the option is accessible only from the web portal, and not the desktop app, it’s likely to get overlooked.
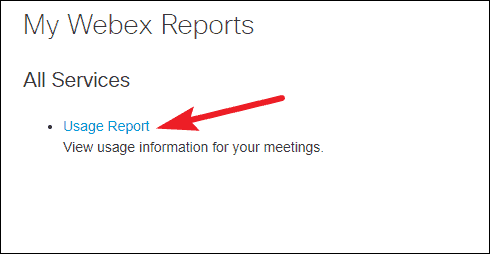
Go to webex.com on your browser and log in to your meeting space. Then, go to your name on the right corner of the screen, click on the down arrow, and select ‘My reports’ from the menu.

Then, click on ‘Usage Reports’.
Enter the time period you want to view the reports for and select the meeting to open the report.
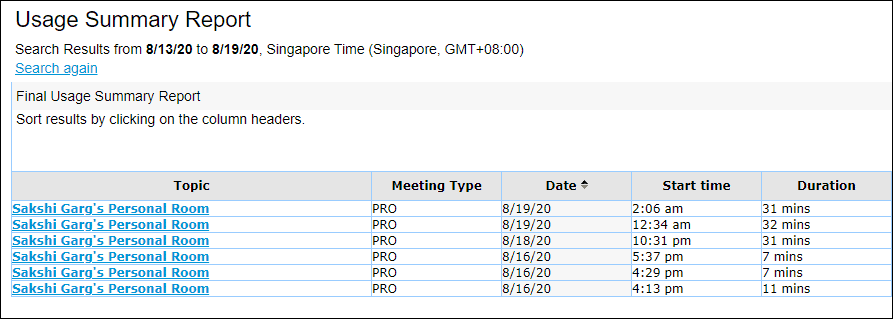
The report will have the details of each participant individually, from basic details like their name, email address, to whether they were invited to the meeting, and when they joined and left the meeting, and much more.
Alternate Hosts
So you’re the meeting host, but need to leave due to some unforeseen emergency. Worried about what will happen to the meeting as the host should be present at all times. The future of the meeting starts to look pretty grim at such times, doesn’t it? Well, it doesn’t have to. You can make someone else the meeting host in Webex in one fell swoop.
Open the ‘Participants’ panel and go to the attendee you want to make the new host. Right-click on their name and select ‘Change Role To’ from the menu. Then, select ‘Host’ from the sub-menu to make them the host.

Raise Hand in a Meeting
There are times when you have doubts in the meeting and wish to speak up, but you don’t want to be rude and disrupt the person already speaking. In real-life situations, it’s really easy to do that. You can just raise a hand, and the speaker can let you speak when it suits them.
But in a virtual meeting, raising your hand and hoping the speaker sees your video isn’t the most practical solution. Thank god for virtual hand raising in Webex! You can raise a hand, and the speaker will be able to see your risen hand next to your name on the participant panel. But keep in mind, that you can only use this feature if you’re not the meeting host.
Open the Participant panel, and go to your name. Then, click the ‘Raise Hand’ option (a hand icon) next to your name. Everyone will get an alert, and they will be able to see that you have raised your hand from the participant panel.
Change Views for Recordings
You can record all your meetings in Webex, everyone knows that. But did you know that you can also change the view of the meeting recordings? By default, the recordings contain the videos of participants, and if it’s a sharing session, then the shared screen and the video thumbnails of other participants. So, in short, the exact replica of your screen.
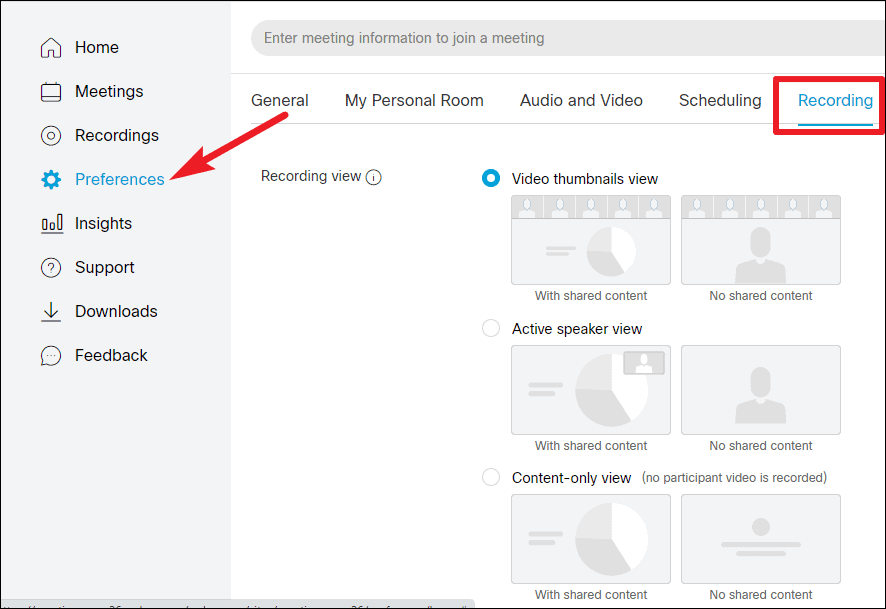
But these recording views can be modified. You can choose between active-speaker view, and content-only view if you don’t want the video thumbnail view. The active-speaker view contains the video of only the active speaker and if it’s a screen-sharing session, then the shared contents and the video of the active speaker.
In the content-only view, the recording contains only the contents of the shared screen. And if there’s no content sharing session active, then it will only record the audio without any video. You can change the recording views only from the web portal, so it’s prone to escaping people’s notice.
Open the web portal, and go to ‘Preferences’ from the navigation menu on the left. Then go to the ‘Recordings’ tab. Here, you can select the preferred recording view for your recordings.
Change the Host Before the Meeting
You scheduled a meeting, but now you can’t attend it. How will the meeting go forward without the host present? You can change the hosts during the meeting, but for that, you have to join the meeting at least once. But what about the situations when you simply cannot? Well, don’t worry. You can change the host before the meeting.
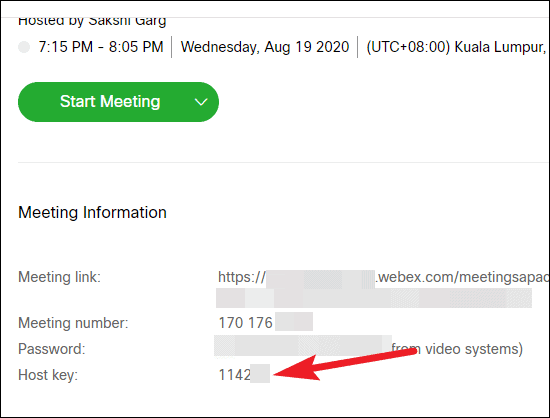
Every scheduled meeting has a host key that is only visible to the host. Share this key with the person you want to take the role of the host. And they’ll be able to claim the role of the host after entering this key.
To view the key, log in to the Webex web portal and go to your meetings. Then, click on the scheduled meeting to view further details.
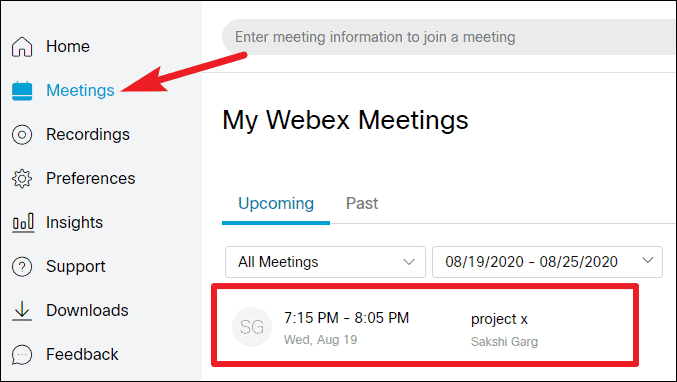
Scroll down and under meeting information, you’ll find the Host key. Share it with the other person.
Use Music Mode in Webex
Have you ever wanted to play music on a Webex meeting but found that the other participants couldn’t hear it clearly? That’s because, by default, Webex suppresses the background noise to enhance the audio. This background suppression interferes with the music. Turning on the Music mode preserves the original sound, and you can play the music without any interference. To use Music mode, you should have the WBS 40.8 or later.
To turn on the Music mode, click on the ‘Settings’ option.
Then, select ‘Music Mode’ from the menu.
Closed Captions in Meetings
If you have a bad connection in the meeting, or there’s a participant with a hearing disability present in the meeting, you can have closed captions and transcribe the entire meeting.
If you have a Webex enterprise account, the Webex Meeting assistant will automatically transcribe the meeting using its AI capabilities. Just click on the ‘CC’ option on the lower-left corner of the meeting window.
Other users can have a designated captionist in the meeting to provide captions for the meeting. Go to the participant panel and right-click on the name of the person you want to make the captionist. Go to ‘Change Role to’ in the menu and select ‘Captionist’ from the sub-menu.
You can go here and find complete details about using closed captions in a Webex meeting.
There you go, folks. With these set of tips and tricks in your arsenal, you’ll become a pro in using Webex in no time. With this information at your fingertips, your productivity is bound to increase in no time.


