
Apple unveiled the new OS lineup for their various devices at the WWDC’21. The upcoming iOS 15, iPadOS15, macOS Monterey, and watchOS 8 are all full of wonderful new features. And all of these features will definitely elevate the experience of using your device.
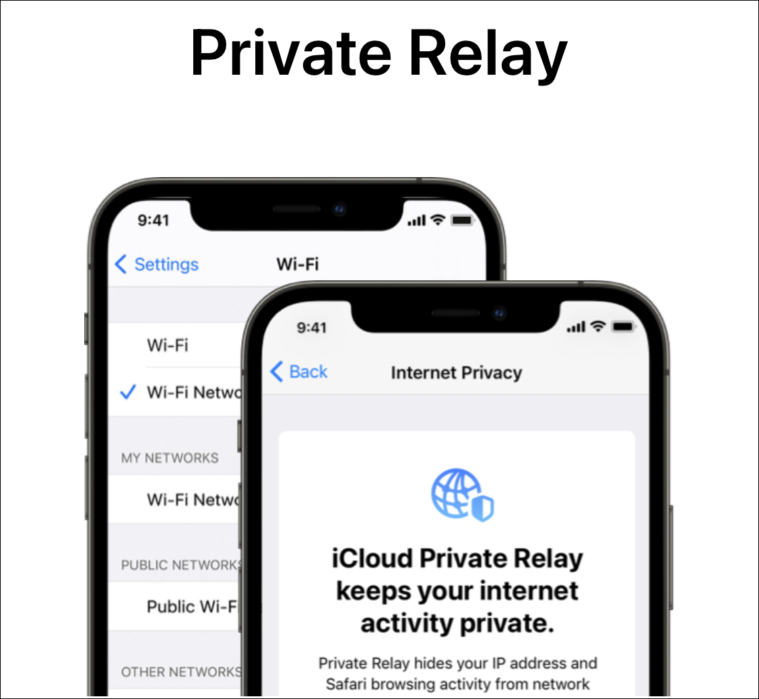
Among them, there were also a lot of new privacy features following Apple’s concern for their customers’ privacy. The introduction of iCloud+ was perhaps one of the most unexpected news at this conference. iCloud+, an evolution of the iCloud subscription service from Apple, introduces users to three new services: Hide my Email, HomeKit Secure Video expansion, and Private Relay.
Now, Private Relay would definitely have to be the winner from this bunch – if there were ever a competition. So, let’s dive right into its basics.
Note: This is a beta feature and won’t be available generally until the public release of iOS 15 or macOS 12 later in fall 2021.
What is Private Relay?
Tracking on the internet has become a valid concern in the past few years. And no matter how many privacy innovations keep popping up, the ways to steal your information keep getting just as creative. With Private Relay, Apple hopes to stay ahead in this game of mouse-and-cat and shield its users’ privacy.
Private Relay is sort of like a VPN from Apple, but better. In fact, Private Relay puts a standard VPN to shame by making it look nosy: When we use a VPN, we can hide what we’re browsing from our ISP while also masking our IP address from the website host.
But in all this exchange, we have to put a lot of trust in the VPN companies as they can see virtually everything – our IP address as well as the sites we’re browsing. Of course, there are a lot of reputable VPNs out there, but there are also a lot of free ones. And they can do whatever they like with your information if they wanted to.
Private Relay will put these worries to bed. Apple is using a dual-hop architecture for their Private Relay. With a dual-hop architecture, Apple is not even asking you to trust them with your information because they won’t have access to this information themselves. At least, not all of it.
A dual-hop architecture means your information will be processed twice before going to the website host. And without going into the mechanics of it all, Apple will only be able to see your IP address and not the websites you want to visit. Whereas their third-party partner, which is a part of this architecture, will only have access to the websites you are visiting and not your IP address.
By processing and encrypting information on two ends, no single entity would have access to all your data. And since, in the process, both your IP address and the site URL gets encrypted too, your ISP won’t know which sites you’re visiting, while the website won’t know your IP address.
How Private Relay Works
Private Relay is part of the iCloud+ subscription. But, Apple isn’t going to change its pricing model to include this service. This essentially means that at the same price as the existing iCloud storage plans, users will get access to Private Relay and other new features of iCloud+. Existing subscribers, too, would get to enjoy its benefits on their existing plan itself.
But there is one catch, Private Relay will only work through Safari. So, even if you’re an iCloud subscriber but are using some other browser like Chrome or Firefox on your device, Private Relay won’t be protecting you. So, you can’t use Private Relay exactly like a traditional VPN.
Private Relay will also always be on by default. So whether you’re logged into your account on iPhone, iPad, or Mac, you’ll be automatically using Private Relay, as long as you’re surfing in Safari. If you don’t already use Safari, this can make for a good case to switch to it now.
When using Private Relay, your precise location will also be hidden from the website. But they will have your regional information. So, you can still enjoy localized content without compromising your privacy.
Now, unlike traditional VPNs, Private Relay won’t allow you to route your traffic through servers in a particular country. So, if you use VPNs to sidestep geolocation restrictions, Private Relay cannot be a substitute for that. Now, if you do want to use some other VPN, you won’t have to disable Private Relay to do it. All traffic will just be routed through the third-party VPN.
This also means that users of Corporate VPNs too should be able to use it while Private Relay is still enabled.
How to Enable Private Relay on iPhone
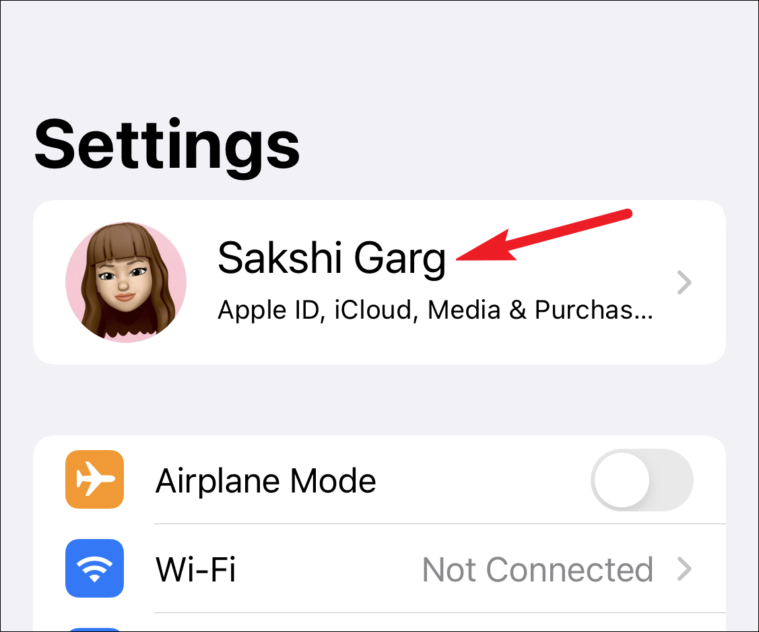
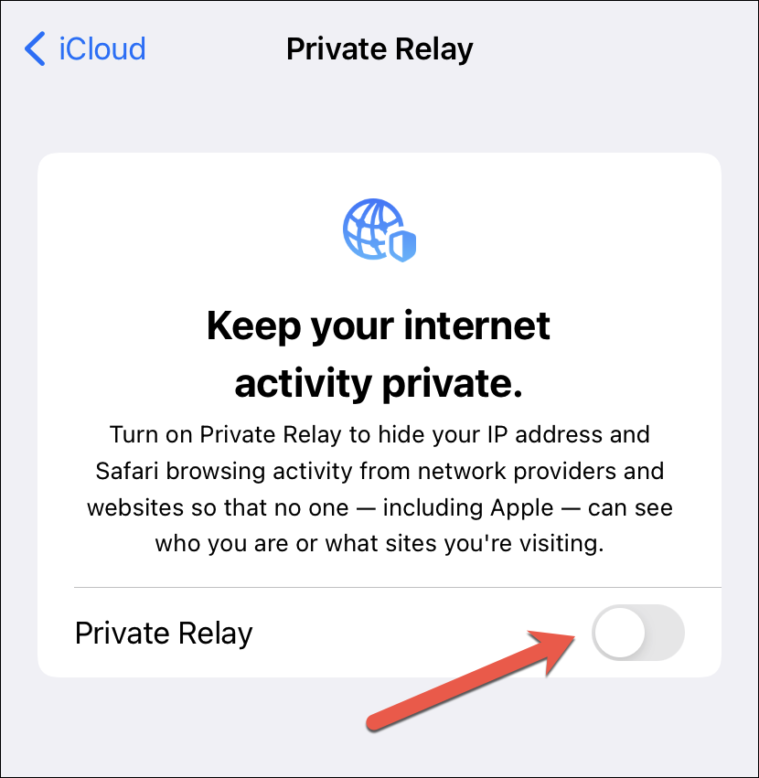
If for some reason, you do want to disable Private Relay, you can easily do it. Open your iPhone settings in iOS 15 and tap the Apple ID card at the top.
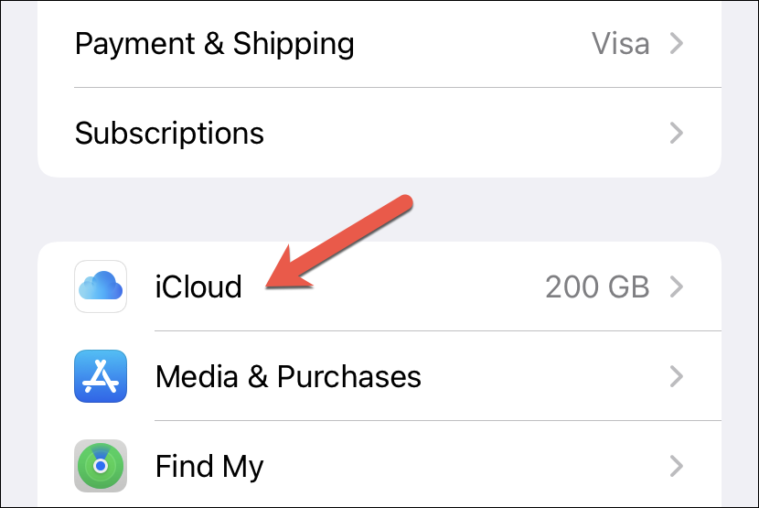
Tap the option for ‘iCloud’.
There, you’ll see the option for ‘Private Relay’. Tap on it.
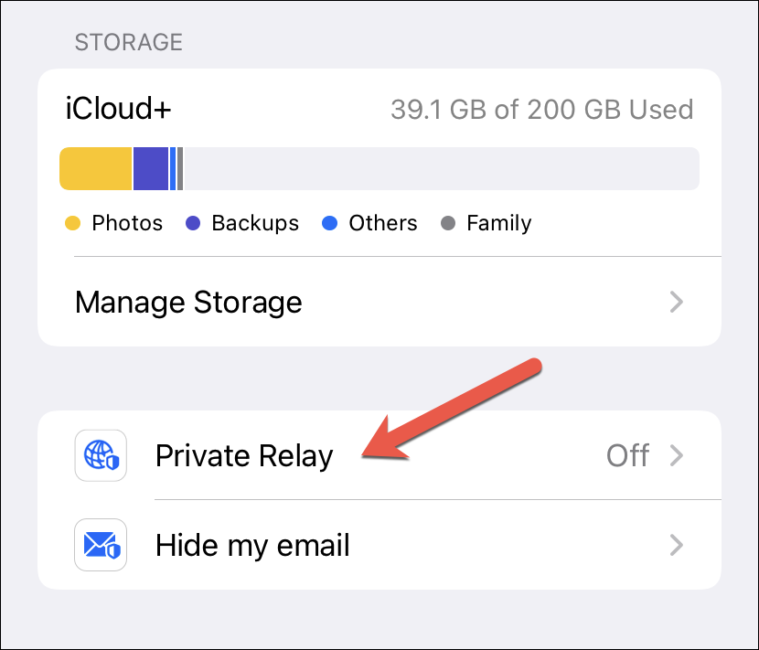
Finally, turn on the toggle switch next to ‘Private Relay’ label.
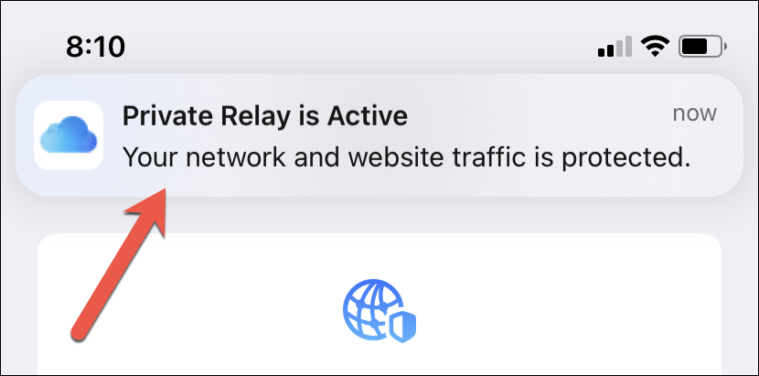
As soon as you enable Private Relay, you’ll see a banner notification at the top of the screen, confirming that “Private Relay is Active” on your iPhone.
You can further change the IP settings by tapping on the ‘IP Address Location Settings’ option on the same screen. You can change if your IP address location should be approximate your location or use a broader location.
Know that choosing a broader location could affect local content from websites. Like, Google may not be able to show you nearby gas stations when you search for it in Safari, as it won’t have your precise location.

Disabling Private Relay on iPhone. Just like enabling, you can similarly disable Private Relay by simply turning off the toggle switch next to ‘Private Relay’ under iCloud settings on your iPhone.
How to Enable or Disable Private Relay on Mac
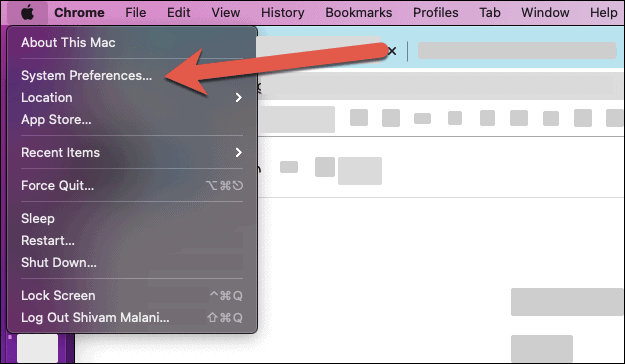
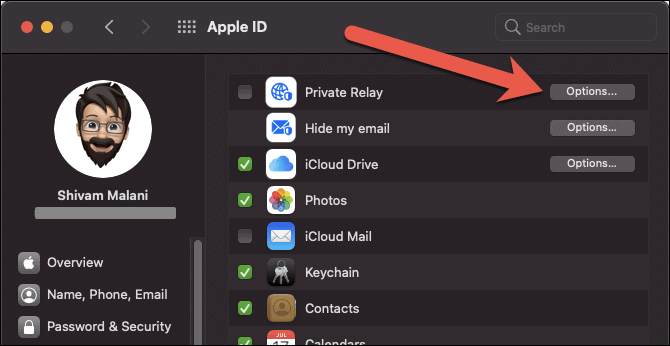
To enable Private Relay on Mac, first open the ‘System Preferences’ from the menu bar on your Mac.
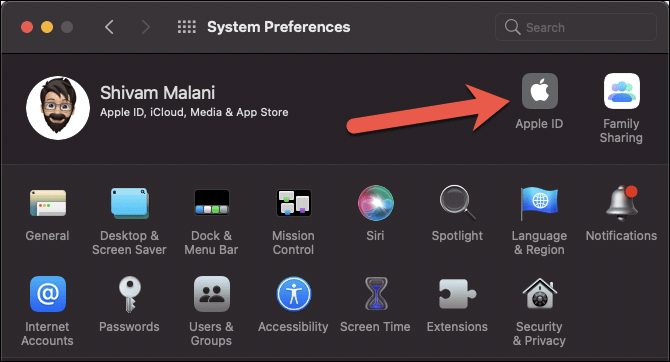
On the System Preferences screen, click on the ‘Apple ID’ button at the top-right of the window.
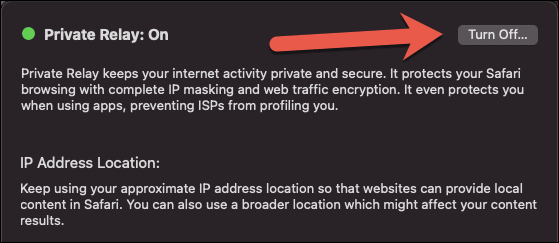
Then, under iCloud settings (which opens by default on Apple ID screen), you’ll see the ‘Private Relay’ feature on the right-pane. Click on the ‘Options’ button next to it.
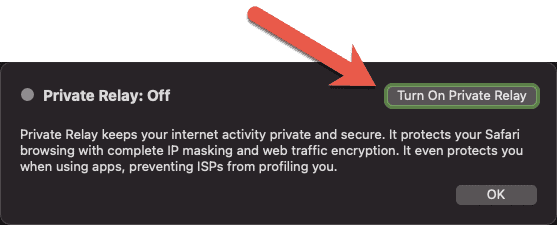
A pop-up will show on the screen with the current status of Private Relay. Click on the ‘Turn on Private Relay’ button at the top-right of the pop-up.
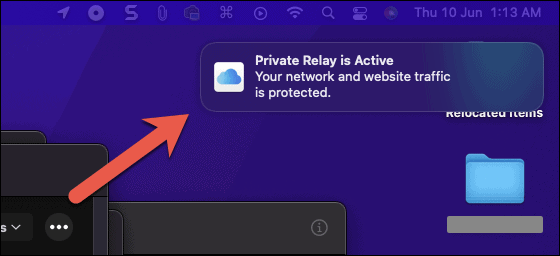
Right after you enable Private Relay, a notification will show on the top-right of your Mac confirming that Private Relay has been activated.
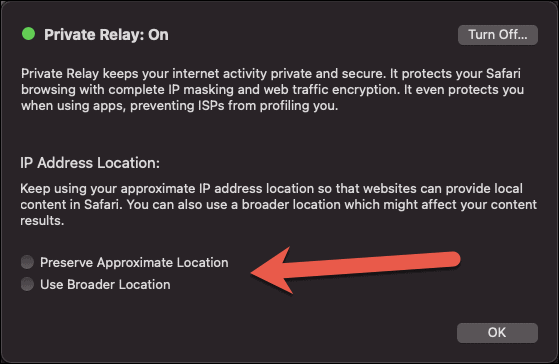
To further optimize Private Relay, you can also configure your IP Address Location to either preserve your ‘Approximate Location’ or a ‘Broader Location’.
Disabling Private Relay on Mac. When you want to disable Private Relay, go to iCloud settings on your Mac, click on the Private Relay ‘Options’ button and then finally click on the ‘Turn Off’ button on the top-right of the Private Relay options window.
iCloud Plus will be available publicly to users later this fall when it will debut along with the upcoming OS updates. But beta users can access the functionality even now.


