
Formatting the external storage devices, such as hard drives, SD cards, and USB drives, comes in handy to clear up space. However, many users have reported encountering the ‘Windows was unable to complete the format’ error.
It’s not just the formatting per se, but also using the storage device can be problematic. When you try to open the drive, you receive a dialog box asking you to format the drive. Now, when you try and format the driver, it throws up the ‘Windows was unable to complete the format’ error. You are basically stuck!
This is one of the errors that just boggles our minds and leaves us helpless. However, there are ways you can fix the error and complete the format. Before we move to the fixes, you must first understand the error and the various issues that lead to it.
What is the ‘Windows was Unable to Complete the Format’ Error?
This error is generally encountered when formating an external drive or SD card. It could be due to several reasons, and we have listed them below for your understanding.
- Write Protected Drive
- Lack of Necessary Permissions
- Presence of Bad Sectors on the Drive
- Drive is Infected with Malware
- Physical Damage to the Drive
- Corrupt File System
Any of these issues can hinder the format process. However, as is the case with other errors, there are some effective fixes to resolve the ‘Windows was Unable to Complete the Format’ error. Follow the fixes in the sequence that they are mentioned for a quick resolution.
1. Check for Physical Damage
Your primary approach should be to look for any signs of physical damage to the device. If you spot one, you must get it checked and repaired. In case, it’s the physical damage that’s preventing the device from being formatted, the other fixes mentioned in the article would be of no use.
Also, repairing a physically damaged storage device can be a costly affair. As surprising as it may sound, sometimes replacing the whole thing makes more sense. So, consult a professional, check the extent of damage and proceed as per their advice.
2. Scan Drive for Malware
Many users have reported encountering the ‘Windows was Unable to Complete the Format’ error due to malware infection. In this case, all it takes is to scan is the drive for malware and neutralize them. You could opt for third-party antivirus or use the built-in ‘Windows Security’ for the job. We will be using the latter since it’s equally effective and quick.
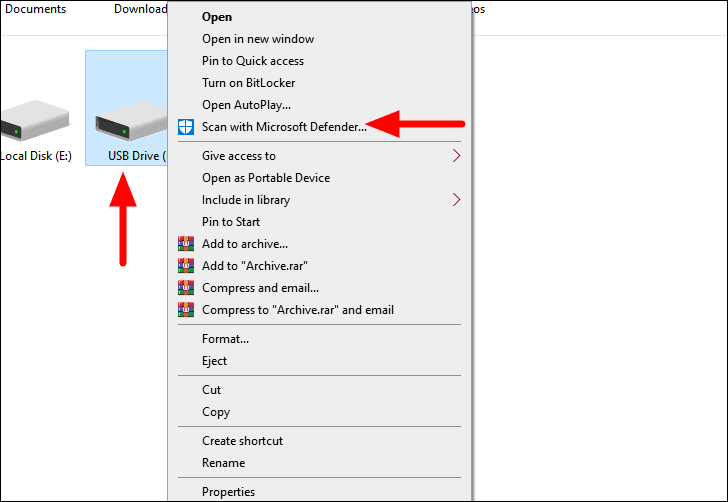
To scan the drive, right-click on it and then select ‘Scan with Microsoft Defender’ from the context menu.
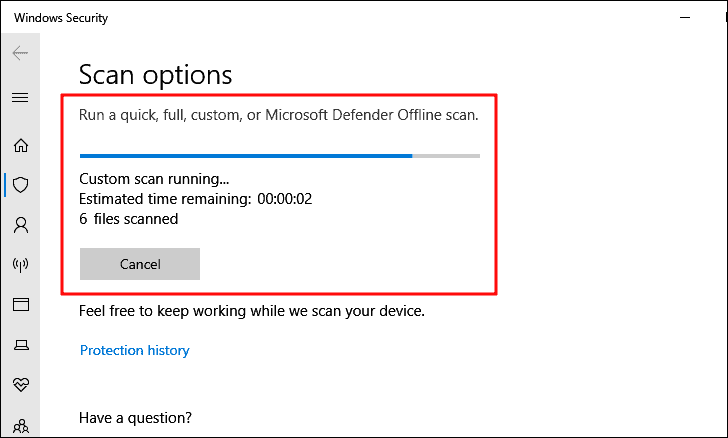
The scan will instantly start and neutralize or quarantine any malware or virus found along the way. Also, you can continue working on the system while the scan runs in the background.
After the scan is complete, check if you are able to format the drive. In case the error persists, move to the next fix.
3. Format with Command Prompt
The simplest of the fixes is to use the ‘Command Prompt’ for formatting the drive. Before you proceed, you must know the ‘File System’ for the drive.
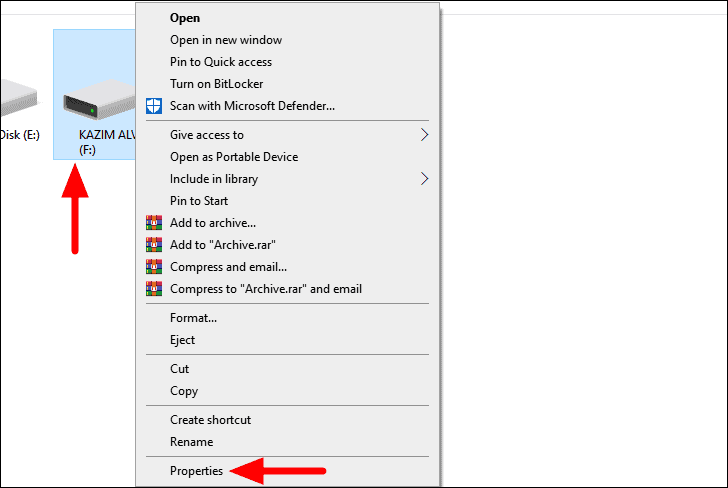
To identify the ‘File System’, right-click on the drive, and select ‘Properties’ from the context menu.
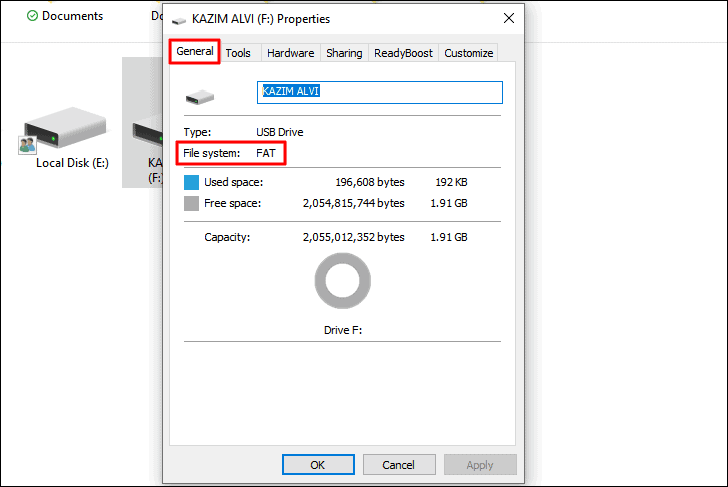
In the ‘Properties’ window, the ‘General’ tab will open by default. Now, note the ‘File System’ mentioned near the top.
After you have found the ‘File System’, you can proceed to formatting the drive.
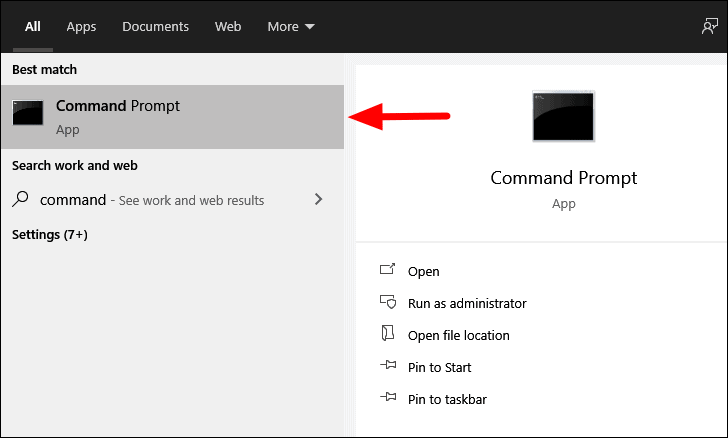
To format the drive, search for ‘Command Prompt’ in the ‘Start Menu’, and click on the relevant search result to launch the app. Click ‘Yes’ on the confirmation box that pops up.
In the ‘Command Prompt’ window, enter the following command with the necessary replacements, and then press ENTER to execute it.
format 'Drive Letter': /fs:'File System'In the above command, replace ‘Drive Letter’ with the letter of the drive that you want to format. Also, replace ‘File System’ with the one you identified earlier for the drive in question.
For instance, we want to format the drive with the drive letter ‘F’, which has ‘FAT’ as the file system. The command now translates as follows.
format F: /fs:FAT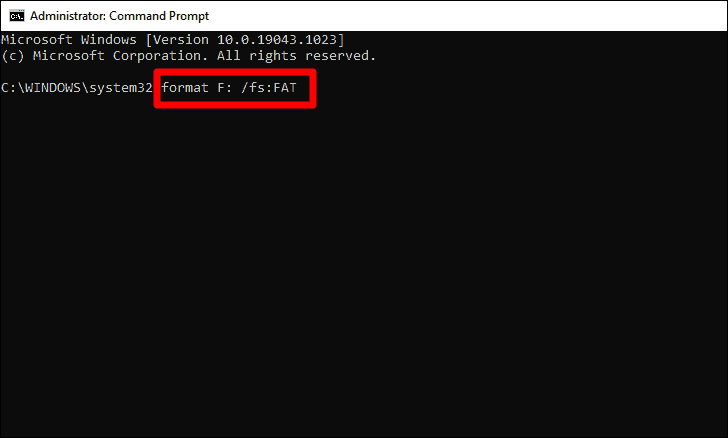
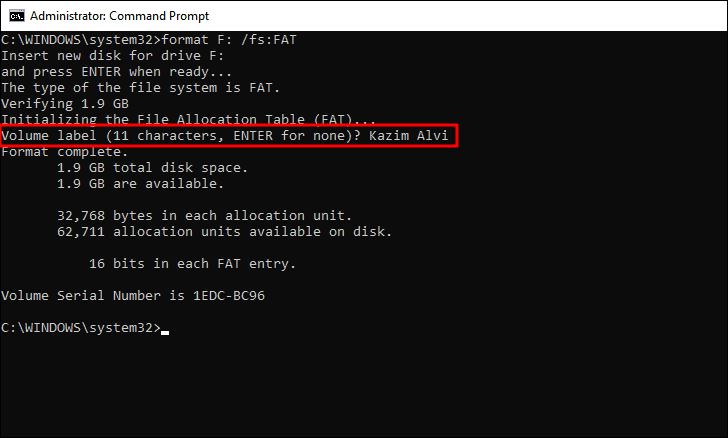
After the command is executed, the format process will start and will take a few minutes to complete.
You will now be asked to set a ‘Volume Label’, i.e., the name of the drive. Type the label name and press ENTER to set a name. You can also skip the step by simply pressing ENTER without entering a volume label, in which case, it will be set as ‘New Volume’ followed by the drive letter.
The disk has now been formatted. In case, you are unable to format the disk through the ‘Command Prompt’, proceed to the next fix.
4. Disable Write-Protection
If ‘Write-Protection’ is enabled on a drive, you can only read and copy the files on it but cannot modify or delete them. Many users have reported encountering the ‘Windows was Unable to Complete the Format’ error if the ‘Write-Protection’ is enabled.
First, check if there is a switch on the external drive to enable/disable ‘Write-Protection’. If you are able to locate one, use it to disable the setting. In case there is no switch, you can disable ‘Write-Protection’ from the ‘Registry’.
In this fix, since we would be making changes, it’s recommended that you create a backup of the Registry before proceeding.
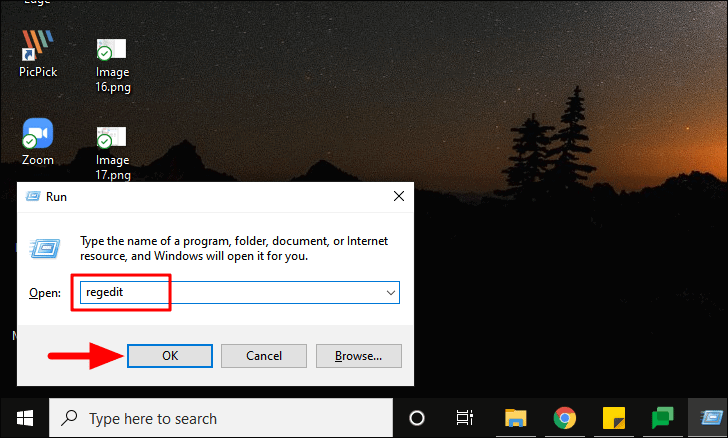
To disable ‘Write-Protection’, press WINDOWS + R to launch the ‘Run’ command, enter ‘Regedit’ in the text box, and then either press ENTER or click on ‘OK’ at the bottom to launch the ‘Registry Editor’. Now, click ‘Yes’ on the confirmation box that pops up.
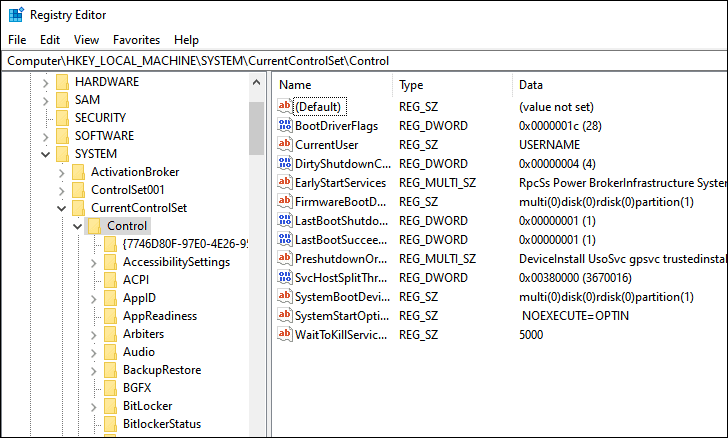
In the ‘Registry Editor’, navigate to the following address or paste the path in the address bar at the top and pres ENTER.
Computer\HKEY_LOCAL_MACHINE\SYSTEM\CurrentControlSet\ControlNow, locate the ‘StorageDevicePolicies’ key.
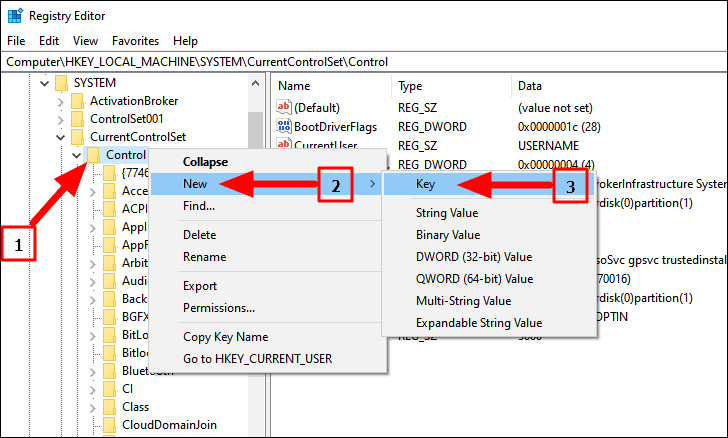
If you can’t find the key, create one. To create a key, right-click on the ‘Control’ option, hover the cursor over ‘New’, and then select ‘Key’ from the list of options. Name the key as ‘StorageDevicePolicies’.
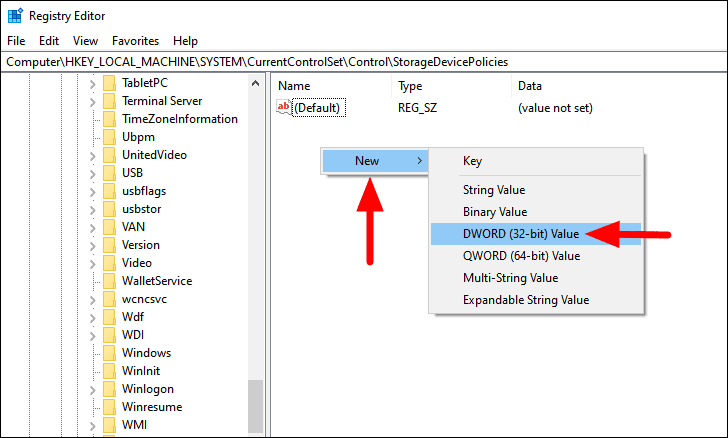
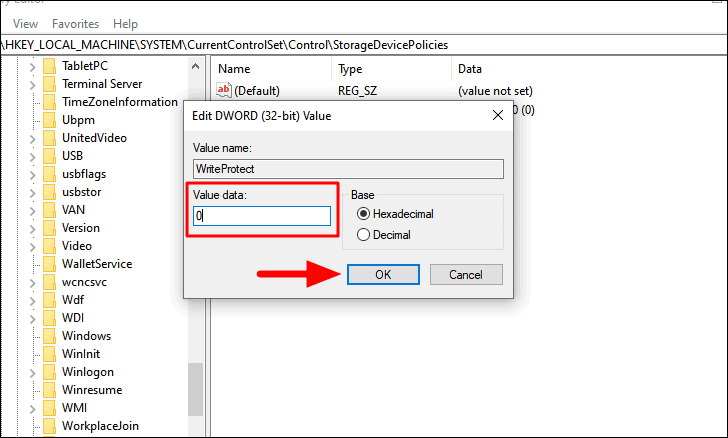
After you have created the key, right-click on the empty portion at the right, hover the cursor over ‘New’, and select ‘Dword (32-bit) Value’ from the menu that appears. Name the entry as ‘WriteProtect’.
Next, right-click on the entry and seelct ‘Modify’ from the context menu.
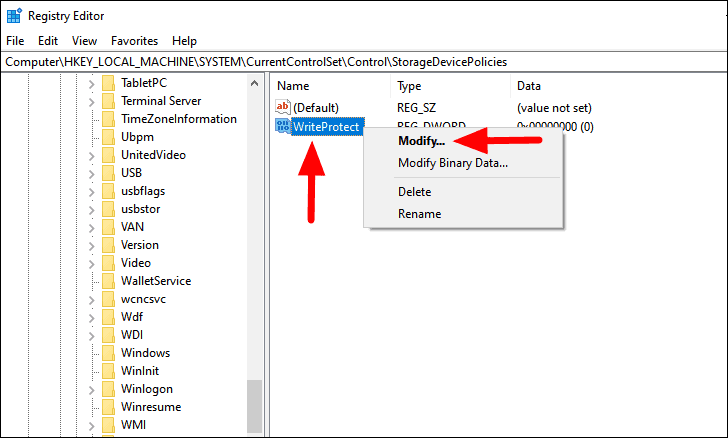
Next, ensure that the ‘Value Data’ has been set to ‘0’. In case, the value is set to ‘1’, change it to ‘0’ and then press ‘OK’ at the bottom to save the changes. If any confirmation box pops up, select the appropriate option to complete the process.
After you have made the necessary changes to the ‘Registry’, restart your computer and check if you can now format the drive.
5. Format with Disk Management
Disk Management is a built-in utility in Windows that allows you to manage both internal and external drives. It’s been a part of Windows for a long time but the one on Windows 10 is far more efficient and offers a lot many features as compared to its predecessors.
The Disk Management app also allows you to format a drive. In case you are unable to format a drive from the file explorer due to a trivial bug, using the ‘Disk Management’ should fix the error. There are two methods of formatting the drive, try the first one, and in case it doesn’t work, move to the next.
Formatting a Healthy Drive
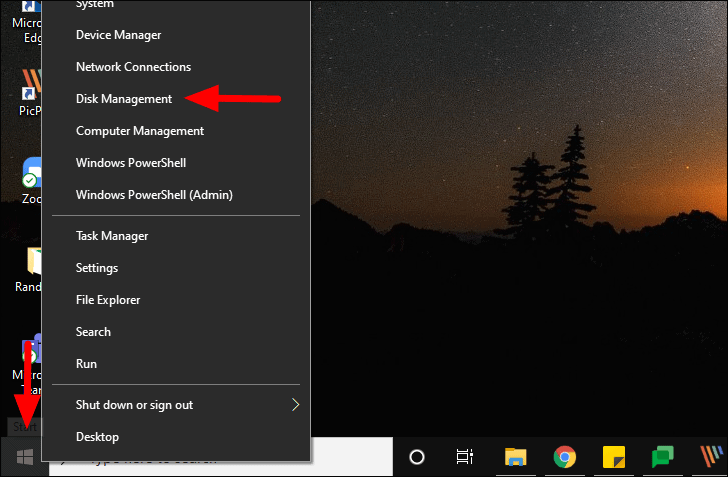
To format a drive with Disk Management, right-click on the ‘Windows’ icon at the bottom left corner of the desktop to launch the ‘Quick Access Menu’, and then select the ‘Disk Management’ option from the list.
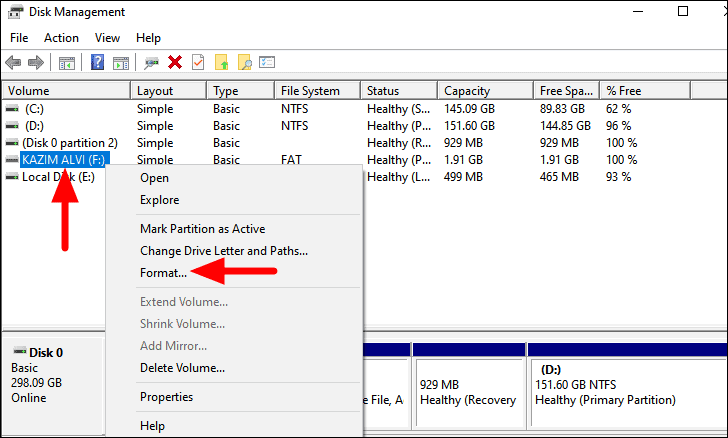
Next, locate the drive that you want to format under the ‘Volume’ column. Now, right-click on the drive, and select the ‘Format’ option from the context menu.
A box will pop up where you can change the ‘Volume Label’, ‘File system’, and ‘Allocation unit size’. In case, you are looking for a simple format, it’s recommended that you don’t change the settings and click on ‘OK’ at the bottom to start the format.
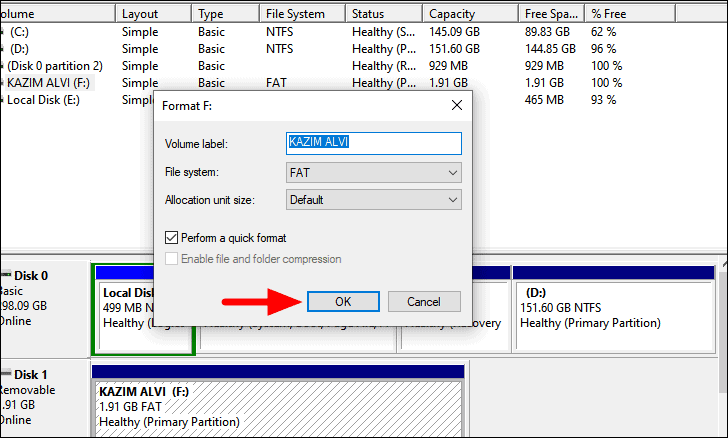
Next, click on ‘OK’ on the warning box that pops up.

The format process will start instantly. However, many users have reported that this method didn’t work for them or the drive was not listed at the top under the ‘Volume’ column. If it’s the same with you, execute the following steps.
Format an Unallocated Drive
Many a time, you might be encountering the error because the space on the drive is unallocated. In such cases, you would neither be able to read/write the drive or format it. Therefore, you must create a new volume on the drive and format it in the process, since that’s our primary objective.
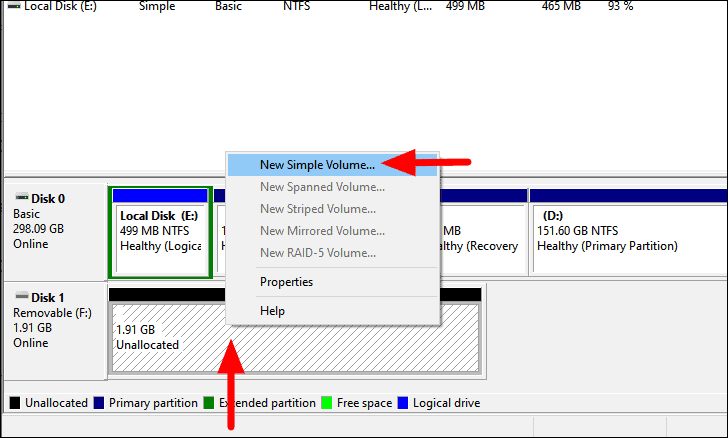
To format a drive, right-click on the drive listed at the bottom of the ‘Disk Management’ window and select ‘New Simple Volume’ from the context menu.
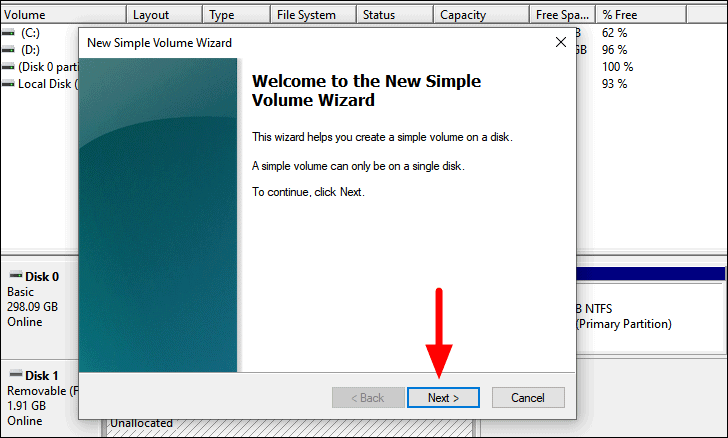
The ‘New Simple Volume Wizard’ window will now launch. Click on ‘Next’ at the bottom to continue.
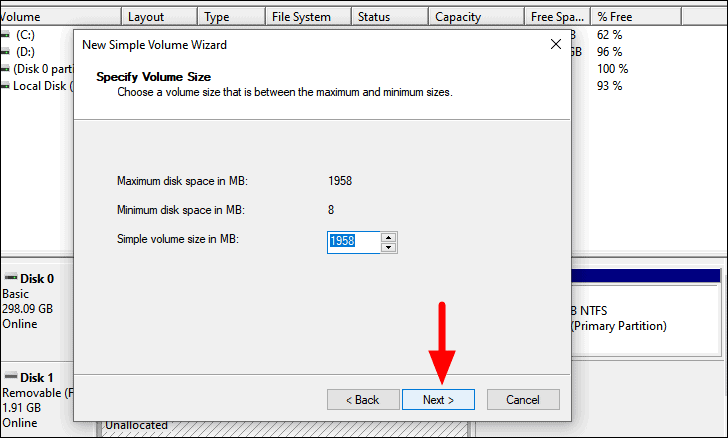
On the next screen, you can specify the size of the new simple volume. If you are not versed with the concept, it’s recommended to leave it unchanged and click on ‘Next’ to proceed.
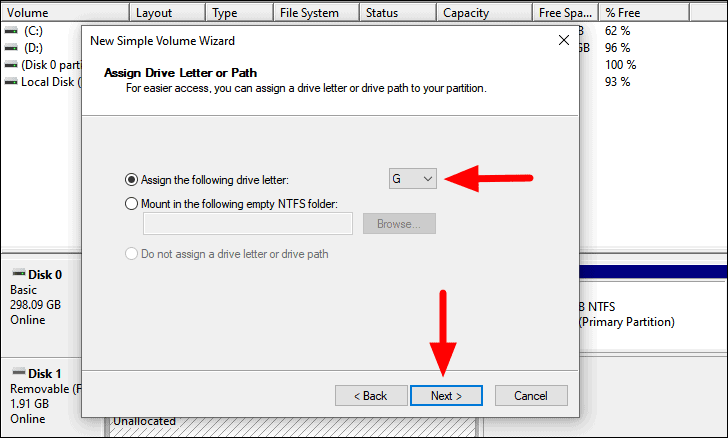
Now, you can choose the ‘Drive Letter’ by clicking on the box next to the option and then select the desired option from the drop-down list. After you have made the selection, click on ‘Next’ at the bottom to proceed.
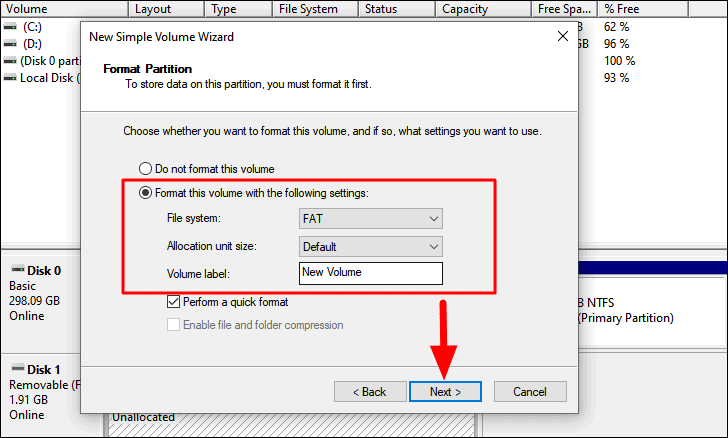
On the next screen, the checkbox for formatting the drive will be selected by default. You can make modifications in the File System, Allocation unit size, and Volume Label as desired, and then click on ‘Next’.
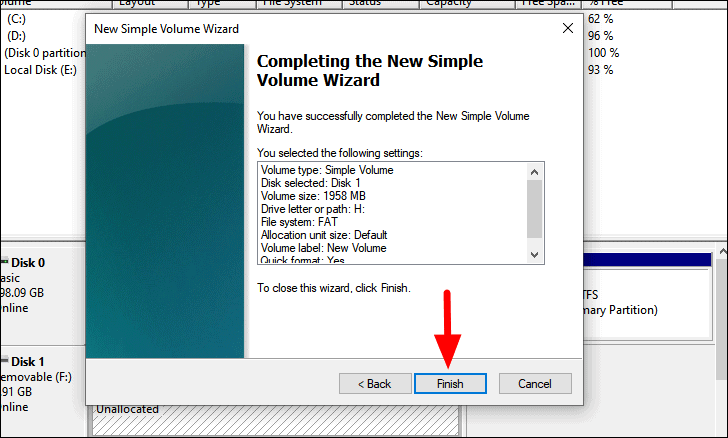
Finally, review the settings for the new volume and then click on ‘Finish’ to complete the process, if everything is in order.
The drive has now been formatted. Once you have created a new volume on the disk and allocated the space, you can easily format it from the ‘File Explorer’ itself.
6. Format with DiskPart
If the above methods to format the storage drive didn’t work, you can use the ‘DiskPart’ command. It’s run in the ‘Elevated Command Prompt’ and can easily be executed.
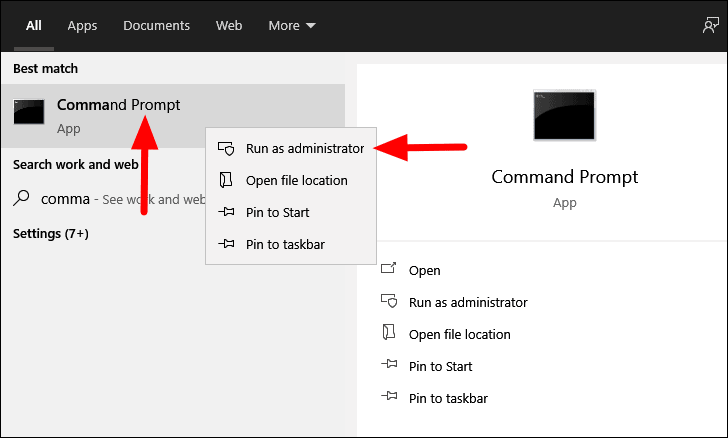
To format with the ‘DiskPart’ command, search for ‘Command Prompt’ in the ‘Start Menu’, right-click on the search result, and select ‘Run as administrator’ from the context menu.
Next, type of paste the following command and then press ENTER to execute it.
diskpart
Now, enter the following command and press ENTER
list disk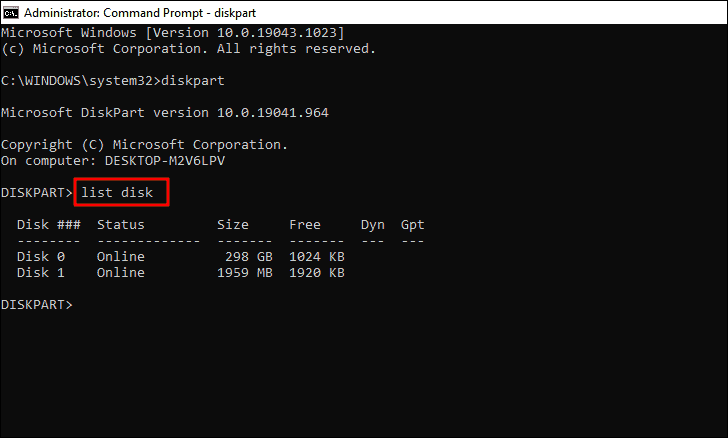
You will now find the various disks on your system listed in the ‘Command Prompt’ with each having a specified number. Note the number of the disk you want to format, enter the next command, and then press ENTER.
select Disk NumberIn the above command, replace ‘Disk Number’ with the value entered in the ‘Disk ###’ column for the disk you are going to format. For instance, we will be formatting ‘Disk 1’, thus, the command becomes as follows.
select Disk 1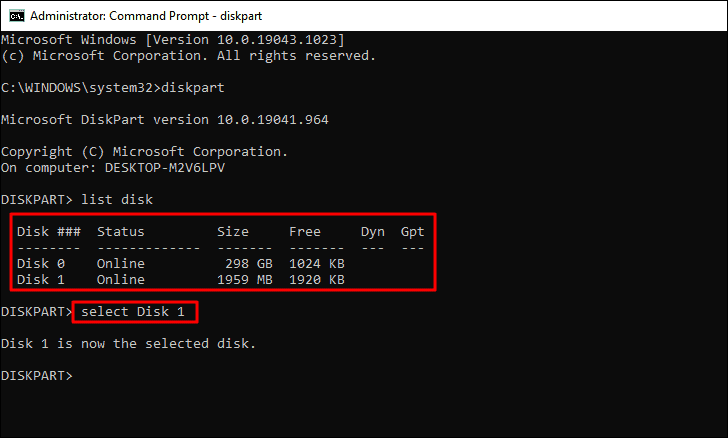
You will now receive a message that the particular disk has been selected. The next step is to clean the disk. Type or paste the following command and then press ENTER.
clean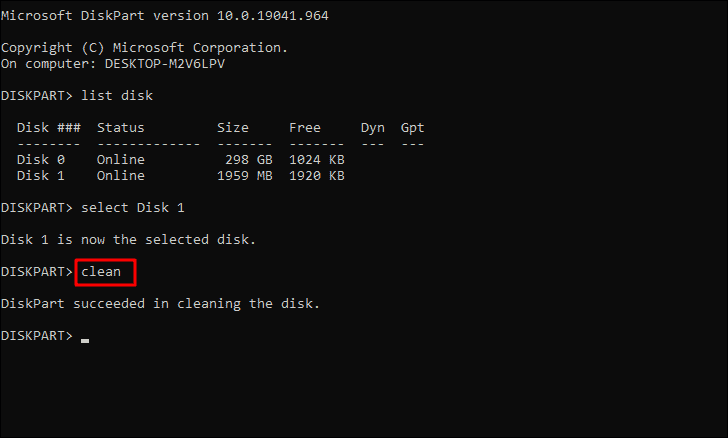
You have now removed any existing partitions and formatting from the disk, however, it’s hasn’t been formatted yet. Next, type or paste the following command, and then press ENTER to execute it.
create part pri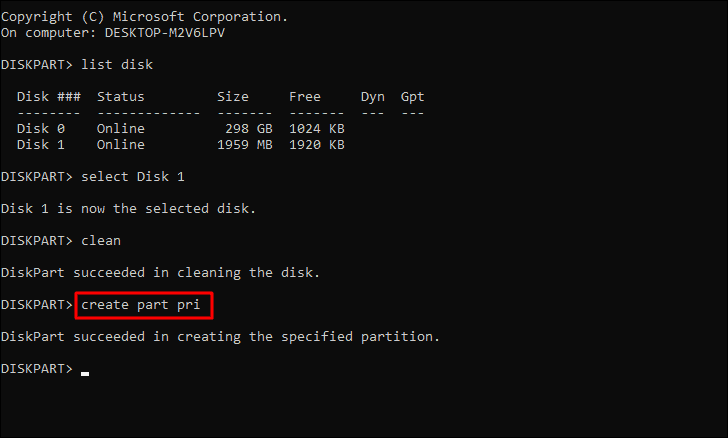
You have now created a partition and the next step is to mark it as active. To do so, type/paste the following command and hit ENTER.
active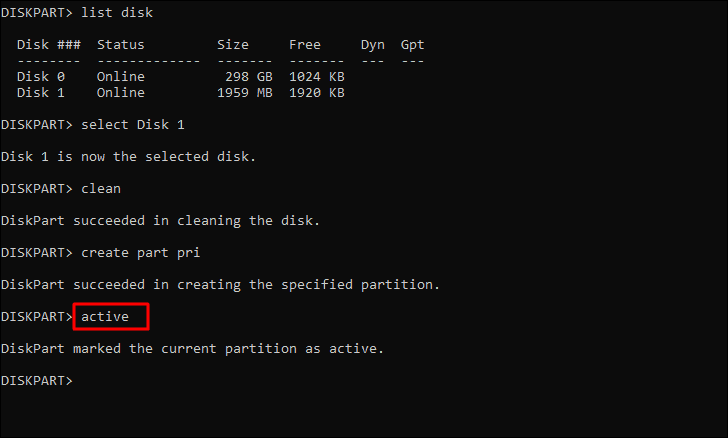
The last step is to set a ‘FIle System’ for the device. It’s recommended that you set ‘FAT32’ for drives that have a storage capacity of upto 4 GB, and ‘NTFS’ for the ones above that.
In this case, we are formatting a drive under 4 GB, hence, we have used the ‘FAT32’ file system. However, if yours is more than 4 GB, just replace the ‘fat32’ part in the command with ‘NTFS’.
To set a ‘File System’, enter the following command and press ENTER to execute it.
format fs=fat32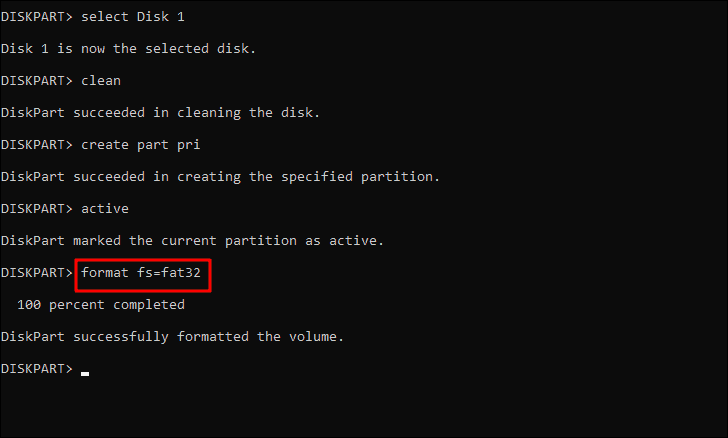
You will now receive a message that the drive has been successfully formatted.
Now that you have formatted the disk with the methods mentioned above, you must have cleared a lot of storage space and can start using the drive. Also, when you start executing the fixes, ensure that you start from the top for a quick and effective solution.


