
Screenshots are very versatile in nature, you can use them to showcase an issue you are facing with your device, you can take a screenshot of a software key or a password you created and keep it for reference for later, or you can even share that sick meme on Reddit with your friend.
Since a majority of our time is spent on computers, it only makes sense that you learn how to quickly take screenshots on your PC. Moreover, in case you like to edit your screenshots before sending them, it is way much easier to do so on a PC instead of a mobile phone.
So without further ado, let’s learn how to take screenshots like a pro on a Windows 11 device and make taking screenshots on a PC as much of a breeze as it is on a mobile device.
Take Screenshots Using Keyboard Shortcuts
Taking screenshots using the keyboard shortcuts is hands down the fastest and the easiest method of the lot. Just a couple of keypresses and you are done.
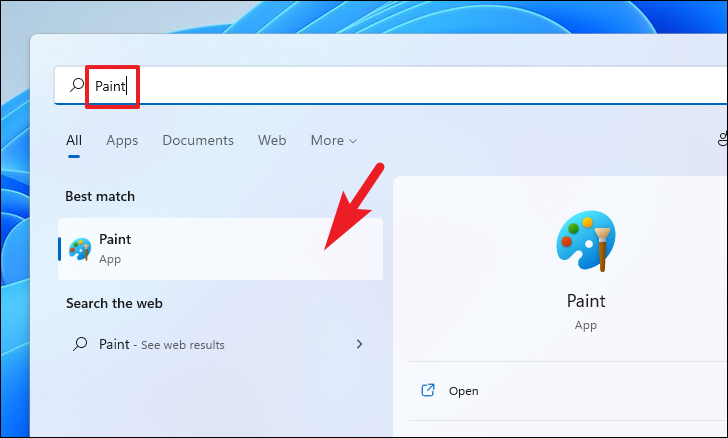
To take a fullscreen screenshot and copy it to the clipboard, press the PrtScr/PrtSc key on your keyboard. Then head to the Start Menu and type Paint to search for the app. Next, from the search results, click on the ‘Paint’ app tile to open the app.
After that, press the Ctrl+C keys together on your keyboard to paste the copied screenshot in the paint window. Then, either click on the ‘Save’ icon or press the Ctrl+S keys together on your keyboard to save the screenshot at your desired location.

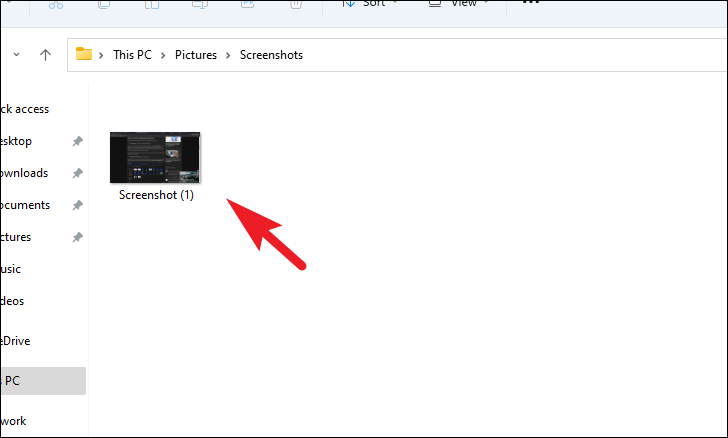
If you wish to take a screenshot and save it automatically on your storage, press the Windows+PrtScr/PrtSc keys together on your keyboard to take a screenshot of the complete desktop and save it in the screenshots folder in the ‘Pictures’ directory on your computer.
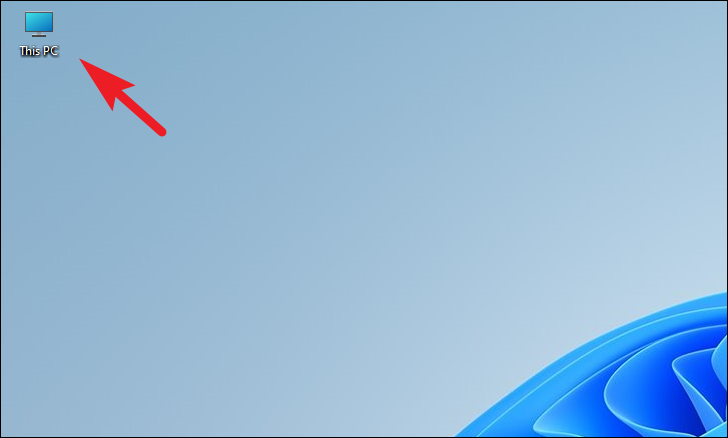
To locate the screenshot, head to ‘This PC’ by double-clicking on the icon present on your desktop. Alternatively, you can also press the Windows+E keys together on your keyboard to open the directory.
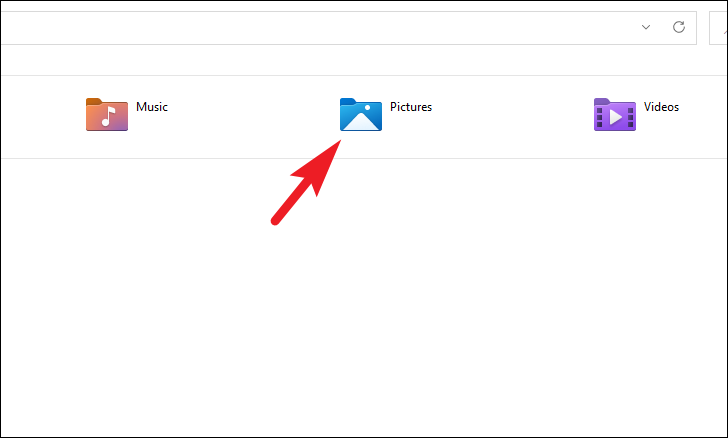
Next, locate and double-click on the ‘Pictures’ folder to continue.
After that, double-click on the ‘Screenshots’ folder to proceed.
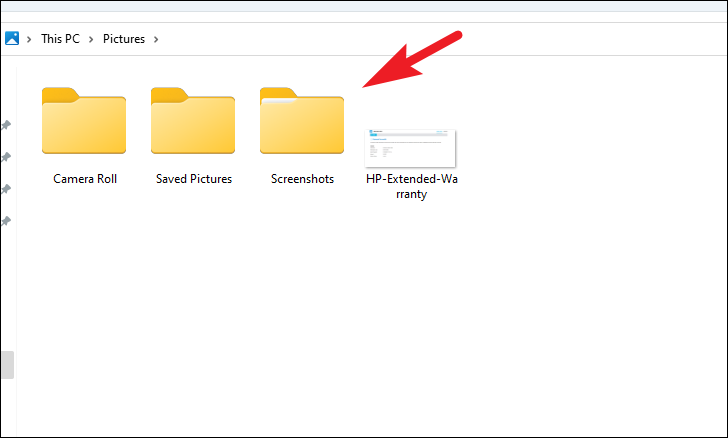
You will now be able to see all the screenshots you clicked using the Windows+PrtScr/PrtSc shortcut.
In case you wish to take a screenshot of a certain portion of the screen, press the Windows+Shift+S keys together on your keyboard. Then, click on the ‘Rectangular Snip’ icon present on the bar situated on the topmost section of your screen to select the mode.
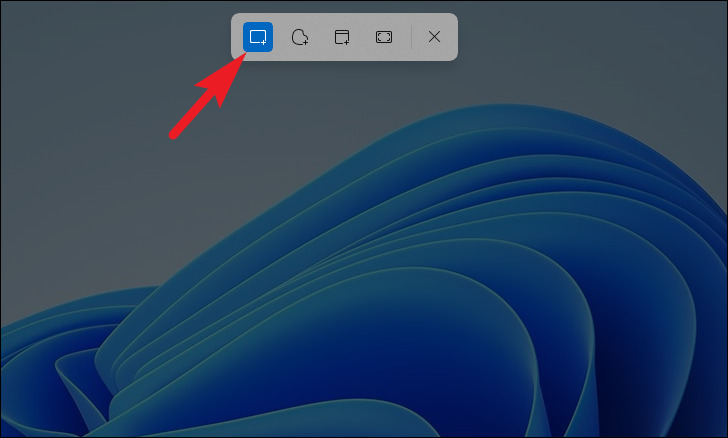
Now, click-hold and drag your mouse pointer across the screen to capture the desired area. Release the mouse button to take the screenshot.
As soon as you take the screenshot, you will be able to spot the thumbnail of the clicked screenshot on the bottom right corner of the screen. Click on it to expand the screenshot.
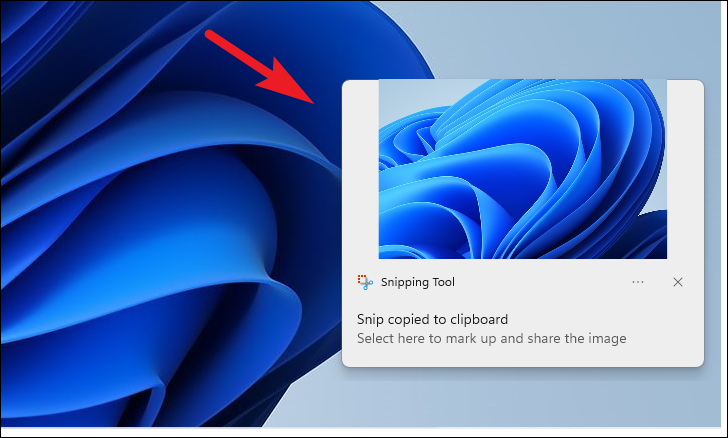
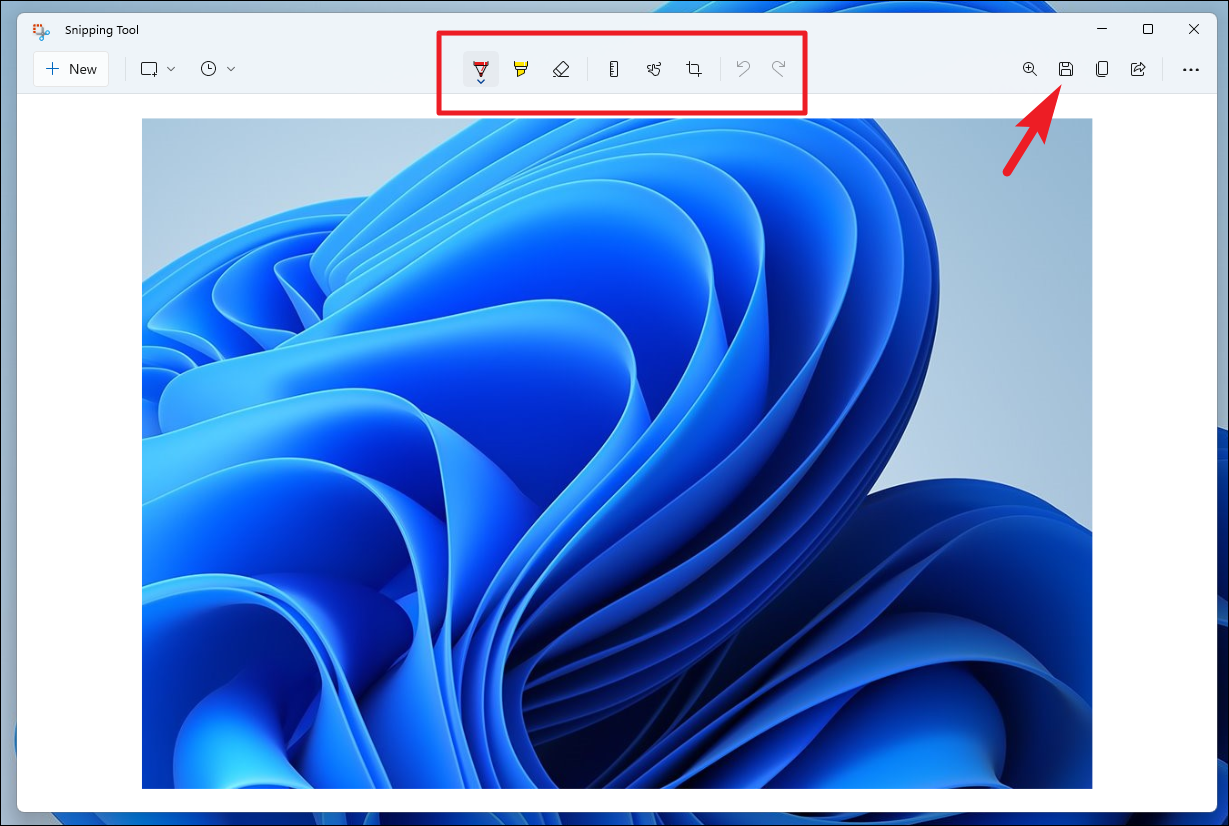
Now, you can either use the marking tools available on the ribbon menu to edit the screenshot or save it by clicking on the ‘Save’ icon to save the screenshot to your desired location using the File Explorer.
To take a specific window snip, you can use the same shortcut of keys. Press Windows+Shift+S keys together on your keyboard to bring up the Snipping Tool. Then, select the ‘Window Snip’ mode from the toolbar present on the topmost section of your screen.
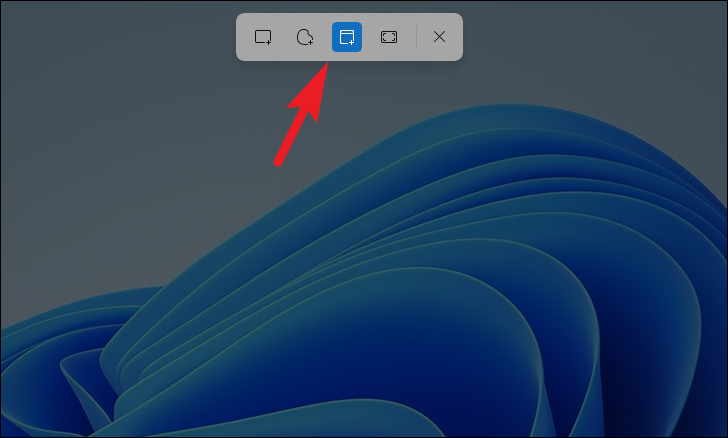
Then, click on the window you wish to take a screenshot of, and once taken, click on the thumbnail to expand the screenshot as you did in the previous step.
Use Snipping Tool to Take a Delayed Screenshot
Though you can definitely take a regular screenshot using the Snipping Tool. However, taking a delayed screenshot is also possible. Moreover, Snipping Tool also enables you to annotate and edit the screenshots for your ease of convenience.
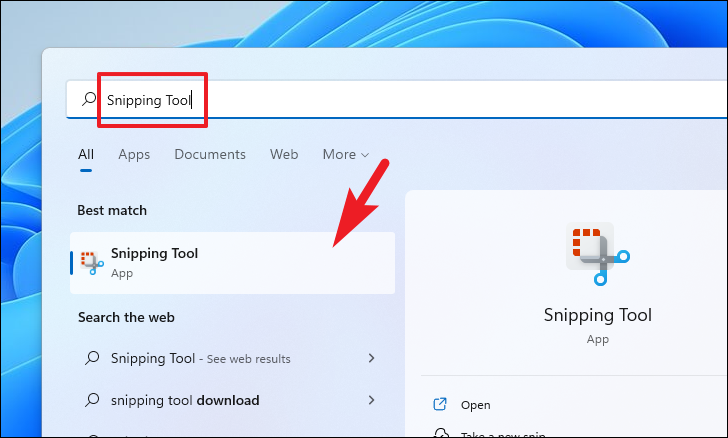
To take a delayed screenshot using the Snipping Tool, head to the Start Menu and type Snipping Tool. Then, from the search results, click on the ‘Snipping Tool’ tile to open the app.
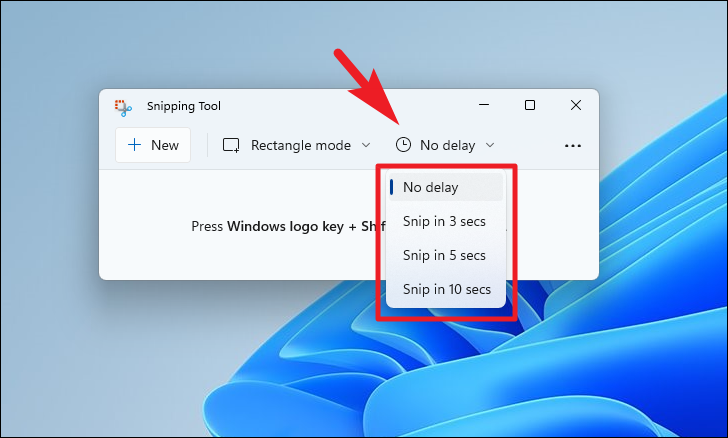
Then, from the ribbon menu, click on the ‘No delay’ button to reveal a context menu and choose your preferred time of delay by clicking on one of the options from the list.
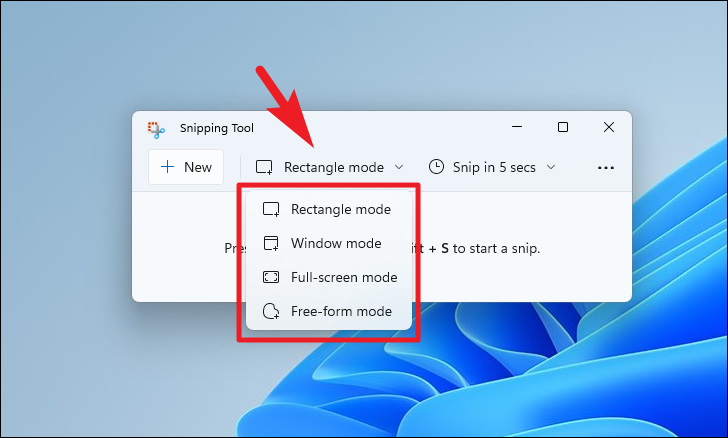
After that, click on the ‘Rectangle mode’ button to reveal the context menu, then choose your desired mode of a screenshot.
Moreover, if your workflow requires you to take delayed screenshots, you can also set your PrtScr key as a shortcut to open the Snipping Tool.
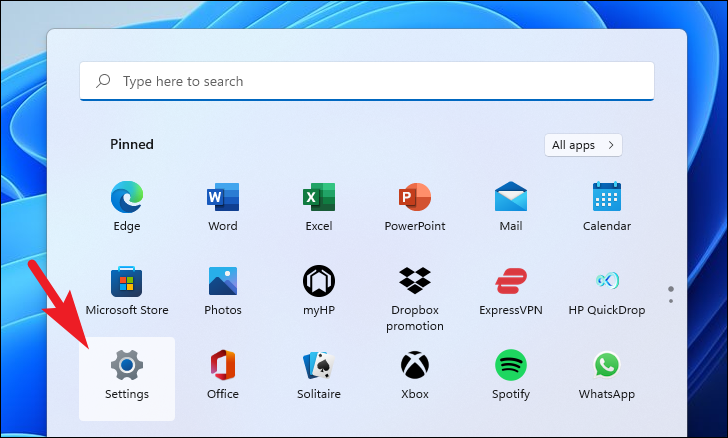
To do so, open the Start Menu and head to the Settings app either from the ‘Pinned apps’ section or by searching for it. Alternatively, you can also press the Windows+I keys together on your keyboard to open the app.
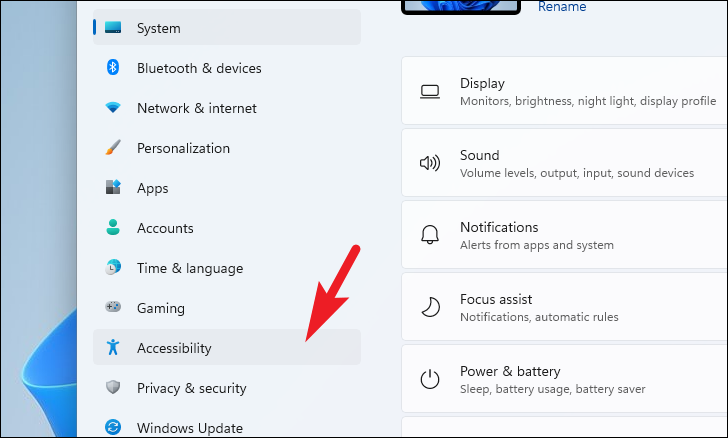
Then, click on the ‘Accessibility’ tab present on the left sidebar to continue.
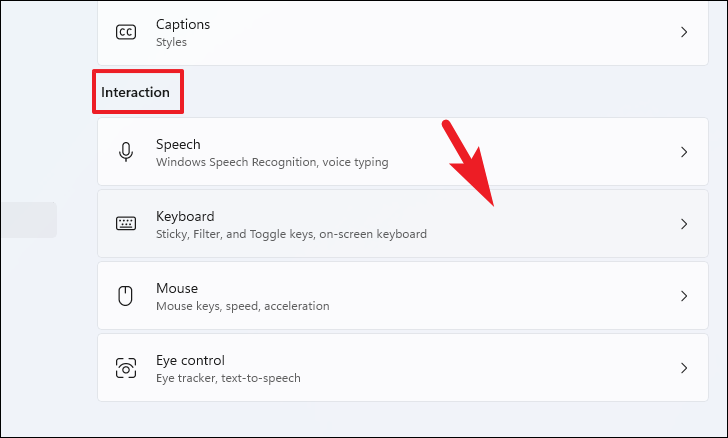
After that, from the right section of the window, scroll down to locate and click on the ‘Keyboard’ tile present under the ‘Interaction’ section to proceed.
Next, locate the ‘Use the Print screen button to open screen snipping’ tile present under the ‘On-screen keyboard, access keys, and Print screen’ section and click on the toggle switch present on the far right edge of the tile to bring it to the ‘On’ position.
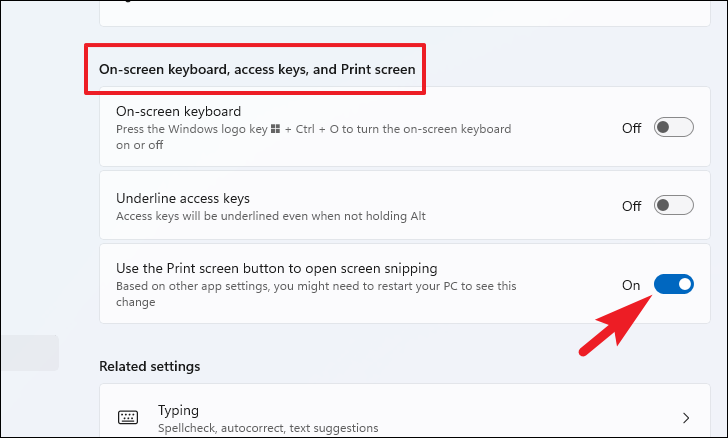
Now, every time you press PrtScr/PrtSc button on your keyboard, the Snipping Tool app will open on your machine.
Take a Screenshot Using the Xbox Game Bar
Though the Xbox Game Bar is intended to record or capture your precious gaming moments, you can also use it to capture regular screenshots. However, the caveat of using the Xbox Game Bar is that you cannot take screenshots of your Desktop or anywhere in File Explorer.
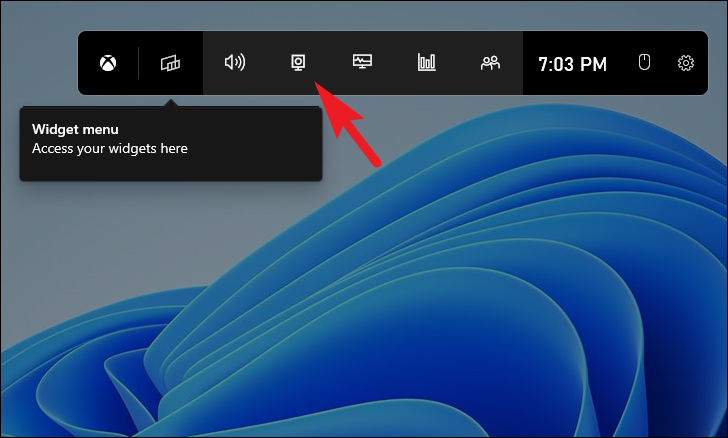
To bring up the Xbox Game Bar on your desktop, press the Windows+G keys together on your keyboard. Then, click on the ‘Capture’ icon on the game bar to display the capture pane on your screen.
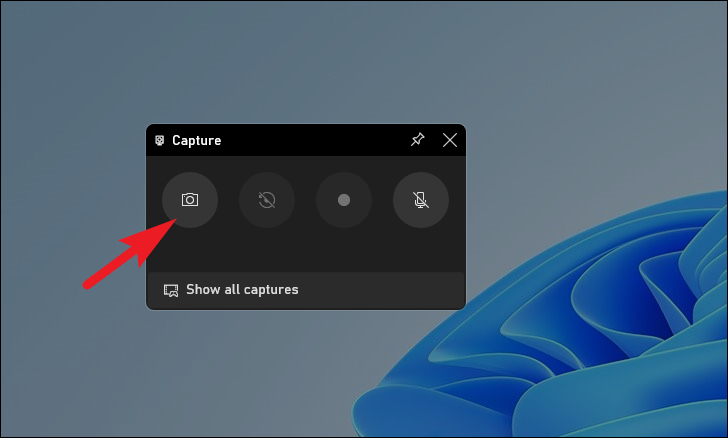
After that, click on the ‘Camera’ icon present on the ‘Capture’ tile to click a screenshot.
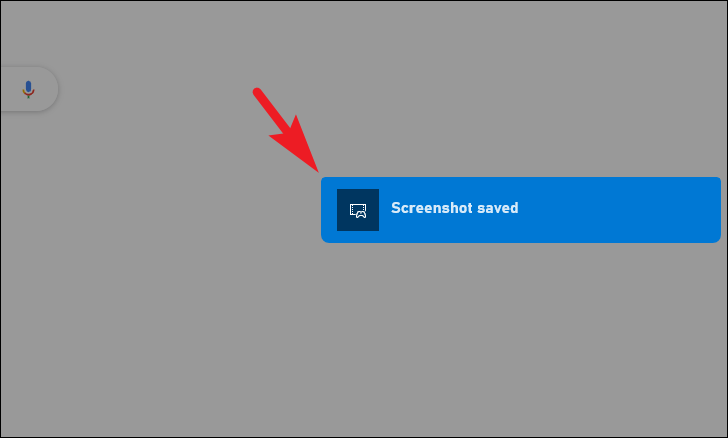
As soon as you click a screenshot, a small banner will appear in the right section of your screen. Click on it to open the captured screenshot.
Alternatively, you can also locate the captured screenshot in the below-mentioned directory of your Windows 11 machine.
Note: Make sure you change the placeholder with your user account name before pasting the below-mentioned address in the address bar of your File Explorer.
C:\Users\<Your User Account Name>\Videos\Captures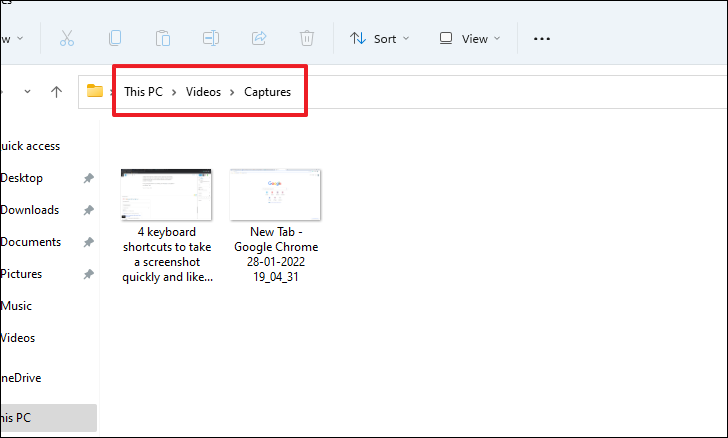
There you go folks, using the simple steps mentioned above you can get bring out your A-game when taking screenshots next time on your Windows 11 machine.


