
The Microsoft Store in Windows 11 is your go-to place for downloading Apps on your computer. The Apps downloaded from Microsoft Store are different because they aren’t saved as your typical desktop software and also receive updates via the Store application.
As the Microsoft Store is infamous for being buggy and problematic, it should not come as a surprise that these Apps are also riddled with issues. Many users reported experiencing apps crashing after the app window opens and they receive a ‘This app can’t open’ message afterward in a dialog box.
If you are having such a problem then fear not. This guide will show you numerous methods you can follow to eliminate this issue. But before we proceed to the guide, it is important to understand what are the reasons behind this problem as this will help you better understand what needs to be fixed.
What Causes ‘This app can’t open’ error?
There are numerous factors that can cause the ‘This app can’t open’ error. Some of the noticeable ones are:
- The app or Store being buggy or broken
- Conflict with UAC settings
- Broken Store Cache data
- Conflict with Anti-virus or Firewall
- Outdated version of Windows
- Disabled Windows Update service
Now that we know what might be causing the error in your system, let’s move on to how you can fix this issue.
1. Use the Windows Store Apps Troubleshooter
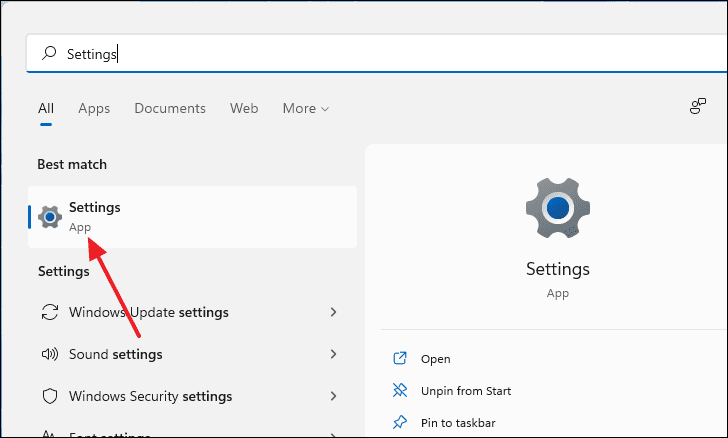
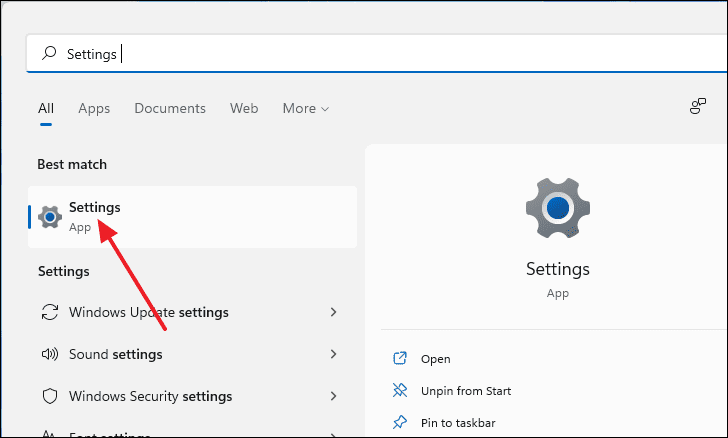
Windows 11 already comes with a native Microsoft Store Apps troubleshooter to help you resolve any Store-related issues. To get to the troubleshooter first open up the Settings menu by pressing Windows+i on your keyboard or search for ‘Settings’ in Windows search and select it from the search results.
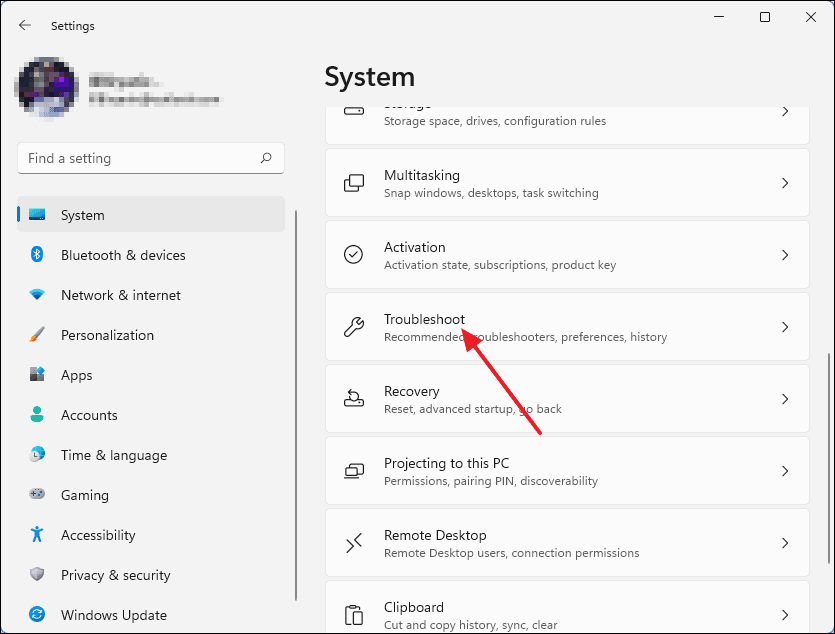
On the Settings window, scroll down and select ‘Troubleshoot’ from the right panel.
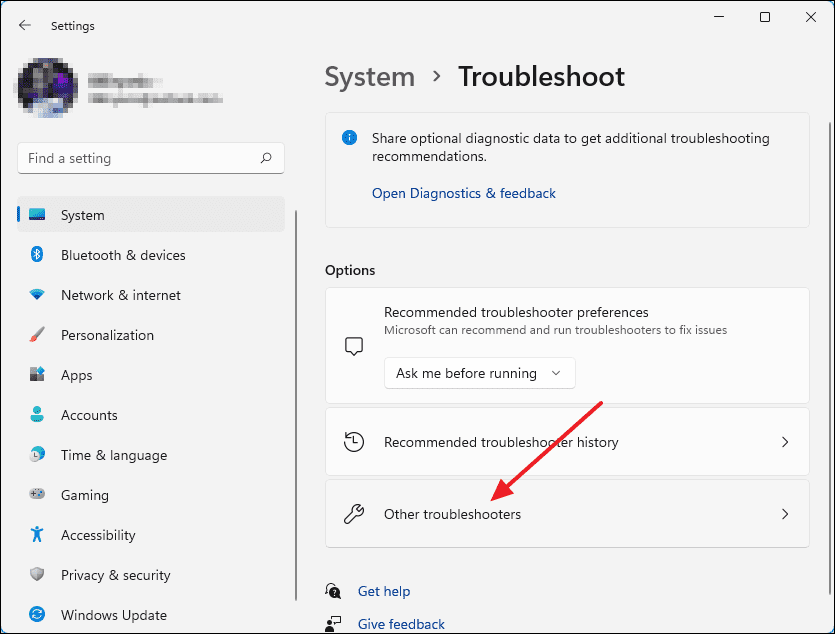
After that, click on ‘Other troubleshooters’. This will open a list of one-click troubleshooter programs.
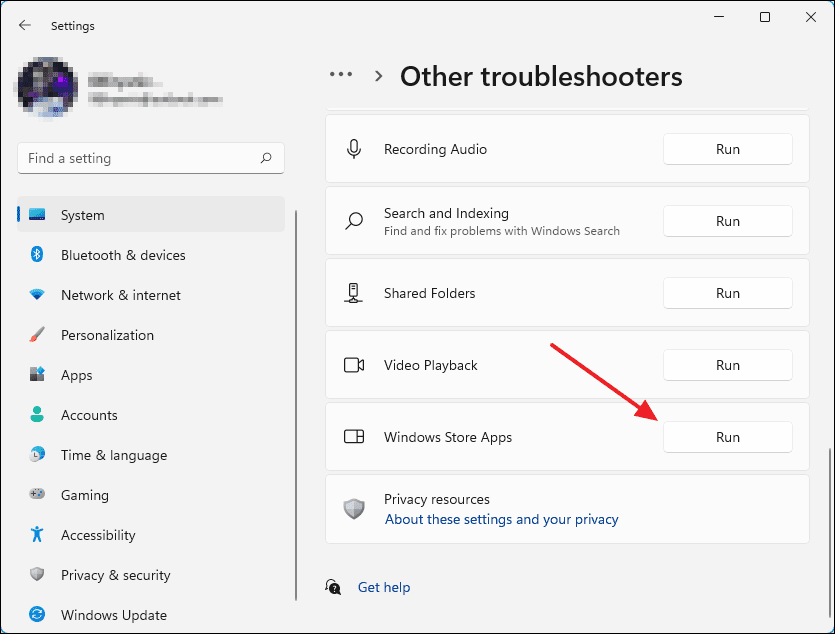
Scroll down to the very bottom until you see ‘Windows Store Apps’ and click on the ‘Run’ button next to it.
A window will appear called ‘Windows Store Apps’ and you can see the diagnosis in process.
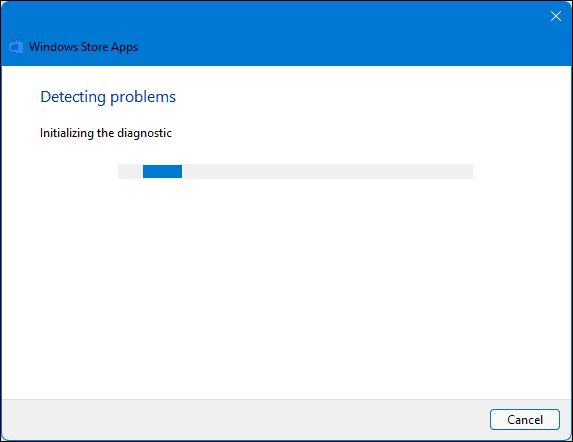
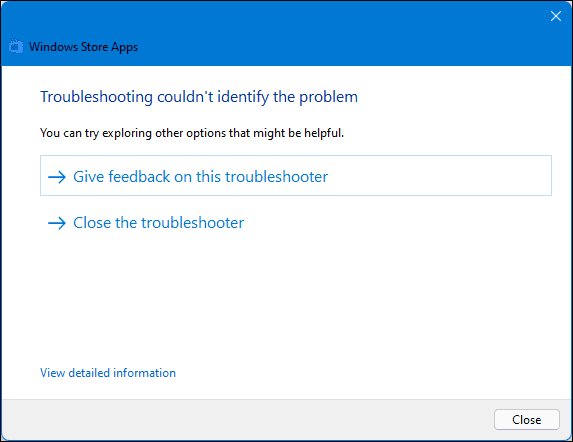
Wait for the process to finish and if it manages to identify any problem, it will come up here with suggested solutions.
2. Reset or Repair the Application
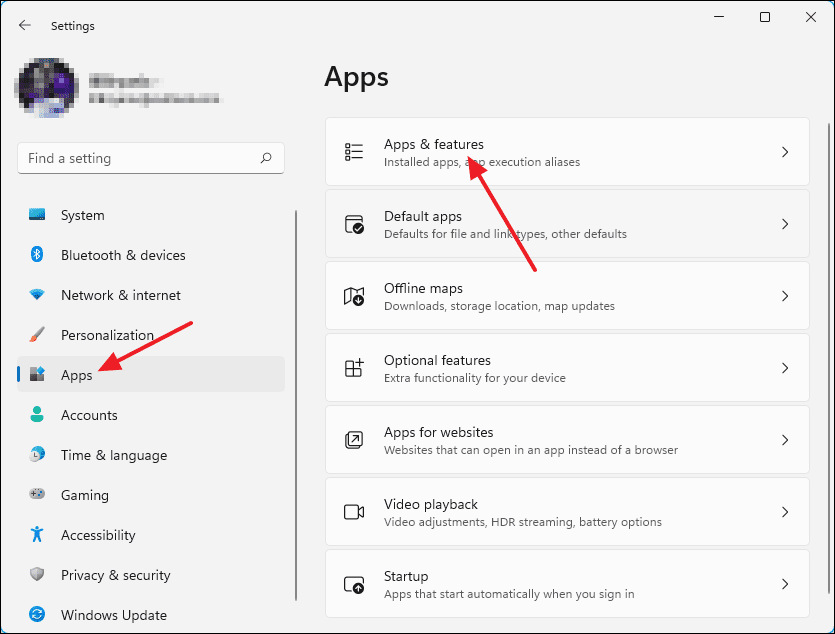
If automatic troubleshooting wasn’t able to solve your problem then you can try manually resetting or repairing an app via the Apps settings menu. Start by launching the Settings menu by pressing Windows+i on your keyboard or by searching for it in the Start Menu search.
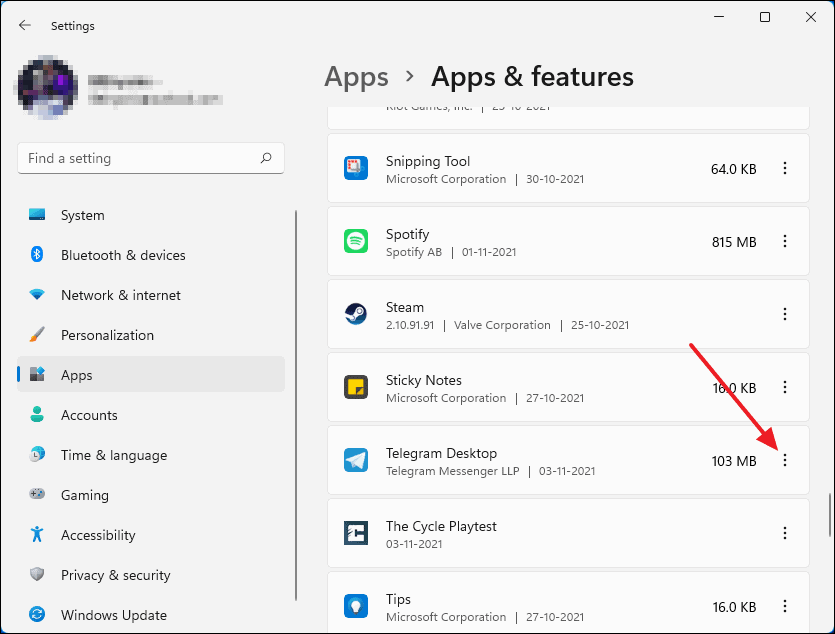
On the Settings window, click on ‘Apps’ from the left panel and then click on ‘Apps & features’ from the right panel. This will open a list of installed applications on your PC.
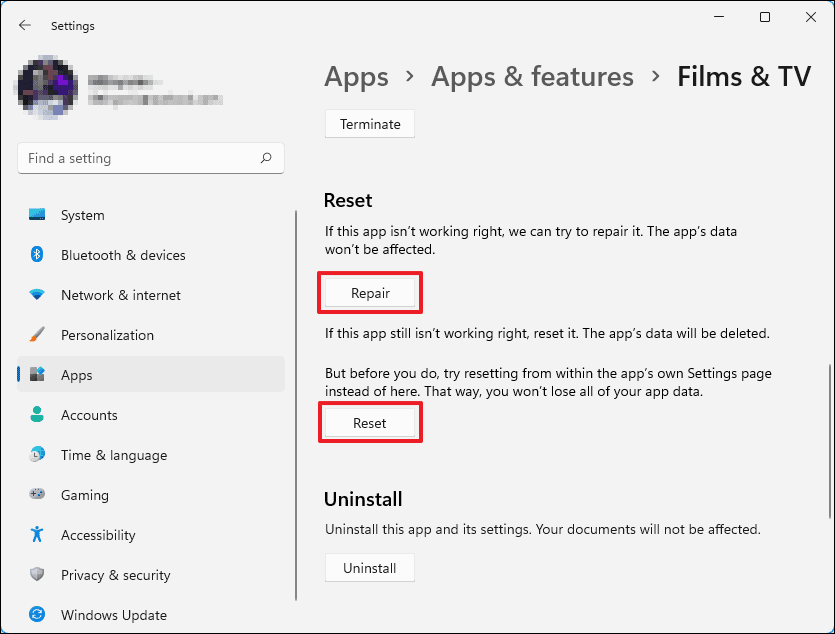
Now, scroll down until you find the faulty app from the list. Then click on the 3 vertical dots next to the application and select ‘Advanced options’.
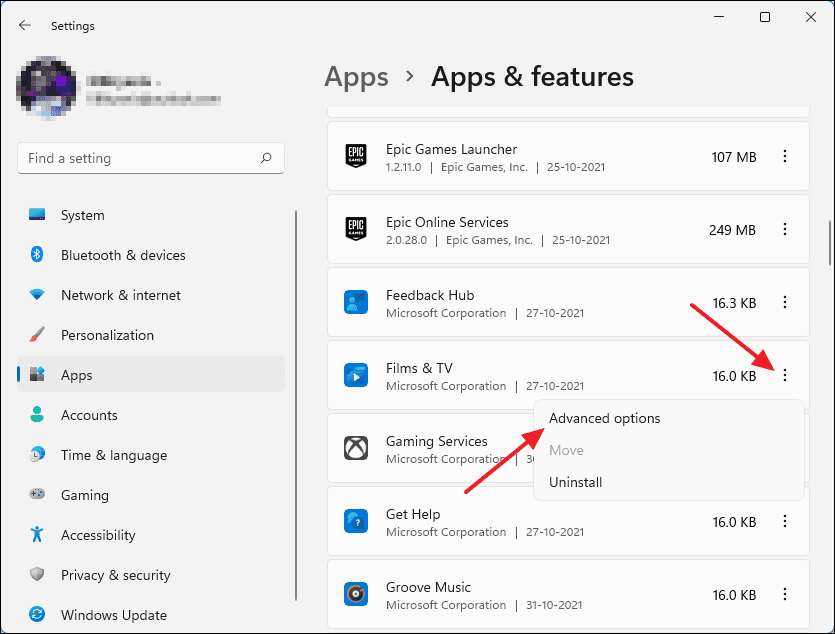
It will take you to a new menu. From there, scroll down again and you will see the ‘Repair’ and ‘Reset’ options under the Reset section with descriptions for each action.
3. Uninstalling and Re-installing the App
Uninstalling and then Re-installing the broken app is a good alternative to resetting or repairing the app. A fresh installation can get rid of any bugs inside the app package which resetting or repairing might fail to remove.
First, go to the Settings menu by pressing Windows+i on your keyboard. On the Settings menu, select ‘Apps’ from the left panel and then select ‘Apps & features’ from the right panel.
Now to uninstall the broken app locate it from the list and then click on the 3 vertical dots next to it.
From there, click on ‘Uninstall’.

After that click on ‘Uninstall’ once again to confirm the action and the app will be removed from your computer.

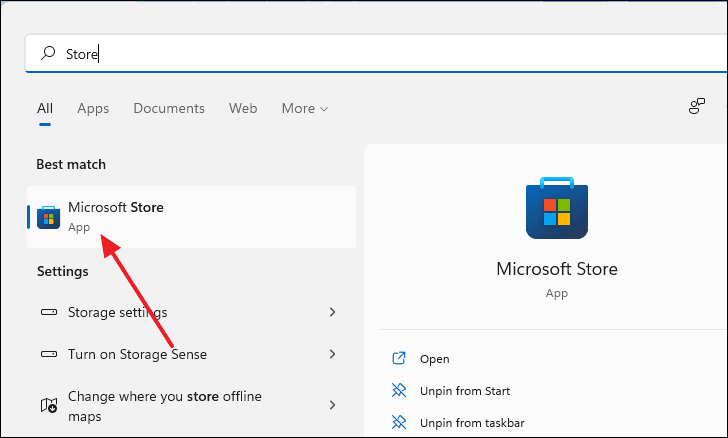
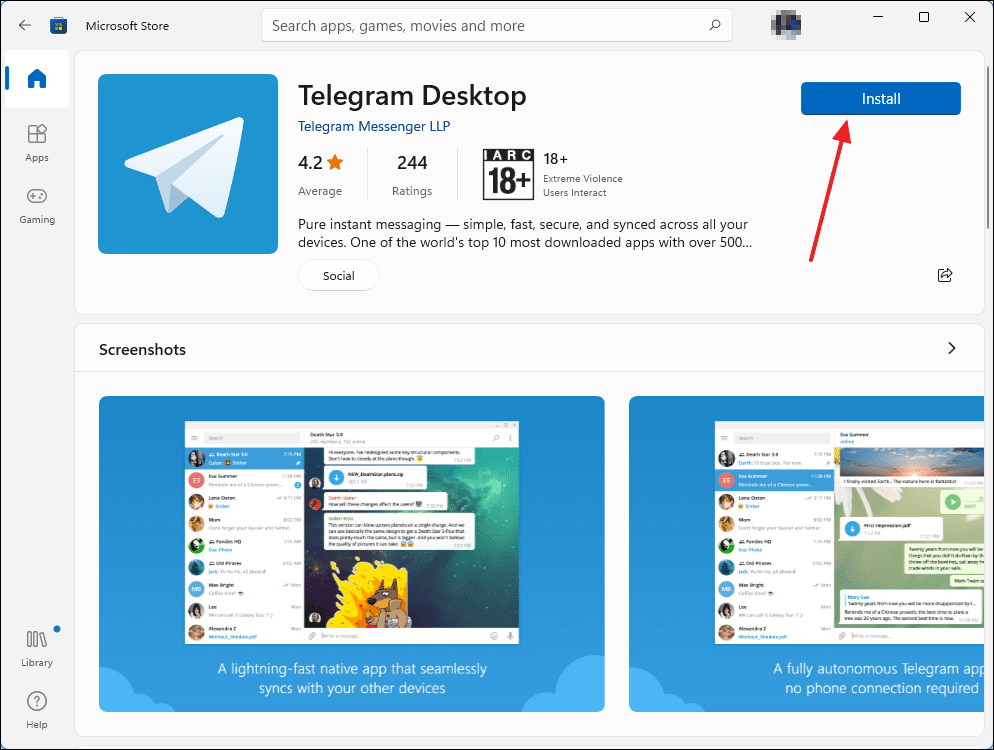
Now you have to re-install the app from Microsoft Store. Launch ‘Microsoft Store’ by searching for it in the Start Menu search and selecting it from the search results.
Now, on the Store window, enter the name of the application inside the search bar which is located on the top of the window. Select the application from the search results to get to the download page.
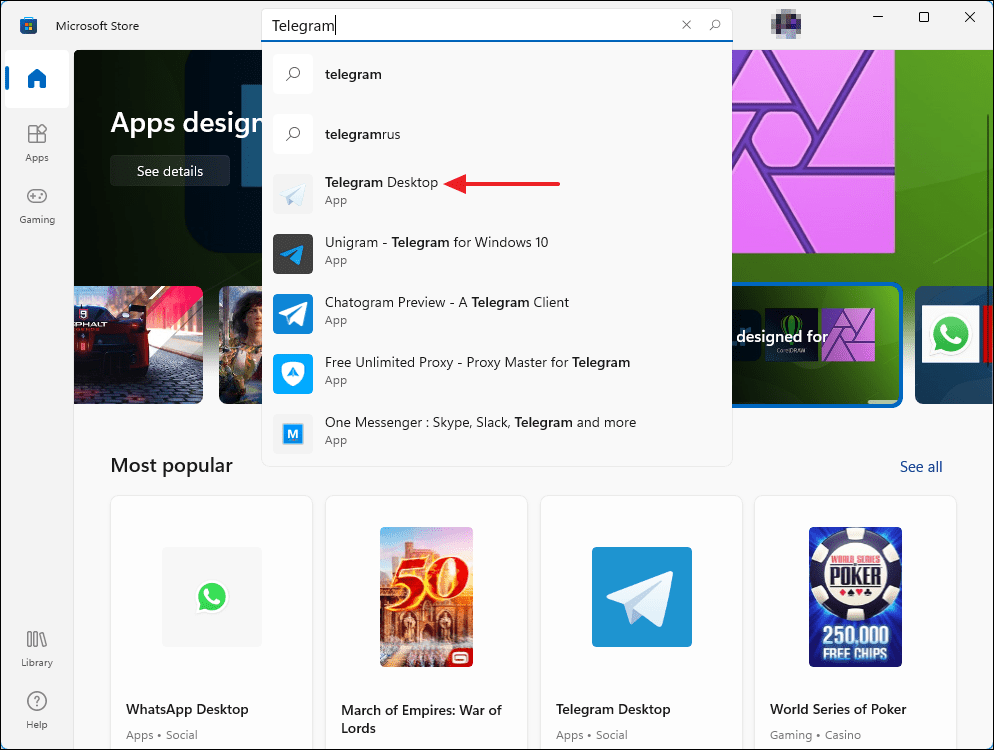
After that, click on the blue ‘Install’ button on the download page and you are done.
4. Clean the Microsoft Store Cache Data
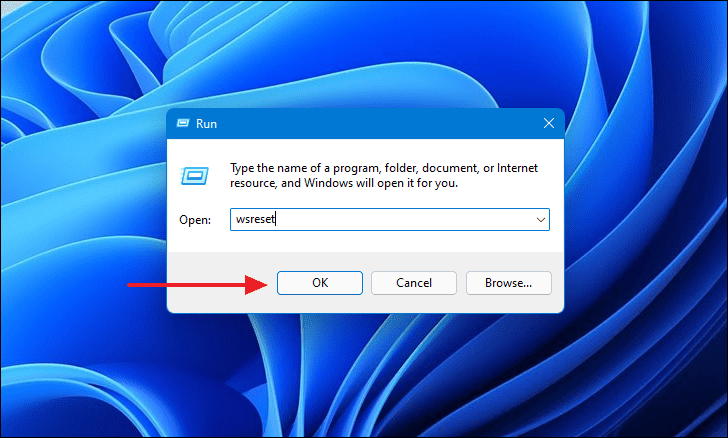
If the above fixes aren’t working for you then it is possible that Microsoft Store is the source of the issue. In this case, resetting the Store cache can help to eliminate the problem. Press Windows+r to pull up the Run window. Type ‘wsreset’ inside the command line and then press Enter or click on ‘OK’.
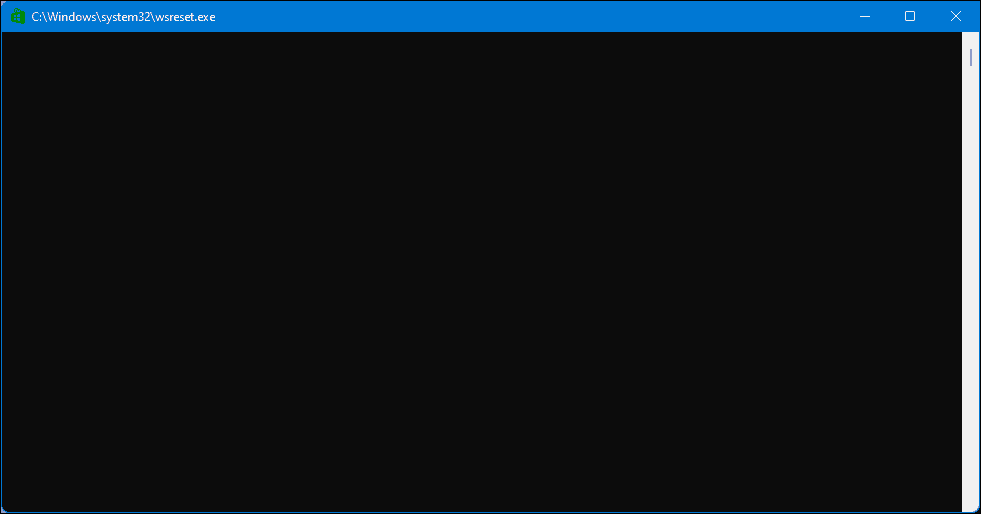
A black console window will appear. Although there is nothing in it, wait for it to finish resetting the store cache and it will close on its own.
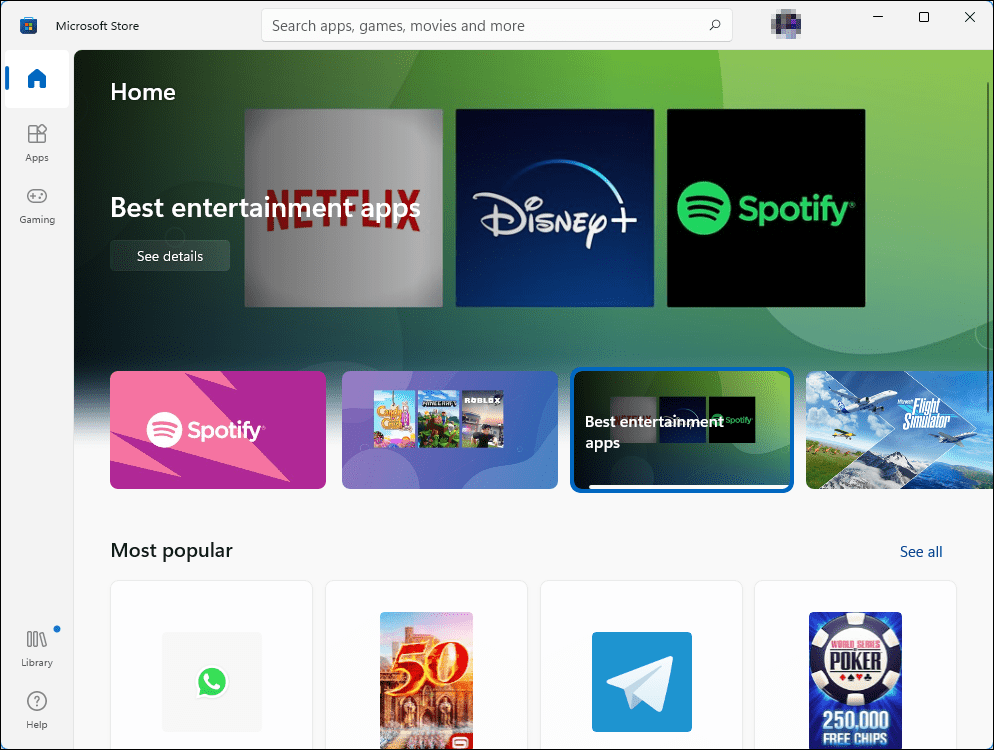
Once the process is finished you will be automatically taken to the Microsoft Store home page. Close it and try launching the application.
5. Re-register Microsoft Store Using Windows PowerShell
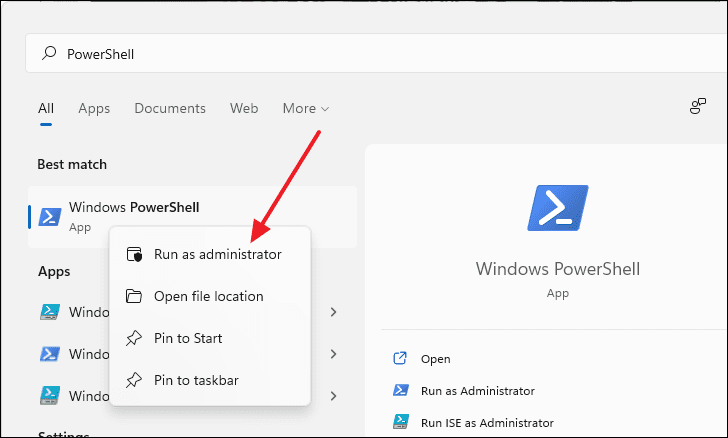
You can re-register the Microsoft store to your system using the Windows PowerShell console to eliminate ‘This app can’t open’ error. Press the Windows button and then type ‘PowerShell’. Right-click on the app and then select ‘Run as administrator’.
Now, copy & paste the following command in the command line and press Enter.
PowerShell -ExecutionPolicy Unrestricted -Command "& {$manifest = (Get-AppxPackage Microsoft.WindowsStore).InstallLocation + 'AppxManifest.xml' ; Add-AppxPackage -DisableDevelopmentMode -Register $manifest}
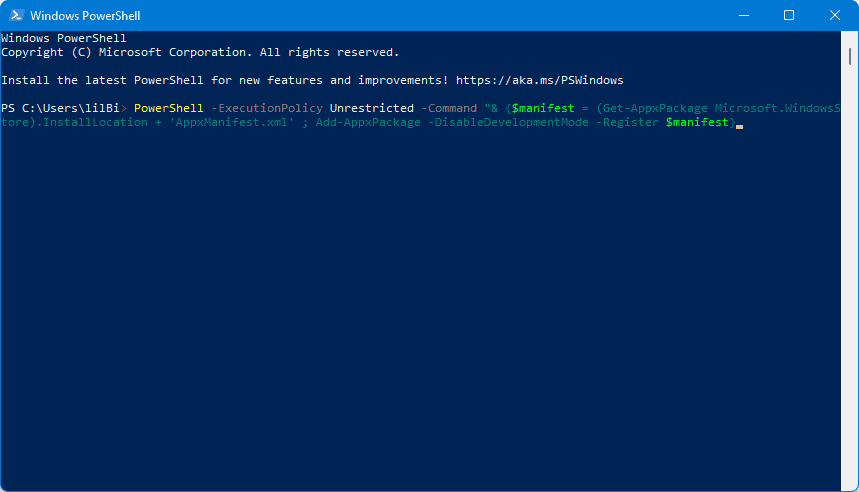
After pressing Enter, close the Window and try launching the App.
6. Enable Windows Update Service
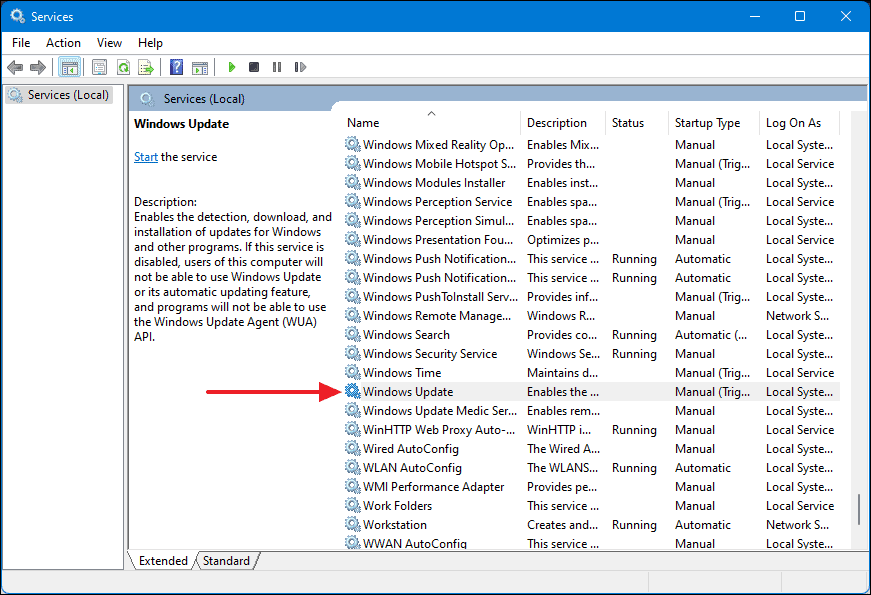
The Windows Update Service is a background process and by default, it is enabled. If for some reason this service is not running or disabled then it might cause the error. To restart the service go to Windows search and type ‘Services’ and select it from the search results.

A new window labeled ‘Services’ will appear. It will contain a list of all services present on your computer. Scroll down and find ‘Windows Update’.
Double-click on ‘Windows Update’ service and a dialog box will come up. From there, make sure that the ‘Startup type’ is set to ‘Automatic’. Then click on the ‘Start’ button below the Service Status text and then click on ‘Apply’.
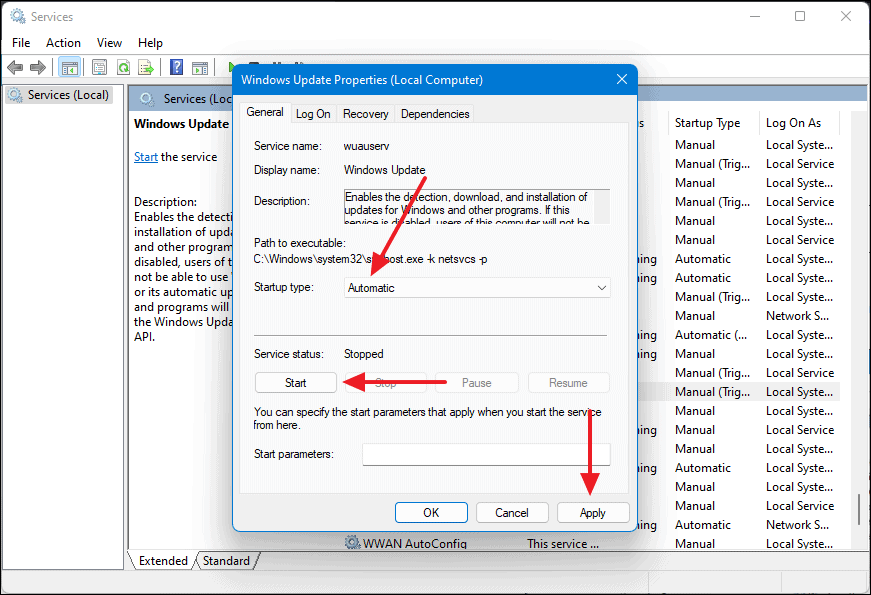
And it is done. Close this window and relaunch the app.
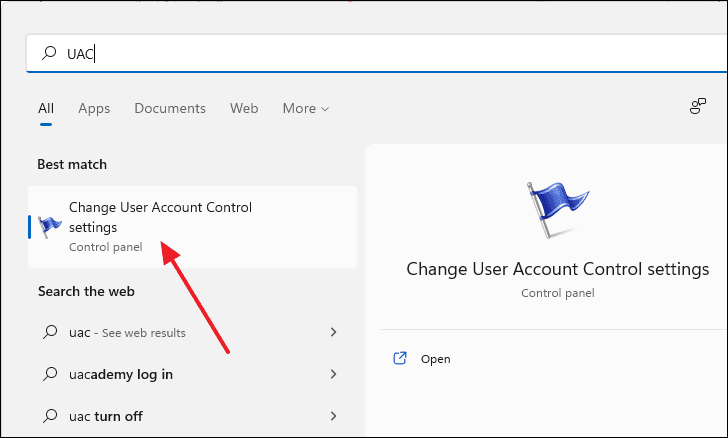
7. Change User Account Control or UAC Settings
Changing current User Account Control settings can solve ‘This app can’t open’ issue. To quickly get to User Account Control open up the Start Menu search by pressing the Windows key and type ‘UAC’ inside the search bar. Select the option that says ‘Change User Account Control’.
A new window will appear. Notice where the slider is located. If it is set to ‘Never notify’, then change it to ‘Always notify’. On the other hand, if it is set to ‘Always notify’, then change it to ‘Never notify’.
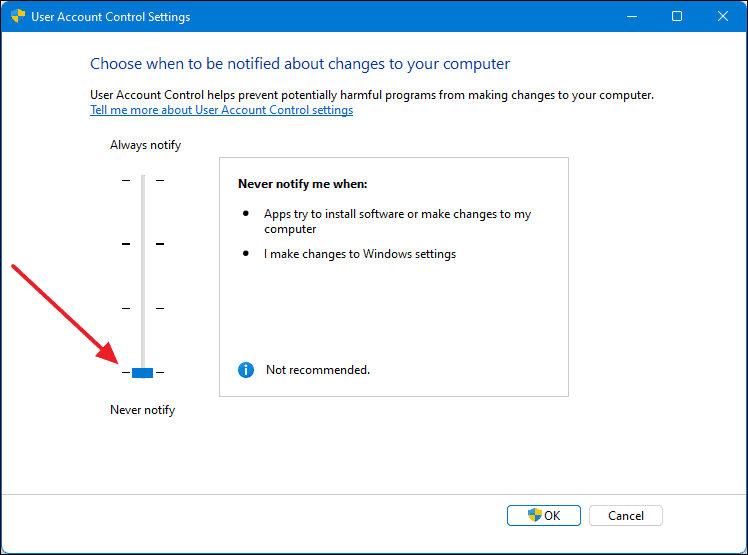
After you have made the change, click on ‘OK’ to save it.
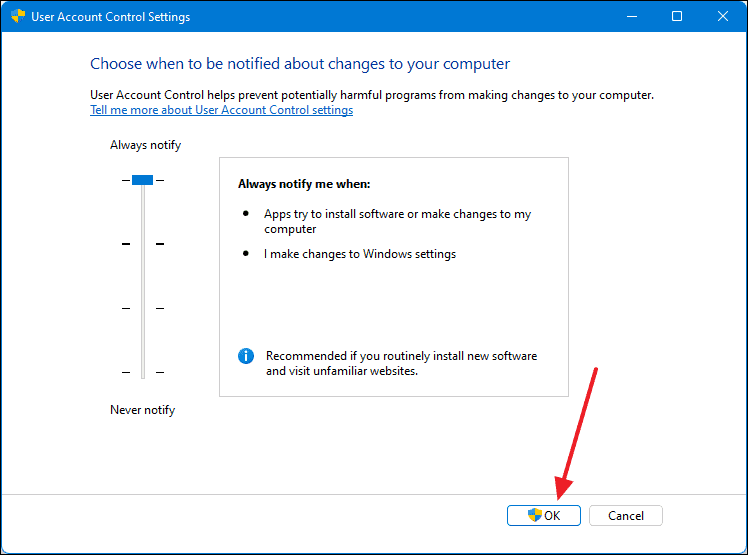
Note: You can also test by setting the silder to other two options in between ‘Always notify’ and ‘Never notify’. Test with every settings on and see which one solves your issue.
8. Make Sure Windows is Updated
It is possible that you are having ‘This app can’t open’ issue due to any bugs present in your current version of Windows 11. Thus, it is best to always keep your Windows updated to make sure that you receive all the bug fixes, stability, and performance improvements that Microsoft releases with these updates.
To check if you have my pending updates, launch the Settings menu by pressing Windows+i on your keyboard. On the Settings Window, select ‘Windows Update’ from the left panel.
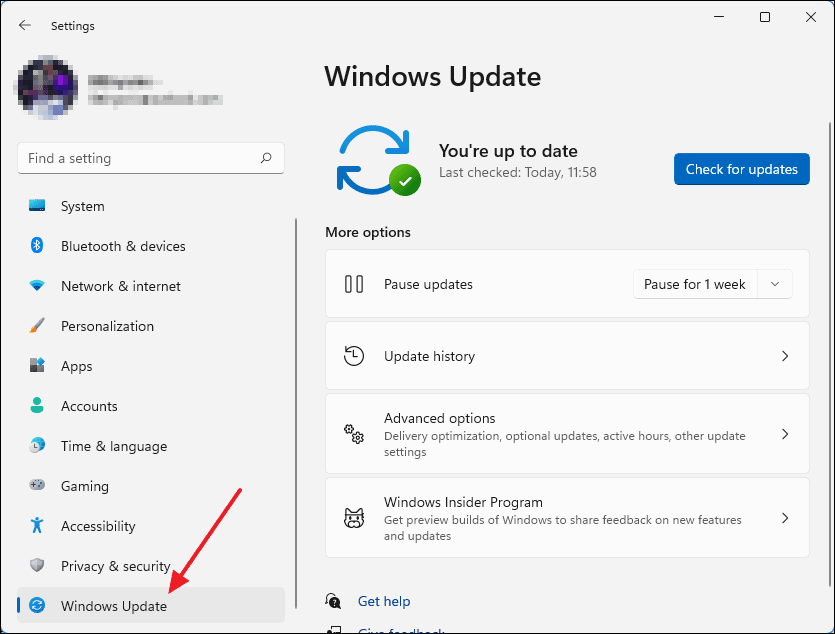
After that, click on the blue ‘Check for updates’ button.
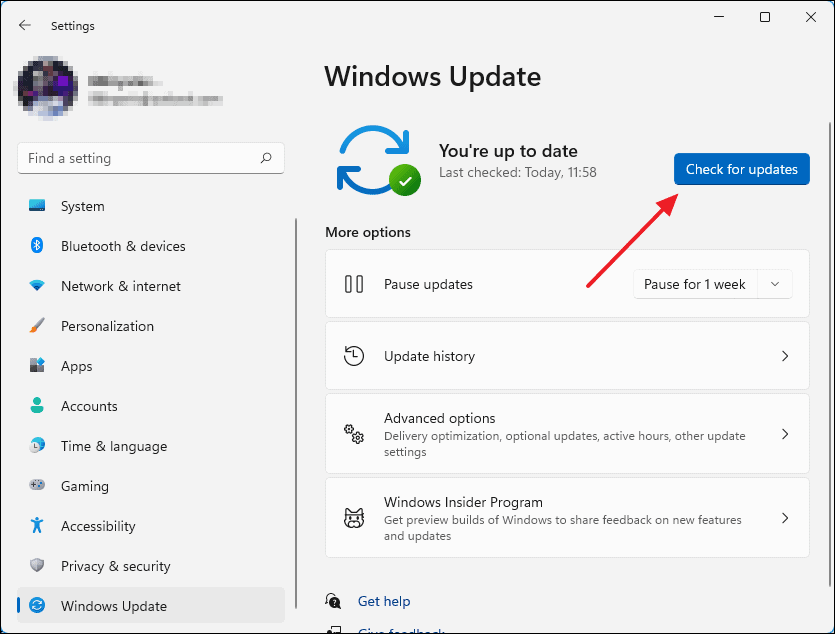
After clicking on ‘Check for updates’ the system will look for any pending updates and if there is one, the download will begin automatically.
Note: Depending on the type of update you download, you may require to restart your computer to finish installing the update.
9. Turn Off Windows Firewall
The Windows Firewall is a part of the layered security measurements in Windows 11. The Firewall filters incoming and outgoing network activities and prevents unauthorized access to your computer. If the broken application connects to the internet, it is possible that the Windows Firewall is blocking its access.
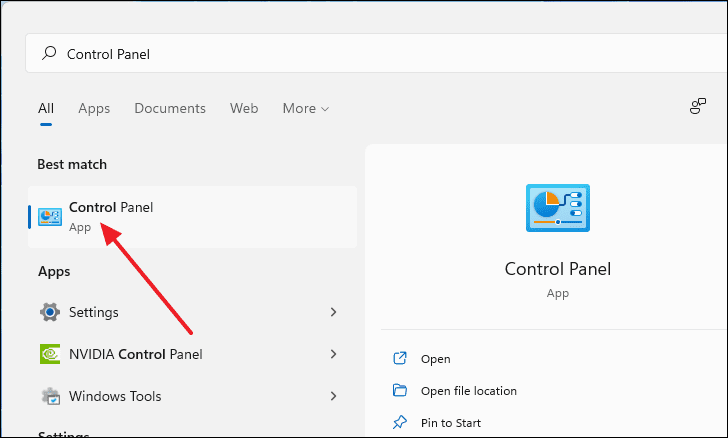
To disable Firewall, first, open up Control Panel by searching for it in the Windows Search.
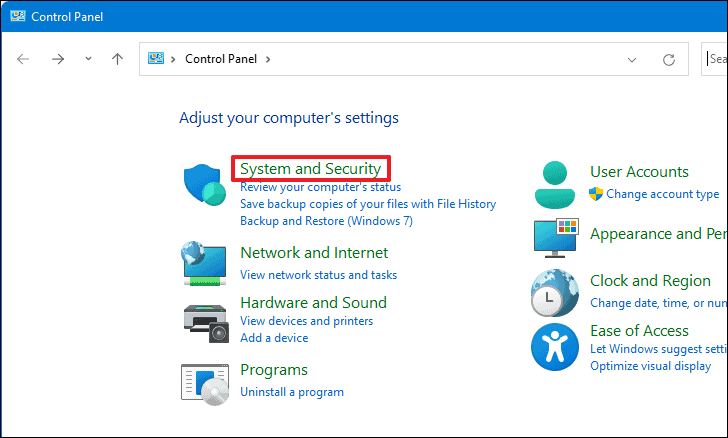
After the Control Panel window opens up, click on ‘System and Security’.
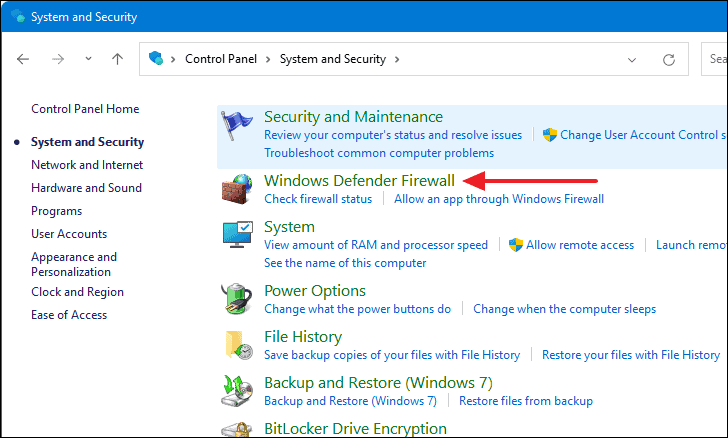
After that, select ‘Windows Defender Firewall’.
Now, from the left side menu, click on ‘Turn Windows Defender Firewall on or off’. From this point, you will need administrator privileges to proceed further.
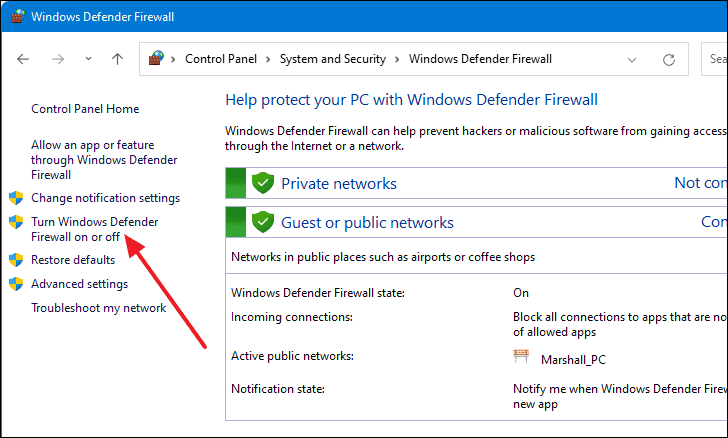
After that, turn of the Firewall for both the Private network and Public network by selecting ‘Turn off Windows Defender Firewall (not recommended)’ under ‘Private network settings’ and ‘Public network settings’. Lastly, save the changes by clicking ok ‘OK’.

Now you can go ahead and launch the application.
Note: Disabling Windows Firewall can be very risky. Only consider this method if other methods are not working for you. Even if you do turn off the Firewall to lunch the application, do remember to turn it back on after you’ve closed the app or before you browse the internet.
10. Use a New Local Account
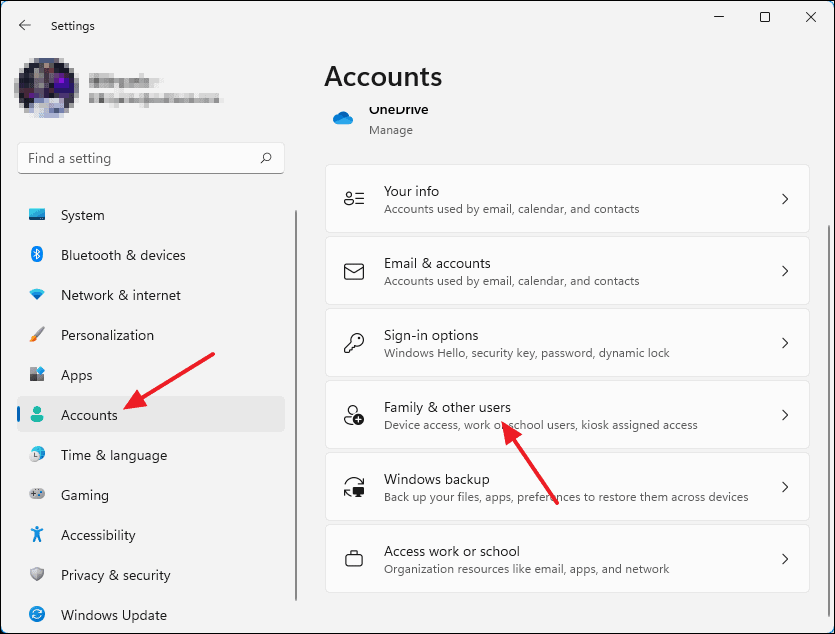
‘This app can’t open’ issue can be resolved by creating a new local user account. To create a local account, first, open up the Settings menu by searching for it in Windows search.
On the Settings window, click on ‘Accounts’ from the left panel and then select ‘Family & other users’ from the right panel.
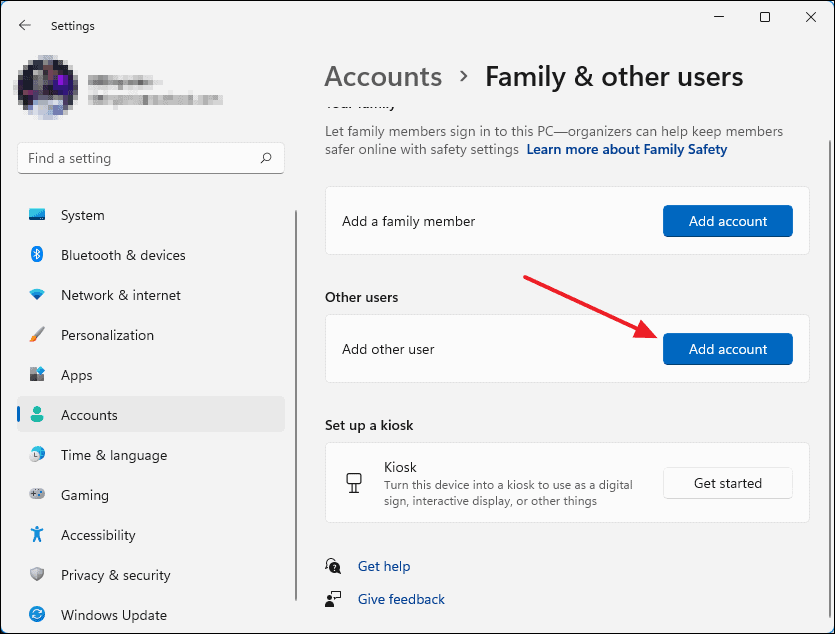
After that, click on the blue ‘Add account’ button under the ‘Other Users’ section.
A new window will come up. From there, click on ‘I don’t have this person’s sign-in information’.
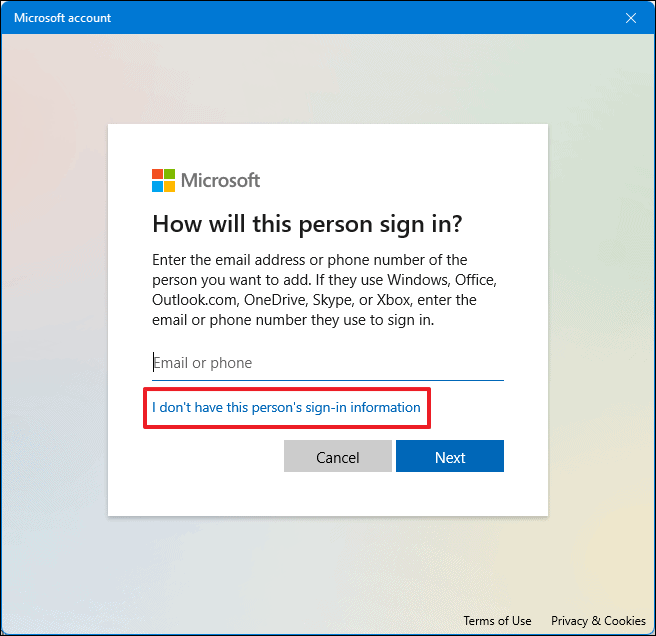
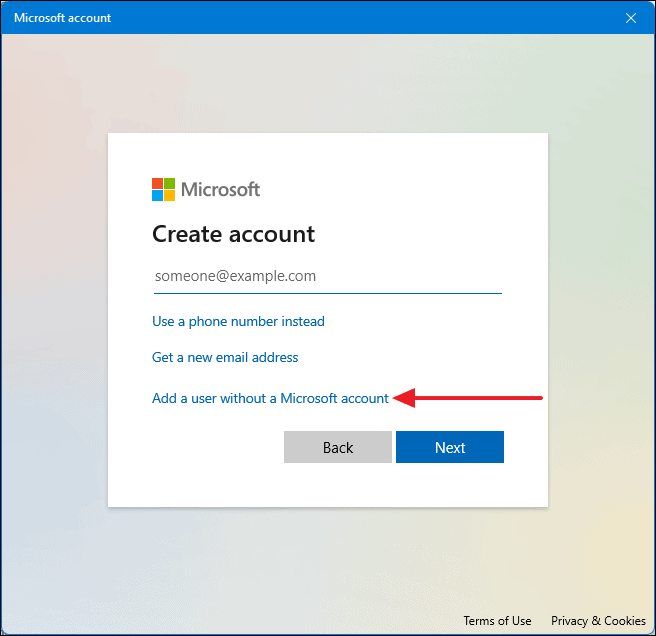
Next, click on ‘Add a user without a Microsoft account’.
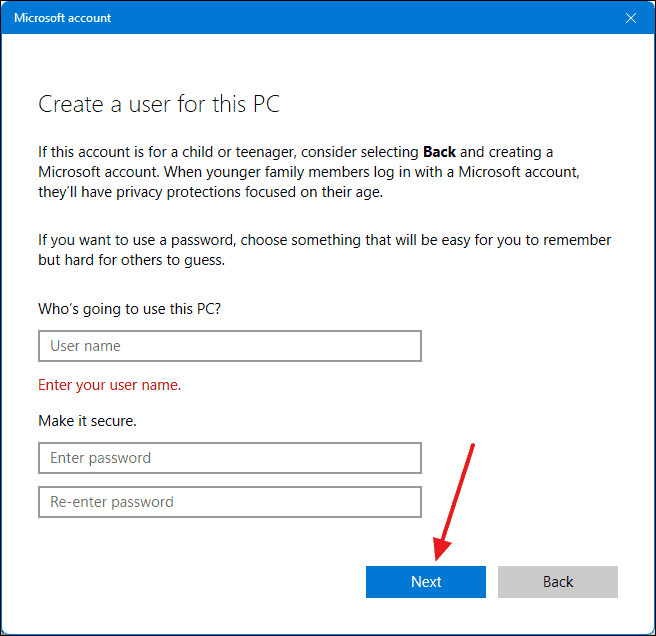
Now you can set up a new account. First, assign a username for your new local account by typing it inside the ‘User name’ text field. Then you have to enter a password for the local account inside the ‘Enter password’ text field. Confirm your password by entering it again inside the ‘Re-enter password’ text field. This password will be used as your sign-in password.
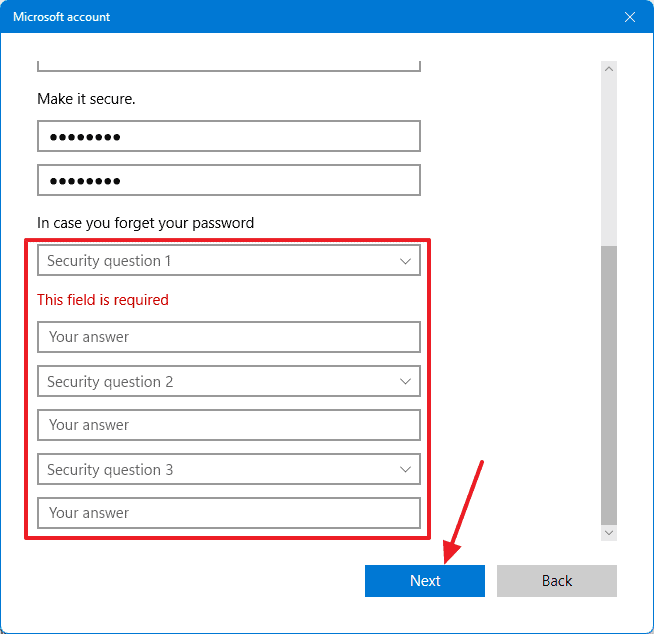
After that, you will have to assign 3 security questions as a means to recover your account if you forget the password. When everything is done, click on ‘Next’.
Now sign in to your local account and try opening the app.
11. Fix the Lisence Service
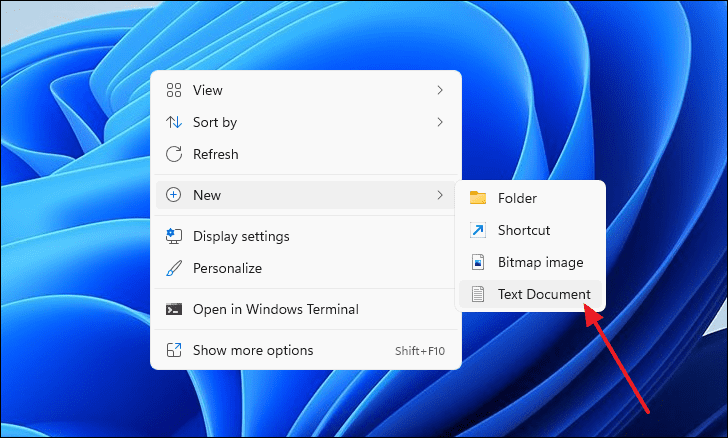
Fixing the license service can resolve the ‘This app can’t open’ issue’. To do this, first, right-click over any empty space on your desktop and then select ‘New’ and after that select ‘Text document’.
Open up the New Text Document by double-clicking on it from the desktop and copy & pasting the following text.
echo off


net stop clipsvc


if “%1?==”” (

echo ==== BACKING UP LOCAL LICENSES

move %windir%\serviceprofiles\localservice\appdata\local\microsoft\clipsvc\tokens.dat %windir%\serviceprofiles\localservice\appdata\local\microsoft\clipsvc\tokens.bak

)


if “%1?==”recover” (

echo ==== RECOVERING LICENSES FROM BACKUP

copy %windir%\serviceprofiles\localservice\appdata\local\microsoft\clipsvc\tokens.bak %windir%\serviceprofiles\localservice\appdata\local\microsoft\clipsvc\tokens.dat

)


net start clipsvc
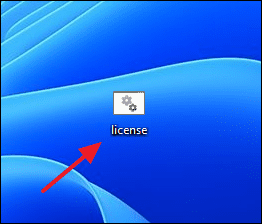
After you’ve pasted the text inside the New Text Document, press CTRL+Shift+s on your keyboard to open the ‘Save As’ window. From there, change toe ‘Save as type’ to ‘All Files’. After that, inside the File Name text box, type ‘license.bat’. Lastly, click on ‘Save’ to save this text as a batch file.

You will see that the icon of the file has changed.
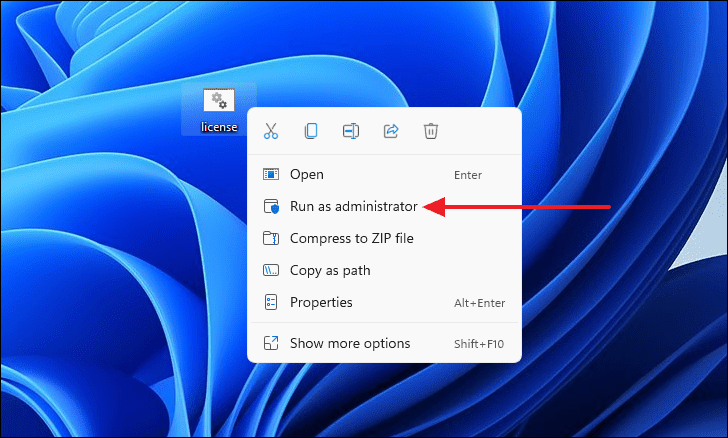
Now, right-click on the batch file and select ‘Run as administrator’. It will do two things, first, it will all the cache files will be renamed and the license service will also be stopped.
12. Perform a Clean Boot
To perform a Clean Boot, first, open up the Run window by pressing Windows+r on your keyboard. Inside the command line, type ‘msconfig’ and press Enter.
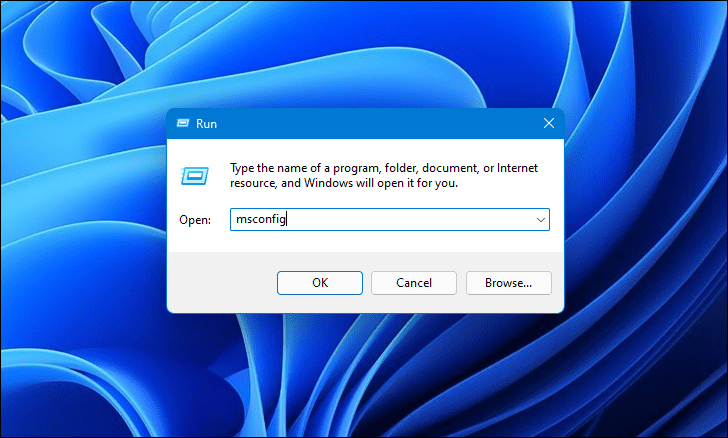
Now, under the ‘Selective startup’ section, uncheck the boxes that say ‘Load system services’ and ‘Load startup items’.
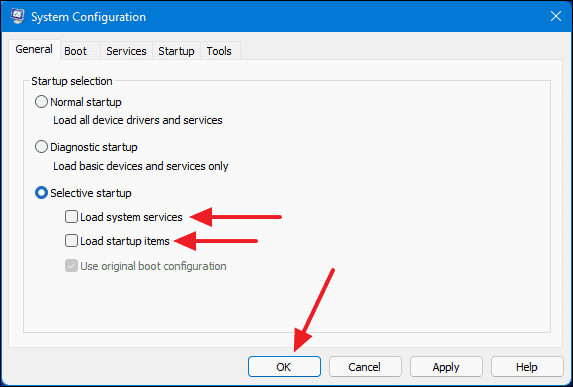
A small dialog box will appear. From there, click on ‘Restart’.

After your computer restarts itself, sign in and try to open the application.
13. Edit the Group Policy
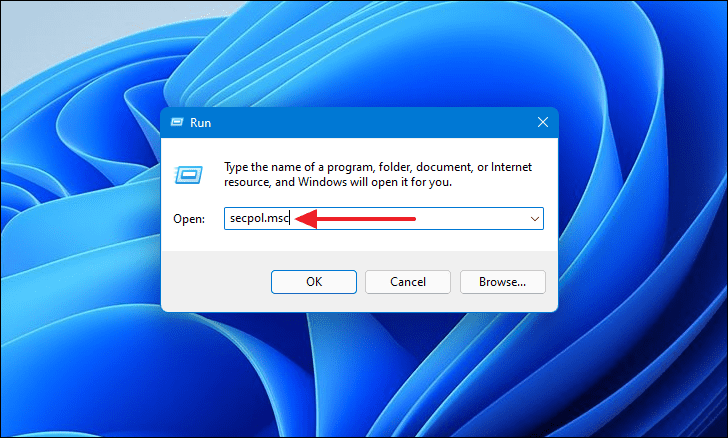
First, launch the Run window by pressing Windows+r on your keyboard. After the Run window appears, type ‘secpol.msc’ inside the command line and click on ‘OK’.
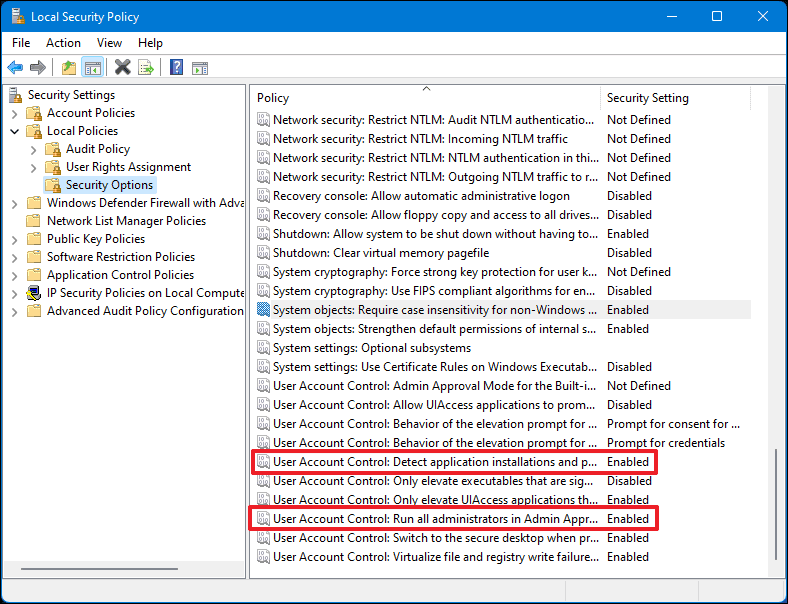
Now, a new window will come up called ‘Local Security Policy’. From the left side menu, first, select ‘Local Policies’ and then from the drop-down menu, select ‘Security Options’.

Scroll down on the right panel until you see the ‘User Account Control’ options. From there, make sure ‘User account control: Detect application installations and prompt for elevation’ and ‘User account control: Run all administrators in Admin Approval Mode’, both are set to ‘Enabled’.
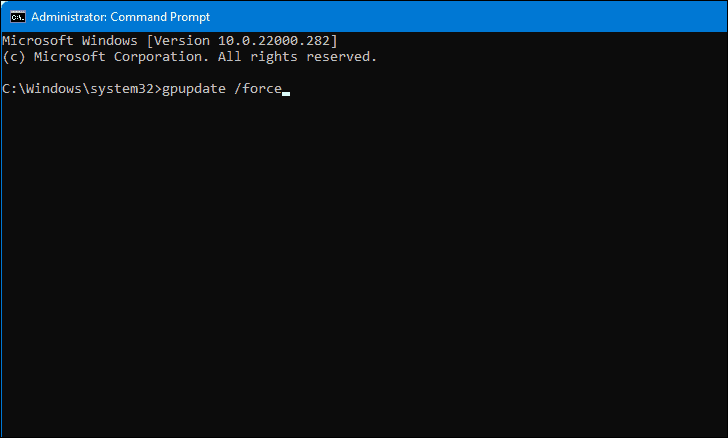
Now, search for ‘Command Prompt’ in the Start Menu search. Right-click on it from the search results and select ‘Run as administrator’.
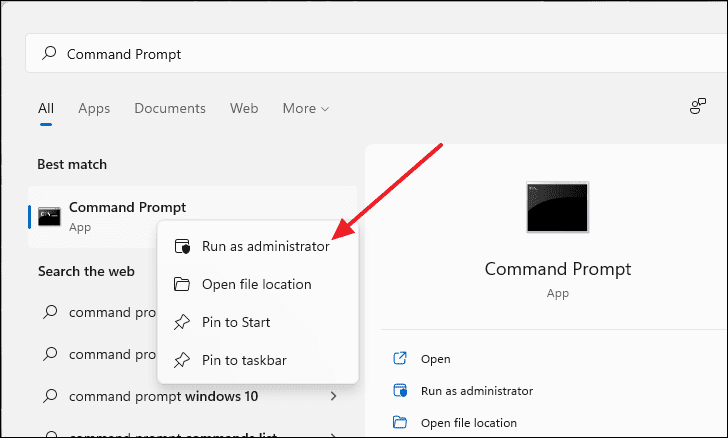
On the Command Prompt window, type ‘gpupdate /force’ in the command line and press Enter.
Let the command run and after the process finishes, restart your computer. Now you will be able to open the application.
These are fixes you can try if you are having ‘This app can’t open’ error in your Windows 11 computer.


