
Windows 10 is one of the finest iterations in the series. It’s straightforward, user-friendly, and offers a ton of features users had been asking for. However, just like the previous versions, Windows 10 too is prone to errors, BSOD (Blue Screen of Death) error being the most common. In this article, we will focus on the ‘System Service Exception’ error and the various fixes to resolve it.
What is System Service Exception Error?
The ‘System Service Exception’ is a BSOD error encountered due to various issues. When you encounter the error, the system crashes and the screen turns blue with the error message ‘System Service Exception’ mentioned at the bottom. This error message helps you identify the error and thus proceed to the specific fixes.
Some of the issues that lead to the ‘System Service Exception’ error are mentioned below.
- Outdated or Corrupt Graphics Driver
- Running an Older Version of Windows
- Corrupted Hard Disk
- Third-party Apps Conflicting with the OS
- Corrupted System Files
- System Infected with Malware or Virus
Since there are so many issues leading to the error, one cannot just go with a particular fix for it. Therefore, we have listed the most effective fixes in the sections below. Also, follow the fixes in the sequence they are mentioned for a quick resolution.
1. Update Windows
Whenever you encounter an error on Windows 10, your primary approach should be to check for updates. If you are encountering the error due to a bug in the current version of Windows, it’s highly likely that the bug would be fixed in the updates.
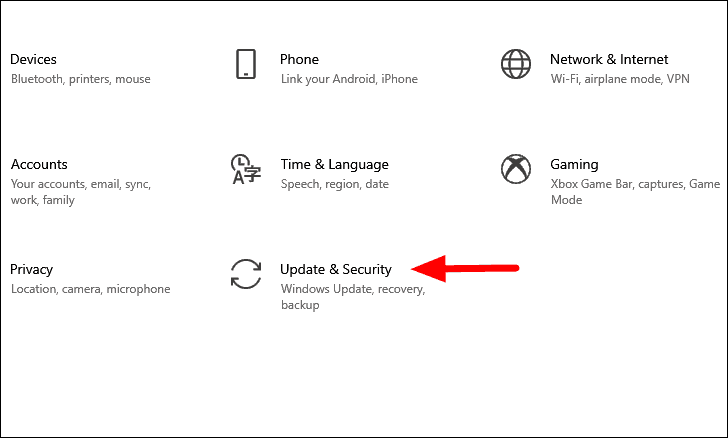
To update the Windows, press WINDOWS + I to launch system ‘Settings’ and then click on the ‘Update & Security’ settings.
In the ‘Update & Security’ settings, the ‘Windows Update’ tab will open by default. Next, click on the ‘Check for updates’ option at the right under.
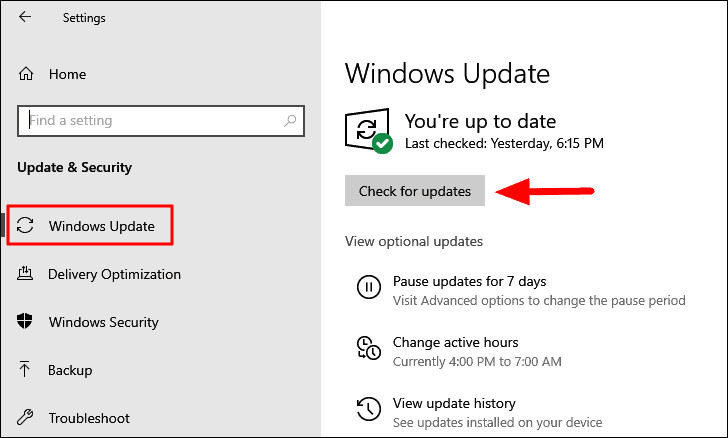
The Windows will now scan for an update, and download and install it on your computer, if any is available. After you have installed the Windows, check if you still encounter the ‘System Service Exception’ error.
2. Reinstall Graphics Driver
If the ‘Display’ driver on your system has gone corrupt due to some reason, it might lead to the ‘System Service Exception’ error. In the case of corrupt drivers, all you have to do is reinstall them.
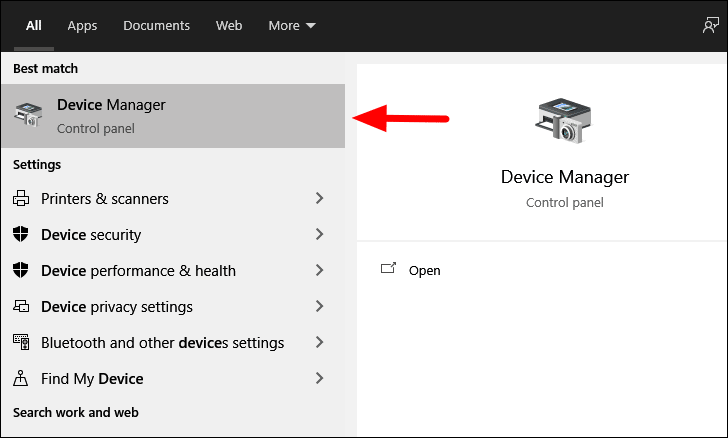
To reinstall the driver, search for ‘Device Manager’ in the ‘Start Menu’, and then click on the search result to launch the app.
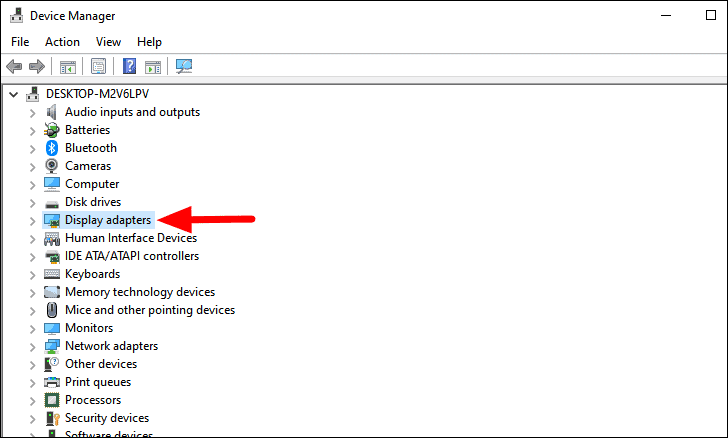
In the ‘Device Manager’, double-click on the ‘Display adapters’ option to expand and view the drivers under it.
Next, right-click on the ‘Graphics’ driver and select ‘Uninstall device’ from the context menu.
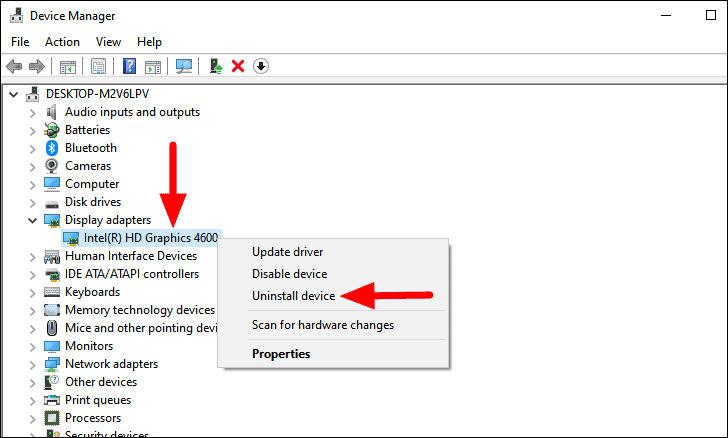
In the confirmation box that pops up, select the checkbox for ‘Delete the driver software for this device’, and then click on ‘Uninstall’ at the bottom.

After the driver is uninstalled, restart the computer. When you restart the computer, a fresh driver will be automatically installed to the system. Now, check if the BSOD error is fixed.
3. Update Graphics Driver
The ‘System Service Exception’ error can also be encountered due to an outdated ‘Graphics’ driver. If reinstalling the driver didn’t work, it indicates that you are using an older version of it and that needs an update.
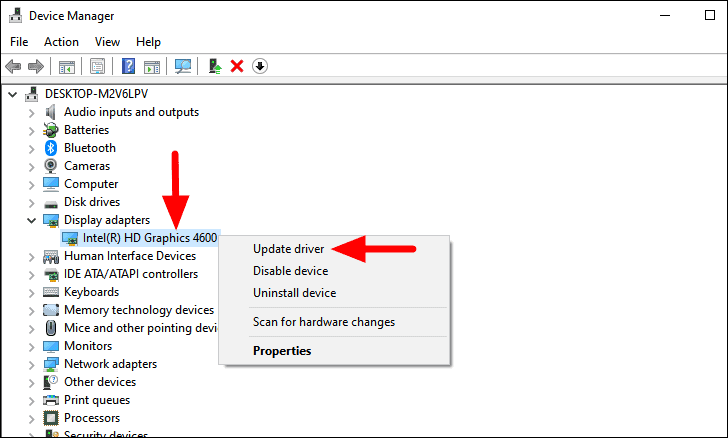
To update the ‘Graphics’ driver, open the ‘Device Manager’, double-click on the ‘Display adapter’ option, and then select ‘Update driver’ from the context menu.
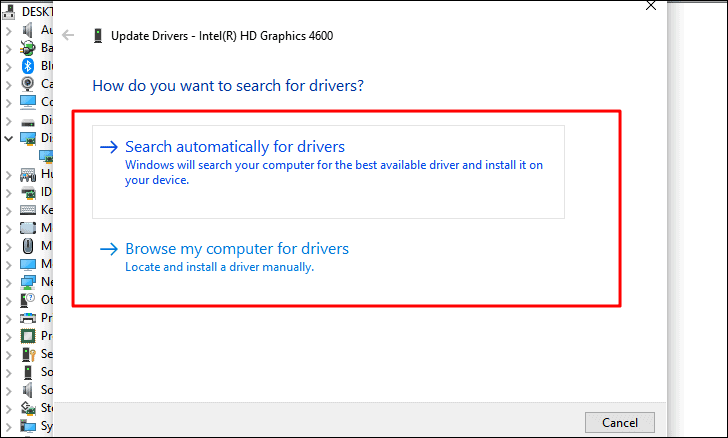
The ‘Update Drivers’ window will now launch with two options on the screen. The first option is to let Windows automatically search for the best available driver for your system or manually choose one and install it. It’s recommended that you let Windows search for the driver and install it, if one is available.
If Windows was unable to find an update, it’s still likely that one is available on the manufacturer’s website. Many manufacturers release updates on their website, and users can directly download them from there itself. But before you look for a newer version of the driver, you must find out the current version.
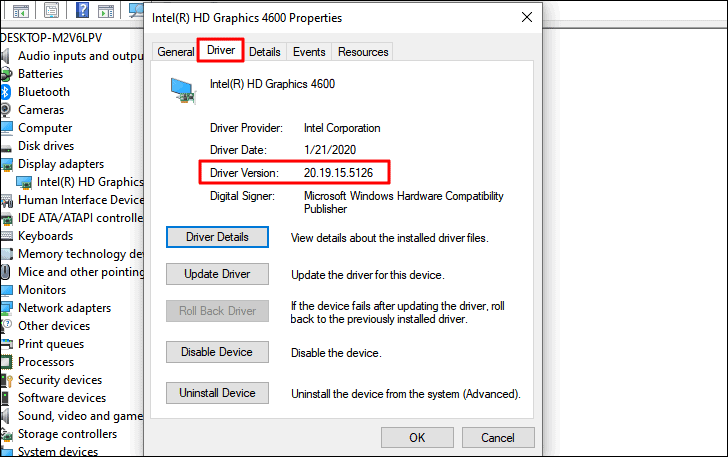
To find the current version of the ‘Graphics’ driver, right-click on it, and then select ‘Properties’ from the context menu.
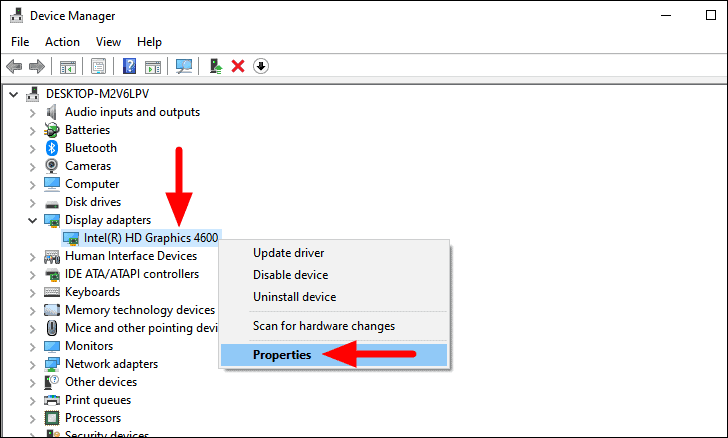
In the driver properties window, navigate to the ‘Driver’ tab, and note down the driver version mentioned near the top.
Now search for a new version for the driver with ‘Computer Model’, ‘Operating System’, and ‘Driver Name’ as the keywords on any search engine. If the manufacturer’s official website is displayed in the search result, open it and check if a new version is available. If case there’s one, download it, double-click on the downloaded file, and follow the on-screen instructions to complete the process.
In some rare cases, the driver might not be available on the manufacturer’s official website, but on other websites. In such cases, you must tread with great caution and do thorough research before you proceed. The installation process, however, remains the same.
4. Run Full System Scan
In case you are encountering the ‘System Service Exception’ error due to a malware or virus, that has infected your system, running a ‘Full Scan’ will do the job. Many users resort to third-party antivirus, however, the built-in ‘Windows Security’ is equally effective when it comes to identifying and neutralizing the threats.
To run a ‘Full Scan’, search for ‘Windows Security’ in the ‘Start Menu’, and then click on the search result to launch the app.

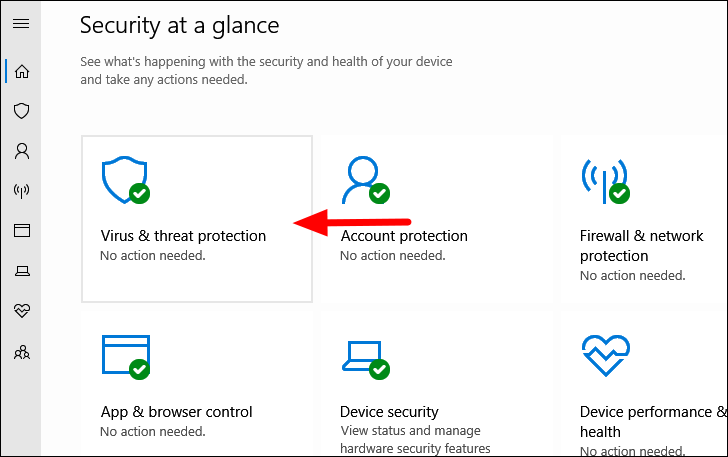
In the ‘Windows Security’ app, you will find multiple options listed on the home screen, select ‘Virus & threat protection’.
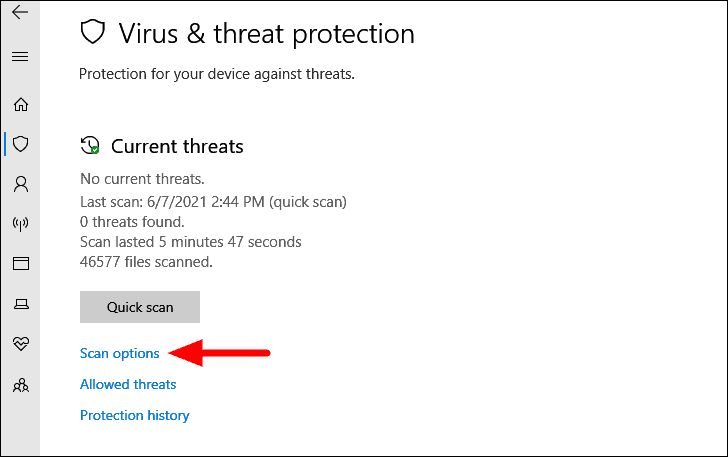
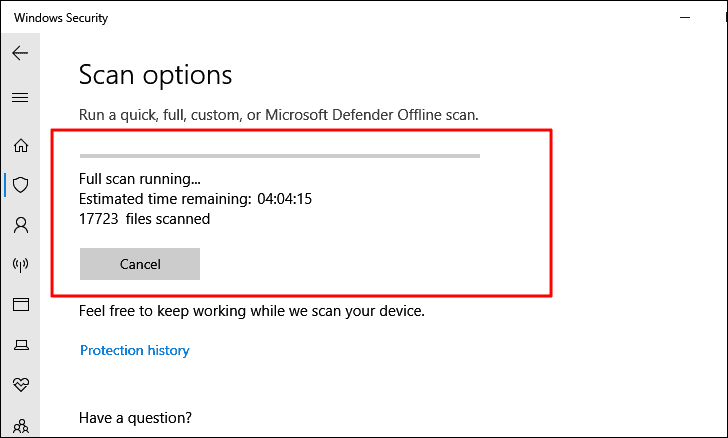
You will now find the ‘Quick scan’ opton listed on the screen. However, to fix the error, we need to run the full system scan. Next, click on ‘Scan options’.
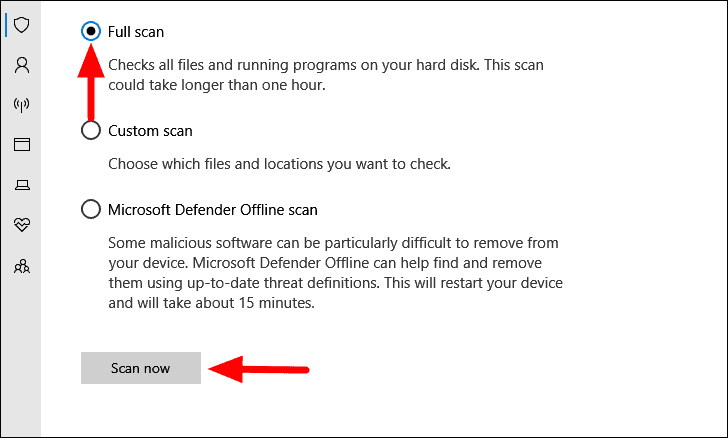
Now, select the checkbox for ‘Full scan’, and then click on ‘Scan now’ at the bottom.
The scan will start instantly and you can view monitor its progress as well. Also, you can continue working on the system while the scan runs in the background.
After the scan is completed, you will be notified of the threats that were identified and neutralized. Now, check if the error is fixed.
5. Uninstall Third-party Applications
If you first encountered the issue after installing an application, it’s time you uninstall it. There are many apps that are found to conflict with the system processes, thus leading to the ‘System Service Exception’ error.
Some of the common apps and tools are Virtual CloneDrive, Xsplit, Bit Defender, and Cisco VPN, amongst others. If you have any of these installed, remove them and check if the error is fixed.
If none of the above apps are installed on your system, identify the ones that you installed around the time, you first encountered the error. When you have a list of apps, proceed to the uninstallation part.
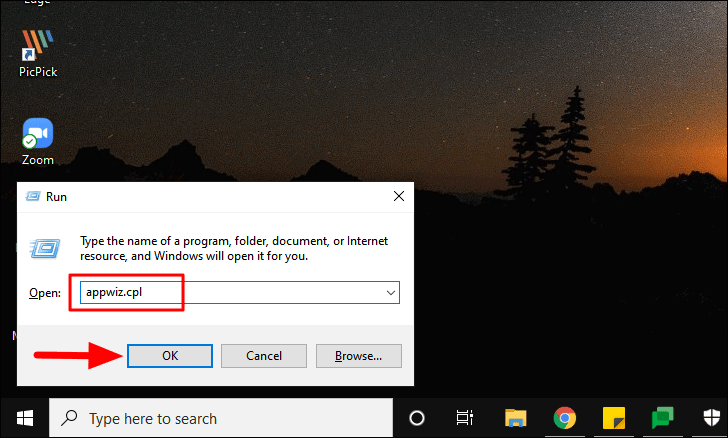
To uninstall an app, press WINDOWS + R to launch the ‘Run’ command, enter ‘appwiz.cpl’ in the text box and then either click on ‘OK’ or press ENTER.
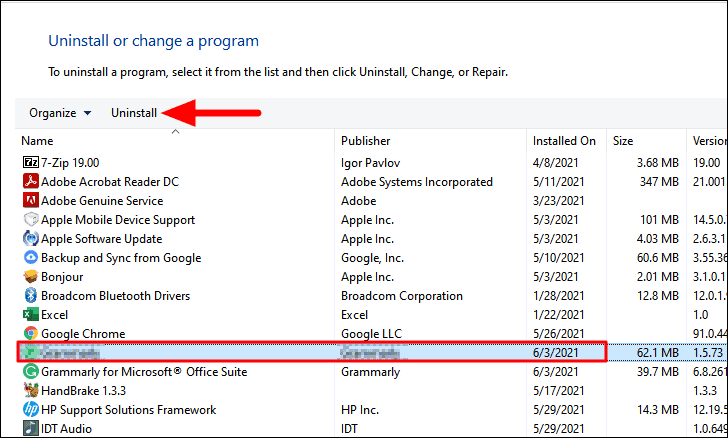
You will now find a list of the apps installed on your system. Select the one you believe might be leading to the error and click on ‘Uninstall’ at the top. Also, the date of installation of the app is mentioned next to it, which makes it easy to identify the malfunctioning app. Now, follow the on-screen instructions to complete the uninstall process.
After you have uninstalled the app, restart the computer and check if you still encounter the error. If the error persists, uninstall the next app on the list, restart the computer and check for the error. You can similarly proceed and uninstall the apps on your list. If this doesn’t work, you are probably encountering the error due to other reasons, hence, move to the next fix.
6. Disable Antivirus
Many users have reported that it was their antivirus that resulted in ‘System Service Exception’ error. McAfee has commonly been found to lead to the error. If you are using a third-party antivirus, disable it from the app settings and check if the error is fixed.
In case the error persists, uninstall the antivirus altogether and then check. If the error is not yet fixed, it wasn’t your antivirus and you can reinstall it.
7. Run SFC Scan
If none of the above fixes have worked, the error could be due to corrupt system files. The SFC (System File Checker) scan can be used in this case. It scans the system files for corruption and replaces any corrupt files that are found with a cached copy. To run the SFC scan, you will need to launch the ‘Elevated Command Prompt’.
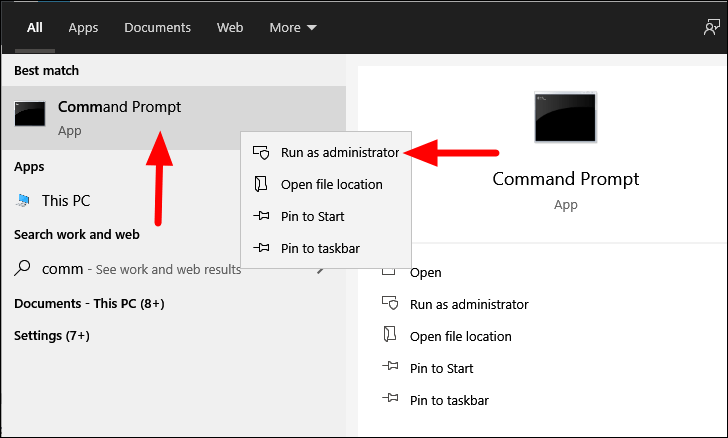
To run an SFC scan, search for ‘Command Prompt’ in the ‘Start Menu’, right-click on the search result, and then select ‘Run as administrator’ from the context menu. Next, click on ‘Yes’ in the confirmation box that pops up.
In the ‘Command Prompt’ window, enter the following command and then press ENTER to execute it.
sfc /scannow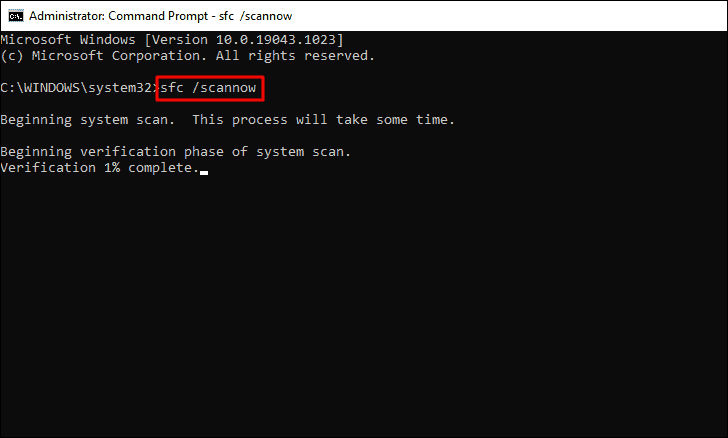
The scan will start within a few seconds. After the scan is complete, restart your computer and check if the error is fixed.
8. Run Check Disk Scan
If running the SFC scan didn’t fix the error, you can go with the ‘Check Disk’ scan. It scans the whole drive rather than just the system files. Since the number of files to be scanned is more, the ‘Check Disk’ scan takes a lot longer than the ‘SFC’ scan. It scans for any corrupted parts in the drive and fixes them along the way.
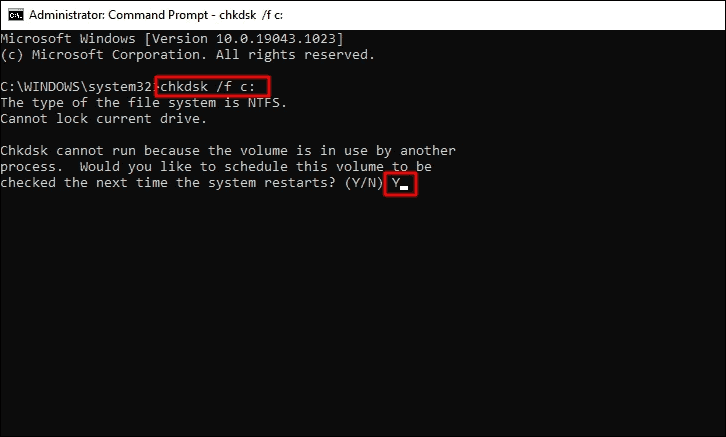
To run the ‘Check Disk’ scan, enter the following command in ‘Command Prompt’ and then press ENTER to execute it. The command mentioned below will scan the ‘C:’ drive. To scan other drives on your system, replace the driver letter, ‘c’, at the end with the drive letter of the drive you want to scan next.
chkdsk /f c:If you are asked to run the scan the next time your computer restarts, press Y, and then press ENTER.
Now, restart your computer and let the ‘Check Disk’ scan run. Once the scan is completed, check if the ‘System Service Exception’ error is fixed.
9. System Restore
If none of the above fixes have worked, your last resort is the ‘System Restore’. With ‘System Restore’, you can take your Windows back in time to a point where the error did not exist. Sounds fascinating, doesn’t it?
When you restore the system, it removes certain apps and changes in settings that had been made recently and could be leading to the error. Identifying these apps or settings can be an intricate affair, thus making ‘System Restore’ the ideal choice at this point. Moreover, it doesn’t affect the files stored on your system.
Whenever you make any major changes to the system or install a Windows update, a restore point is automatically created so that you can always revert to the previous state, in case things go haywire. You can also manually create restore points.
Now that you have a fair understanding of the concept, it’s time you run ‘System Restore’. When choosing a restore point, select one that’s prior to the time you first encountered the error. After you have run ‘System Restore’, the ‘System Service Exception’ error must be fixed.
Every time you encounter an error on Windows 10, the world seems to stop. But, what users don’t realize is that most of these BSOD errors are easily fixable. All you got to do is identify the underlying cause and execute the right fix.


