Grand Theft Auto VI folds weapons and equipment into one radial menu rather than two separate screens. Everything a character is carrying — guns, armor, explosives, healing items — sits on the same wheel, split into tabs you flip between while the wheel is held open. The layout shown in Rockstar’s extended gameplay footage is pre-release, so details can still shift before launch, but the core structure is clear.
Quick answer: Hold the weapon wheel button, then tap R1 to switch between the WEAPONS and ITEMS tabs. Square and Triangle use your health and adrenaline consumables instantly without leaving the wheel.
Weapons and items share one wheel, toggled with R1
Two tab labels sit across the top of the wheel — WEAPONS on one side, ITEMS on the other — with a small R1 chip printed between them. That chip is the instruction. While the wheel is open, R1 swaps the tab, and the slots underneath repopulate with whatever that category holds. On Xbox controllers the equivalent shoulder button does the same job.
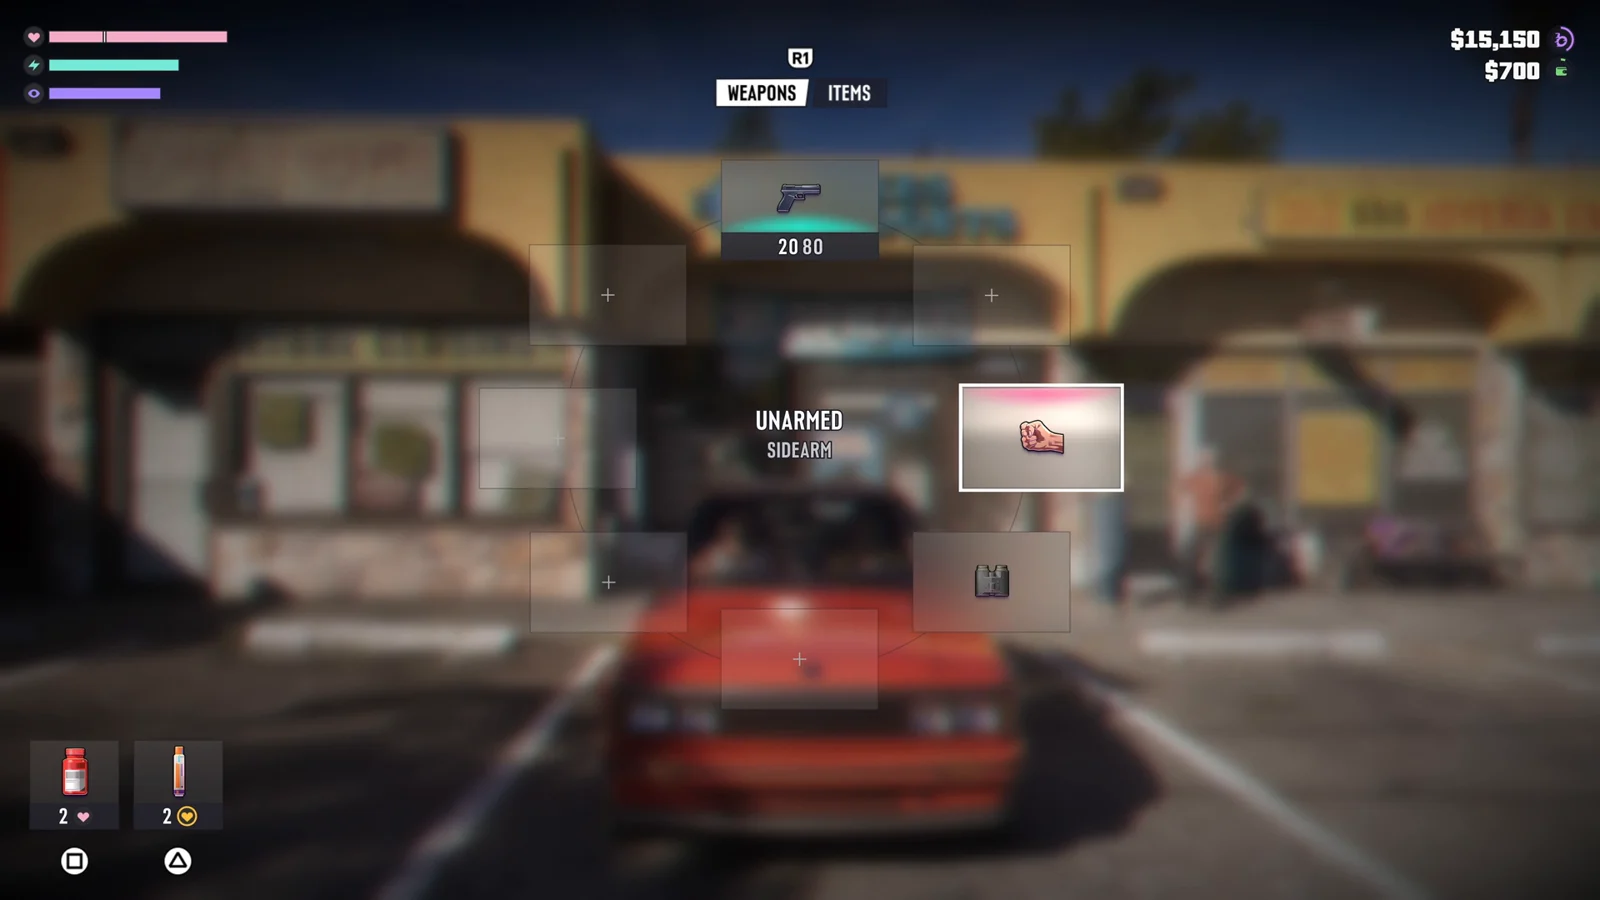
The practical effect is that you never back out of the wheel to reach body armor or a throwable. Selecting a gun and grabbing a healing item are the same interaction, one button apart.
What sits in each wheel slot
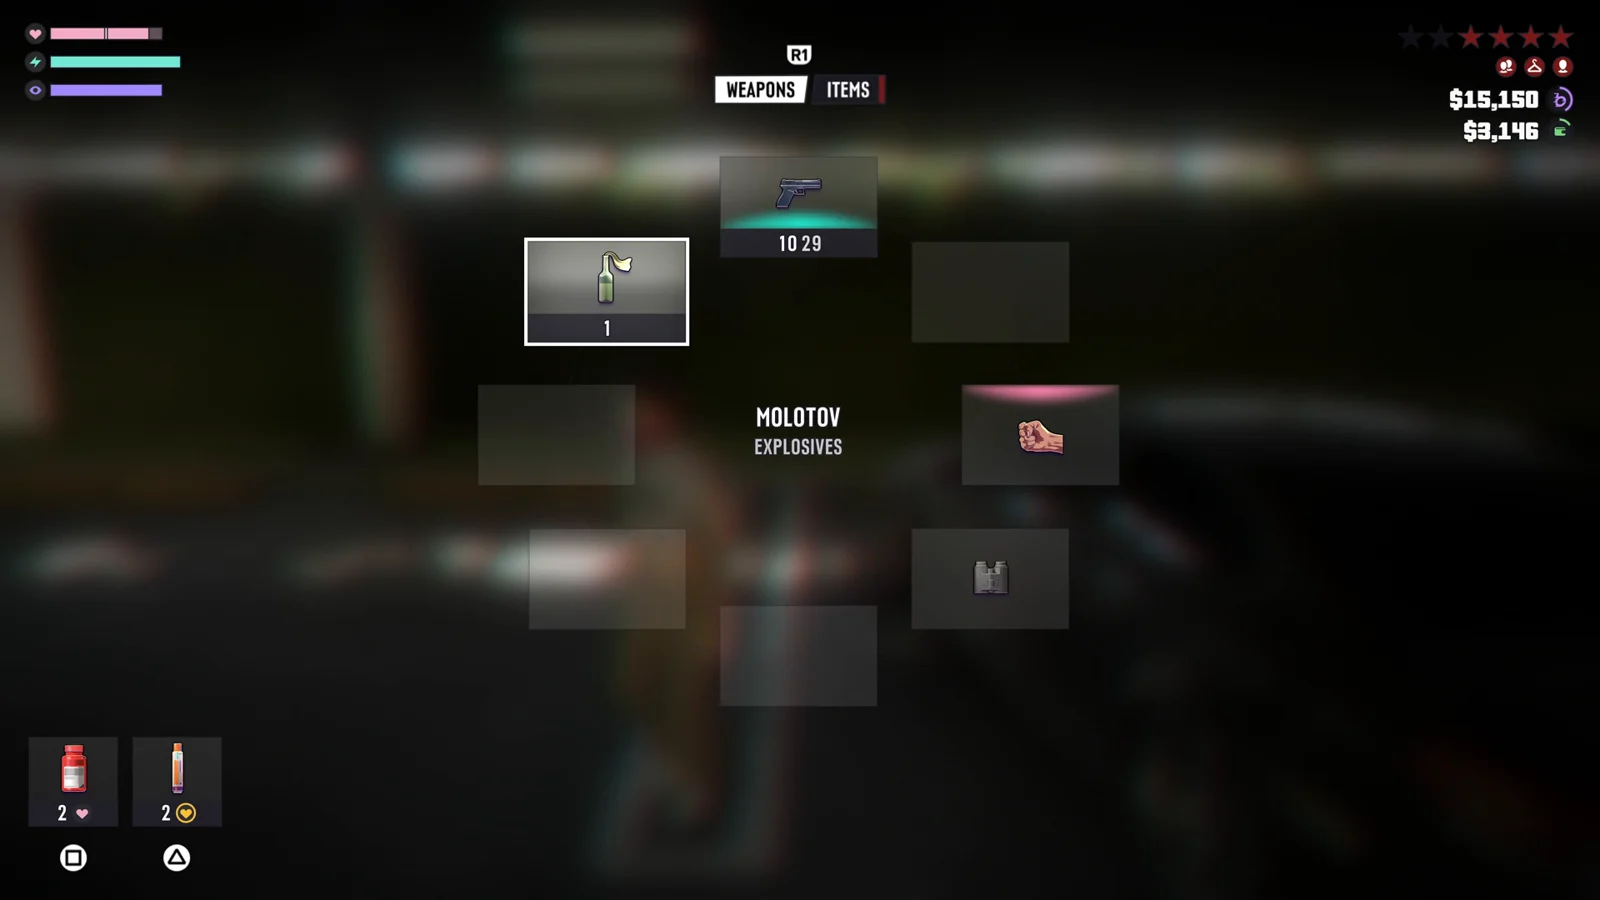
Slots are labeled by role rather than by individual weapon name, so SIDEARM covers whichever pistol you are carrying. Each slot displays its own count, which means you can read your remaining ammo or throwable stock straight off the wheel instead of checking a separate screen.
| Slot | What it holds | On-screen readout |
|---|---|---|
| UNARMED | Fists, the default empty-hands state | None |
| SIDEARM | Equipped pistol | Live ammo count, e.g. 20/80 |
| EXPLOSIVES | Throwables such as the Molotov | Quantity carried, e.g. 1 |
| Body armor | Wearable protection | Availability shown in the slot |
The 20/80 figure on the sidearm is the standard split you would expect — rounds currently in the magazine, followed by reserve ammunition. Longer guns appear in the same wheel structure, including a Duke 556-style rifle and a gold-plated AK-style rifle seen in the footage.
Health and adrenaline items map to Square and Triangle
Two consumables live in the bottom-left corner of the wheel screen, each bound to a face button so you can use them in a firefight without hunting through slots.
| Button | Item | Stock shown |
|---|---|---|
| Square | Red pill bottle marked with a heart icon (health) | x2 |
| Triangle | Energy/adrenaline shot | x2 |
Because both counts are printed next to the icons, the wheel doubles as a supply check. If a number reads zero, that button does nothing until you restock.
Money is displayed on the wheel screen
The top-right corner of the wheel carries a cash readout. One figure represents money on hand — $15,150 in one sequence — with a second, smaller green figure listed beneath it, showing values such as $700 and $3,146 in different scenes. Opening the wheel is therefore also the fastest way to check your balance mid-mission.
Picking up weapons from the ground
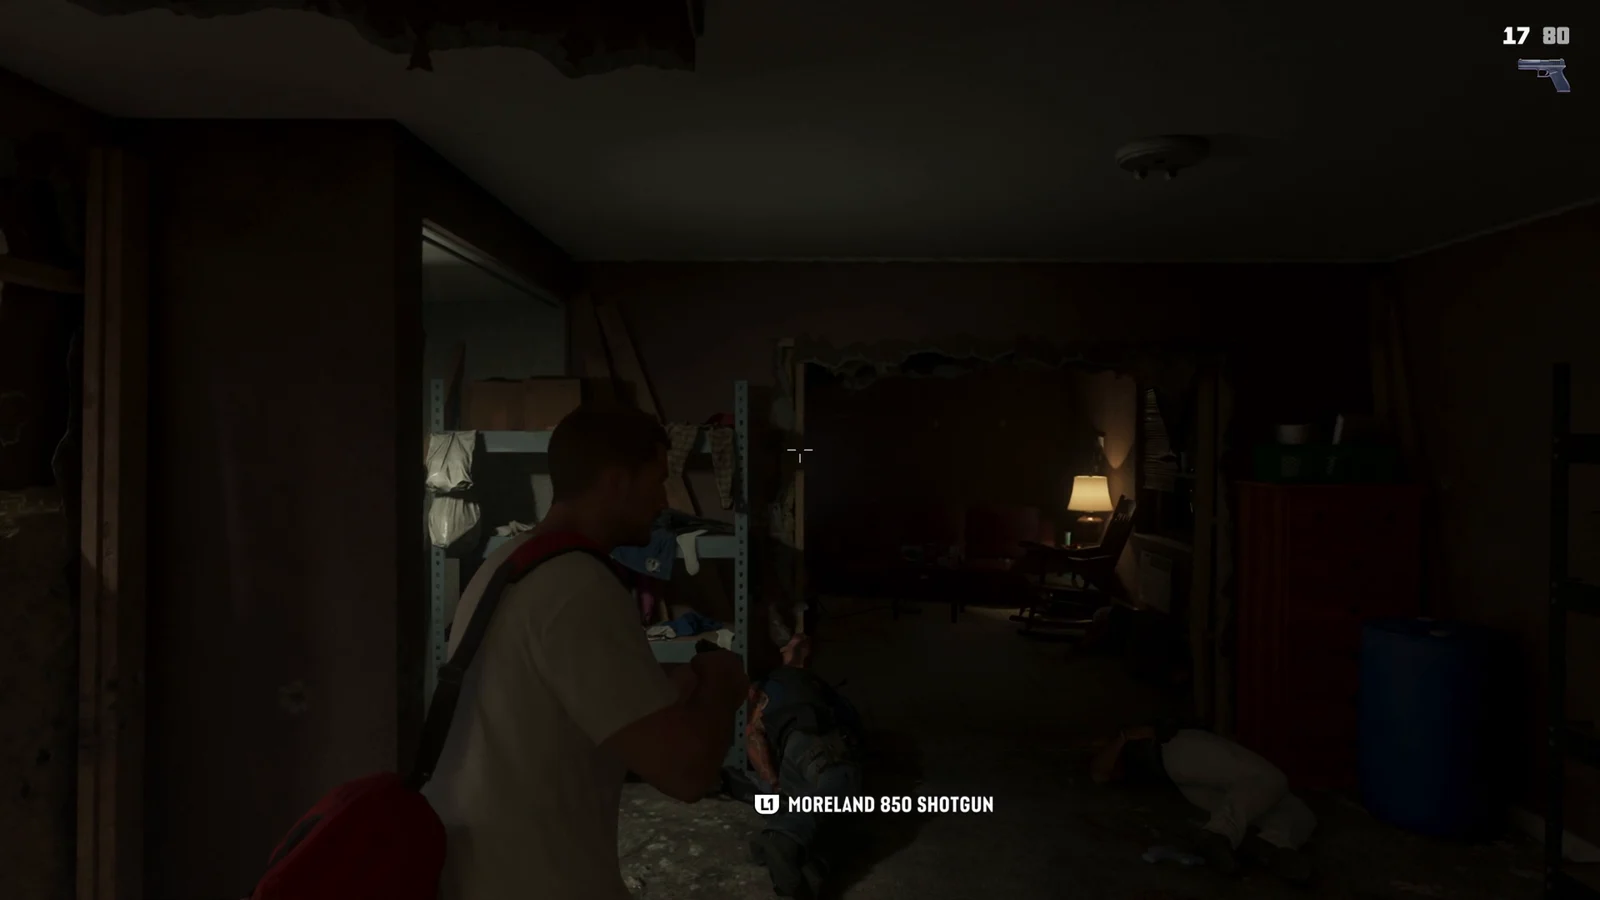
Dropped guns are named before you take them. Standing over one brings up an L1 prompt with the weapon’s title spelled out — MORELAND 850 SHOTGUN, for example — so you know exactly what you are adding before it enters the wheel. That removes the guesswork of grabbing an unidentified pickup during a shootout.
Carried gear outside the wheel: duffel bags and holsters
Some inventory is visible on the character model rather than in a menu. Jason carries a shoulder-slung duffel for mission cargo, and a concealed shoulder holster shows under his jacket in cutscenes. Neither is something you dig through — they are the physical representation of what the character is hauling at that moment.
Masks use their own quick wheel
Masks are treated as equippable gear with a separate, smaller wheel. It comes up from inside a vehicle — used just before the jewelry-store robbery — and offers a choice between wearing the mask and taking it off. Keeping it off the main weapon wheel means you can gear up in the car during the approach rather than fumbling through weapon slots.
Note: the mask wheel appears in a vehicle context, so it is best thought of as a pre-heist step rather than something you toggle constantly on foot.
The wheel blurs the action instead of pausing it
Opening the wheel does not freeze the scene. The world behind it blurs while the game keeps running, and the HUD stays readable through it. The wanted-star row and the pursuing unit icons remain visible above the wheel during police attention, so you can watch your heat level while switching guns.
That single design decision shapes how the whole system feels in play. Every swap costs you real seconds, which pushes you toward setting up before trouble starts rather than reorganizing in the middle of it.
More GTA 6 guides
- GTA 6 guides hub: every system and trick we know
- Every GTA 6 Weapon Confirmed in the Extended Gameplay Reveal
- GTA 6 Controls on PS5: Every Confirmed Button Prompt From the Extended Look
- GTA 6 HUD Icons and Meters Explained (Extended Look)
- GTA 6: How to Lower Your Wanted Level
- GTA 6 Robberies: How Store, Diner and Jewelry Heists Work