Every Operation you take in Star Wars Zero Company quietly pushes your reputation in one of twelve zones, and those zones pay out on a schedule you cannot undo. Pick badly and you end up with a scattering of half-finished tiers and none of the rewards that actually change how the campaign plays. The Influence tab on the Holotable is where that decision lives, and a few zones are worth far more than the rest.
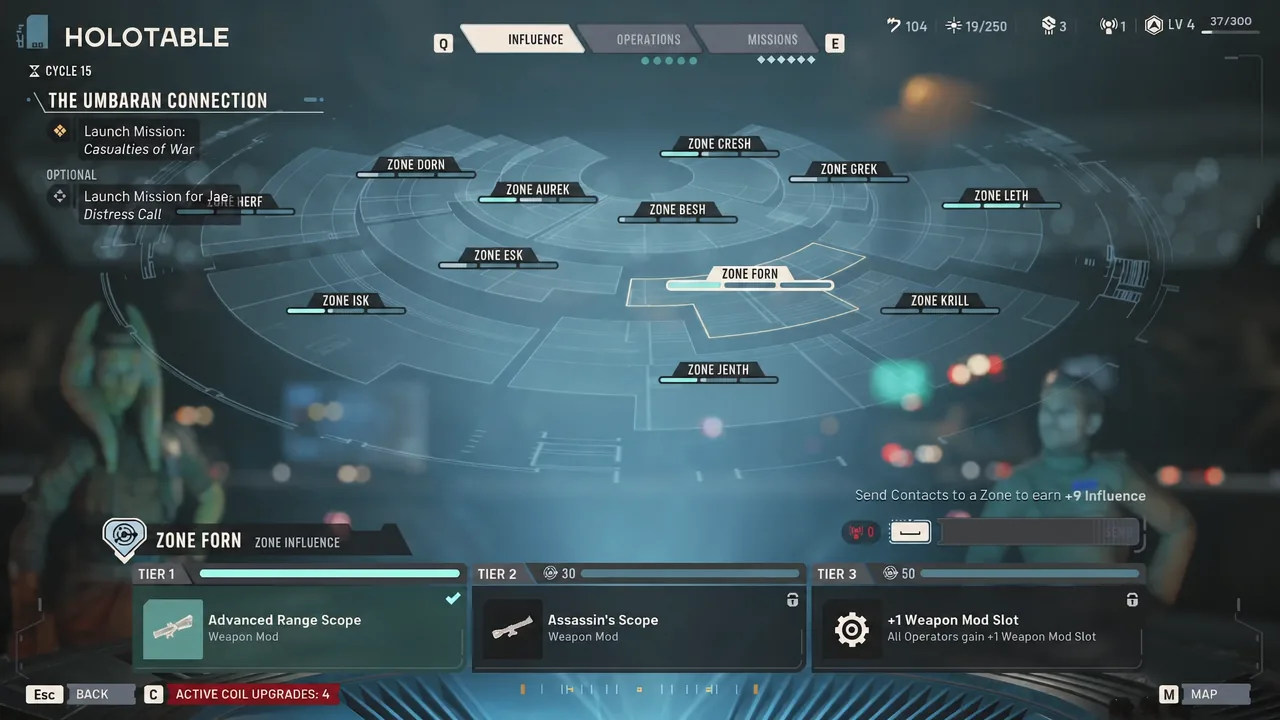
Quick answer: Drive Zone Dorn to Tier 3 first for the extra facility upgrade slot, then Zone Leth (Tier 2 for +250 Credits per mission, Tier 3 for better Black Market stock), then Zone Forn for the +1 Weapon Mod Slot that applies to every Operator.
How Zone Influence tiers work
Influence behaves like experience points attached to a place rather than a person. Each of the twelve zones has three tiers, the thresholds are identical everywhere, and Influence can never be lost once you have banked it. That means slow progress is still permanent progress.
| Tier | Influence required |
|---|---|
| Tier 1 | 20 |
| Tier 2 | 30 |
| Tier 3 | 50 |
Operations are the main faucet, and the zone that gets credit is simply the zone the Operation sits in on the map. The per-Operation amounts are small, though, so raw mission grinding is a slow way to hit 50. Contacts are the fast lane. Each one you spend is worth 7 Influence, they can be dropped into any zone you choose, and there is no cap on how many you stack into a single zone in one cycle.
The Networking node in the Den’s Facility upgrades adds +2 Influence to every Contact you send out. On its own that sounds trivial; across a full campaign of cycles it is the difference between reaching two Tier 3 rewards and reaching four. Zone Grek’s own Tier 2 reward also increases the Influence you earn from Operations and missions, which makes it a compounding pick if you take it early.
Best zones to prioritize, in order
Three zones carry the early and mid campaign. The rest are useful, but these are the ones that change the pace of everything else you do.
| Priority | Zone | Target tier | Why it comes first |
|---|---|---|---|
| 1 | Dorn | Tier 3 | +1 Upgrade Facility Slot, so you can build or upgrade more than one Den facility per cycle |
| 2 | Leth | Tier 2, then 3 | +250 Credits every mission, then higher-quality Black Market stock |
| 3 | Forn | Tier 3 | +1 Weapon Mod Slot for every Operator on the roster |
Dorn is first because it is the only zone that widens your Den build queue. You start with a single facility upgrade slot per cycle, the campaign hands you a second one eventually, and Dorn’s Tier 3 makes it three. Everything you unlock afterwards arrives sooner because of it.
Leth is the economy zone. Credits fund Den facilities, weapon upgrades and Black Market purchases, and the game deliberately keeps you short of them, so a flat +250 per mission at Tier 2 adds up quickly. Tier 3 then improves the quality of what the Black Market offers, which is generally a better use of resources than upgrading one Operator’s weapon by hand.
Forn is the strongest pure combat investment. Its Tier 1 and Tier 2 rewards are respectable weapon mods on their own — Advanced Range Scope cuts range-based hit penalties by 10%, Assassin’s Scope adds 12% Critical Chance — but Tier 3 is roster-wide. An extra mod slot on every Operator is a permanent increase in build flexibility rather than a one-off item.
Strong secondary zones for combat and intel
Once the big three are moving, a second wave of zones is worth Contacts. Zone Besh’s Tier 3 mod, Weightless Stabilizer, gives a 33% chance to gain Evasion whenever that blaster fires, which effectively cancels an incoming attack on a frontline Operator. Zone Cresh handles intel, raising your maximum by 25 at Tier 1 and adding +5 intel per mission at Tier 2, and intel is what lets you run more Operations per cycle. Its Tier 3 Prototype Imploder is one of the harder-hitting grenades available.
Zone Grek is the generalist. A Focus Point for the whole company at Tier 1, faster Influence gain at Tier 2, and an armor-piercing pistol shot at Tier 3 make it a reasonable third or fourth target. Zone Aurek and Zone Esk both give +4 Max Health to all Operators at Tier 2, which is meaningful on higher difficulties where a single downed Operator can spiral into a permanent loss.
Zone Isk is the pick if your Den level is lagging, thanks to +175 Den Level XP at Tier 2. Zone Herf leans into Bond progression with +30 Bond XP for everyone, plus capacitors.
Tier 1 zone hopping: cheap rewards across several zones
Tier 1 costs 20 Influence, less than half of what Tier 3 demands, so spreading Contacts around to collect first tiers is a legitimate alternative to committing everything to one zone. It works best in the early campaign, when roster space and starting cash matter more than a single powerful weapon mod.
The Tier 1 rewards most worth grabbing this way sit in Zone Aurek and Zone Krill (+1 Roster Capacity each), Zone Dorn (+100 Den Level XP), Zone Herf (+1 Capacity) and Zone Jenth (+2,500 Credits).
Note: this is a supplement to your main push, not a replacement for it. Nothing in Tier 1 comes close to Dorn’s extra facility slot or Forn’s mod slot.
All zone rewards by tier
| Zone | Tier 1 | Tier 2 | Tier 3 |
|---|---|---|---|
| Aurek | +1 Roster Capacity | +4 Max Health, all Operators | Medpac Mk. IV (heals 30% of an ally’s Health; not usable on Droids) |
| Besh | Repulsor Units Mk. II (+1.0m Movement) | +2 Focus Points for all Operators | Weightless Stabilizer (33% chance of Evasion when firing) |
| Cresh | +25 maximum intel | +5 intel each mission | Prototype Imploder grenade |
| Dorn | +100 Den Level XP | +2 Capacitor | +1 Upgrade Facility Slot |
| Esk | Trauma Kit Mk. II (Rallied allies return fully healed) | +4 Max Health, all Operators | Gas Dispenser Mk. IV (Dazes units in the target area) |
| Forn | Advanced Range Scope (-10% range hit penalty) | Assassin’s Scope (+12% Critical Chance) | +1 Weapon Mod Slot for all Operators |
| Grek | +1 Focus Point for all Operators | Extra Influence from Operations and missions | Custom RSKF-44 (short-range armor-piercing shot) |
| Herf | +1 Capacity | +30 Bond XP for everyone | Lightning Modulator (100% chance to Shock on hit) |
| Isk | Advanced Tracking Scope (+2 Assist Damage) | +175 Den Level XP | Ion Blaster Mk IV (weakens Ray Shields, strong vs Droids) |
| Jenth | +2,500 Credits | +1 item at the Black Market | Unknown Exotic item |
| Krill | +1 Roster Capacity | Reinforced Underlay Mk. III (+3 Defense) | Wildfire Modulator (4 stacks of Burning on hit) |
| Leth | +20 Bond XP for everyone | +250 Credits each mission | Higher-quality Black Market items |
Confirming a tier unlocked, and why Influence stalls
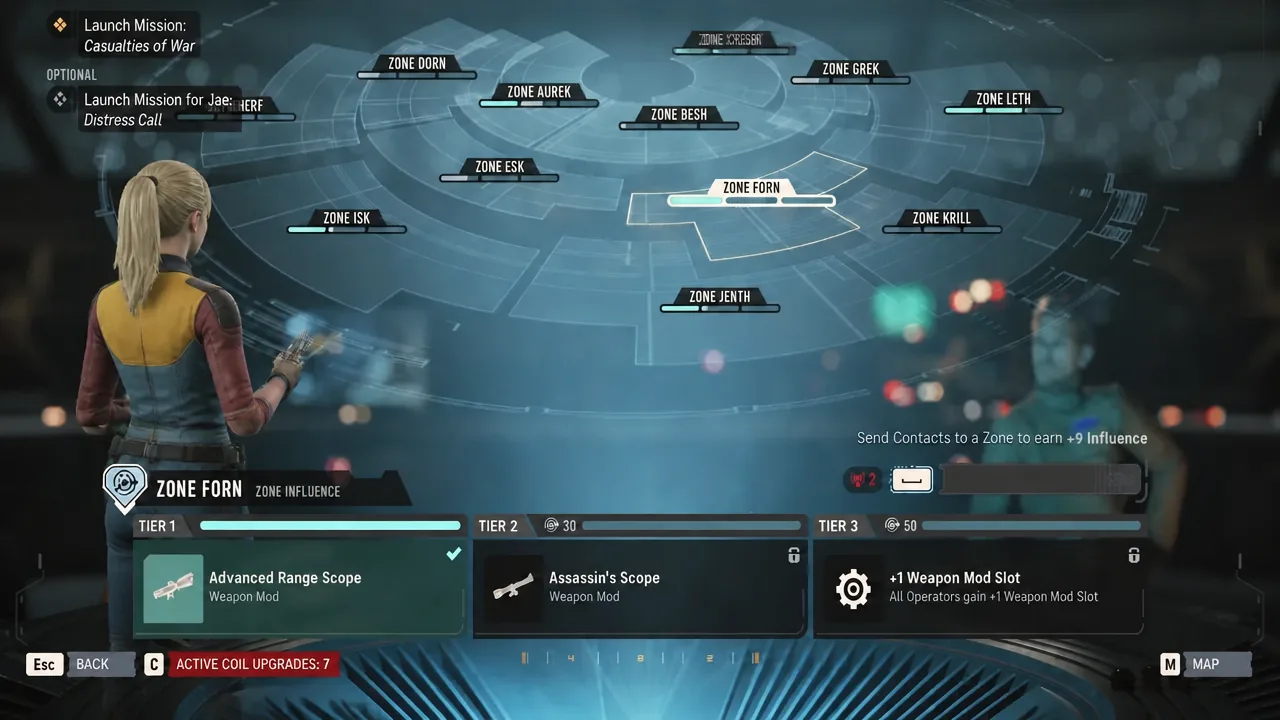
Open the Holotable in the Den and select the Influence tab at the top of the screen. The galaxy map lists all twelve zones with a progress bar for each, and the reward for the tier you are working toward is displayed along the bar at the bottom. When the threshold is crossed, that reward is granted immediately — utility items and weapon mods land in your inventory, while roster, health and facility bonuses apply straight away.
If a zone is not filling as fast as you expect, the cause is usually one of two things. Operations only credit the zone they physically take place in, so running high-reward Operations elsewhere does nothing for your target. And Operations do not always display their rewards before you commit, which makes Contacts the only reliable way to aim Influence exactly where you want it.
The habit that matters most is simple: check your Contacts every cycle and send all of them to whichever zone you are currently pushing. Idle Contacts are the single biggest source of wasted Influence, and because tiers unlock at fixed 20/30/50 breakpoints, a mission that gets you over a threshold is worth more than a mission with slightly better loot.