Harlowe’s strongest max-level setup barely resembles the Chroma Accelerator nuke most players level with. At 70, the Gravitar turns into a gun character who never stops critting, never stops entangling, and rarely stops shooting long enough to reload. The engine behind it is the green tree, Cosmic Brilliance, paired with the Nuclear Winter augment and the Group Study capstone.
Quick answer: Put 59 points into Cosmic Brilliance and 12 into Creative Bursts, run Flux Generator with Nuclear Winter and Group Study, and equip a Relative Physicist class mod with an Amp shield.
How the Entangle and Irradiate loop works
Everything in the build hangs off two statuses. Entangled is Harlowe’s signature debuff, and Irradiated is the element she stacks on top of it. Nuclear Winter is what glues them together, because it entangles any enemy she hits with a Cryo or Radiation status effect, and it adds bonus Cryo damage inside the Flux Generator radius and bonus Radiation damage for 12 seconds after you step out of it.
Once an enemy is entangled, the multipliers pile up fast. Decoherence adds 50 percent bonus damage to entangled targets and another 30 percent to anything still standing inside the Flux Generator. Momentum hands you and your allies +25% critical hit damage for 12 seconds every time you entangle something. Neutron Decay stacks +10% gun damage per irradiation, up to five stacks.
The crits are the part that makes it feel broken. Excited State turns the next shot on any enemy damaged by your action skill into an automatic critical hit, and because Nuclear Winter is constantly applying status effects through your gun, that condition keeps re-arming itself. Critical Funding then gives each crit a 15 percent chance to drop five rounds straight back into your magazine, which is where the practically infinite ammo comes from.
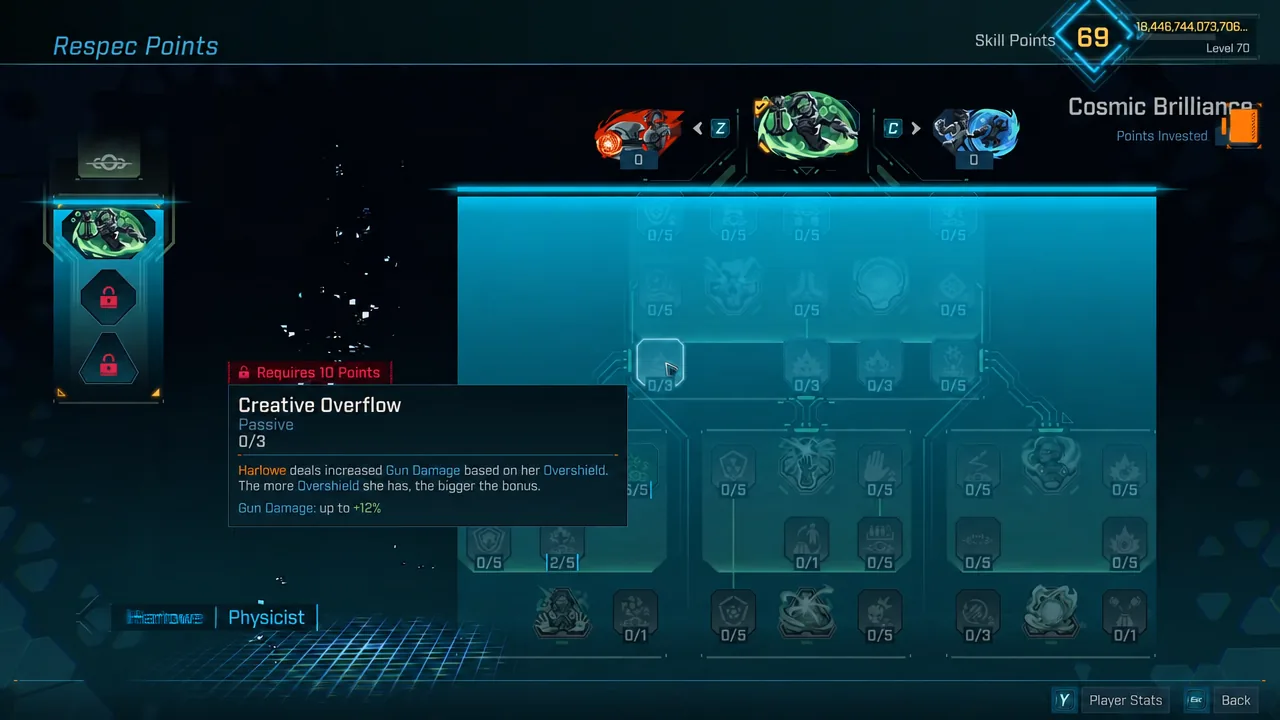
Survivability runs on the same loop. Distribution Function converts 30 percent of your action skill damage into shield restore, and overflows into Overshield once your shield is full. That Overshield feeds Latent Charge (up to +50% bonus damage) and Creative Overflow (up to +36% gun damage), so staying topped up is a damage decision as much as a defensive one. A single point in Accretion adds 3 percent lifesteal against entangled enemies.
Skill point allocation for Cosmic Brilliance
Open Respec Points and dump the bulk of your budget into the green tree. Fifty-nine points go into Cosmic Brilliance, and only the last twelve are spent in the red tree, Creative Bursts, purely for fire rate and elemental scaling.
| Skill | Rank | Effect |
|---|---|---|
| Momentum | 5/5 | +25% crit damage on entangle, 12s |
| Neutron Decay | 5/5 | +10% gun damage per irradiate, 5 stacks |
| Creative Overflow | 3/3 | Up to +36% gun damage from Overshield |
| Confirmative Reality | 2/3 | Cooldown returned per shot on entangled foes |
| Harlowe’s Certainty Principle | 5/5 | +50% gun handling, +15% per enemy in field |
| Critical Funding | 5/5 | 15% chance for 5 free rounds on crit |
| Meltdown | 5/5 | Crits deal 40% bonus Radiation damage |
| Excited State | 5/5 | +35% crit damage, guaranteed crits after skill damage |
| Decoherence | 5/5 | +50% damage to entangled, +30% inside field |
| Latent Charge | 5/5 | Up to +50% bonus damage with Overshield |
| Distribution Function | 5/5 | 30% of skill damage as shield or Overshield |
| Refraction | 5/5 | 30% ricochet chance, doubled on crits |
| Runaway Reaction | 1/1 | +25% status chance, status effects entangle |
| Accretion | 1/5 | 3% lifesteal against entangled enemies |
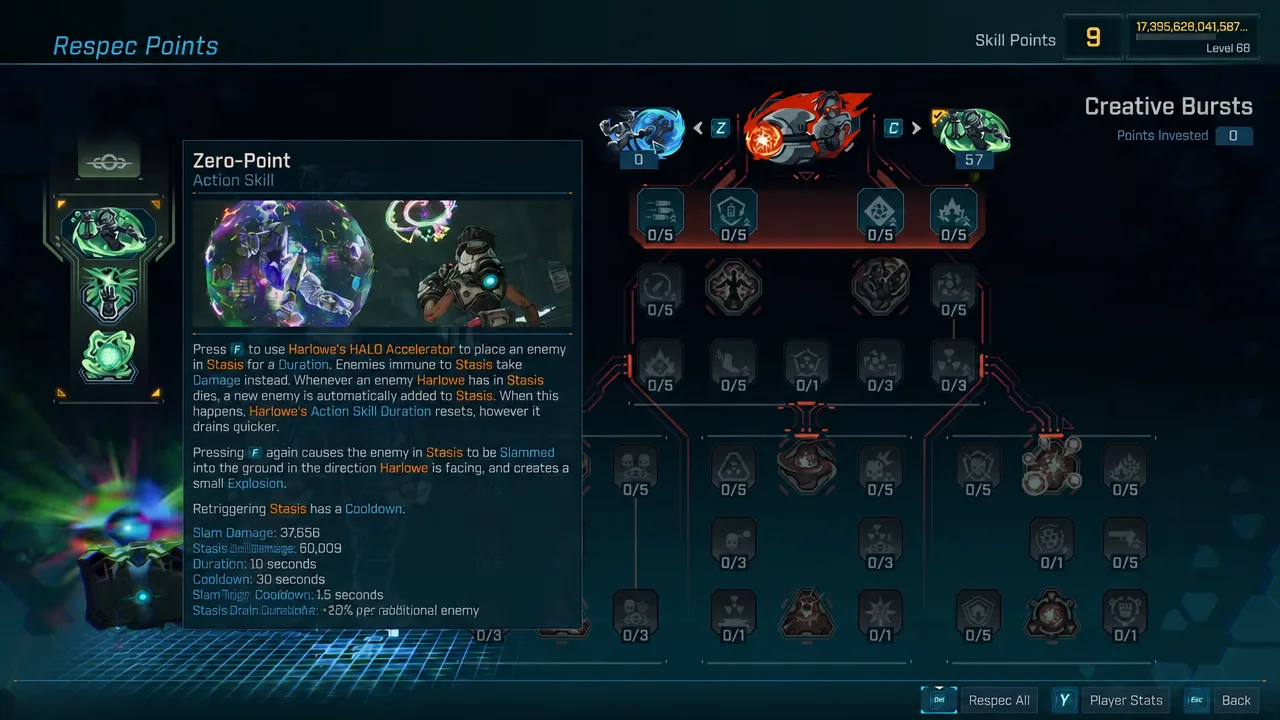
The red tree spend is short and simple. Cyclotron takes 5/5 for +20% fire rate, Elementary takes 5/5 for +20% elemental and status effect damage, and the last two points go into Enriched for +14% Radiation damage.
Confirmative Reality is the skill that keeps Flux Generator off cooldown. Every shot into an entangled enemy hands back action skill cooldown, so dropping it to save points slows the whole build down.
Action skill, augment, and capstone
Flux Generator is the action skill, and you are running it for what it enables rather than for its own damage. Nuclear Winter goes in the augment slot for the Cryo and Radiation bonus damage and the automatic entangles. Group Study takes the capstone.
Group Study replaces the Flux Generator with HALO Sidekicks that hover near you and each ally. Every retrigger overloads them for +25% gun damage, +10% fire rate, and +10% reload speed per activation, with the trade-off that action skill duration drains 25 percent faster per stack. Base duration is 28 seconds against a 32-second cooldown, so retriggering aggressively is only safe because Confirmative Reality is refunding cooldown with every shot.
Best gear for the Level 70 Harlowe build
| Slot | Item | Key stats |
|---|---|---|
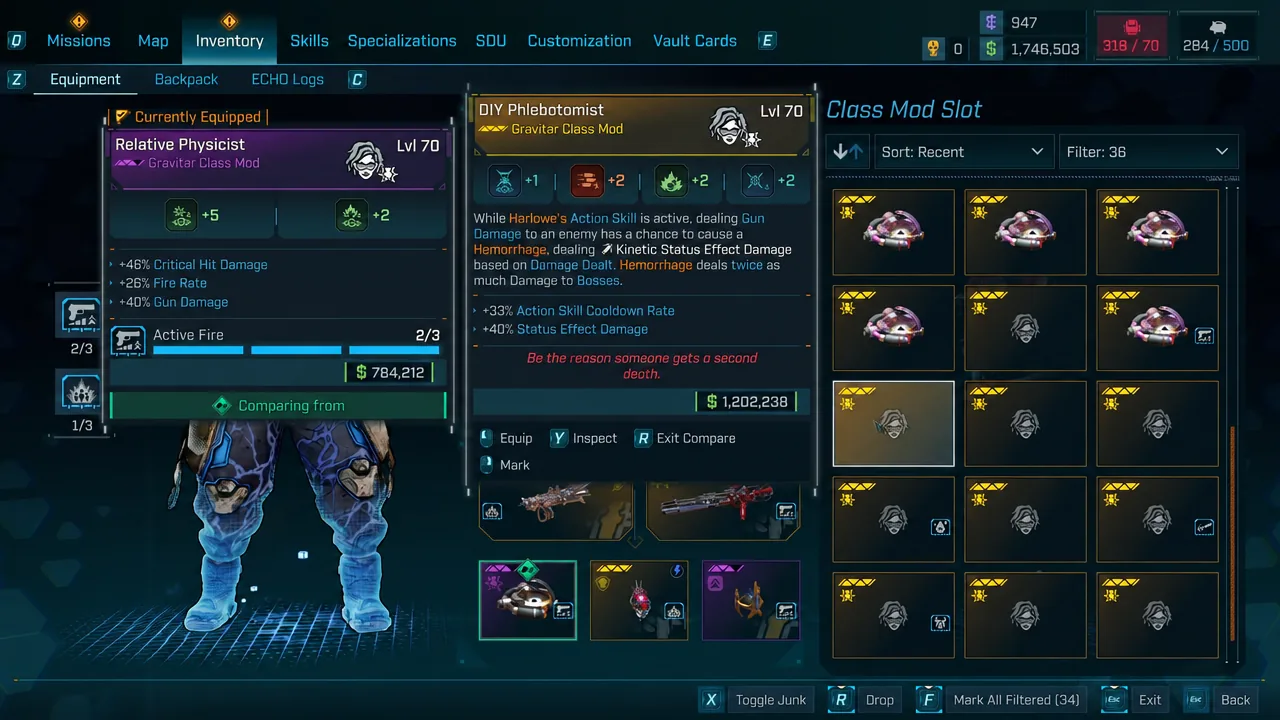
| Class Mod | Relative Physicist | +48% crit damage, +28% fire rate, +40% gun damage, Active Fire +3 |
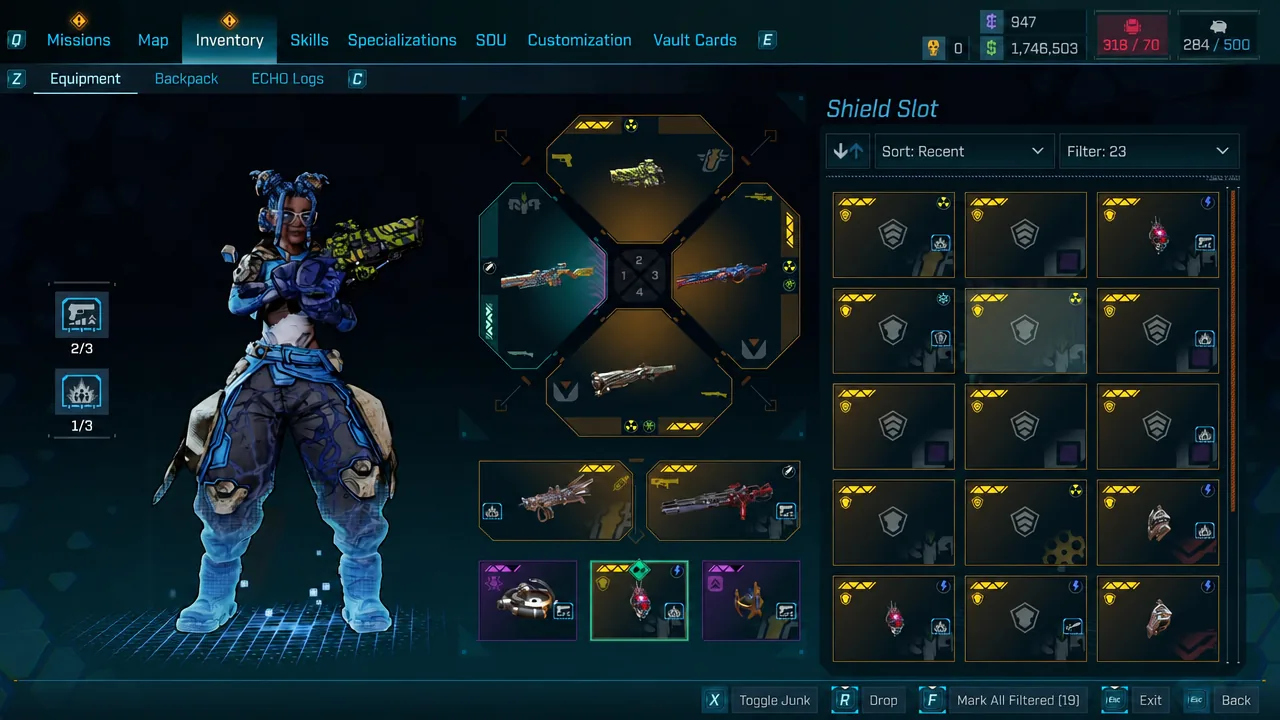
| Shield | Watts 4 Dinner | Overshield Eater, Amp for +150% gun damage |
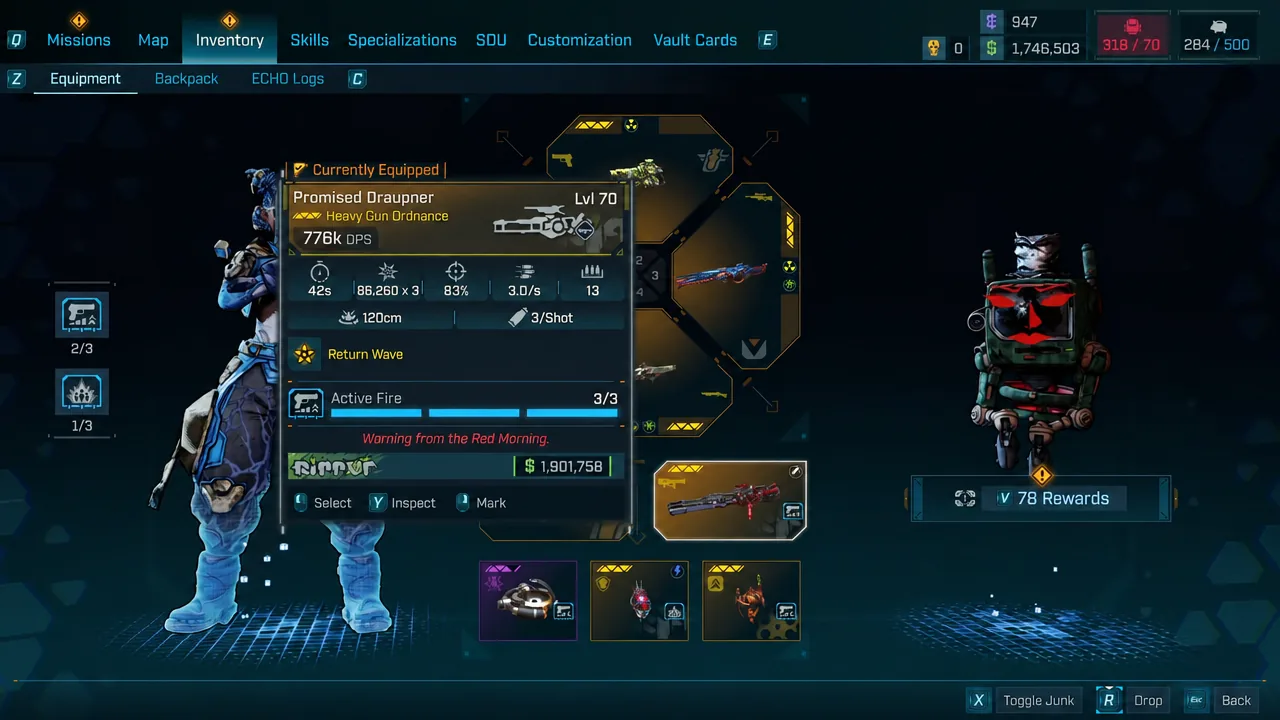
| Ordnance | Promised Draupner | 776k DPS, Return Wave, Active Fire 3/3 |
| Repkit | Shiny War Paint | 11,557 healing, 5,779 over 15s |
| Enhancement | Torrential Hat Trick | Built for Jakobs-made weapons |
| Firmware | Active Fire, Skillcraft | Skill uptime and output |
Class mod
The Relative Physicist is the best-in-slot Gravitar mod here, and it does not need to be legendary. A purple roll with +48% critical hit damage, +28% fire rate, +40% gun damage, and Active Fire +3 covers every stat the build already multiplies. The Flux Reactor is the fallback if you want status application instead, trading the crit and gun damage lines for +40% status effect application chance.
Shield
Watts 4 Dinner is the energy shield of choice. Overshield Eater gives enemies an 8 percent chance to drop an Overshield when hit, and grants +25% Shock damage while that Overshield is up. The Amp part is the real prize, draining 30 percent of a full shield per shot for +150% gun damage. Distribution Function refills that shield constantly, so the Amp bonus stays live in a way it would not on most characters.
Ordnance and repkit
The Promised Draupner heavy gun sits in the ordnance slot at 776k DPS with Return Wave and Active Fire 3/3. It out-damages a lot of guns outright, which is why the specialization tree bothers to scale ordnance at all. Shiny War Paint handles the repkit slot with 11,557 instant healing plus 5,779 over 15 seconds, covering the gaps that Accretion’s small lifesteal cannot.
Weapons that pair with the crit loop
Because Excited State is granting the crits and Critical Funding is handling ammo, the gun itself matters less than it does on most builds. Jakobs weapons with ricochet parts are the natural fit, since Refraction’s 30 percent ricochet chance doubles on critical hits and you are critting almost constantly.
| Weapon | DPS | Notable parts |
|---|---|---|
| Quincunx Decompiler | 95,093 | Tinkerer |
| Surplus Socialized Exhibition | 91,429 | Display of Force |
| Hungry Scraping Astonisher | 44,761 | Incendiary Override, Pure Energy, Ripper |
| Debauched Performative Critical Decay | 3,222 DMG/s | Decay, 11% chance |
The Quincunx Decompiler and Surplus Socialized Exhibition are the newer additions and both clear 90k DPS. If you are sticking to base game gear, the Hungry Scraping Astonisher and the Looming Constable both hold up. Torrential Hat Trick is the enhancement to look for when your loadout leans on Jakobs-manufactured gear, and Active Fire and Skillcraft are the firmware picks.
Specialization nodes
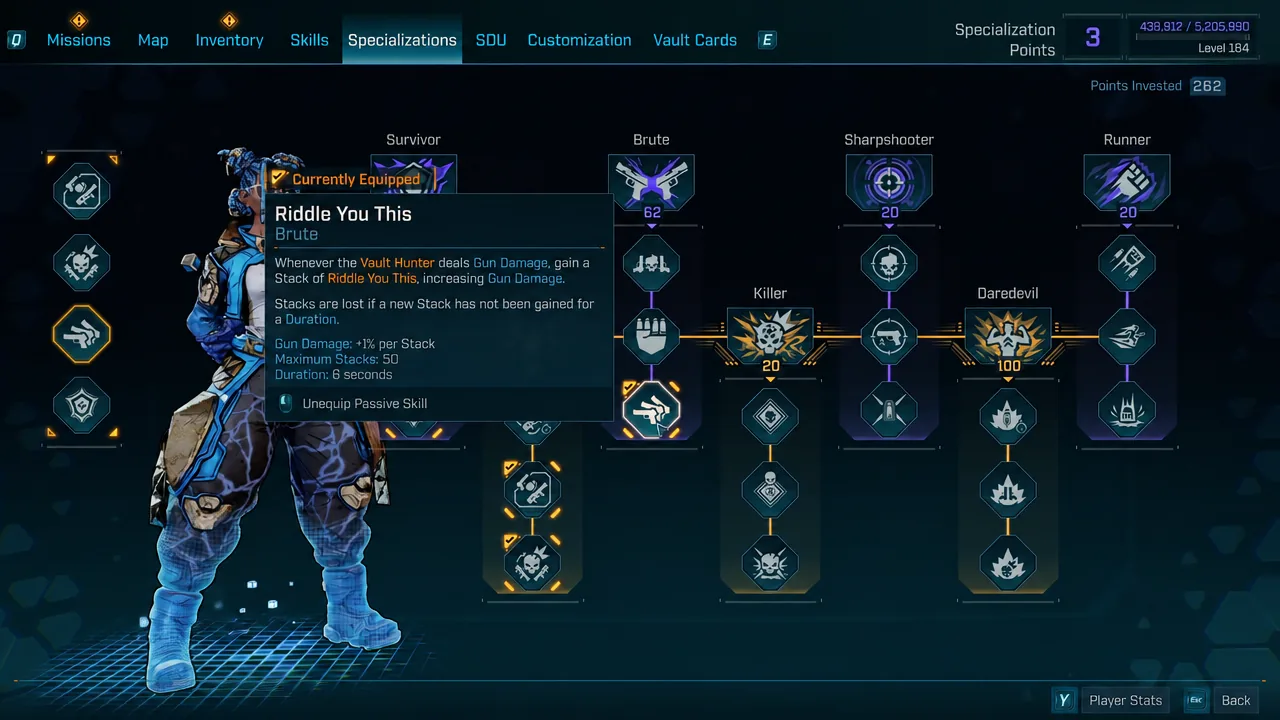
With 282 specialization points to spend, the priority is anything that multiplies gun damage or extends it to your ordnance.
- Riddle You This (Brute) — +1% gun damage per stack, up to 50 stacks, refreshed by any gun damage.
- The Best Defense (Survivor) — +30% damage dealt while your larger pool of shield or health is full.
- Full Spectrum Arsenal (Gadgeteer) — ordnance inherits 50 percent of your gun damage increases.
- Fragmentation Payload (Gadgeteer) — 5 percent ordnance crit chance and +50% ordnance crit damage.
- Contamination (Killer) — +10% status application chance per crit stack, to ten stacks.
Contamination is worth flagging because it closes the loop rather than just adding a number. More status applications mean more entangles through Runaway Reaction and Nuclear Winter, which means more Momentum and Decoherence uptime.
How to run it and confirm it is working
You will know the loop is running correctly when crit numbers appear on nearly every shot against enemies your action skill has touched, your magazine counter climbs back up mid-fight without reloading, and your Overshield bar stays populated instead of draining away. If those three things are happening at once, Creative Overflow, Latent Charge, and the Amp bonus are all live simultaneously, which is when boss health bars in the Hadron Abyss takedown and fights like Thol the Invincible start dropping in chunks.
The one genuine weakness is that almost all of Harlowe’s survivability is borrowed. There is no large flat damage reduction anywhere in the tree, just shield restore, Overshield, and a repkit. Lose the shooting rhythm for a few seconds and the whole defensive layer disappears with it.