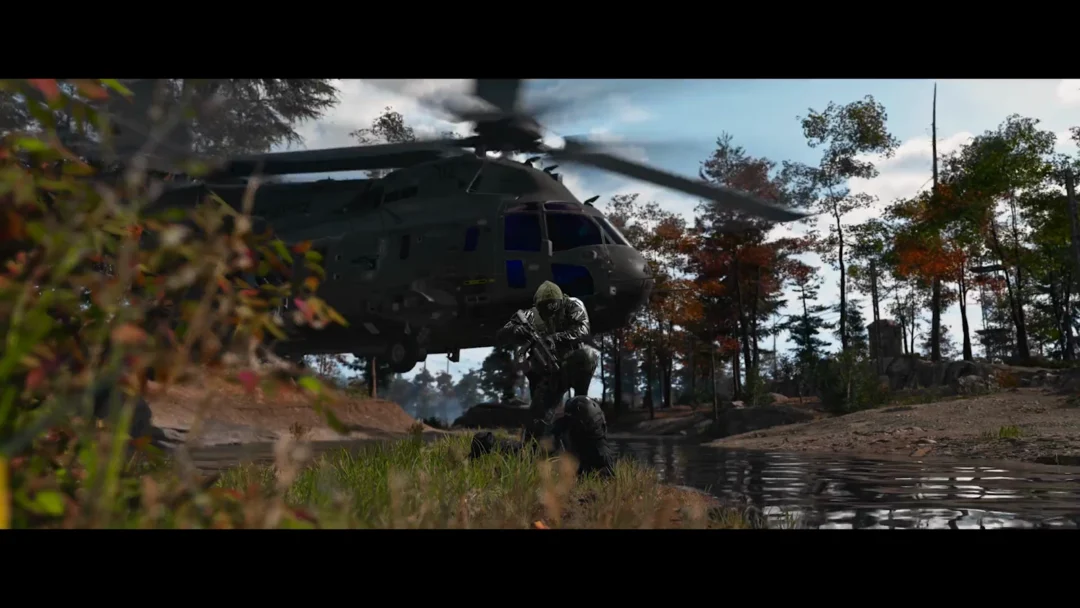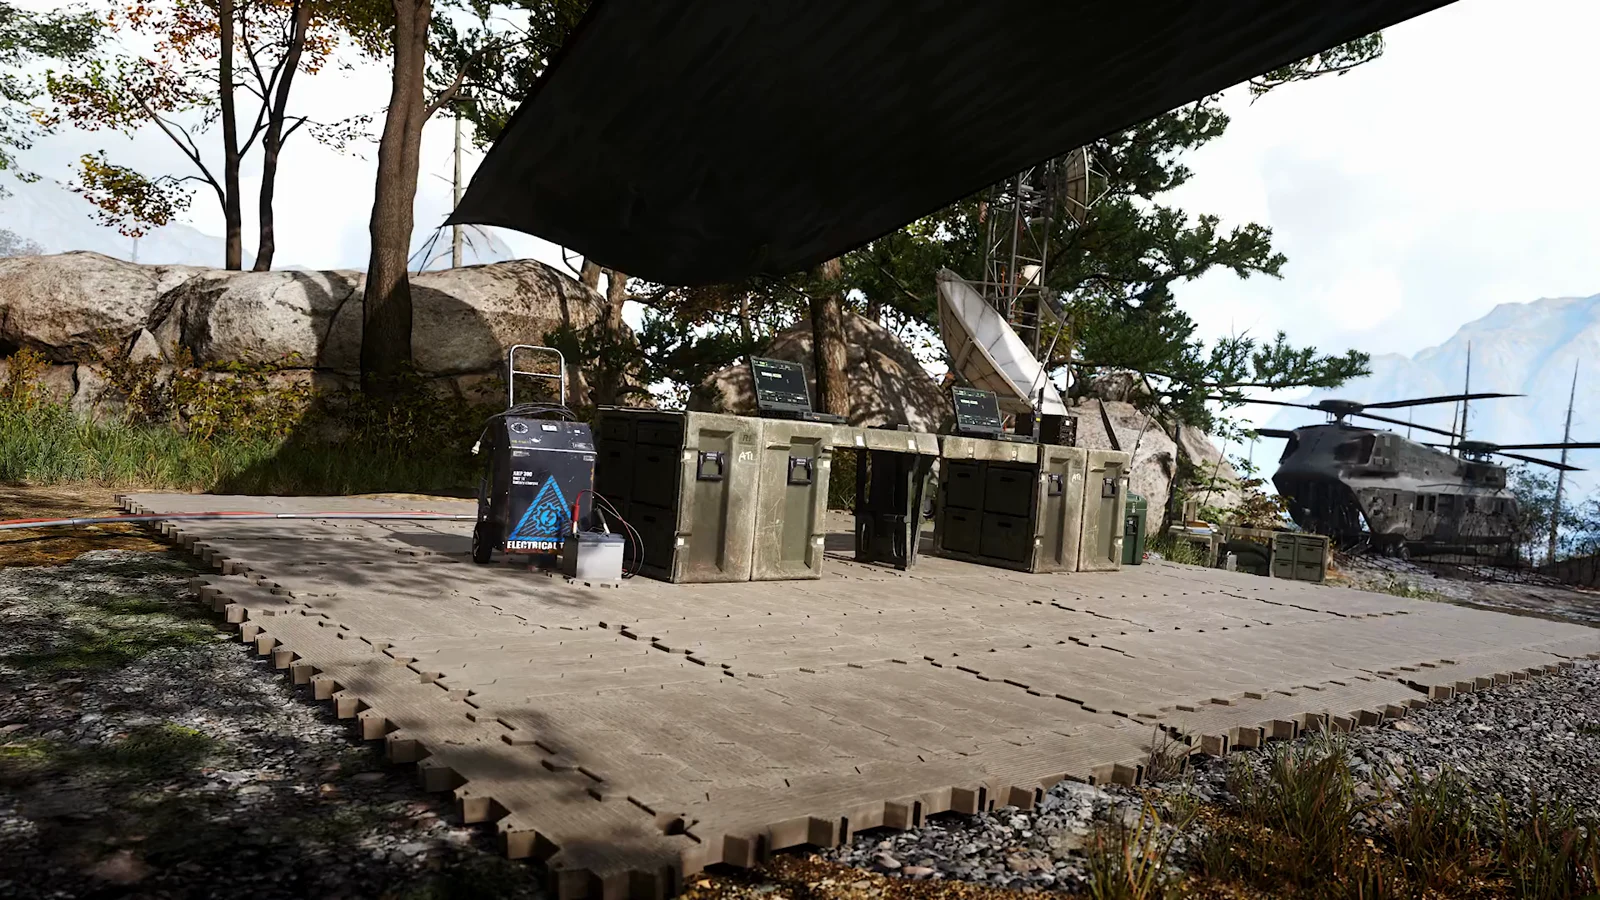
The Forward Operating Base (F.O.B.) is where you spend your time between DMZ deployments in Call of Duty: Modern Warfare 4’s DMZ. You pick up orders there, sort your stash, print gear, buy weapons and check rankings before you head back out. The eleven stations and areas below are not a complete list of what the FOB holds, but they cover the parts you will use most.
The Events Station reads “AVAILABLE AFTER LAUNCH”. Track the rest under Career > Progression > “DMZ LEVEL UNLOCKS”.
DMZ FOB stations and what they do
| Station | Used for |
|---|---|
| DMZ Orders | Mission list and page rewards |
| Stash/Loadout | Storing loot, building your loadout |
| Firing range | Testing weapons |
| Survival Kit Station | Ready-made deployment packages |
| Bounty Leaderboards | Weekly bounty rankings |
| 3D Printer | Turning resources into gear |
| Boss Board | Lieutenant and Commander boss rewards |
| Vendor | Buying weapons and gear for cash |
| Gunsmith | Buying weapons and attachments |
| Dog Tag Station | Displaying extracted dog tags |
| Events Station | Limited-time objectives and rewards |
Those stations sit alongside the DMZ Level Unlocks screen, which tracks what each DMZ level opens. Unlock details for individual stations are covered in the sections below.
DMZ Level Unlocks: How station unlocks are tracked
DMZ has a dedicated progression track that runs from Level 1 through Level 70. It operates independently of your multiplayer rank, and progress in either does not affect the other. Reaching higher levels makes additional stations, recipes, operator slots, stash capacity and fire support available.
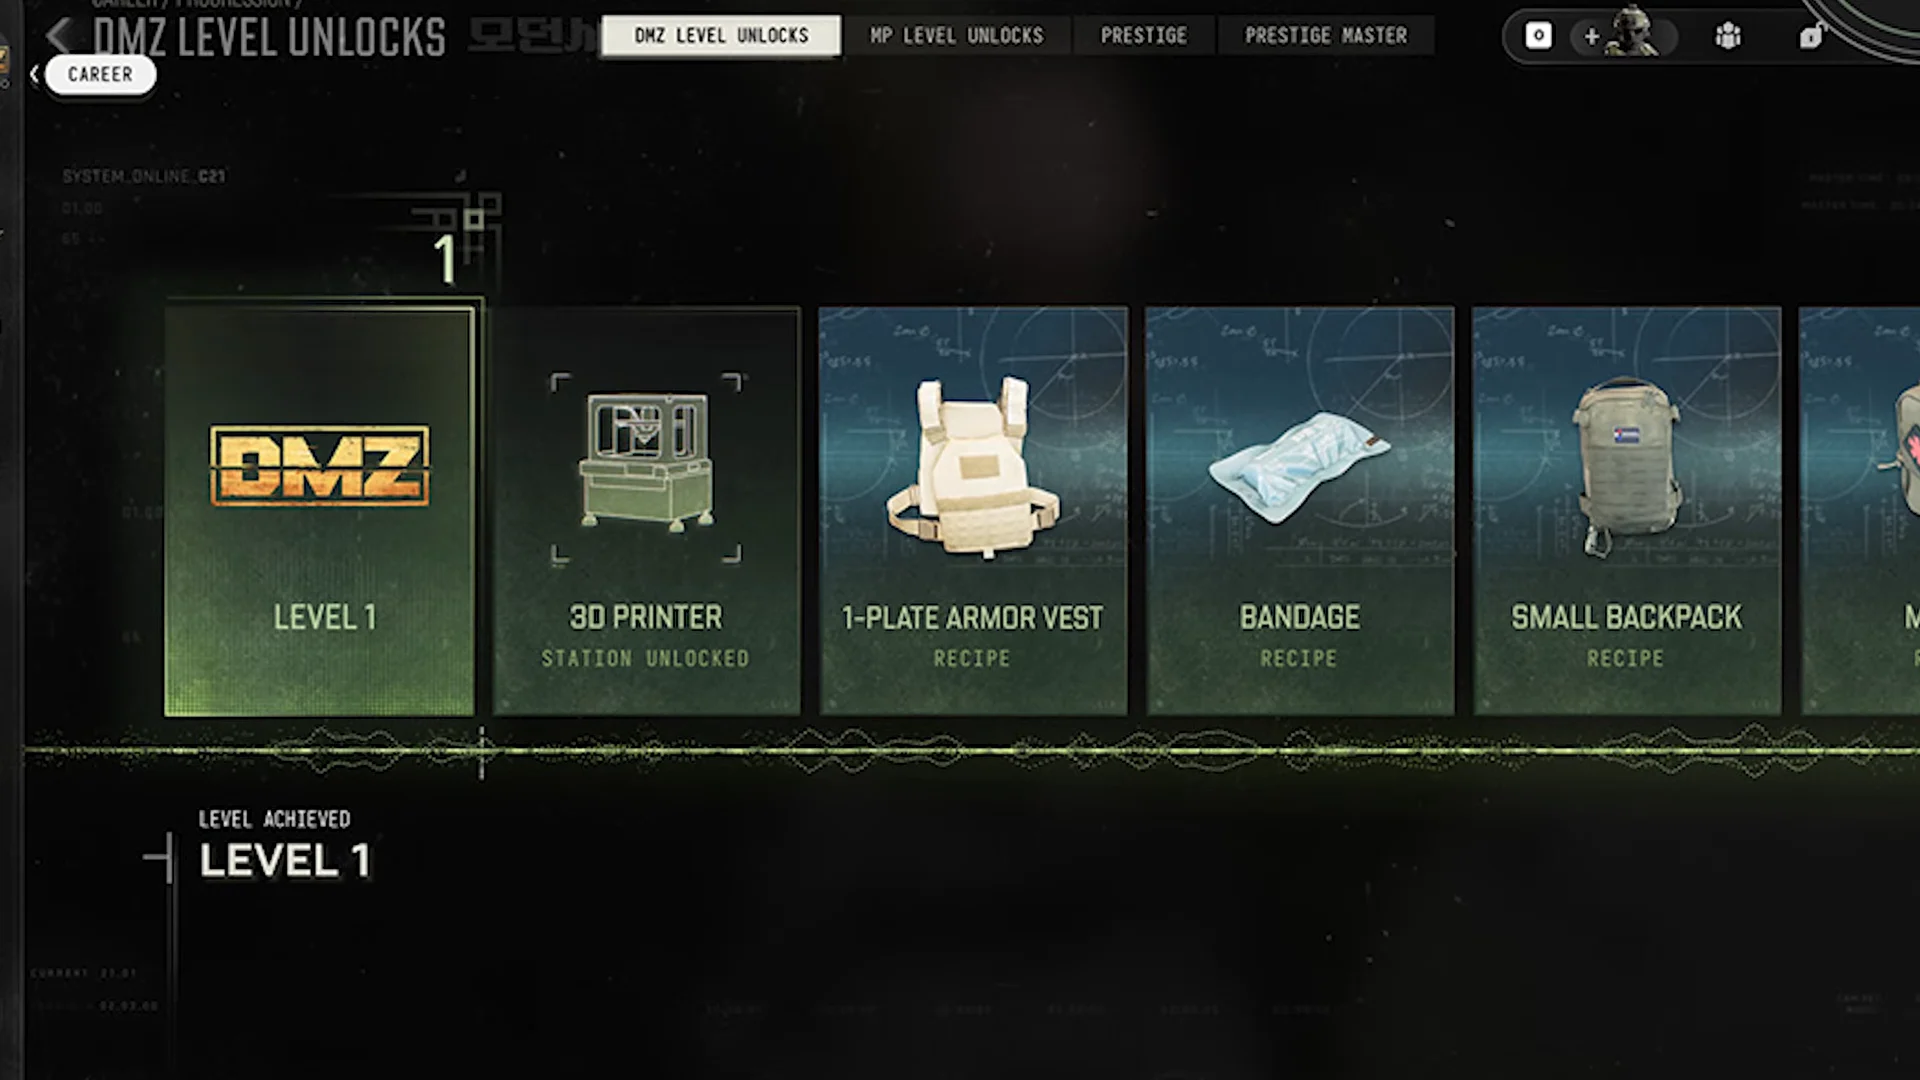
Level 1 grants the 3D Printer (“3D PRINTER – STATION UNLOCKED”) along with the 1-Plate Armor Vest, Bandage and Small Backpack recipes, and more past that first row. Two other unlock markers appear inside the FOB. The Vendor shows extra stock slots locked behind “LVL 52”, and the Events Station’s “FORWARD OPERATING BASE STATION INTEL” card marks it “AVAILABLE AFTER LAUNCH”.
Stash, Survival Kits and the firing range
Stash/Loadout
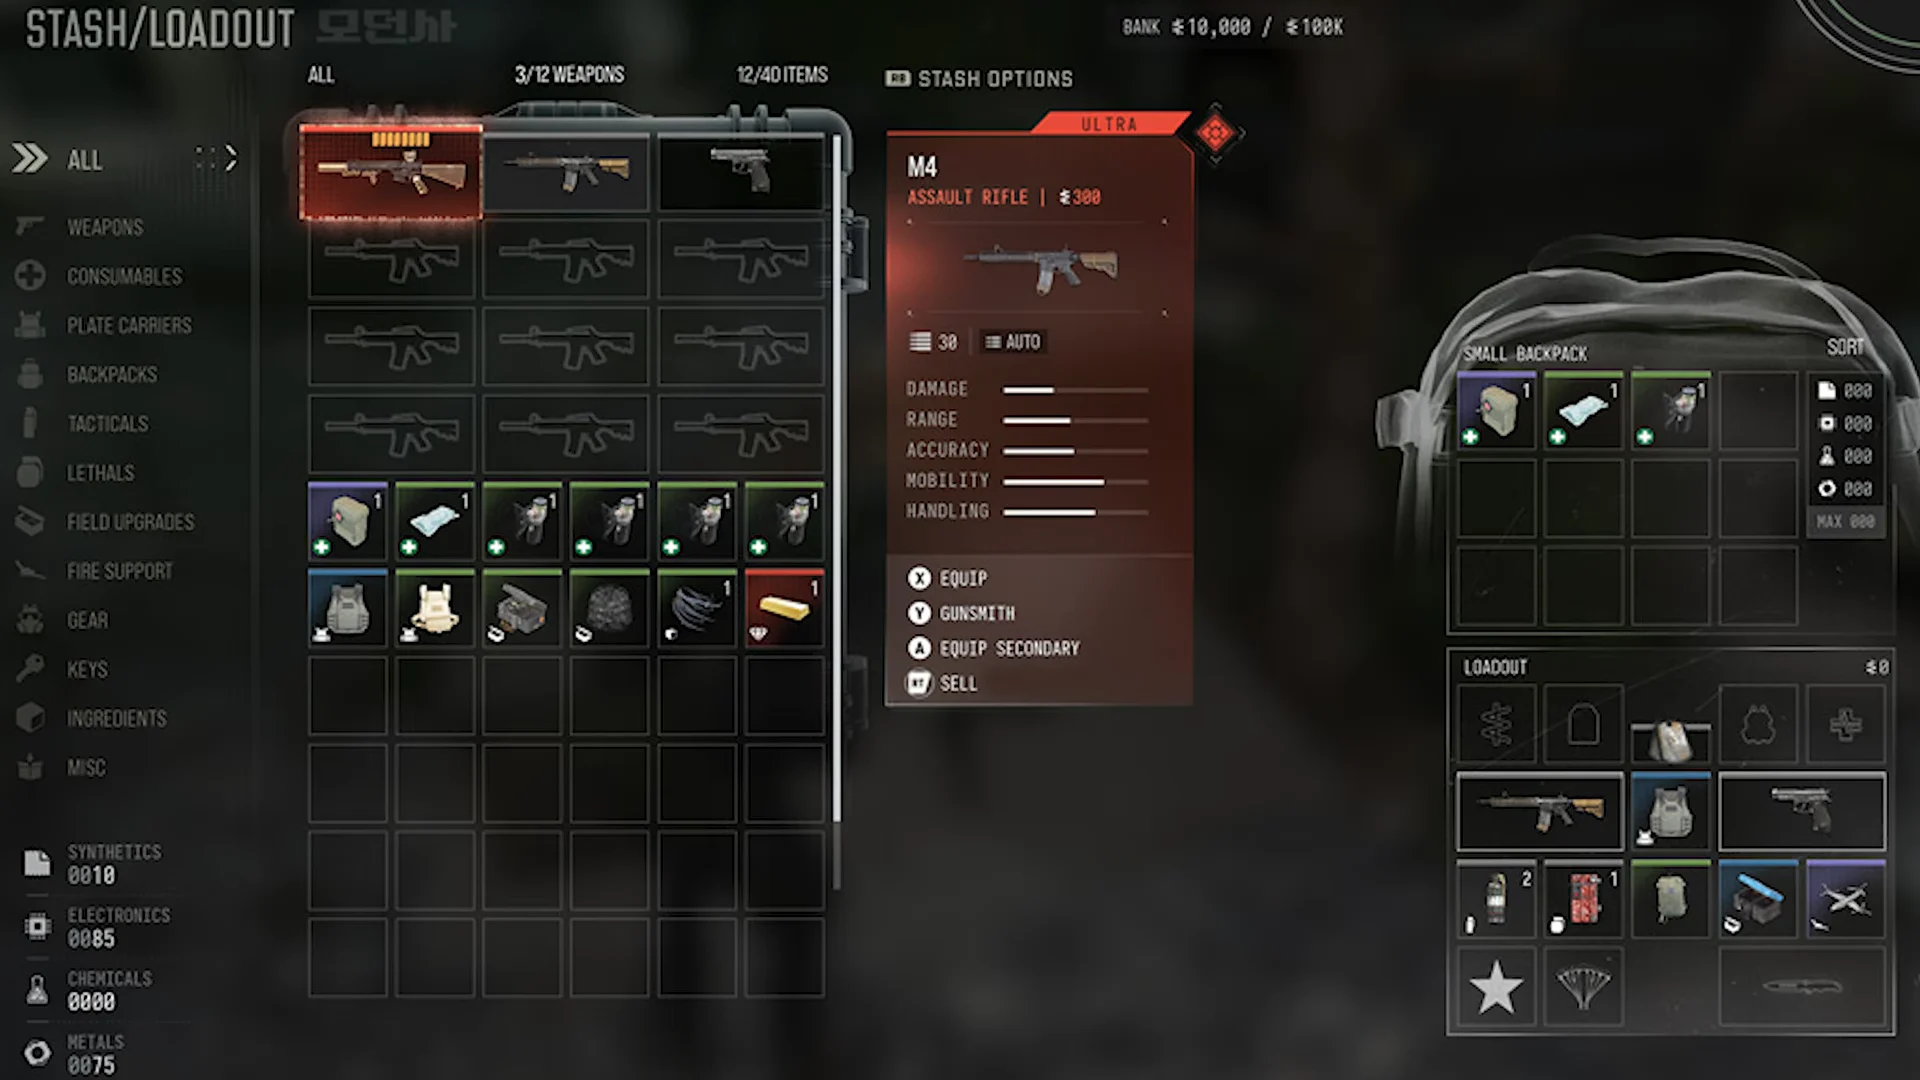
The STASH/LOADOUT crate holds what you extract and lets you build the kit you deploy with. Its contents are shared across your active duty operators. Weapons and items have separate limits: the header reads “3/12 WEAPONS” and “12/40 ITEMS”, meaning 12 weapon slots and 40 item slots.
- Tabs run in this order: All, then Weapons, then Consumables, then Plate Carriers, then Backpacks, then Tacticals, then Lethals, then Field Upgrades, then Fire Support, then Gear, then Keys, then Ingredients, and finally Misc.
- With a weapon selected, you can choose Equip, Gunsmith, Equip Secondary or Sell.
- Your bank cash appears at the top, shown against a cap.
- Synthetics, Electronics, Chemicals and Metals counters sit in the bottom-left corner.
- The Loadout panel on the right shows what your operator takes into the next deployment.
Looted salvage breaks down into those four crafting resources, so it never eats stash slots. Move items between the stash and the Loadout panel before you deploy.
Survival Kit Station
The Survival Kit Station supplies ready-to-deploy packages. Their contents include Weapon Insurance Contracts, followed by Operator Rescue Beacons, then Fulton Drop Markers, then Medium Backpacks, and 2-Plate Carriers. Progression, orders, and event rewards are ways to earn kits.
Firing range
The range has several lanes, barricades and target dummies set at different distances. Use it to check how a weapon handles, including stances and mounting, before you take it into a match.
3D Printer, Vendor and Gunsmith: Spending resources and cash
3D Printer
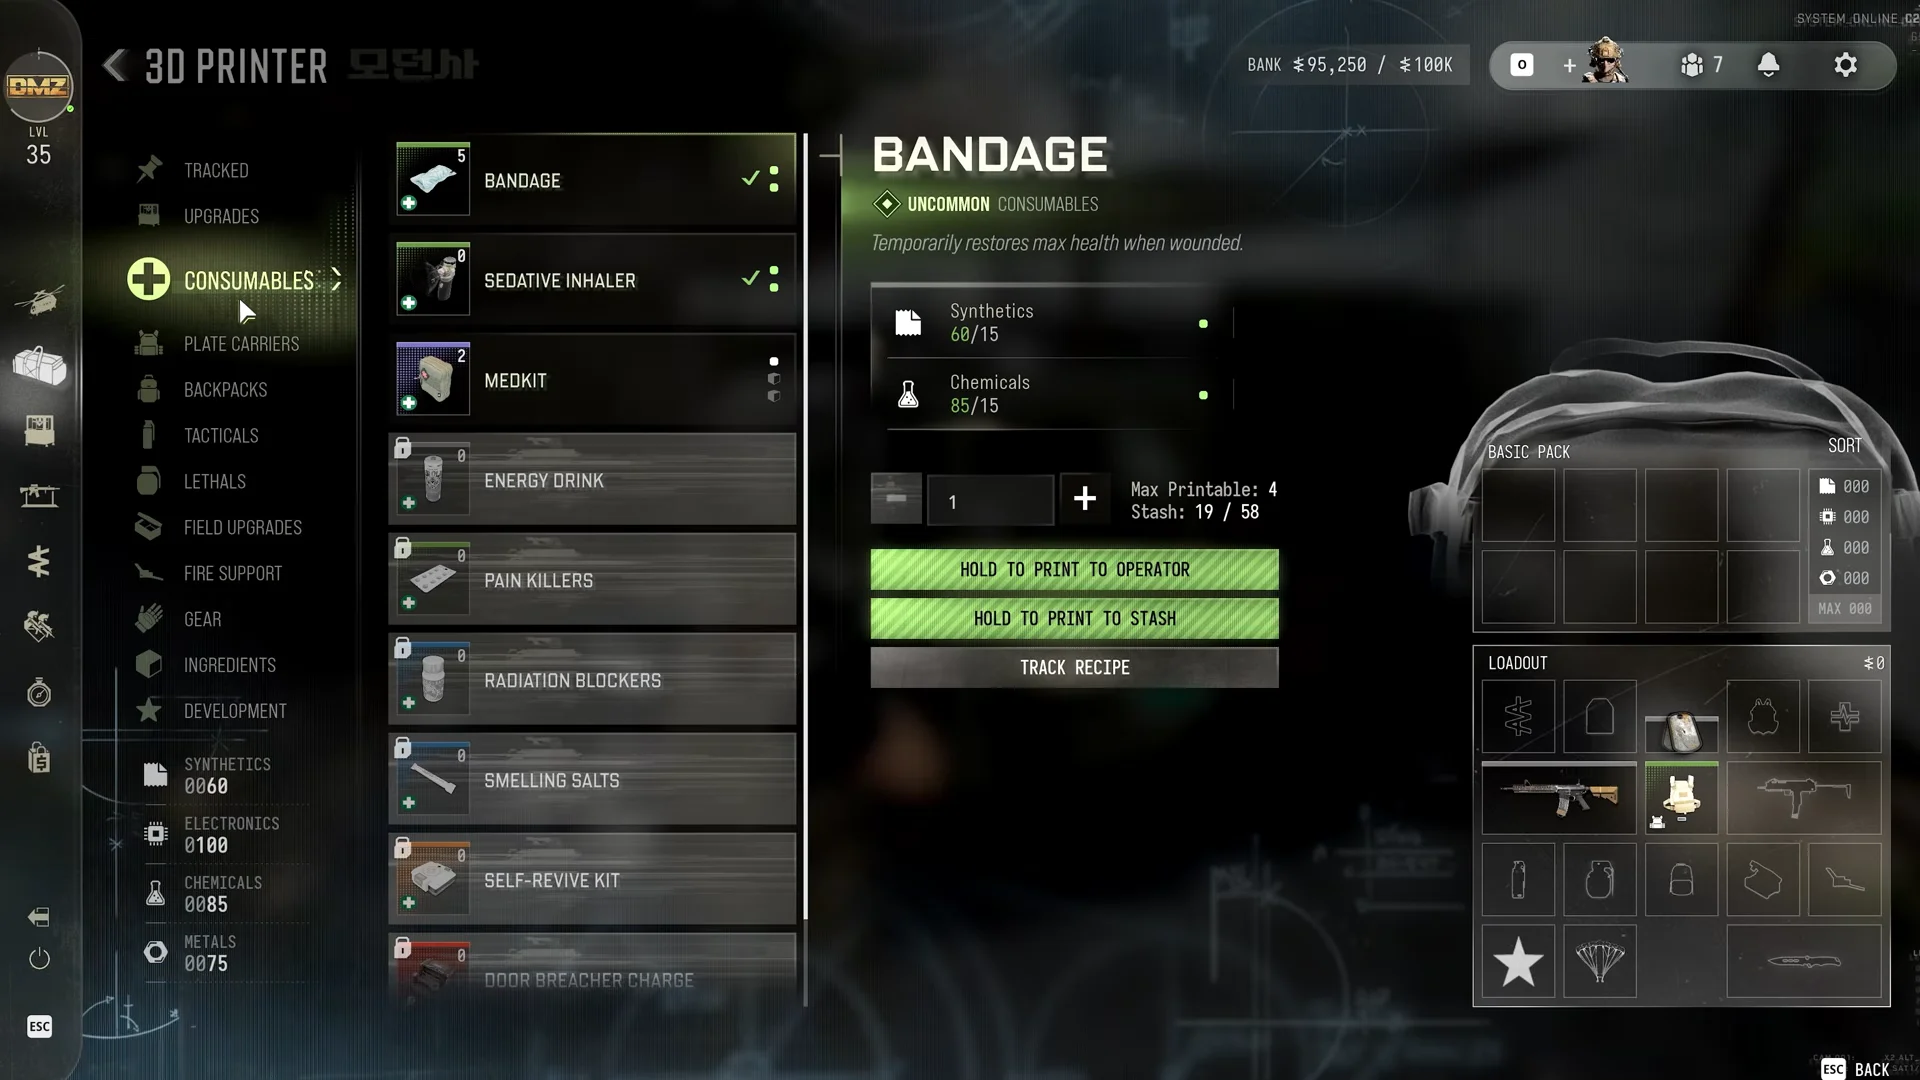
The 3D Printer uses your four resources to make gear. Its categories, in order, are Tracked; then Upgrades; then Consumables; then Plate Carriers; then Backpacks; then Tacticals; then Lethals; then Field Upgrades; then Fire Support; then Gear; then Ingredients; and Development. Select Upgrades to print base upgrades.
Each recipe lists its rarity, a description, the resources required (what you hold against what it costs), “Max Printable”, and how many copies already sit in your stash. Three buttons handle output: “HOLD TO PRINT TO OPERATOR” sends the item straight to your loadout, “HOLD TO PRINT TO STASH” stores it, and “TRACK RECIPE” pins it.
| Recipe | Rarity | Cost |
|---|---|---|
| Bandage | Uncommon | 15 Synthetics + 15 Chemicals |
| 1-Plate Armor Vest | Uncommon | 25 Synthetics + 25 Metals |
The Bandage description reads “Temporarily restores max health when wounded”. The 1-Plate Armor Vest is a plate carrier that holds one armor plate. Other consumable recipes include Energy Drink and Pain Killers, plus the Sedative Inhaler and Radiation Blockers; Smelling Salts and Medkit are also available, along with Self-Revive Kit and Door Breacher Charge. Plate carriers start with the 2-Plate Armor Vest, 2-Plate Ballistic Gel Vest and 2-Plate Helmet Armor Vest, then extend to the 3-Plate versions and Tempered Armor Vest.
You can get new recipes by leveling up in DMZ, earning DMZ Orders rewards, or looting recipes and extracting successfully.
Vendor
The Vendor trades weapons and gear for cash. Its stock rotates on a “REFRESHES IN” countdown. A WEAPONS column carries items like the Mosin-Nagant marksman rifle, and a GEAR column holds vests, backpacks, a gas mask and more. Further slots in both columns stay locked at “LVL 52”. Pick an item and press “PURCHASE” to buy it.
Gunsmith
Gunsmith offers weapons and attachments in exchange for DMZ cash. Choose a base weapon, fit attachments and pay to unlock each slot you use; the cart calculates the combined cost. For example, it can contain an ISO Nightshade SMG for $3,000, a Pulse-MW Laser for $1,900 and a 1st Attachment Slot for $1,000, with a “GUNSMITH DISCOUNT 5% OFF” applied. Use “HOLD TO PURCHASE” to buy the build.
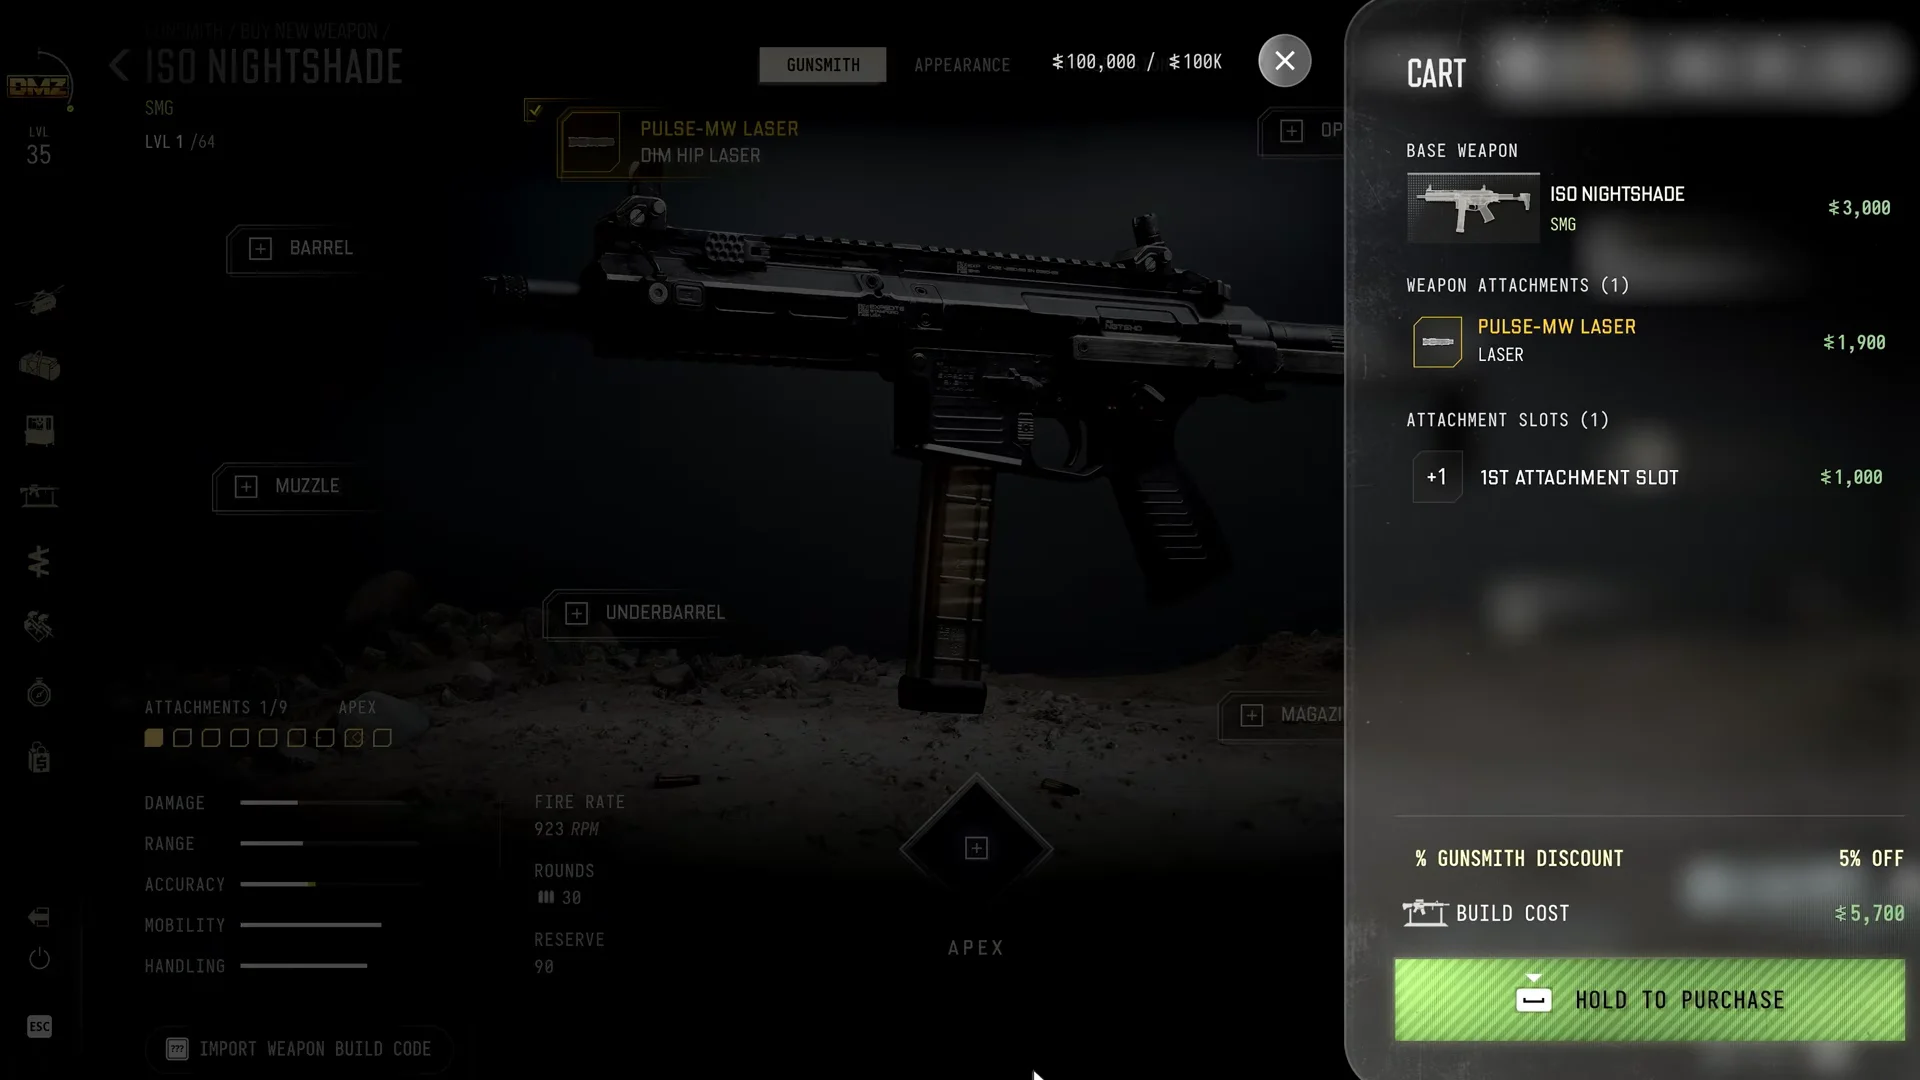
Blueprints list their own build cost; the Beta Forged blueprint, for instance, shows “BUILD COST $116,750”. To modify a weapon you extracted, select it in your stash and choose Gunsmith.
DMZ Orders, bounties, bosses and events
DMZ Orders
The DMZ Orders terminal holds your missions, grouped into chapters made of pages. “CHAPTER: COUNTERFEIT 1/2”, for example, includes orders 01, 02 and 03 (“EXECUTE INTEL”), each with counted tasks:
- “Hack a UAV Tower in Downtown 0/1”
- “Kill 5 NK Soldiers Pinged by a UAV Tower 0/5”
- “Loot Counterfeit Cash Dropped by Pinged NK Soldiers 0/1”
Clearing a page pays a reward; this page’s “REWARDS FOR PG2” is the Recon Drone recipe. You need to finish the current active page before the next one opens.
Bounty Leaderboards
Two tabs rank players. “TOP 50 MOST WANTED” lists “PLAYERS WITH THE HIGHEST BOUNTIES LAST WEEK”, while “TOP 50 BOUNTY HUNTERS” lists “PLAYERS WHO COLLECTED THE MOST BOUNTIES”. Both switch between Global and Friends views and show a “NEXT REFRESH” countdown.
Boss Board and Dog Tag Station
Use the Boss Board to track the Lieutenant and Commander bosses. After bringing boss dog tag cases back from a deployment, turn them in at the board for rewards. The FOB’s Dog Tag Station is a display rack for tags taken from operators you eliminate.
Events Station
The Events Station carries the label “AVAILABLE AFTER LAUNCH”. It features time-limited objectives, challenges and unlocks for Modern Warfare 4 and DMZ, offering rewards such as DMZ XP, equipment, recipes and camos. To view current activities, visit the FOB station or open it through the blade menu on the left. Event offerings rotate and change over time.