
Modern Warfare 4 won’t run on PC unless two security features are switched on. The game’s Steam page says “TPM 2.0 and Secure Boot required, other security measures may be enforced”, and RICOCHET Anti-Cheat checks for both. If the game tells you at launch that your PC doesn’t meet its attestation or security requirement, these are the two settings it is looking at. Most modern PCs support both. They are often just turned off in the motherboard firmware.
Quick answer: Turn on the firmware TPM and Secure Boot in your UEFI/BIOS, with the system drive on GPT and CSM/Legacy off. Then run the Call of Duty Secure Attestation Wizard until it reports “System compliant: Ready to play”.
Check TPM 2.0 and Secure Boot status in Windows
Check what’s already on before you touch the firmware. Two built-in Windows tools tell you, and you open both from the Run box.
tpm.msc, then press Enter. Check the TPM management window to see whether a TPM is installed and ready.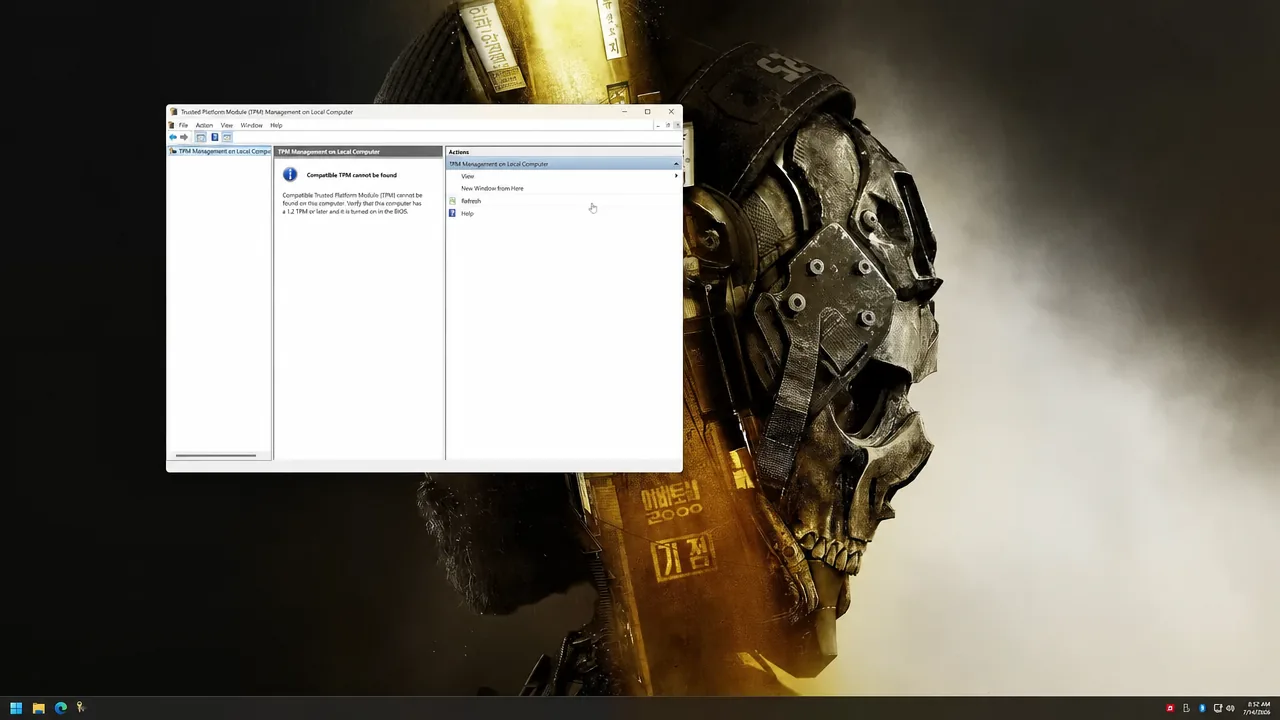
msinfo32, and press Enter to launch System Information. Keep the System Summary page open.| Tool | What you want to see | If it’s wrong |
|---|---|---|
tpm.msc | TPM present and ready | Turn on the firmware TPM |
msinfo32: Secure Boot State | On | Turn on Secure Boot |
msinfo32: BIOS Mode | UEFI | Check GPT, then switch to UEFI |
If tpm.msc says it can’t find a compatible TPM, the firmware TPM is switched off in the BIOS. If BIOS Mode reads Legacy, follow the order “Legacy Mode -> Check GPT First -> Switch to UEFI”.
If your system disk is MBR rather than GPT, switching to UEFI without converting it first can leave Windows unable to boot. Activision’s support page has a section on confirming the partition style is GPT and converting it if it’s MBR.
Safety checks before changing BIOS settings
Firmware changes can affect drive encryption and boot, so go through these first, in this order.
- Save your BitLocker recovery key and back up important data.
- Change the required TPM, UEFI, CSM, and Secure Boot settings and nothing else.
- Do not clear, reset, or delete TPM keys.
- If a setting isn’t there, check your motherboard manual or ask your IT administrator.
Enable the firmware TPM in UEFI/BIOS
Intel systems use a different name and location for the firmware TPM option. “BIOS menus vary by motherboard – check your manual” applies here more than anywhere. Once you’re back in Windows, tpm.msc should report the TPM as ready.
Turn on Secure Boot (GPT drive, CSM off)
Secure Boot depends on UEFI booting, so confirm the OS drive is GPT before you start. The on-screen reminder is “Check first: OS drive = GPT”.
Confirm with the Call of Duty Secure Attestation Wizard
A wizard result of “System compliant: Ready to play” means setup is complete and the game’s checks should succeed. If the result is “System not compliant: Follow wizard instructions”, use the wizard’s list to identify which setting remains disabled. Correct it, then run the scan again. Common items to inspect are the GPT partition, firmware TPM, and motherboard-specific menus. For a missing or unavailable option, consult the board manual; on a managed machine, contact the PC maker or IT administrator. The FAQ on that Activision support page also explains the consequences of leaving TPM 2.0 and Secure Boot disabled and offers guidance if you cannot enable them.