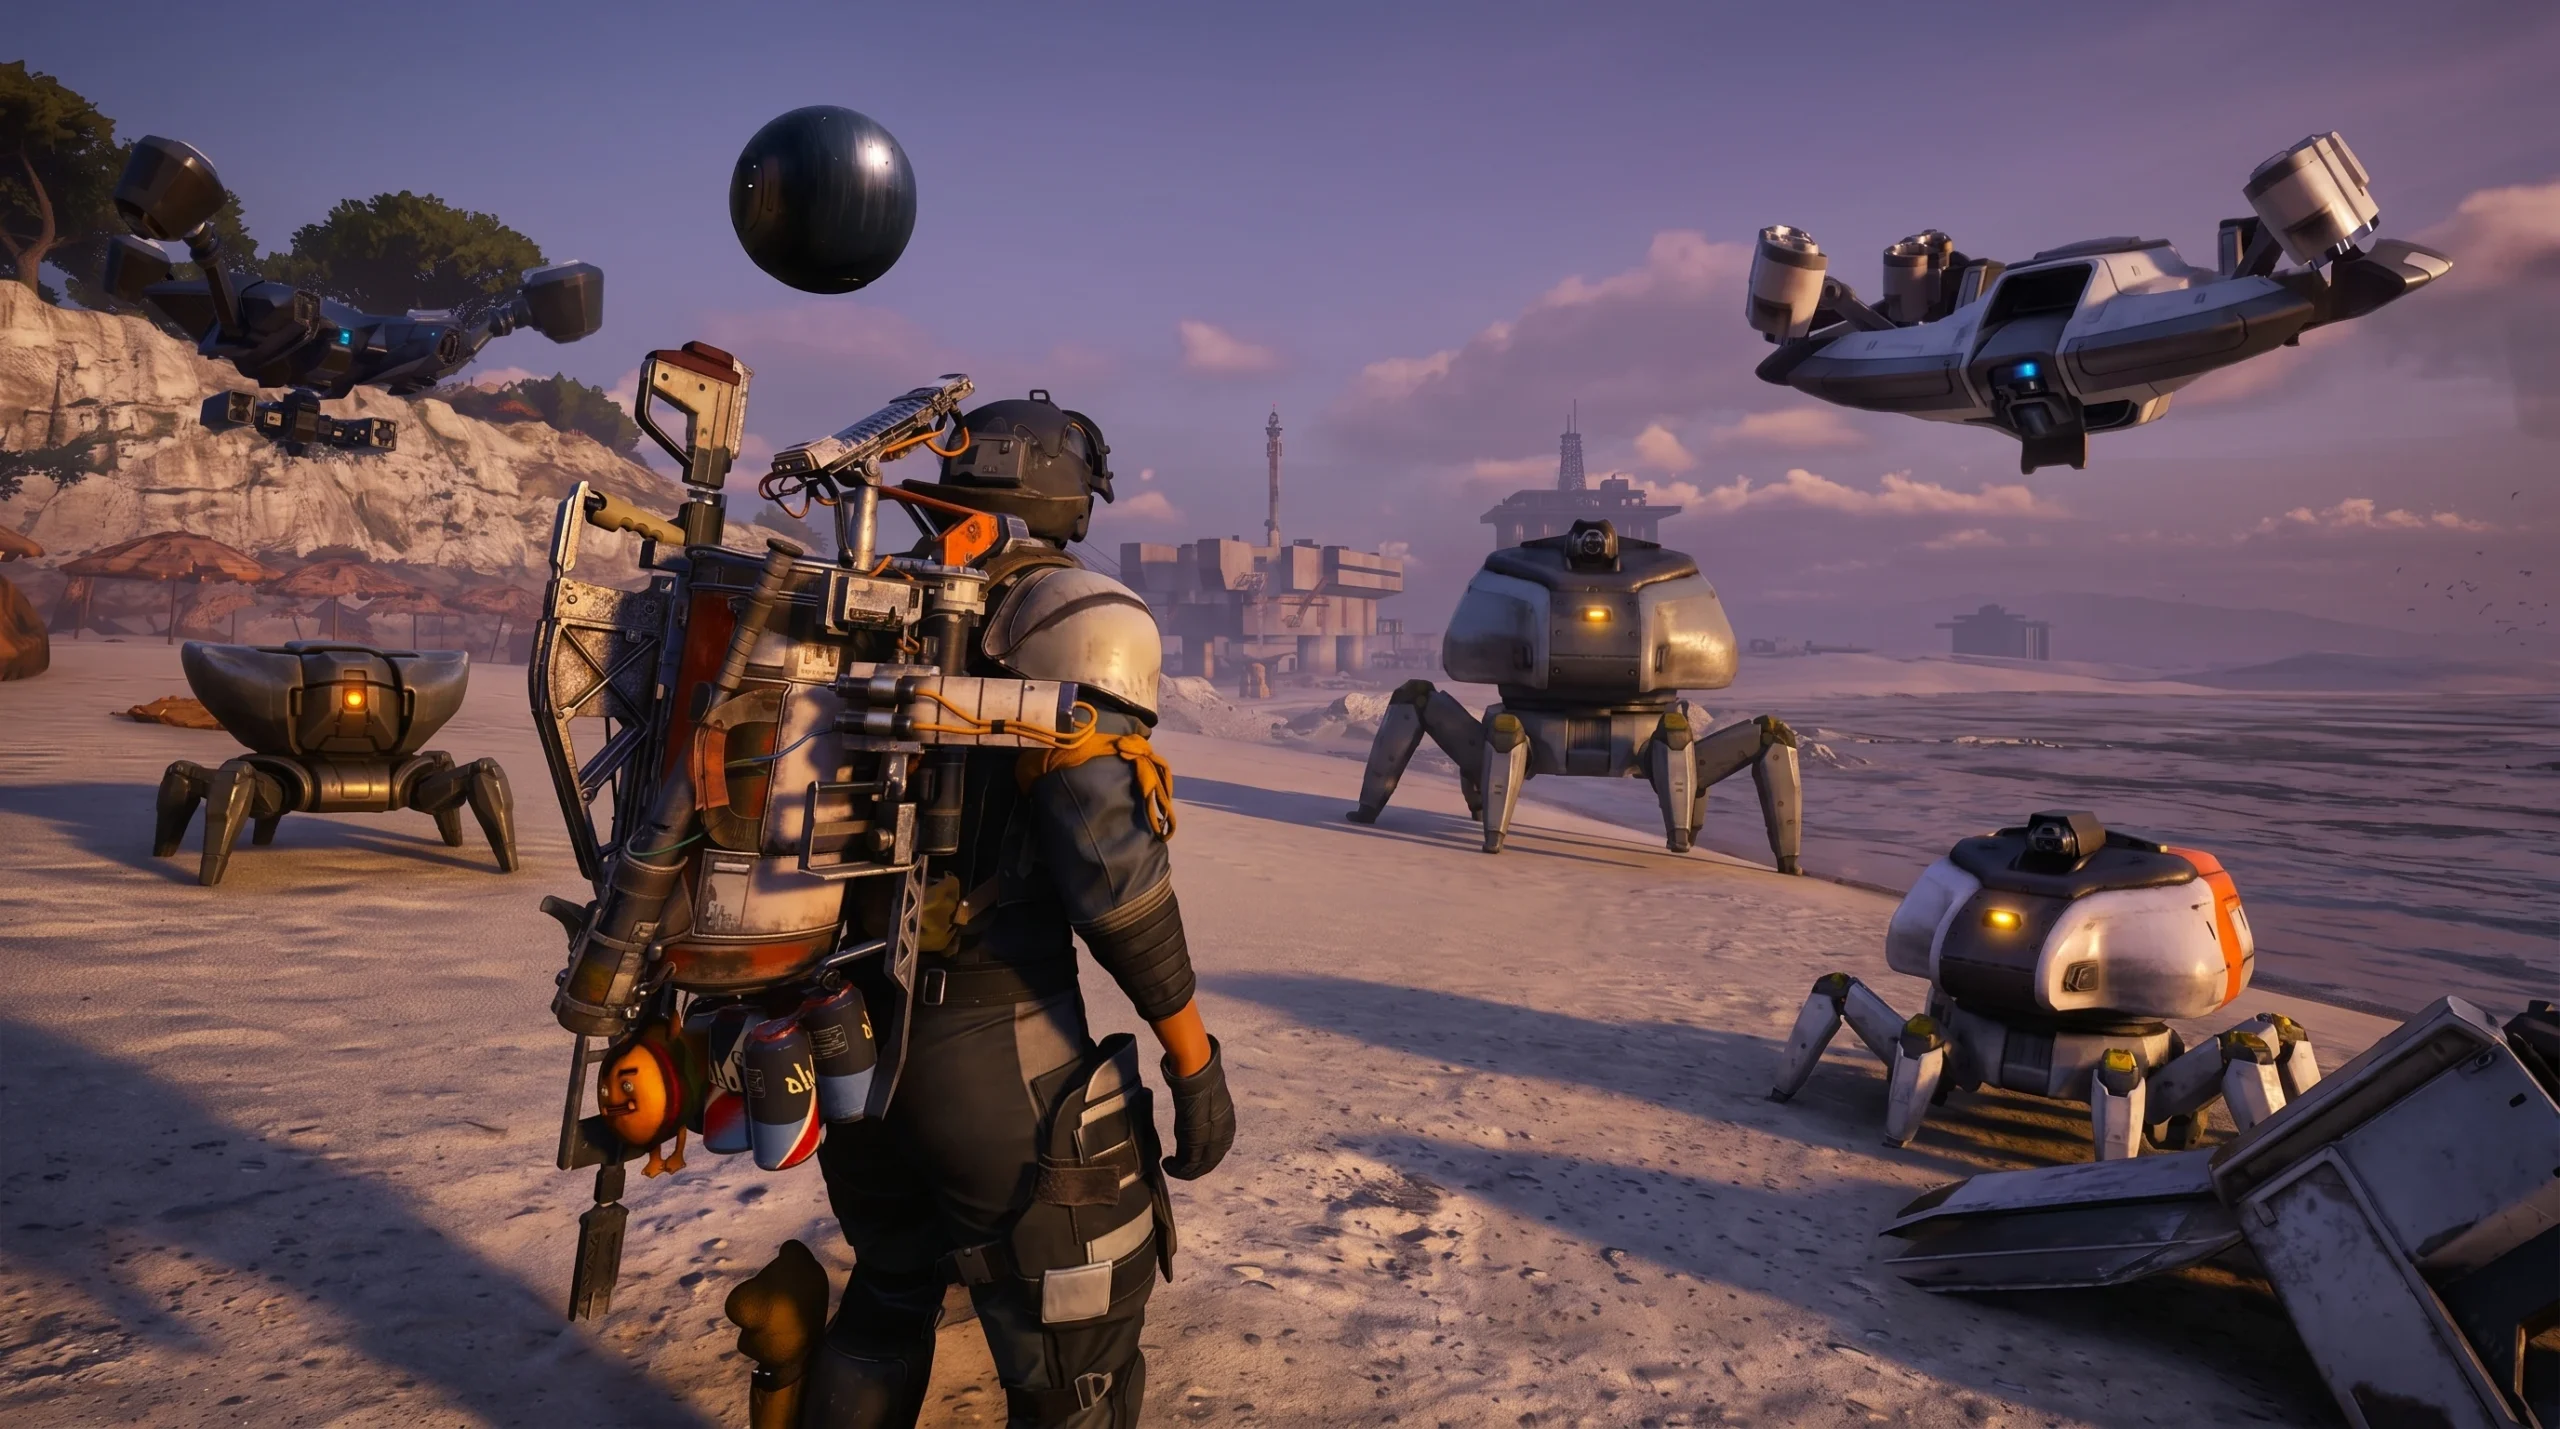
Every machine roaming the surface and interiors of ARC Raiders has a clear weak point you can exploit. The trick is reading each unit’s behavior, aiming for the right spot, and bringing the correct ammo type before the fight starts. Get those three things right and even the heaviest armored ARC drops fast.
Quick answer: Aim for yellow components for maximum damage, white areas take full damage, and grey plating resists everything except heavy or armor-piercing ammo. For flyers, destroy thrusters. For ground tanks like Bastions and Bombardiers, hit the yellow canister on the rear and the leg joints.

How ARC weak points and damage colors work
Damage in ARC Raiders is tied to the color of the surface you hit. Learning to read these colors instantly tells you where to shoot and which weapons to bring.
| Surface color | Effect |
|---|---|
| White | Soft, unarmored. Takes full damage from any weapon. |
| Grey | Reinforced armor. Reduces damage unless you use heavy or armor-piercing rounds. |
| Yellow | Weak point. Glowing components on cores, joints, and rear panels that take increased damage. |
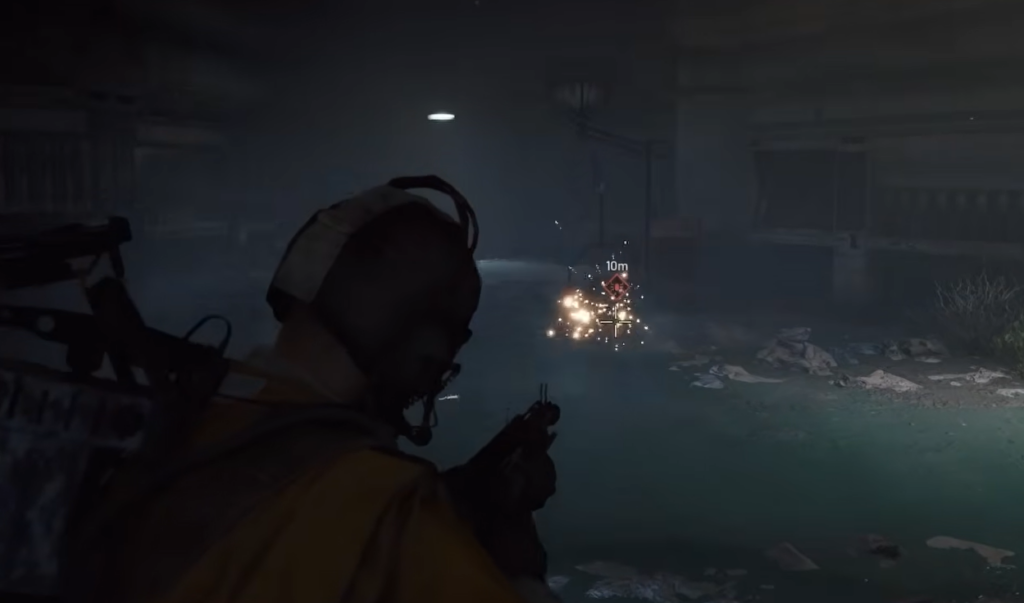
Yellow weak spots usually sit on the back of an enemy, around joint connections, or on exposed cores. Two more rules make a big difference. Most ARCs are nearly deaf, so gunfire alone won’t aggro the whole map, but the Snitch hears from long range and calls in reinforcements. Engaging one group also won’t alert another, so you can pick fights one at a time.
Tip: You can tag or mark an enemy in-game to reveal its name, which makes identifying the right weak spot much easier mid-fight.

Small interior enemies: Ticks, Pops, Fireballs, and Turrets
These show up inside buildings and high-loot rooms. None of them are durable, but ignoring them gets you killed fast.
Ticks
Ticks are the weakest enemy in the game. They cling to ceilings and walls in dark, enclosed spaces and ambush you by launching themselves on, slowly draining your health and shield. A single shot from most firearms or one melee strike destroys them. Listen for the tapping of their six legs, robotic chirps, or a faint mechanical whirring before they jump. They drop ARC Alloy and a Tick Pod.
Pops
Pops are small rolling drones that charge at you and self-destruct when close, dealing heavy damage. They flash a red light and beep faster right before detonating. They have low health, so destroy them from range before they reach you. Heavy ammo takes one out in a single hit, and elevated terrain keeps you safe since they often travel in groups. They drop ARC Alloy, ARC Powercell, Crude Explosives, and a Pop Trigger.
Fireballs
Fireballs look like Pops but are perfectly spherical and don’t self-destruct. Instead they spray a wall of fire in front of them. Their shells resist non-heavy ammo, so fire when they open their plating to attack and hit the exposed core. The Fireball Burner they drop works as a makeshift incendiary grenade against Leapers and other raiders. Loot includes ARC Alloy, ARC Powercell, Crude Explosives, and the Fireball Burner.
Turrets
Turrets are fixed guns mounted in lobbies, elevator shafts, and other high-traffic rooms. They only detect you when you enter their wide blue scanning beam, so you can slip past for a stealth run. They have no real armor and die to any ammo type. Wait for the pause between their bursts, peek from cover, and return fire. They drop ARC Alloy, Light Ammo, and Simple Gun Parts.
Flying enemies: Wasps, Hornets, Snitches, and Rocketeers
Aerial ARCs almost all share one rule. Destroy their thrusters and they crash. The difference is armor placement and how dangerous their attacks are.
Wasps
Wasps are the most common surface enemy and patrol in groups, often led by a Hornet. They rush your position the moment they hear gunfire and fire bursts of automatic rifle rounds. Their armor is thin and they have four thrusters. Knock out one or two and they plummet and explode. Stay near cover and wait out their fire before striking. They drop ARC Alloy, Wasp Driver, Simple Gun Parts, and Light Ammo.
Hornets
Hornets are heavier, darker Wasps with a rapid-fire machine gun and a charged taser that does massive shield damage and stuns you in place. Their front thrusters are armored and need heavy ammo, but the rear thrusters are unprotected and go down with any weapon. Flank them or wait for them to turn. To dodge the taser, watch for three yellow lasers to merge and flash red, then dodge roll. Don’t spam the roll or they adapt. The Hornet Driver they drop can temporarily stun enemies, letting you open up tougher ARCs. Loot includes ARC Alloy, ARC Powercell, Simple Gun Parts, Medium Ammo, and the Hornet Driver.
Snitches
Snitches are recon units that summon extra ARC when they spot you, so avoid detection if you can. If you have to fight, target one of the three thrusters around the central shaft, or hit the weaker underside plating. They often fly high, making a long-range heavy weapon like the Ferro ideal since it can destroy a thruster in one hit. Kill them before they finish the beacon call. The Snitch Scanner they drop can summon ARC to attack enemy players. Loot includes ARC Alloy, ARC Powercell, ARC Synthetic Resin, Sensors, and the Snitch Scanner.
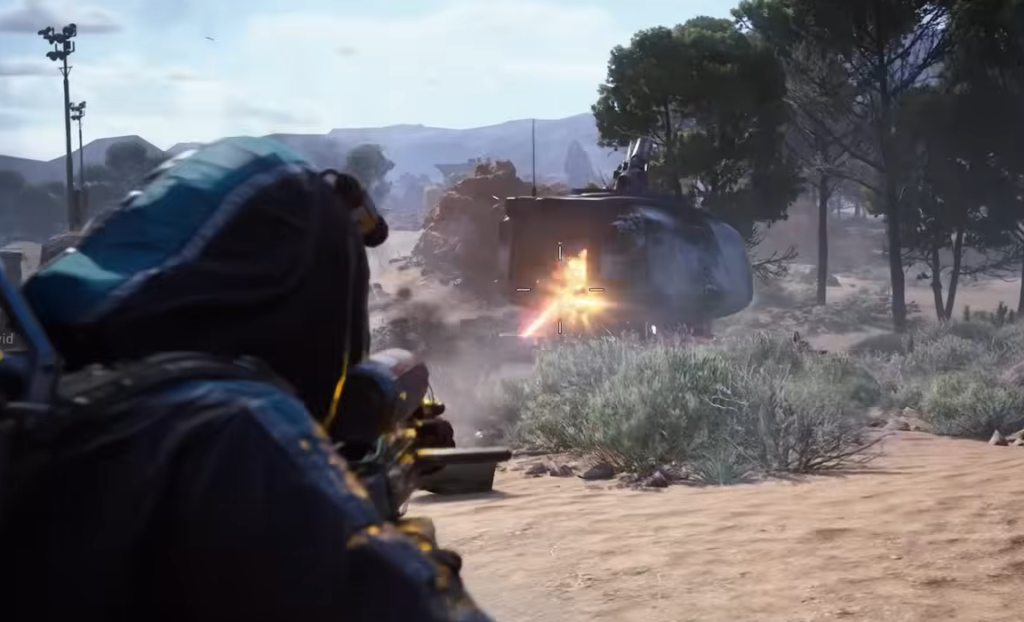
Rocketeers
Rocketeers are the most powerful standard flyer and can kill you in roughly two hits if they catch an open angle. They’re heavily armored and fire area-of-effect rockets, so regular ammo barely scratches them. Bring armor-piercing or heavy rounds and stay at maximum range with cover and room to avoid splash. Focus one thruster until it pops, then a second. Two thrusters down usually triggers a chain explosion and a crash. You can also target the glowing red core that appears when it reloads. Well-timed dives let you close in to plant sticky or stun grenades. Loot includes ARC Alloy, ARC Powercell, ARC Motion Core, ARC Circuitry, Advanced ARC Powercell, Heavy Gun Parts, Heavy Ammo, and the Rocketeer Driver.

Stationary defenses and scouts: Sentinels and Surveyors
Sentinels
Sentinels are the outdoor version of a Turret, guarding high-value locations from towers and rooftops, such as the top of Pilgrim’s Peak in the Blue Gate region. They have long range, track you with a red laser, and fire a single high-damage heavy round. Break line of sight with cover to reset their tracking, then peek and shoot the glowing yellow fuel tank at their base. Destroying it is an instant kill. Loot includes ARC Alloy, Advanced ARC Powercell, ARC Coolant, ARC Synthetic Resin, ARC Thermo Lining, ARC Motion Core, Heavy Ammo, and the Sentinel Firing Core.
Surveyors
Surveyors are rare, high-value spheres that flee the moment they take damage. They move much faster than Pops or Fireballs, so the real challenge is pinning them down. They occasionally stop to emit a bright blue scanning beam into the sky, and that scanning window is when they expose their core. Use a sniper rifle or long-range heavy ammo, and if you can catch one, a Showstopper Grenade followed by detonated Trigger Grenades often destroys it before it escapes. Pieces that fall off can hold loot, so track where they drop. Loot includes ARC Alloy, ARC Powercell, ARC Motion Core, ARC Circuitry, Advanced ARC Powercell, Sensors, and the Surveyor Vault.

Heavy ground units: Leapers, Bastions, and Bombardiers
Leapers
Leapers are fast, four-legged ARCs that close distance by jumping across cover and slamming the ground for a shockwave. Wait for them to land and recover from a leap, then shoot to stagger or interrupt them. Aim for the legs and faceplate with heavy weapons. Indoor spaces and vertical terrain block their jumps. A strong solo method is a fire trap. Set a Blaze Grenade trap, optionally with a Jolt Mine, bait the Leaper into leaping, and let it burn down with no aiming needed. Blaze Grenades or Fireball Burners thrown at the center eyepiece also work. Loot includes ARC Alloy, Advanced ARC Powercell, Mechanical Components, and the Leaper Pulse Unit.
Bastions
Bastions are heavy gun platforms with limited movement and enough firepower to wipe a squad in seconds. They carry multiple armor layers, but the yellow canister on their back and the yellow leg joints are unarmored weak points. Stagger them by hitting those spots, which exposes the core. With a teammate, one player baits to force the Bastion to turn while the other empties a high-fire-rate weapon like the Torrente LMG into the rear canister, swapping roles until it dies. Solo, bring five or six Trigger Nades and stick them each time it resets targeting. Loot includes ARC Alloy, Advanced ARC Powercell, and the Bastion Cell.
Bombardiers
Bombardiers share the Bastion’s weak points but have no body armor, yet they hit harder with long-range mortar strikes. Hit the yellow kneecaps to slow it and expose weak points, then strike the rear cylinder right after it fires to disable it quickly. Fight from a sheltered position with a roof overhead to block its Mortifier strikes. A Showstopper Grenade locks it down so you can stick all your Trigger Nades and detonate them at once. If a Spotter unit is present, kill it to reduce the Bombardier’s targeting precision. Loot includes ARC Alloy, Advanced ARC Powercell, Bombardier Cell, and Launcher Ammo.
Boss-tier ARCs: Queen, Matriarch, Shredder, and Vaporizer
These are the hardest encounters and usually demand heavy weapons, careful positioning, and ideally a coordinated squad.
The Queen
The Queen is a boss-level encounter that appears only under specific map conditions. She attacks with lasers, ground slams, mortars, and EMP waves while constantly spawning smaller ARCs. Target her leg joints and face with heavy weapons like Hullcrackers or similar launchers, keep clearing the adds she spawns, and focus fire on weak spots only when they become exposed during her ability pauses. Loot includes ARC Alloy, Advanced ARC Powercell, Advanced Mechanical Components, Advanced Electrical Components, and the Queen Reactor.
Matriarch
The Matriarch arrived in a later update and is considered harder than the Queen. It uses homing missiles, flashbangs, gas mines, and calls in other advanced ARCs. Always keep cover between you and the Matriarch, deal with the ARCs it spawns, and pour damage into its shields before targeting its limbs and face to break armor and hit the glowing core. Loot includes the Matriarch Reactor, Magnetic Accelerator, ARC Alloy, ARC Circuitry, ARC Performance Steel, Advanced ARC Powercell, ARC Flex Rubber, and ARC Synthetic Resin.
Shredder
The Shredder goes down when you break its thrusters. Focus fire on the exhaust jets with heavy weapons to disable it. Loot includes ARC Alloy, ARC Powercell, Shredder Gyro, Shotgun Ammo, Simple Gun Parts, and Mechanical Components.
Vaporizer
The Vaporizer relies on lasers and a shield. Target the rotors and the underside core, use cover to avoid its lasers, and wait out its shield before attacking again. Loot includes ARC Powercell, ARC Alloy, Electrical Components, Advanced ARC Powercell, ARC Flex Rubber, Energy Clip, Heavy Gun Parts, and the Vaporizer Regulator.

Quick reference: weak point and loot per ARC
| ARC | How to defeat | Key loot |
|---|---|---|
| Tick | One shot or melee before it latches. | ARC Alloy, Tick Pod |
| Pop | Destroy at range before it detonates; heavy ammo one-shots. | ARC Alloy, ARC Powercell, Crude Explosives, Pop Trigger |
| Fireball | Shoot the core when the front panel opens. | ARC Alloy, ARC Powercell, Fireball Burner |
| Turret | Shoot between bursts; no armor, any ammo works. | ARC Alloy, Light Ammo, Simple Gun Parts |
| Wasp | Destroy 1–2 of its four thrusters. | ARC Alloy, Wasp Driver, Light Ammo |
| Hornet | Heavy ammo on front thrusters or any weapon on rear thrusters. | ARC Alloy, ARC Powercell, Hornet Driver |
| Snitch | Destroy a thruster before it calls reinforcements. | ARC Alloy, ARC Powercell, Snitch Scanner |
| Surveyor | Hit the core while it scans; use heavy or sniper ammo. | ARC Alloy, ARC Powercell, Surveyor Vault |
| Sentinel | Break line of sight, then shoot the yellow fuel tank. | ARC Alloy, Advanced ARC Powercell, Sentinel Firing Core |
| Rocketeer | Heavy ammo on thrusters or the red core when reloading. | ARC Alloy, Advanced ARC Powercell, Rocketeer Driver |
| Leaper | Strike legs and faceplate after a leap; fire traps work well. | ARC Alloy, Advanced ARC Powercell, Leaper Pulse Unit |
| Bastion | Hit yellow rear canister and leg joints to stagger. | ARC Alloy, Advanced ARC Powercell, Bastion Cell |
| Bombardier | Yellow kneecaps then rear cylinder, ideally after it fires. | ARC Alloy, Advanced ARC Powercell, Bombardier Cell, Launcher Ammo |
| Shredder | Break the exhaust jets with heavy weapons. | ARC Alloy, ARC Powercell, Shredder Gyro |
| Vaporizer | Rotors and underside core; wait out the shield. | ARC Powercell, ARC Alloy, Vaporizer Regulator |
| Queen | Leg joints and face with launchers; clear spawned adds. | ARC Alloy, Advanced ARC Powercell, Queen Reactor |
| Matriarch | Break shields, then limbs and face for the core. | Matriarch Reactor, Magnetic Accelerator, ARC Alloy |
You’ll know a kill landed correctly when a flyer loses control and crashes, a stationary unit explodes, or a heavy unit staggers and drops its loot. If a fight stalls, the usual cause is ammo type. Grey plating shrugs off light rounds, so switch to heavy or armor-piercing and aim only at the yellow weak points. Solo runs reward planning over noise, so bring explosives and traps, pick your fights, and loot fast before other raiders close in.