

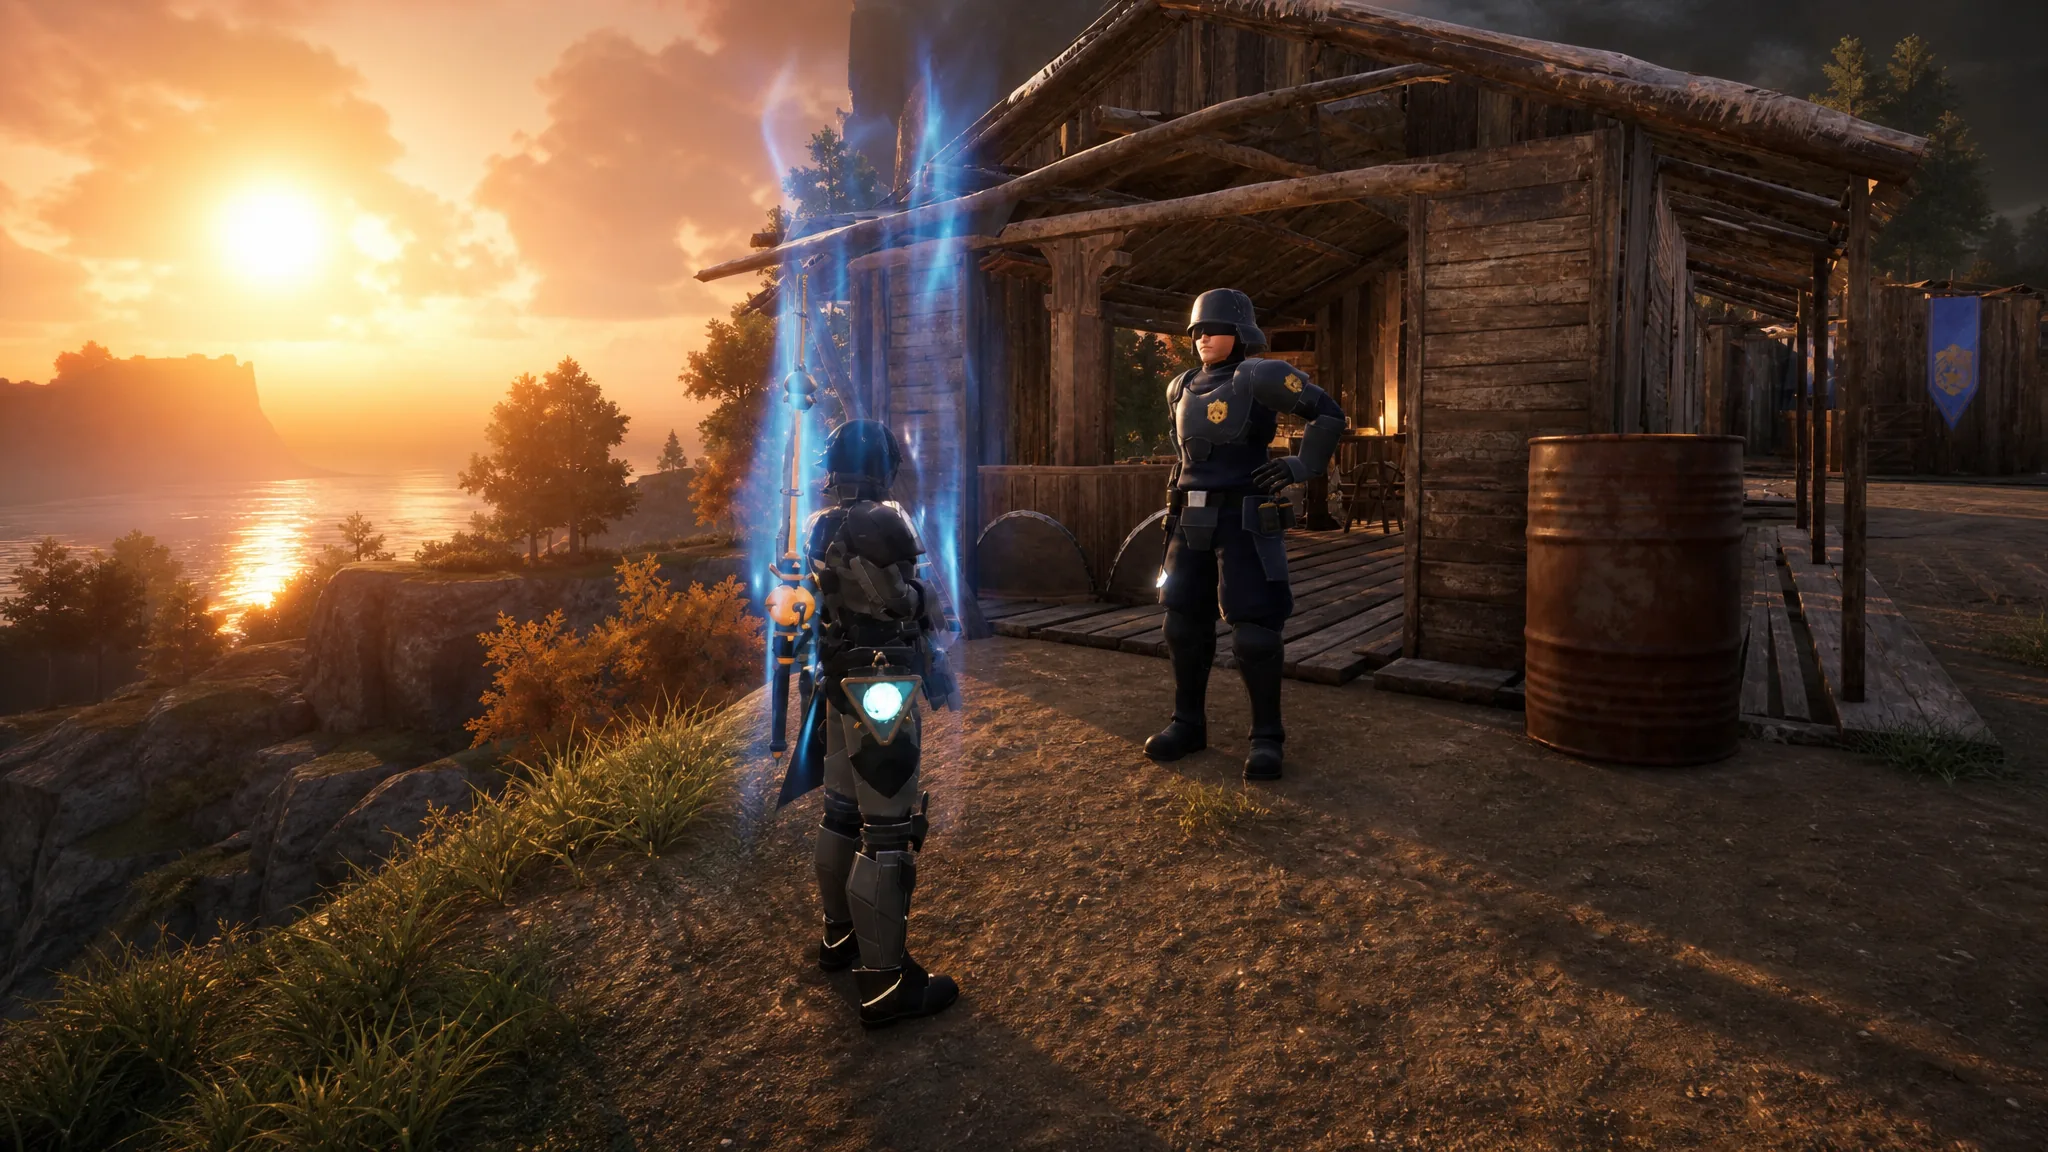
Bounties are human bosses scattered across the Palpagos region, and hunting them is one of the steadiest ways to farm rewards in Palworld 1.0. Each target is marked on your map with a purple hood icon, and defeating or capturing one drops a Successful Bounty Token you can trade with a PIDF Bounty Officer. They respawn on a timer, so the same target can be farmed repeatedly.
Quick answer: Travel to the coordinates listed below, look for the purple hood icon, and defeat or capture the target to collect a Successful Bounty Token. Your first kill on any given bounty also grants an Ancient Technology Point.
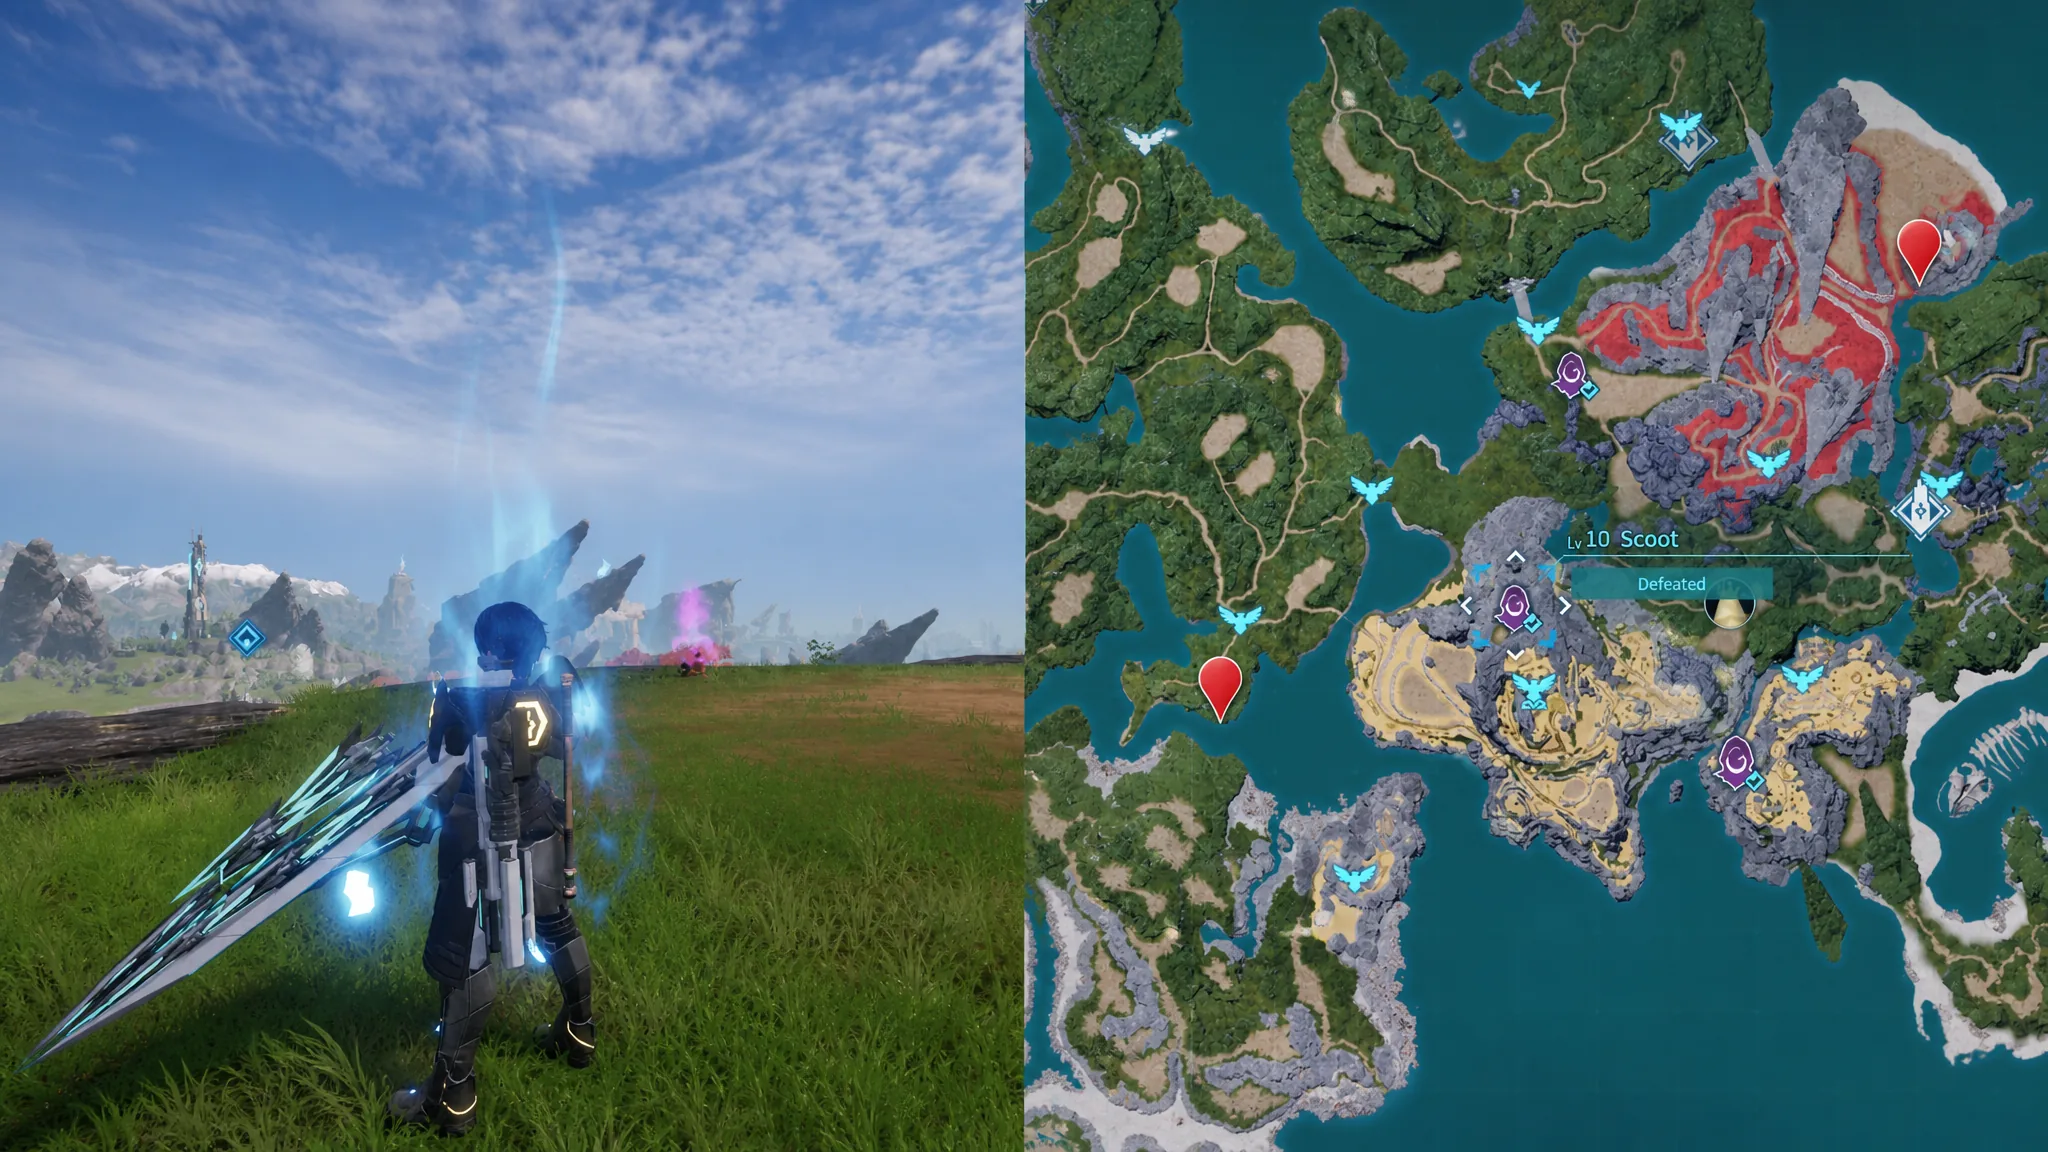
How Bounties work and what they drop
Bounties behave much like Alpha Bosses, except the targets are human instead of Pals. They carry a large health pool and hit hard, but they scale to normal NPC size and can be captured rather than killed. Intel Dealers hint at where some of them hide, though every target sits at a fixed spot you can reach on your own.
Once a target falls or is captured, it drops Successful Bounty Tokens. Take those to a PIDF Bounty Officer, usually found in settlements, to exchange them. One of the earliest and easiest to reach sits at the Small Settlement, and the shop stock is identical no matter which officer you visit.
| Reward | Token cost |
|---|---|
| Gold Coin x2000 | 1 |
| Advanced Technical Manual | 5 |
| Cosmetic caps (Croajiro, Herbil, Turtacle) | 5 each |
| Pal Reverser | 7 |
| Kinship Peach, Implants | 15 each |
| Life Fruit, Power Fruit, Stout Fruit, Ripe Starfruit | 25 each |
Note: Pal Bounty Tokens are a separate thing. Those come from Alpha Bosses, are key items, and cannot be exchanged or sold. This page covers the human targets that give Successful Bounty Tokens.
Starting island and coastal bounties (Level 10–16)
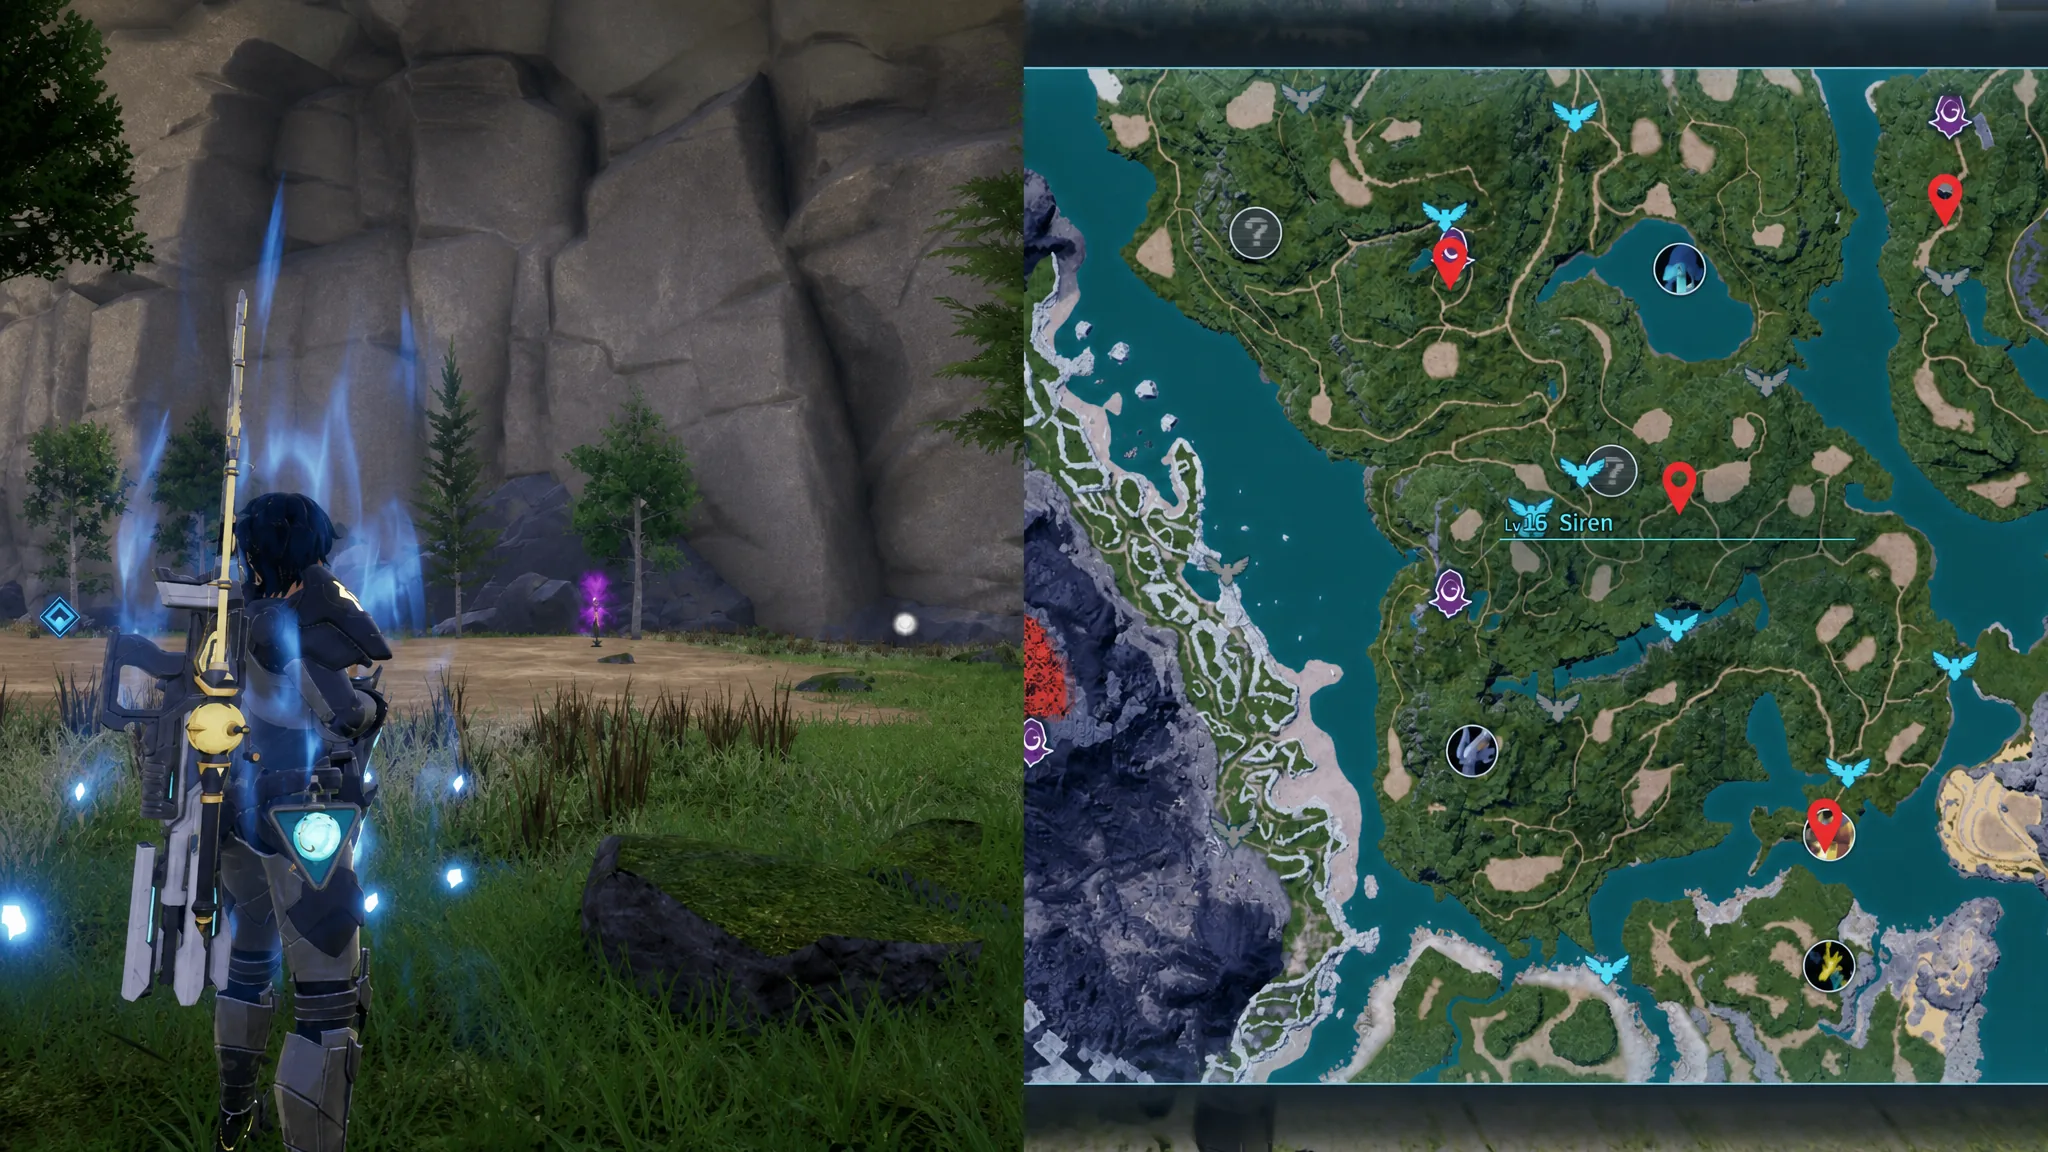
The lowest-level targets sit around the Windswept Islands, Moonless Shore, and Sea Breeze Archipelago. These are ideal for early farming since their damage stays manageable and their coordinates are close to your first fast travel points.
| Bounty | Level | Location | Coords |
|---|---|---|---|
| Scoot (Dine-and-Dasher) | 10 | Open area under the mountain, Windswept Island | -20, -461 |
| Hawk (Amateur Hunter) | 12 | Bridge toward Windswept Watchtower | 52, -513 |
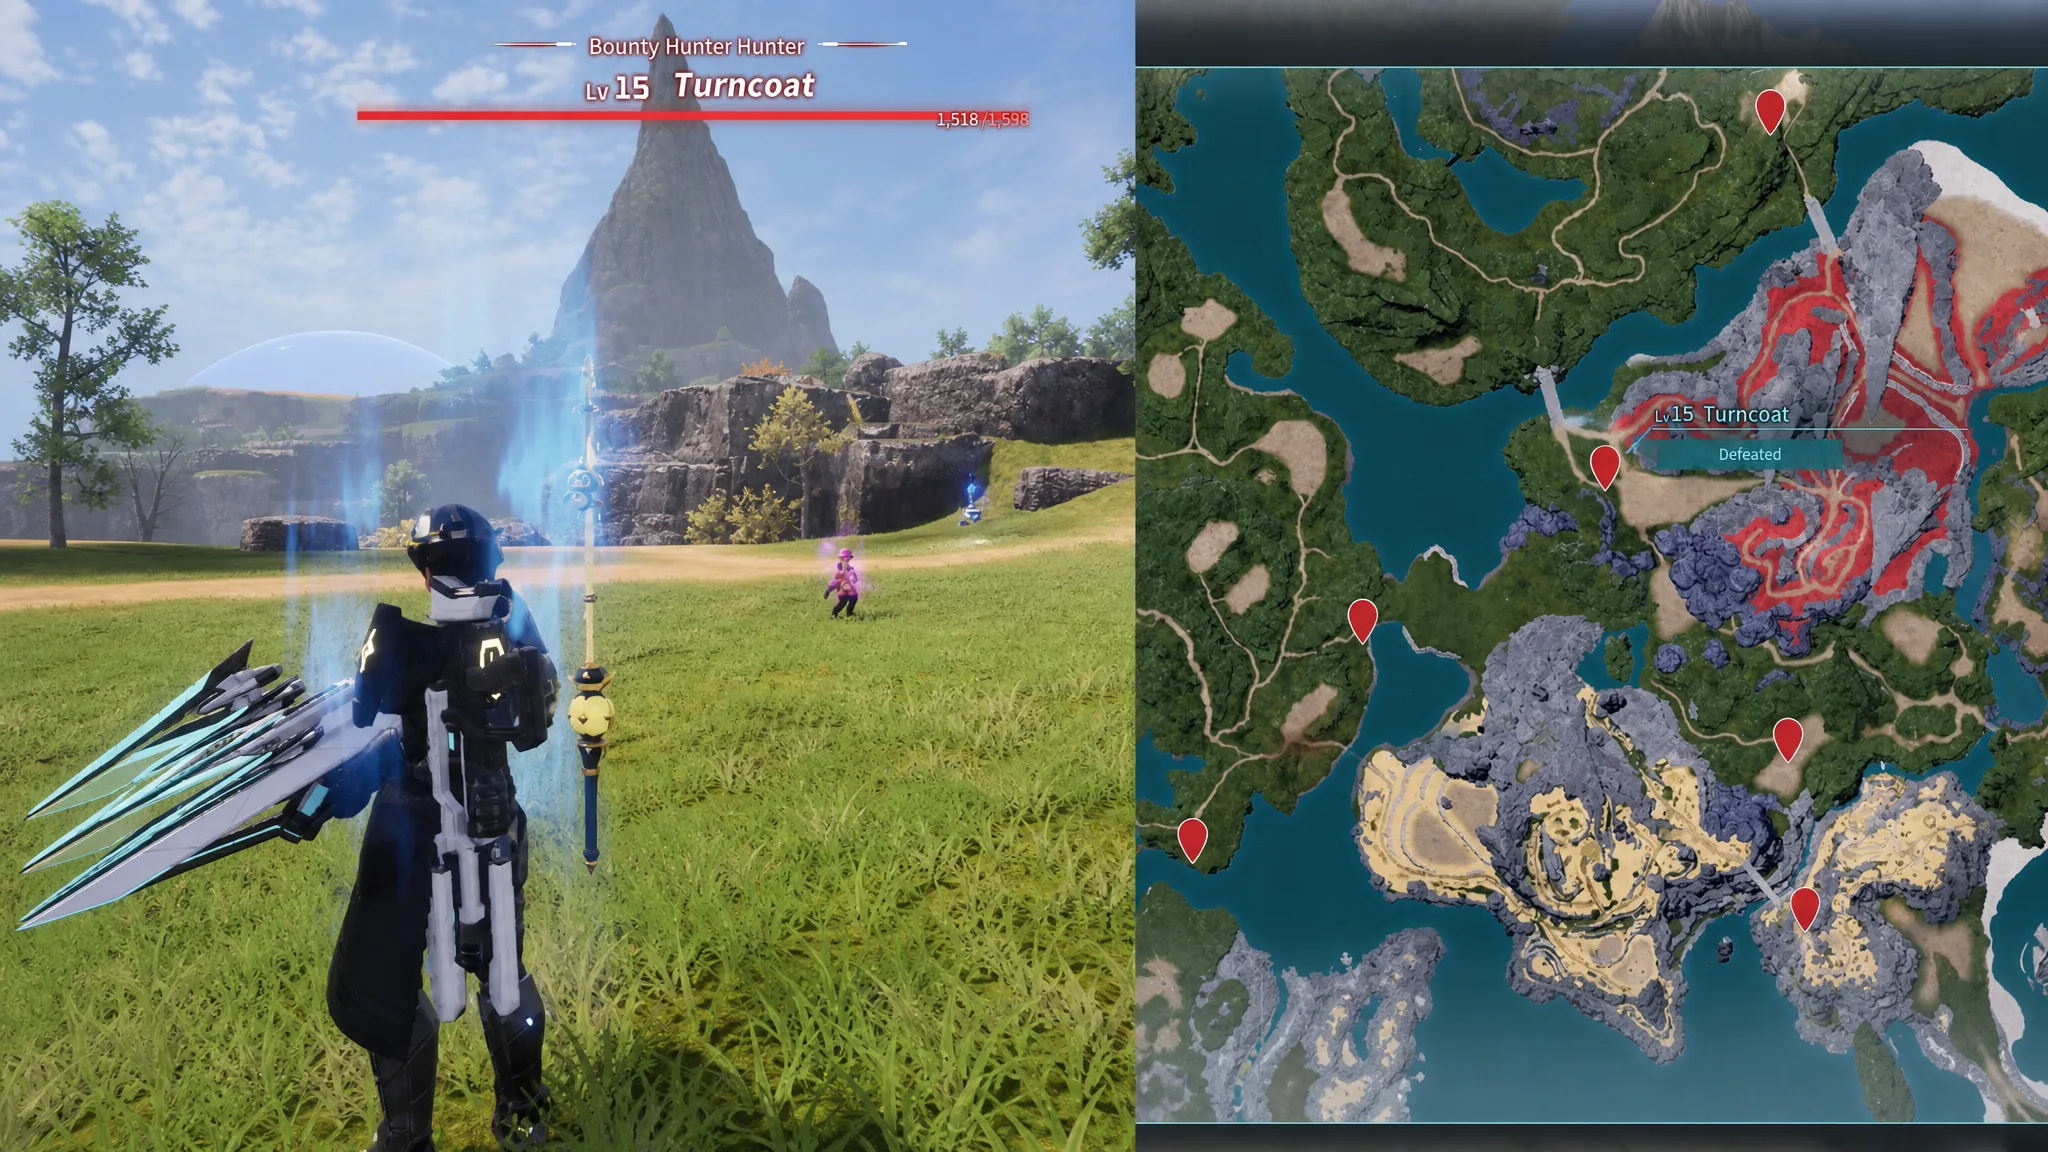
| Turncoat (Bounty Hunter) | 15 | Bridge of the Twin Knights toward Moonless Shore | -2, -386 |
| Crash (Insurance Fraudster) | 15 | Clearing by the coast, Sea Breeze Archipelago | -290, -622 |
| Siren (Serial Cheater) | 16 | Cave on a mountain southwest of Bamboo Forest Watchtower, facing Mount Obsidian | -266, -394 |
Bamboo groves and Crescent Moon bounties (Level 19–30)
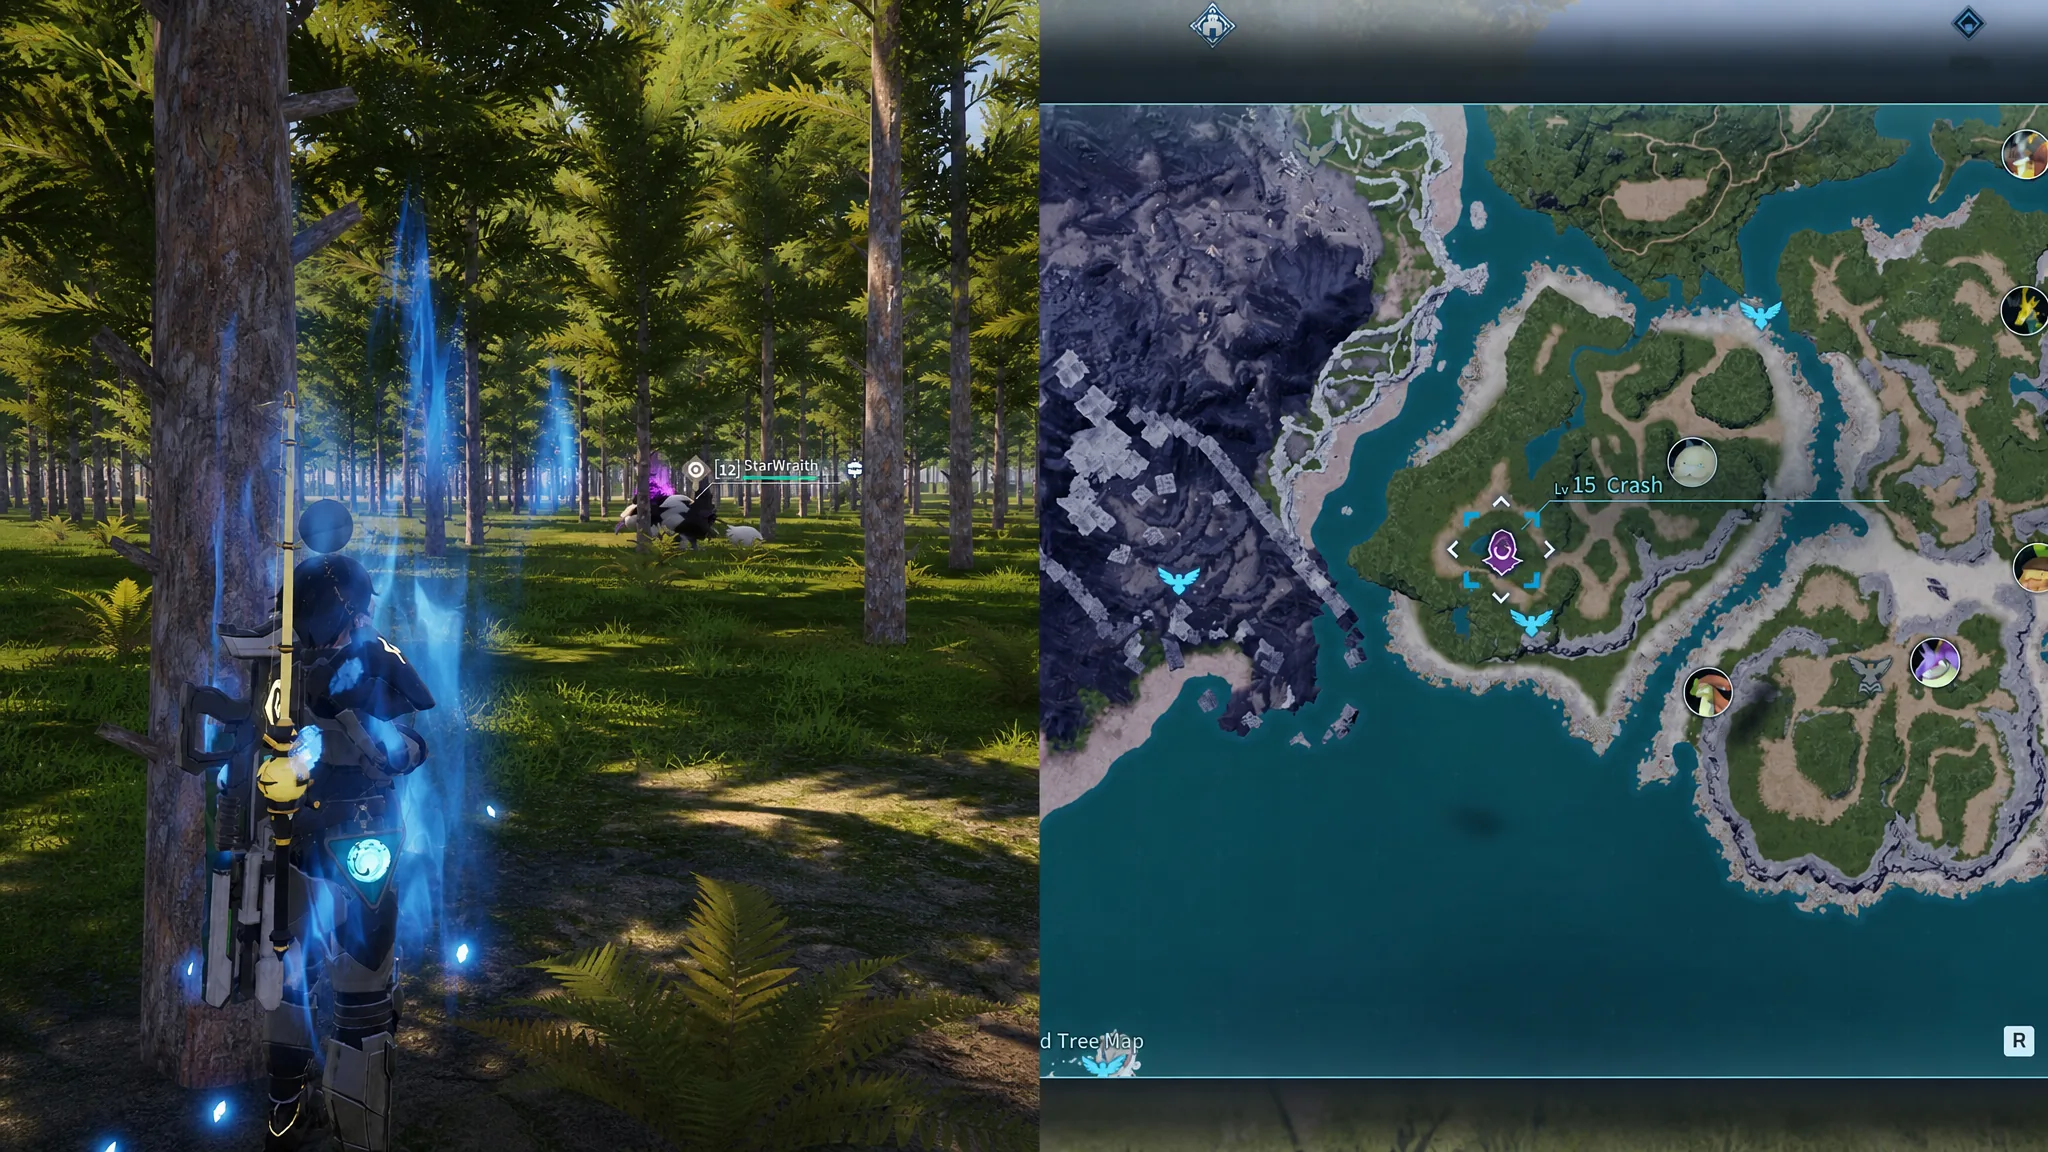
Heading inland, this cluster runs through the Bamboo Thicket, Crescent Moonshore, and the forested paths toward Marsh Island. Several of these targets bring backup, so clear the escorts before focusing the bounty.
| Bounty | Level | Location | Coords |
|---|---|---|---|
| Jade (Scam Artist) | 19 | North of Deep Bamboo Thicket Watchtower, with two Sturdy Mercenaries | -323, -117 |
| Grill (Intimidating Interviewer) | 20 | Near Whispherwind Hill fast travel, flanked by two Syndicate Hunters | -265, -258 |
| Lasso (Cattle Rustler) | 21 | South of Crescent Moonshore Watchtower, by an ancient structure | -67, -203 |
| Ego (Gloating Narcissist) | 23 | Base of the waterfall west of Mount Flopie Summit | -12, -88 |
| Dart (Prolific Smoker) | 23 | Under a mountain arch, Mossanda Inner Coast near Marsh Island | 261, -218 |
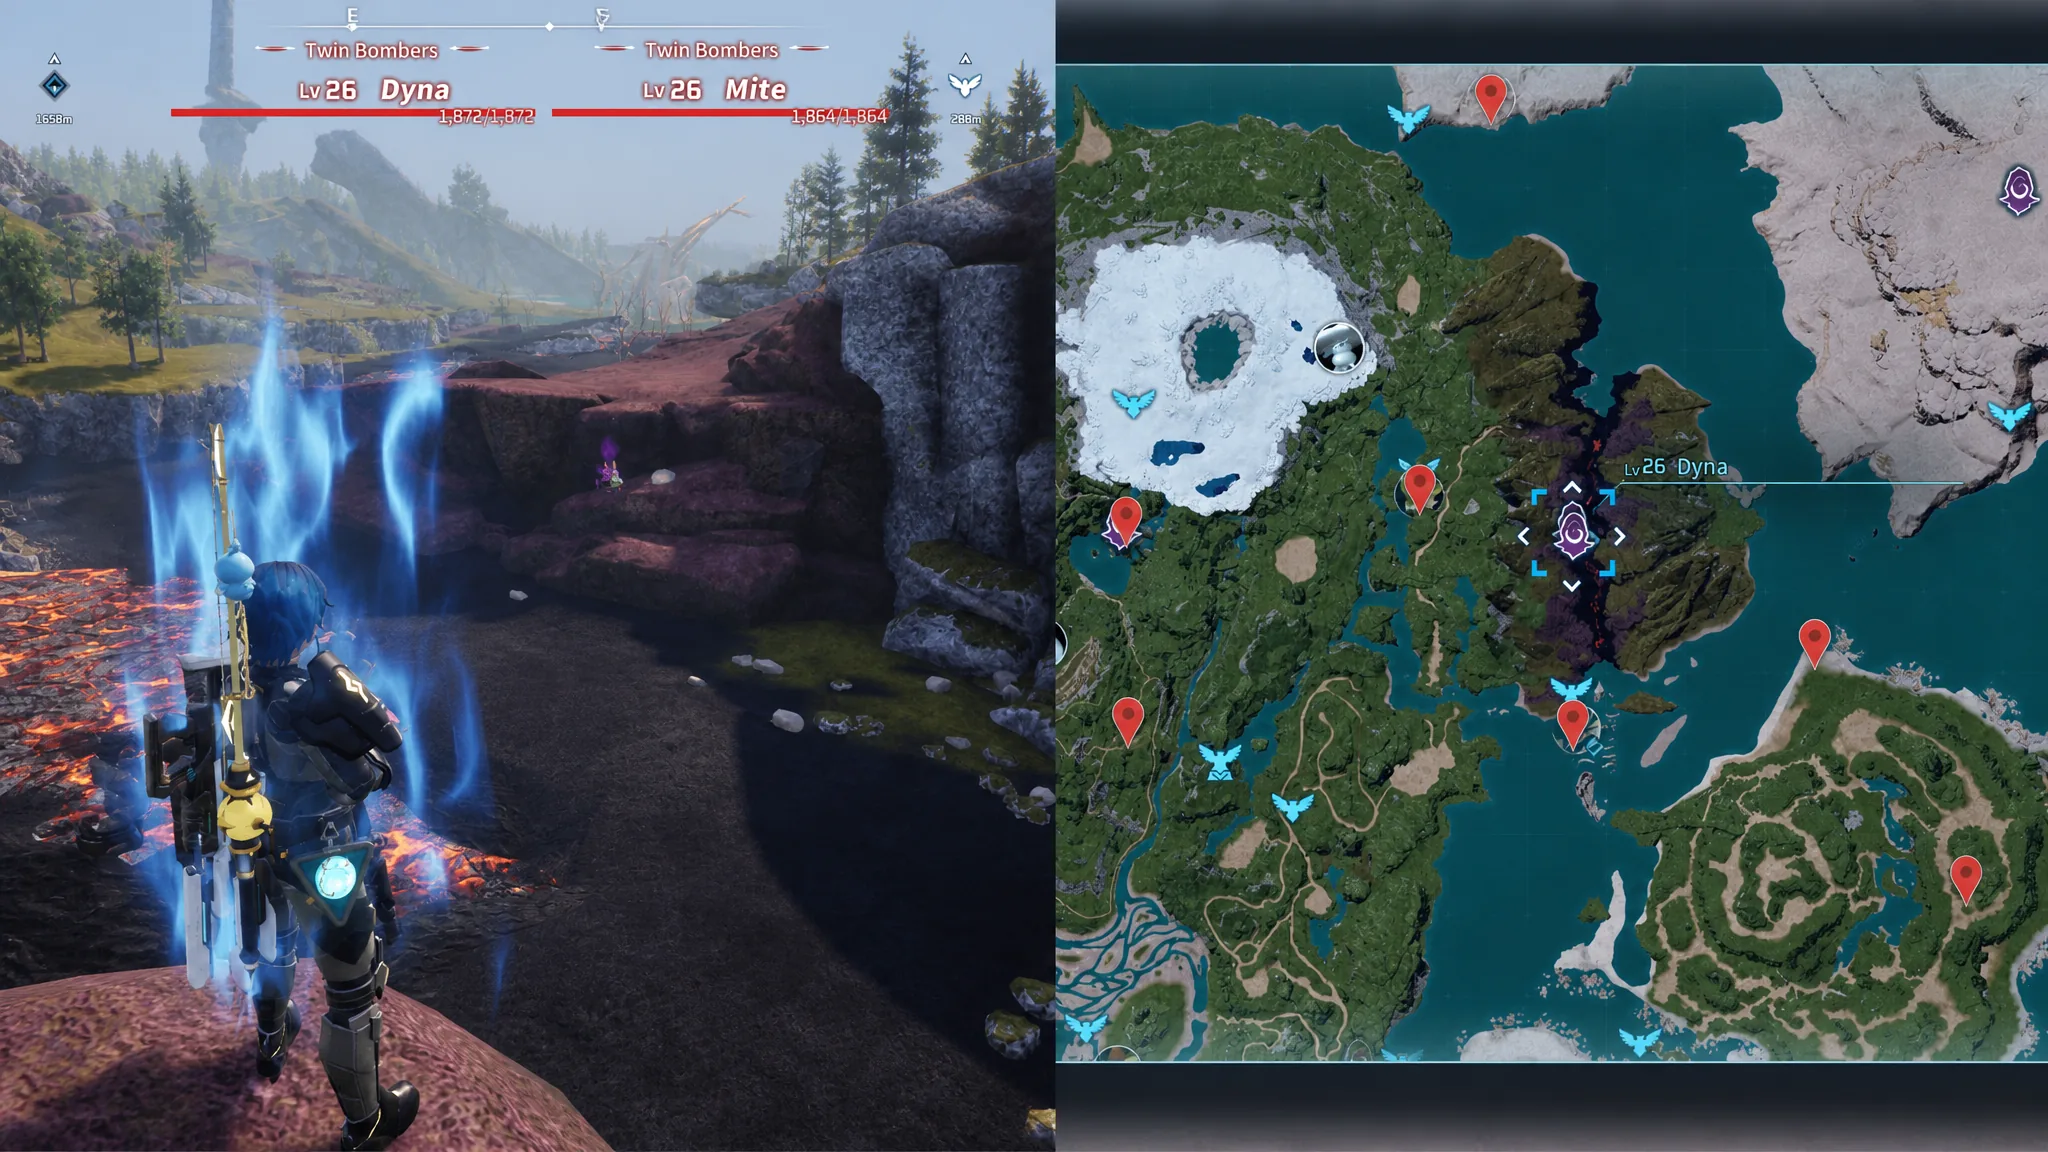
| Dyna and Mite (Twin Bombers) | 26 | Together near the lava river | 349, -6 |
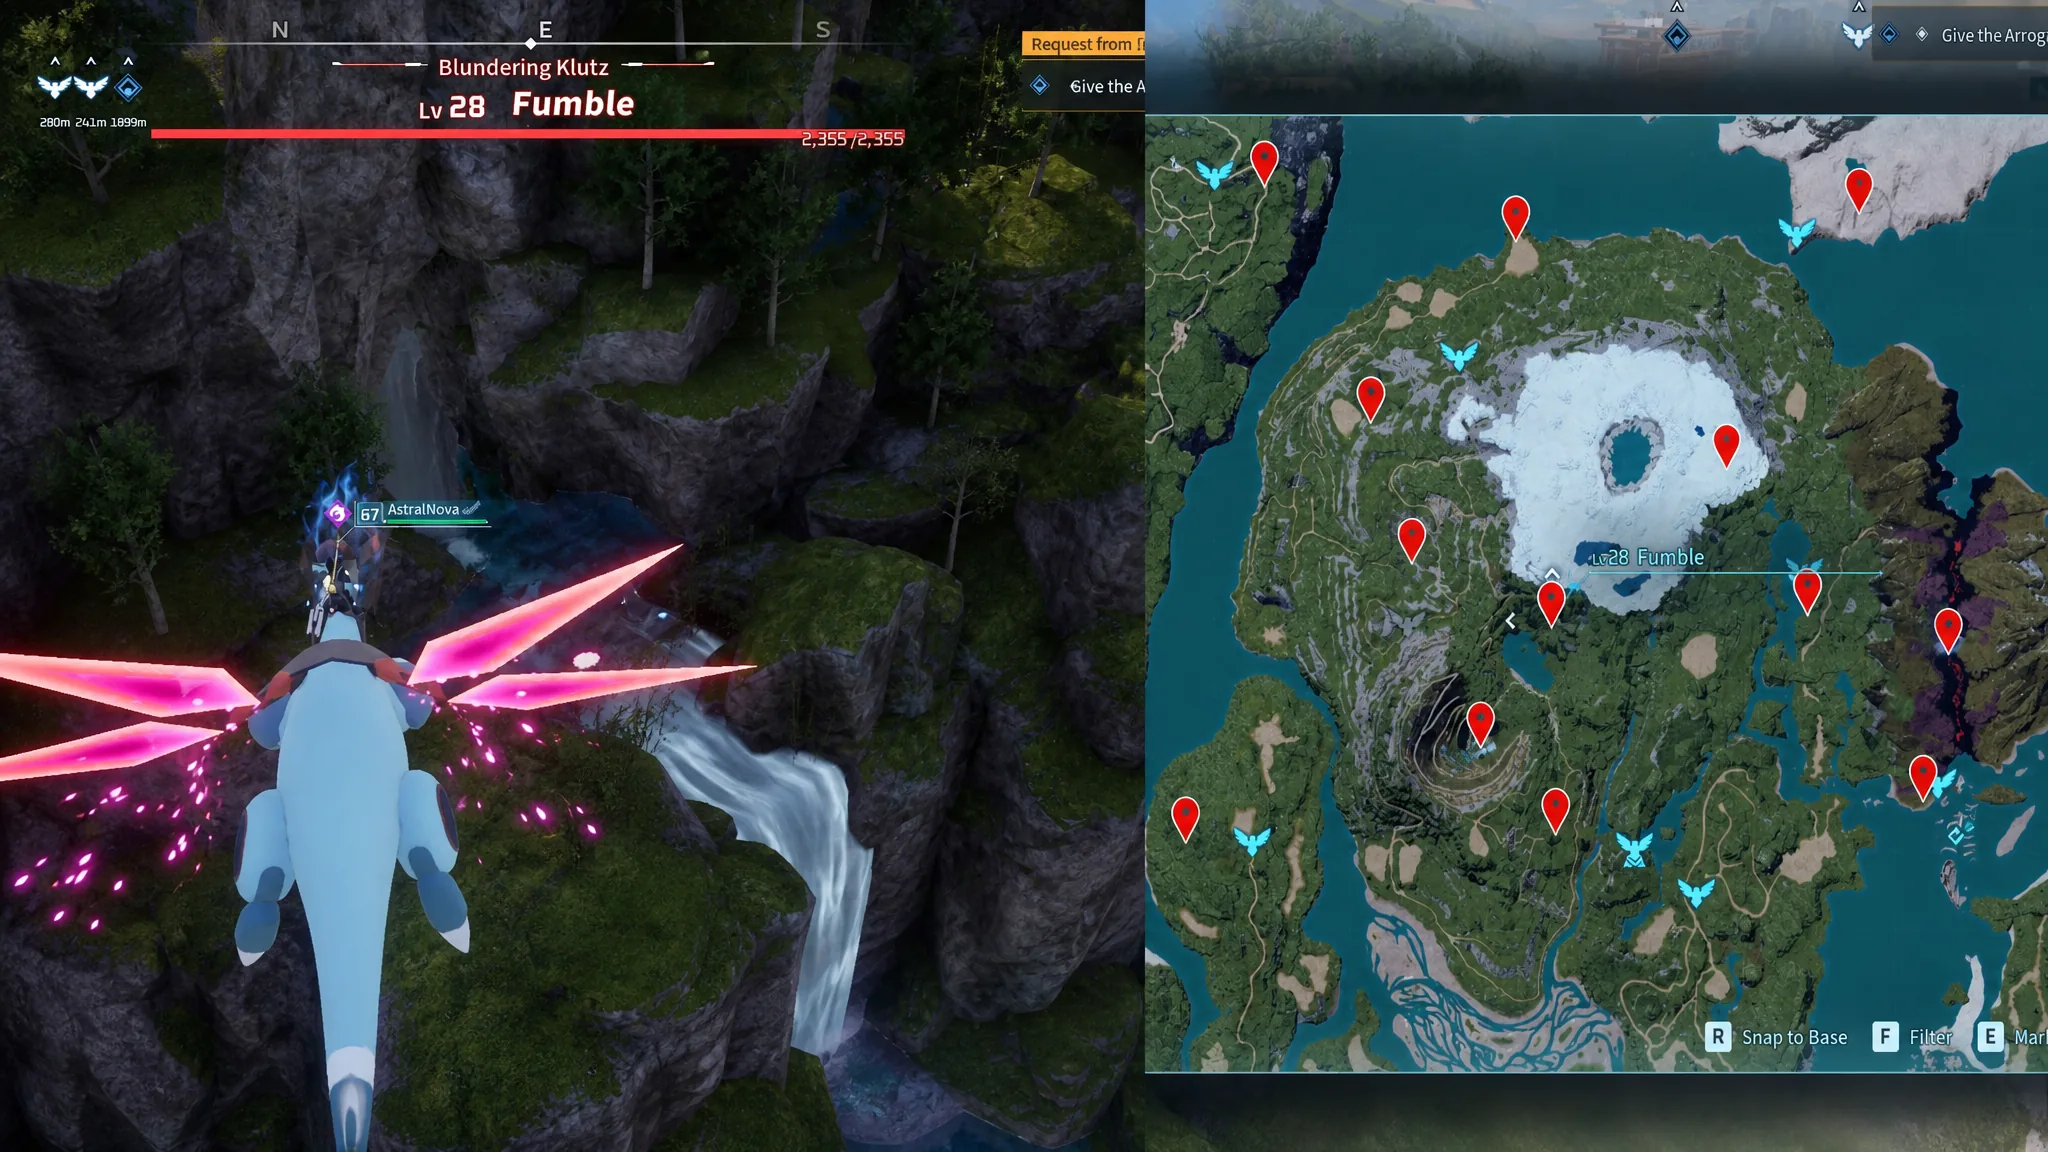
| Fumble (Blundering Klutz) | 28 | Origin of the waterfall, Frostbound Mountains | 162, -2 |
| Brick (Hostile Defender) | 30 | West of Verdant Stream fast travel | 76, 96 |
Desert and volcano bounties (Level 36–41)
The Dessicated Desert and Mount Obsidian raise the stakes with tougher gear and extreme temperatures. Pack heat protection for the volcano stretch and be ready for hidden spawns among the trees and ruins.
| Bounty | Level | Location | Coords |
|---|---|---|---|
| Phantom (Escape Artist) | 36 | Hiding among trees, Dessicated Desert | 533, 133 |
| Whisper (Chronic Spoiler) | 37 | Near the Oasis, Dessicated Desert | 413, 590 |
| Flare (Pyromaniac) | 38 | West along the shore from Fisherman’s Point, Mount Obsidian | -520, -755 |
| Aloha (Pineapple Pizza Enthusiast) | 39 | Guarding the Knocklem entrance, Ruined Fortress City | -592, -235 |
| Whip (Workplace Tyrant) | 40 | Desert west of Duneshelter | 320, 370 |
| Shadow (Black Magic Fanatic) | 41 | East of Mount Obsidian Midpoint, near an enemy outpost | -432, -453 |
Astral Mountains and Sakurajima bounties (Level 42–53)
The frozen Astral Mountains and the Japanese-themed Sakurajima hold the upper mid-tier targets. Expect gunfire and Pal support from these fighters, and use the wild Pals nearby as extra muscle when you can.
| Bounty | Level | Location | Coords |
|---|---|---|---|
| Skim (Serial Embezzler) | 42 | Middle of Abandoned Ruins, green area of Astral Mountains | -91, 145 |
| Quill (Well-Meaning Quack) | 43 | Icy mountains of Abandoned Ruins; uses a Sibelyx and handgun | -195, 481 |
| Whisk (Kidnapper) | 45 | Frozen lake north of Icy Weasel Hill Watchtower, with Pal Genetic Research Units | -9, 292 |
| Clint (Trigger-Happy Gunslinger) | 49 | Western edge of Astral Mountain | -362, 318 |
| Nimble (Dango Thief) | 52 | Heart-shaped lake, Mushroom Wetlands on Sakurajima | -524, 105 |
| Urchin (Street Assassin) | 53 | Southern entrance of Secluded Cemetery, past the Messenger of Love | -674, 230 |
Feybreak Island bounties (Level 56–59)
Feybreak, the late-game island southwest of Palpagos, hosts the strongest human targets. These fights involve miniguns, shotguns, and Pal companions, along with escorts like Feybreak Warriors, so bring end-game gear before chasing them.
| Bounty | Level | Location | Coords |
|---|---|---|---|
| Dazzle (Attention-Seeking Monster) | 56 | Withered tree in a small pond | -845, -1281 |
| Gnaw (Cannibal) | 57 | Inside Cannibal’s Tunnel near Withered Seaside, with two Feybreak Warriors | -740, -1003 |
| Billy (Horse Rustler) | 57 | Northwest edge, near a large lake; uses a Pyrin | -1080, -904 |
| Pinch (Serial Borrower) | 57 | Under the remains of a giant creature on Scorched Hill; uses a pistol | -1173, -1226 |
| Mimic (Counterfeiter) | 57 | Southern edge near a giant icy crystal; uses a shotgun | -1193, -1707 |
| Cache (Human Collector) | 58 | Near a shipwreck, with Feybreak Warriors | -1387, -1485 |
| Ram (Uninvited Guest) | 59 | West of Pinch; uses a minigun and Omascul | -1237, -1183 |
Because bounties respawn, you can loop the low-level coastal targets for quick tokens early on, then move up the difficulty ladder as your team grows. Confirm a clear by watching for the token drop in your loot, then head to any PIDF Bounty Officer in a settlement to cash in for fruit, implants, or gold.





