Idyll places you in a world of creatures to catch, but only a small portion will earn a spot on your active team. Early on, focus on covering the four core combat roles: damage, Break, healing, and support. Your starter already deals damage, so filling the gaps in your lineup is the quickest way to take down early bosses; adding another attacker can wait.
Quick answer: Catch Flutternym for healing, Celestis for ranged damage, Emberpup for fire damage plus fast travel, and Budclaw or Pomegg for Break. Add Nimbi or Chirpi for support, and your starter fills DPS.
Best early Aniimo by role
Aniimo progress through Lumin, Gamma, and Nova, and their starting forms are poor indicators of their eventual strength. Every creature can attain the same maximum stats at Nova, so one that begins with weaker numbers will need more materials, not a permanent benching. Catch several of each species to find the stats you want, and look out for exploration skills such as Hustle, Fly, and Swim along the way.
| Aniimo | Role | Element | Where to get it |
|---|---|---|---|
| Helion / Lunara | DPS | Light | Starter choice |
 Celestis Celestis | DPS | Dark | Wild catches near the Alpha, Forest of Falling Stars |
 Emberpup Emberpup | DPS | Fire / Rock | Nimbus Fields |
 Flutternym Flutternym | Heal | Wind | Nimbus Fields (levels 5–15) |
 Skippy Skippy | Heal | Water | Nimbus Fields waters |
 Budclaw Budclaw | Break | Earth / Grass | Early regions |
 Pomegg Pomegg | Break | — | Early regions |
 Nimbi Nimbi | Support | Wind / Electric | Early regions |
 Chirpi Chirpi | Support | Wind / Grass | Early regions |
Damage: your starter plus two catches
Helion or Lunara, the starter you already own
Helion and Lunara are both Light-element DPS with the same 504 total base stats and the same Hustle exploration skill, so choosing between them is a playstyle call, not a power one. Lunara fights at range, stacks Fox Mark to cut a target’s Light resistance by 5% per stack up to three stacks for 10 seconds, and heals herself through her attack loop. Helion is the melee option, pulling enemies together and stacking 6% Light damage amplification per Holy Roar hit.

Light Bombardment is Helion’s main burst move. The attack has 62 power, costs 20 EP, and has a 1-second cooldown; while Solar Halo is active, it hits 30% harder and restores 4% HP when it connects. You receive just one starter, and no confirmed method exists for getting the one you choose not to take.
Celestis into Stellarys, the biggest early damage jump
With 412 total base stats and 106 physical attack, Celestis is a Dark DPS whose attack is already strong for this stage. It is also useful for getting around: it can climb walls and glide after taking off. Put it in your exploration slot to scale walls without using a combat slot. You can find wild Celestis along the route to the Alpha encounter in the Forest of Falling Stars.
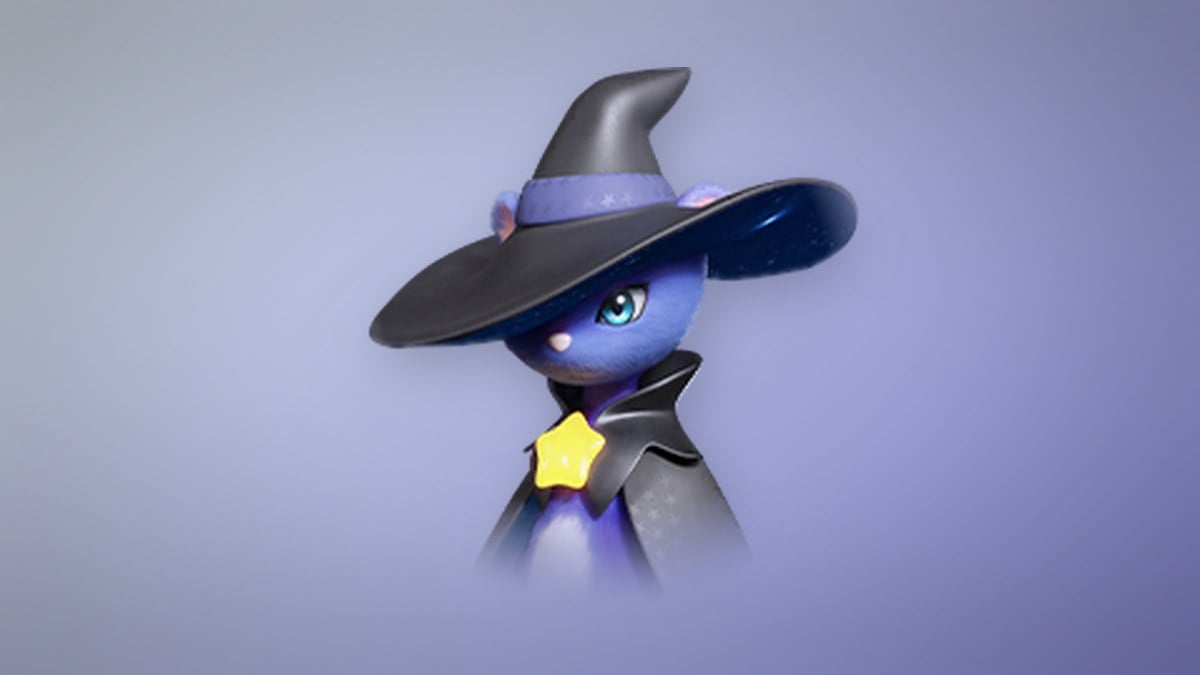
The payoff is Stellarys, a Dark/Water DPS with 485 total base stats, 125 physical attack, and Fly Level 1. Its Grand Sorcerer trait adds bonus basic-attack damage for five seconds after any skill, and Shooting Stars costs 20 EP to fire five homing stars, each hit granting a 1% damage boost that stacks up to 20 times. The Comet closes fights as its ultimate. The most reliable way to get one is the Alpha boss in the Forest of Falling Stars: beat it, then capture it with an Ultra Aniipod for a guaranteed catch. Evolving a few caught Celestis works as a fallback.
Emberpup, fire damage and the fastest early travel
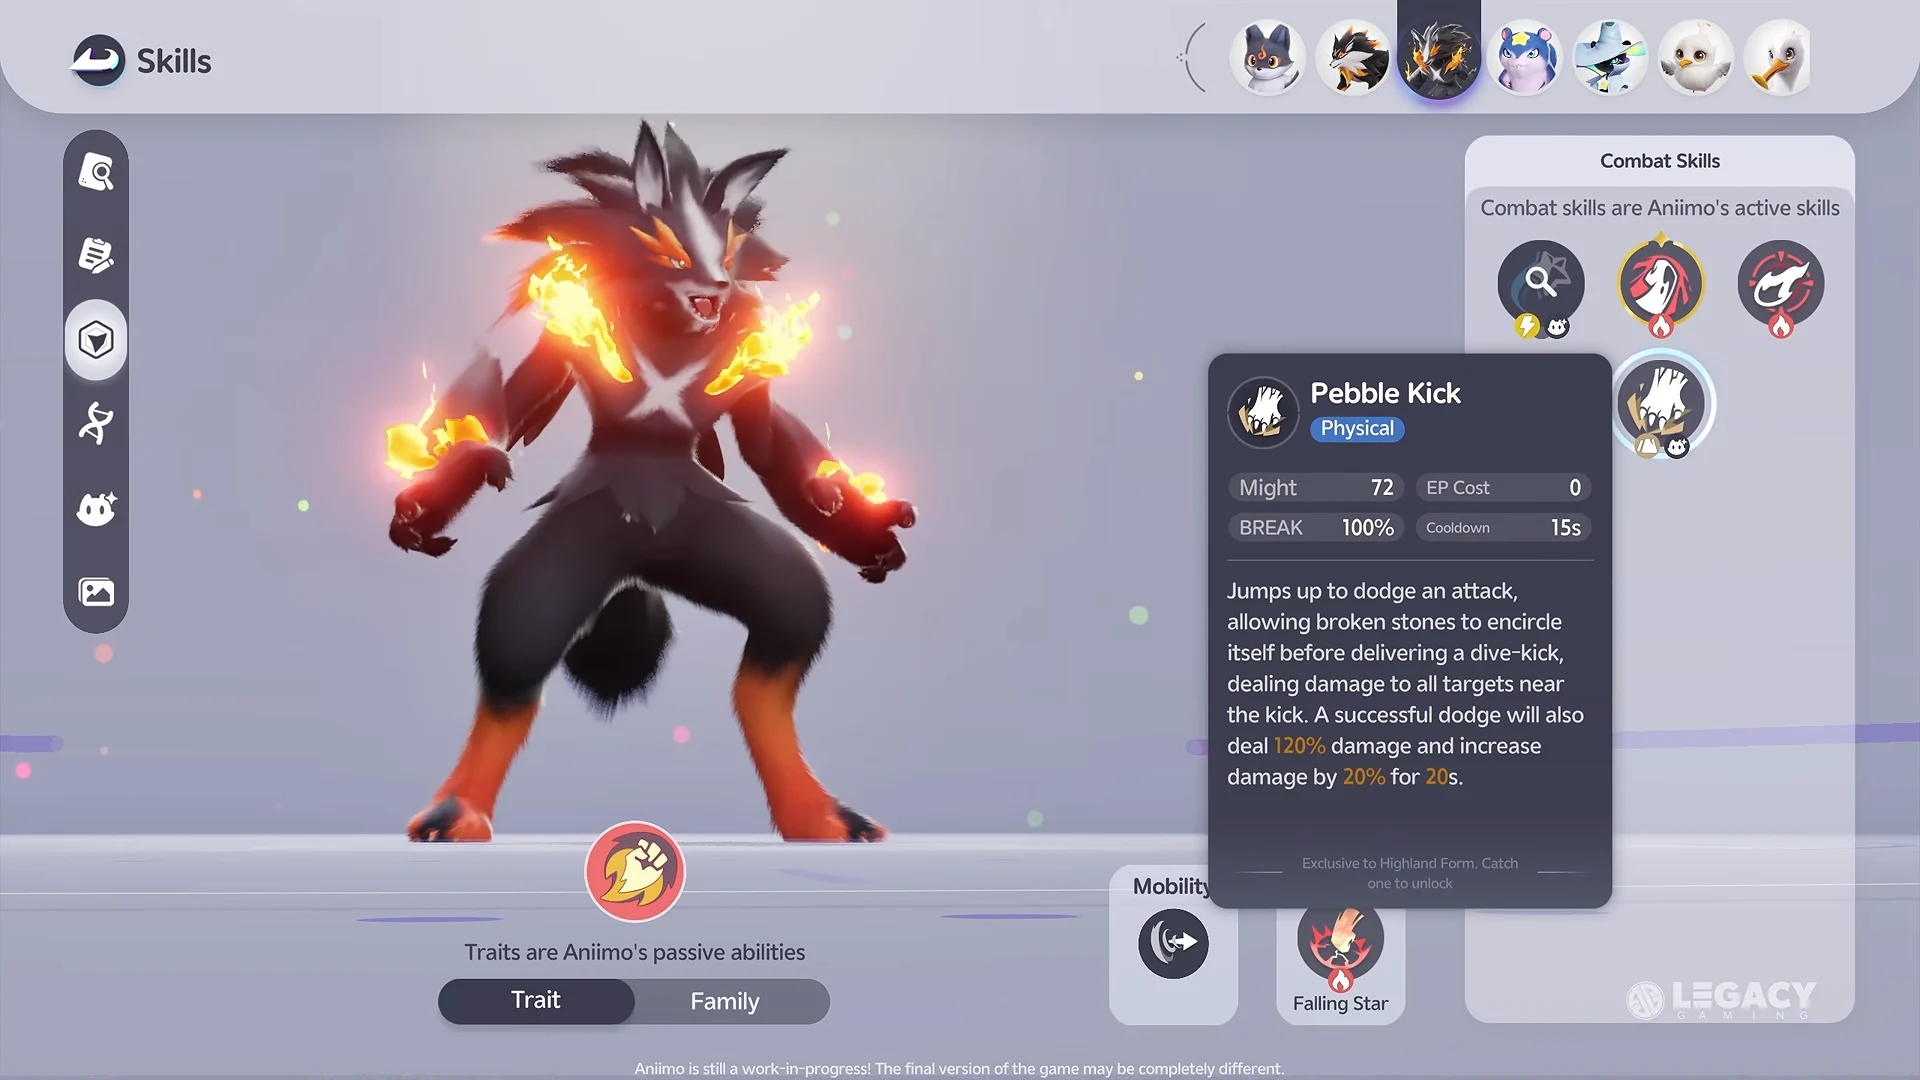
With 371 total base stats and 86 physical attack, Emberpup is a Fire/Rock DPS. Scorching Flames lets it deal 15% extra damage to elements it has an advantage against. Learn to time Fire Kick: it dodges an incoming hit, counters for 120% damage, and boosts its damage by 20% for 20 seconds. Fire Bolt gives you a ranged poke and inflicts a fire debuff. Emberpup can be farmed in Nimbus Fields from the start, so catch several to find one with good stats.
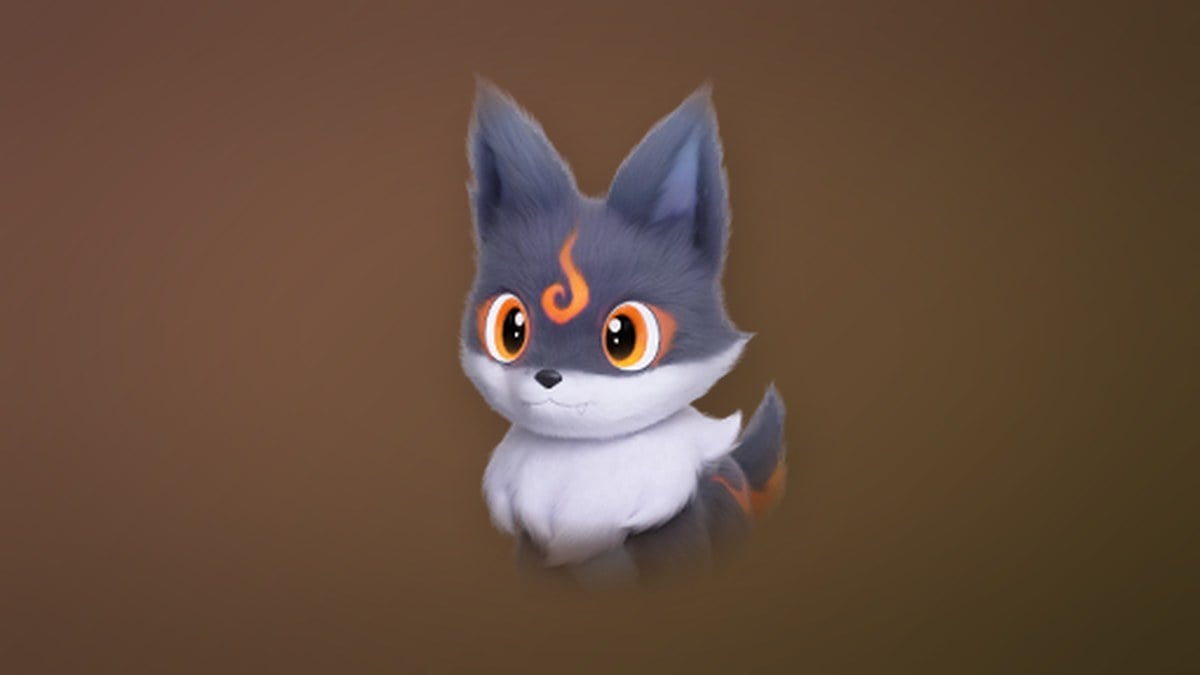
Hustle is the line’s main draw for travel, letting you cover the map quickly, while fire helps solve puzzles. Burn wood and bushes or melt ice blocks to access many chests and eggs; later forms can also launch fireballs at obstacles from afar.
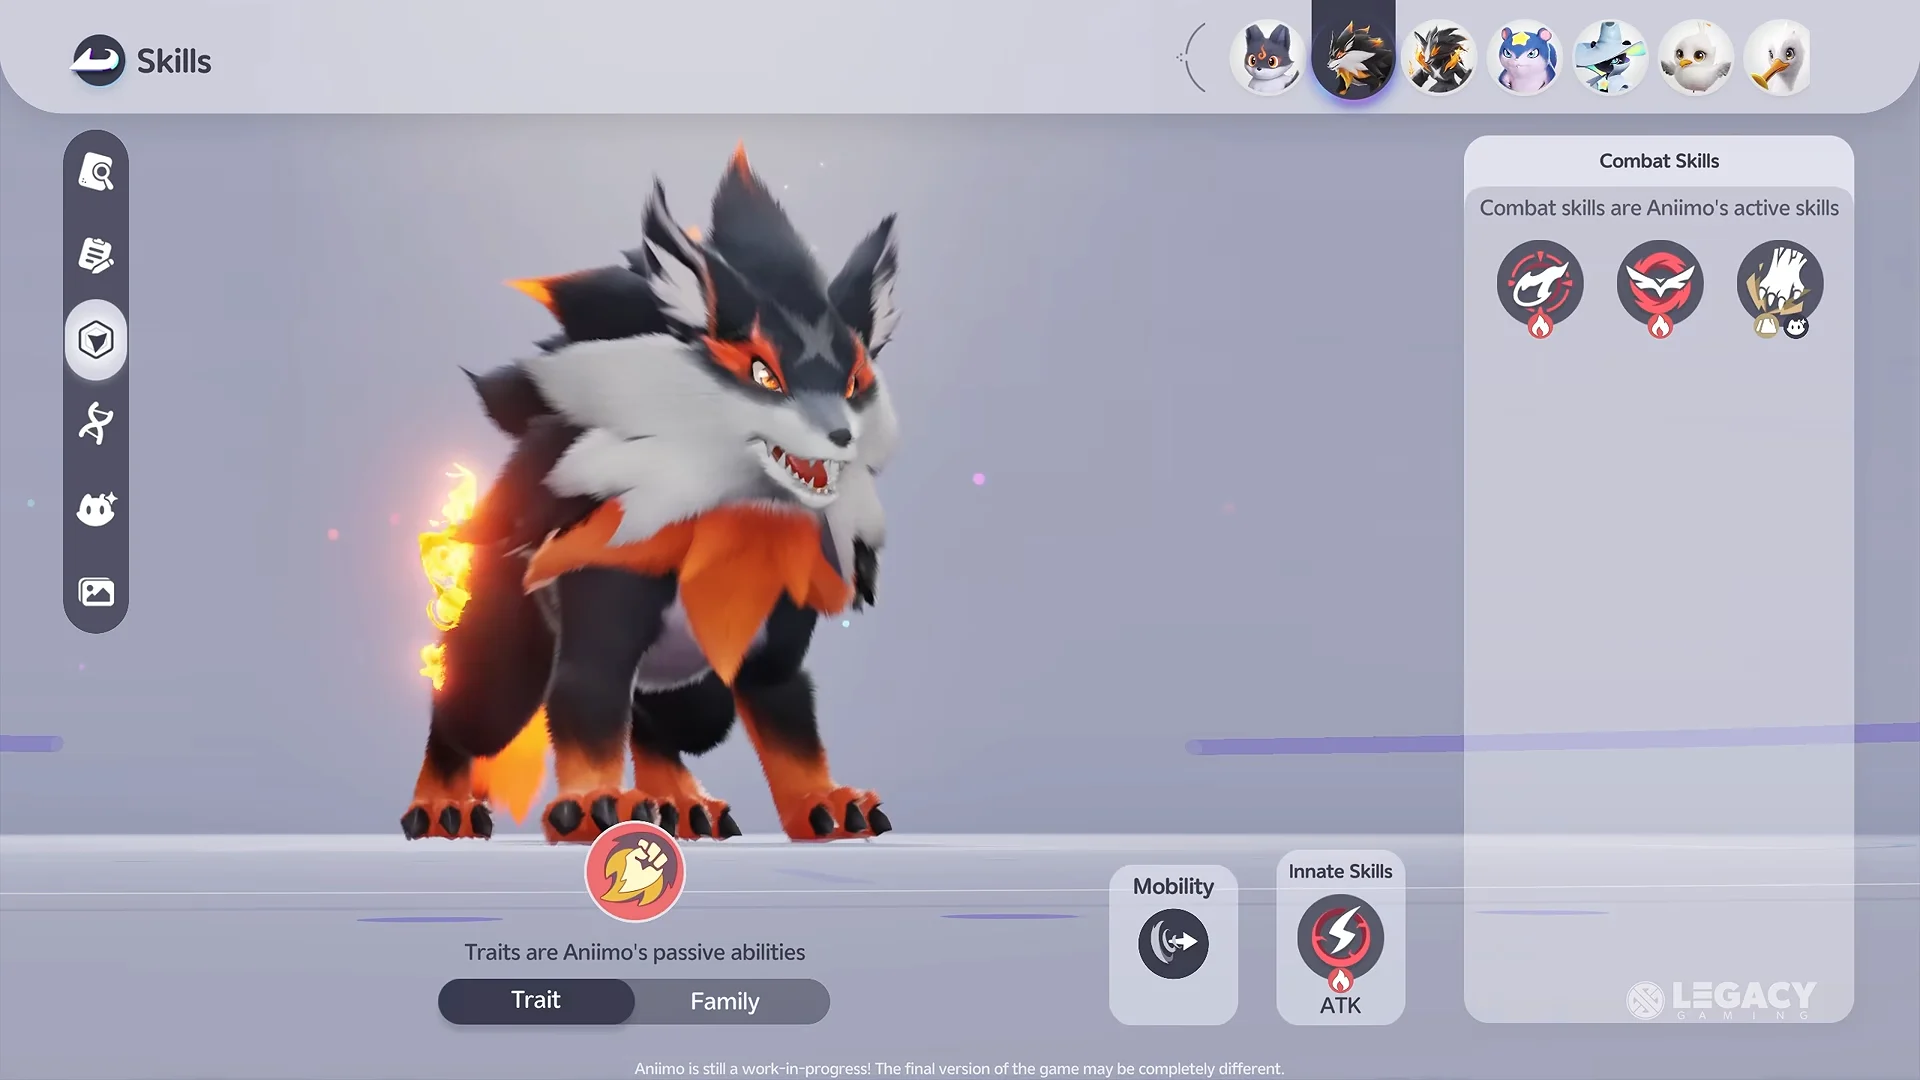
Emberpup becomes Flameruff, which then splits. Scorchhowl is the Fire DPS route at 495 total base stats and 115 attack, with Burn Breaker and the Falling Star ultimate, and it lives on Beast Fang Ridge at levels 30 to 35. Inferlupa is the Break route instead, at 551 total base stats with 113 Break, making it a boss opener rather than a carry. Regional variants add cross-element coverage: the Highland form learns Pebble Kick, and other variants gain Lightning Kick, which deals damage and Paralysis on a successful dodge.
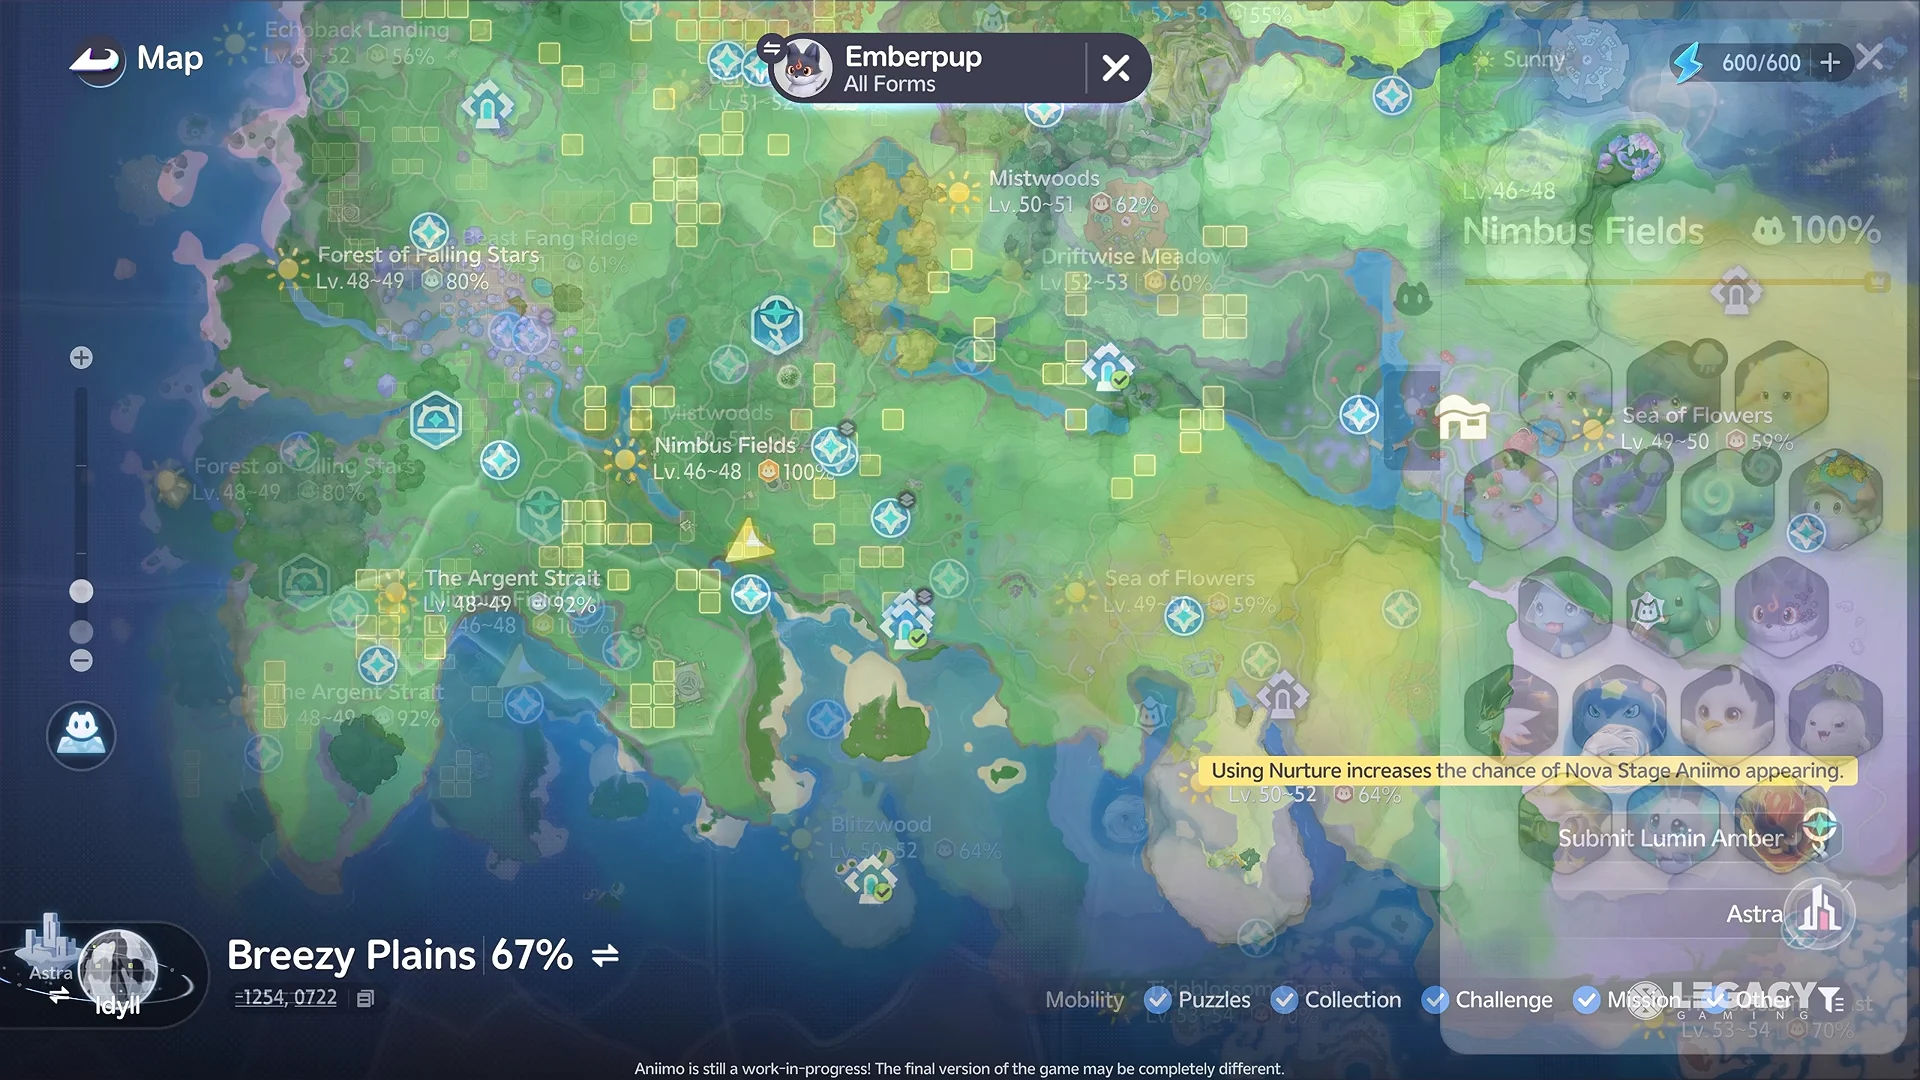
Emberpup shows up in Nimbus Fields early, then in the higher-level Beast Fang Ridge to the north and Blitzwood to the south.
Healers: Flutternym now, Glacy later
Flutternym, the easiest healer to get
Flutternym is a Wind-element Heal Aniimo at 437 total base stats, with 94 HP, 81 attack, 68 defense, 85 EP regen, and 68 magic defense. It appears in Nimbus Fields at levels 5 to 15, one of the first useful catches you can make, and later at higher levels in The Mistwoods, Blitzwood, and the Sea of Flowers.

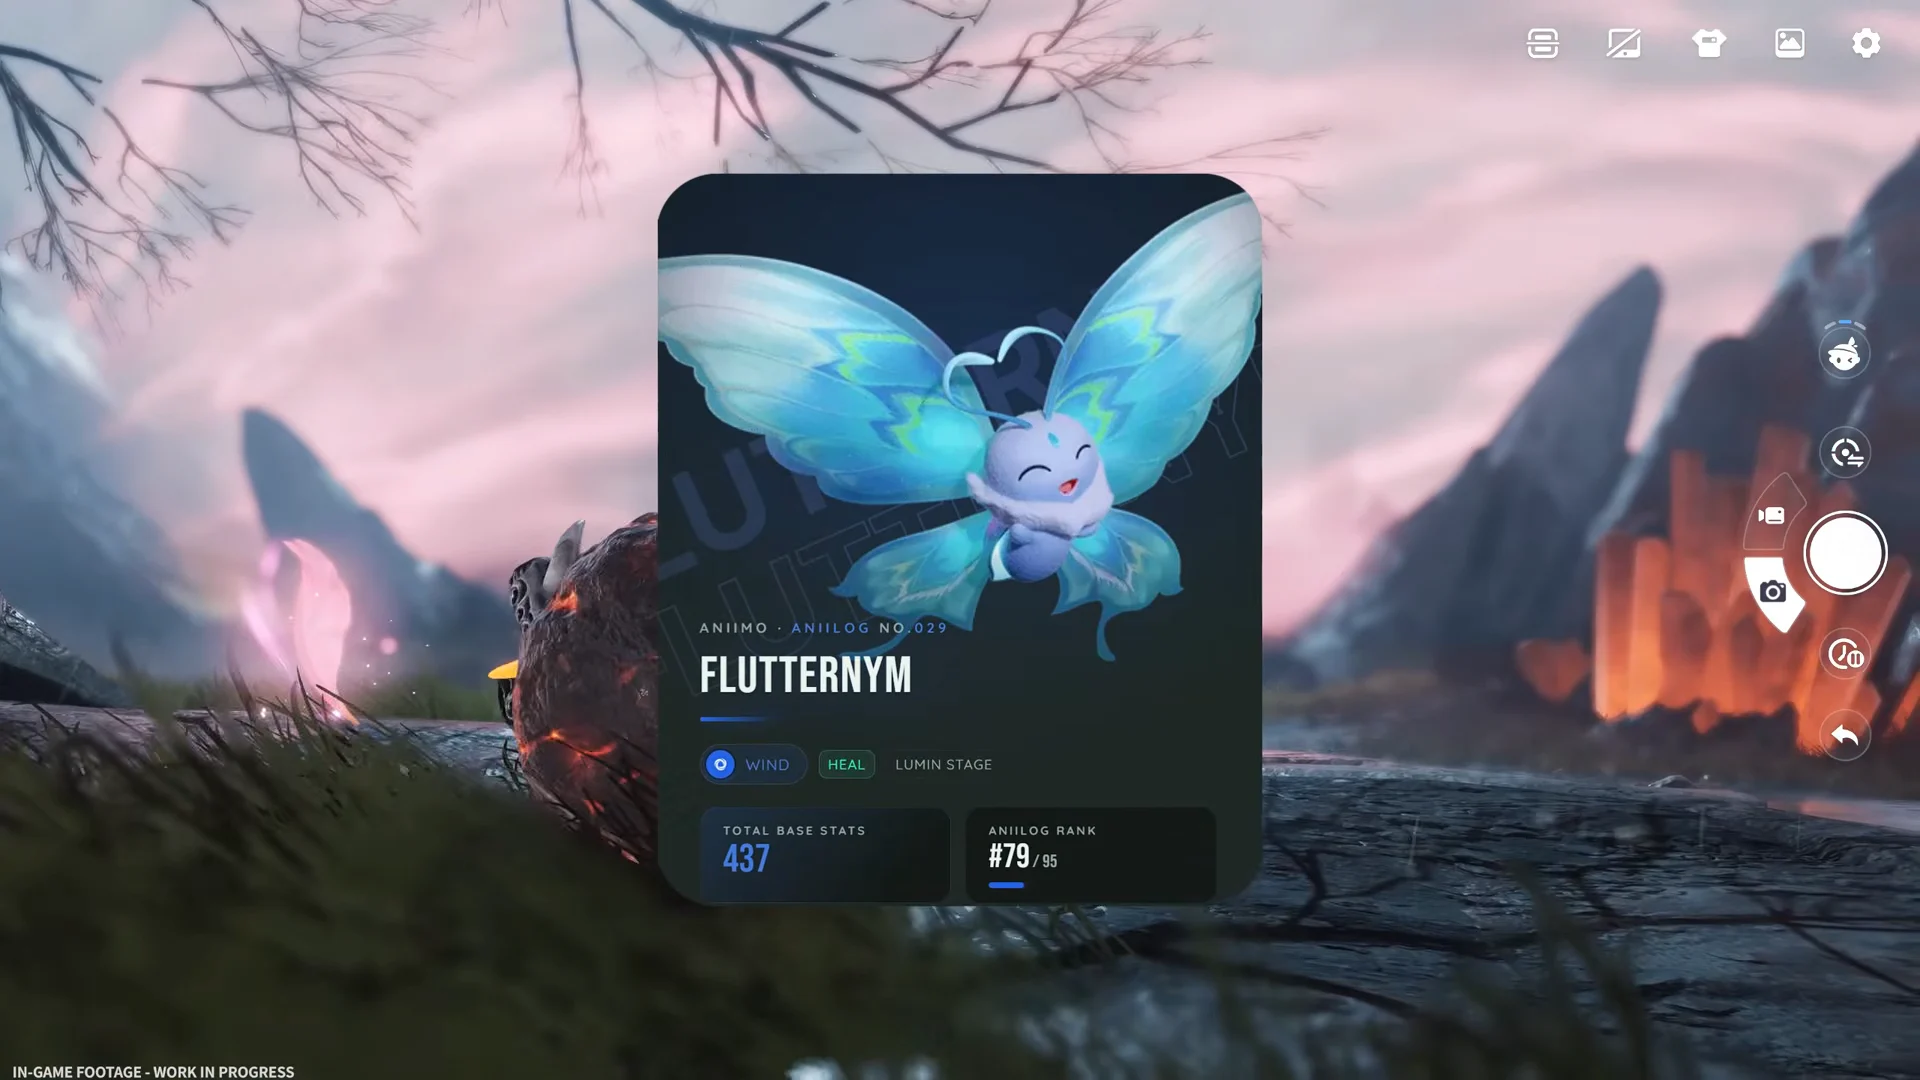
Most of its value is passive. Its Flutter Heal trait raises its healing by 20% while active, and when benched it follows you as a phantom that heals whenever the active creature uses a skill, so you never stop attacking to benefit. When you do press buttons, Healing Dance drops a healing zone, and Purifying Dance strips every debuff from surrounding teammates for 20 EP on a 15-second cooldown, then raises their EP recovery rate by 20% for 10 seconds. It evolves into Gracewing at Aniimo level 21 with one Gust Stone, keeping the same passive healing on a broader support kit.
Skippy to Glacy, the heal line worth spending stones on
Skippy’s 332 total base stats are modest, but its evolution line makes it worth catching. Healing Water restores 8% of Skippy’s max HP to all allies and heals Skippy for 10% over five seconds. Water Spirit reduces skill EP costs by 10% while Skippy is in water, and Swim Level 1 grants the water traversal skill you’ll need.

Skippy evolves into Pranky at level 12, and Pranky becomes Glacy at level 20 with 3 Wave Stones. Glacy is a Water/Ice healer with 118 HP and 110 magic defense, and its Spring of Life ultimate costs no EP on an 8-second cooldown, creating a fixed water zone that heals allies inside it for 36% of Glacy’s max HP over six seconds. Glimmer Shot adds a damage buff, so it is not a pure sustain slot. The alternate branch, Leafy, leans into Regen with summons and a team heal.
Break: the role new players skip
A grey Break gauge sits beneath each enemy’s health bar. Empty it to create an opening for your damage dealer and make the enemy easier to capture. Without a Break specialist, boss battles become drawn-out contests of draining health.
Budclaw and Pomegg
With 454 total base stats, Budclaw is an Earth/Grass Break Aniimo that has 93 physical defense and 84 Break. Stealth builds up to six momentum stacks, granting 30% more Break efficiency for 15 seconds; Tunnel drains stamina but makes it immune to ranged attacks. One evolution is Shrubclaw, with 535 total base stats, 99 Break, and 109 physical defense. The other is Geoclaw, which builds an ice effect until enough stacks land to snap the Break gauge. Budclaw is also useful for mining around the Homeland.

Pomegg is the other strong early breaker, with a very high base BREAK stat and a decent HP pool, which makes it a clean Break opener before you swap to a carry.
Helmut, for later Dark teams
You can find Helmut in the Russet Islands, an area intended for around level 40, though careful players can reach it sooner. Pawney uses a grapple that attaches to walls, trees, or enemies. Grappling an enemy pulls it close and leaves it controlled, giving Shadow Cut a chance to tear through its Break gauge. The other branch is Rookey, acquired with 3 Night Stones. Its Immovable Bastion passive makes it an opener for Dark-focused teams.

Support: Nimbi and Chirpi
Nimbi into Turbo, the standard buff opener
Nimbi is a Wind/Electric Support at 442 total base stats with 93 EP regen, plus Fly Level 1 and Puff Up for exploration. Its Shrouded in Mist trait triggers after six basic attacks and empowers the next skill, whether that is Cloud Orb, Thunder Bolt, or Cloud Shield. The shield absorbs damage equal to 15% of Nimbi’s max HP and cuts stamina use by 15%.

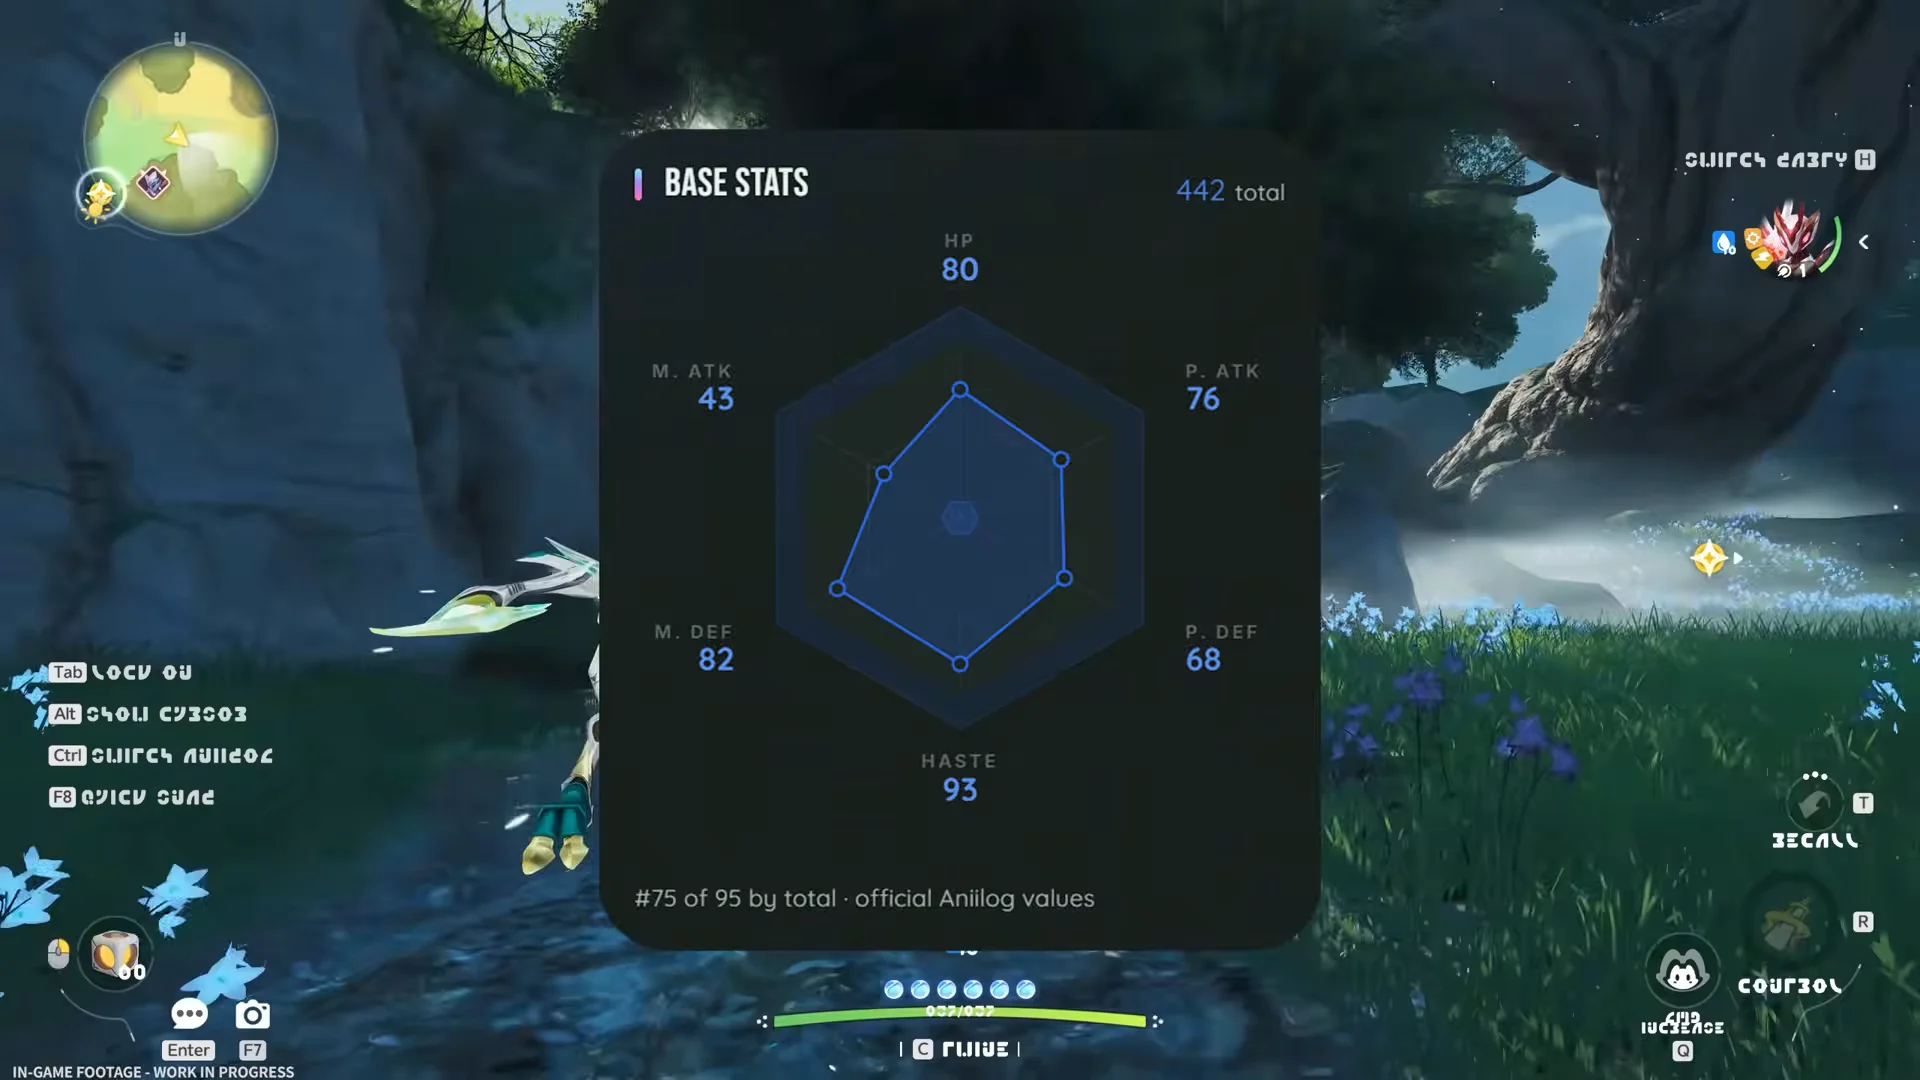
At level 21, use 3 Gust Stones to evolve it into Turbo, which has 520 stats and buffs damage. Start with its Nimbi Burst, then switch to your carry. Dreaple is the Dark-element alternative.
Chirpi, the flexible support
Chirpi is the more flexible catch at 443 total base stats, 96 HP, 93 EP regen, and Fly Level 2. Its Band Member trait restores 12.5 EP to the next Chirpi-family member you switch in, Leaf Tornado groups enemies for AoE, and March hands out a movement buff while healing 0.8% max HP per second for 20 seconds.

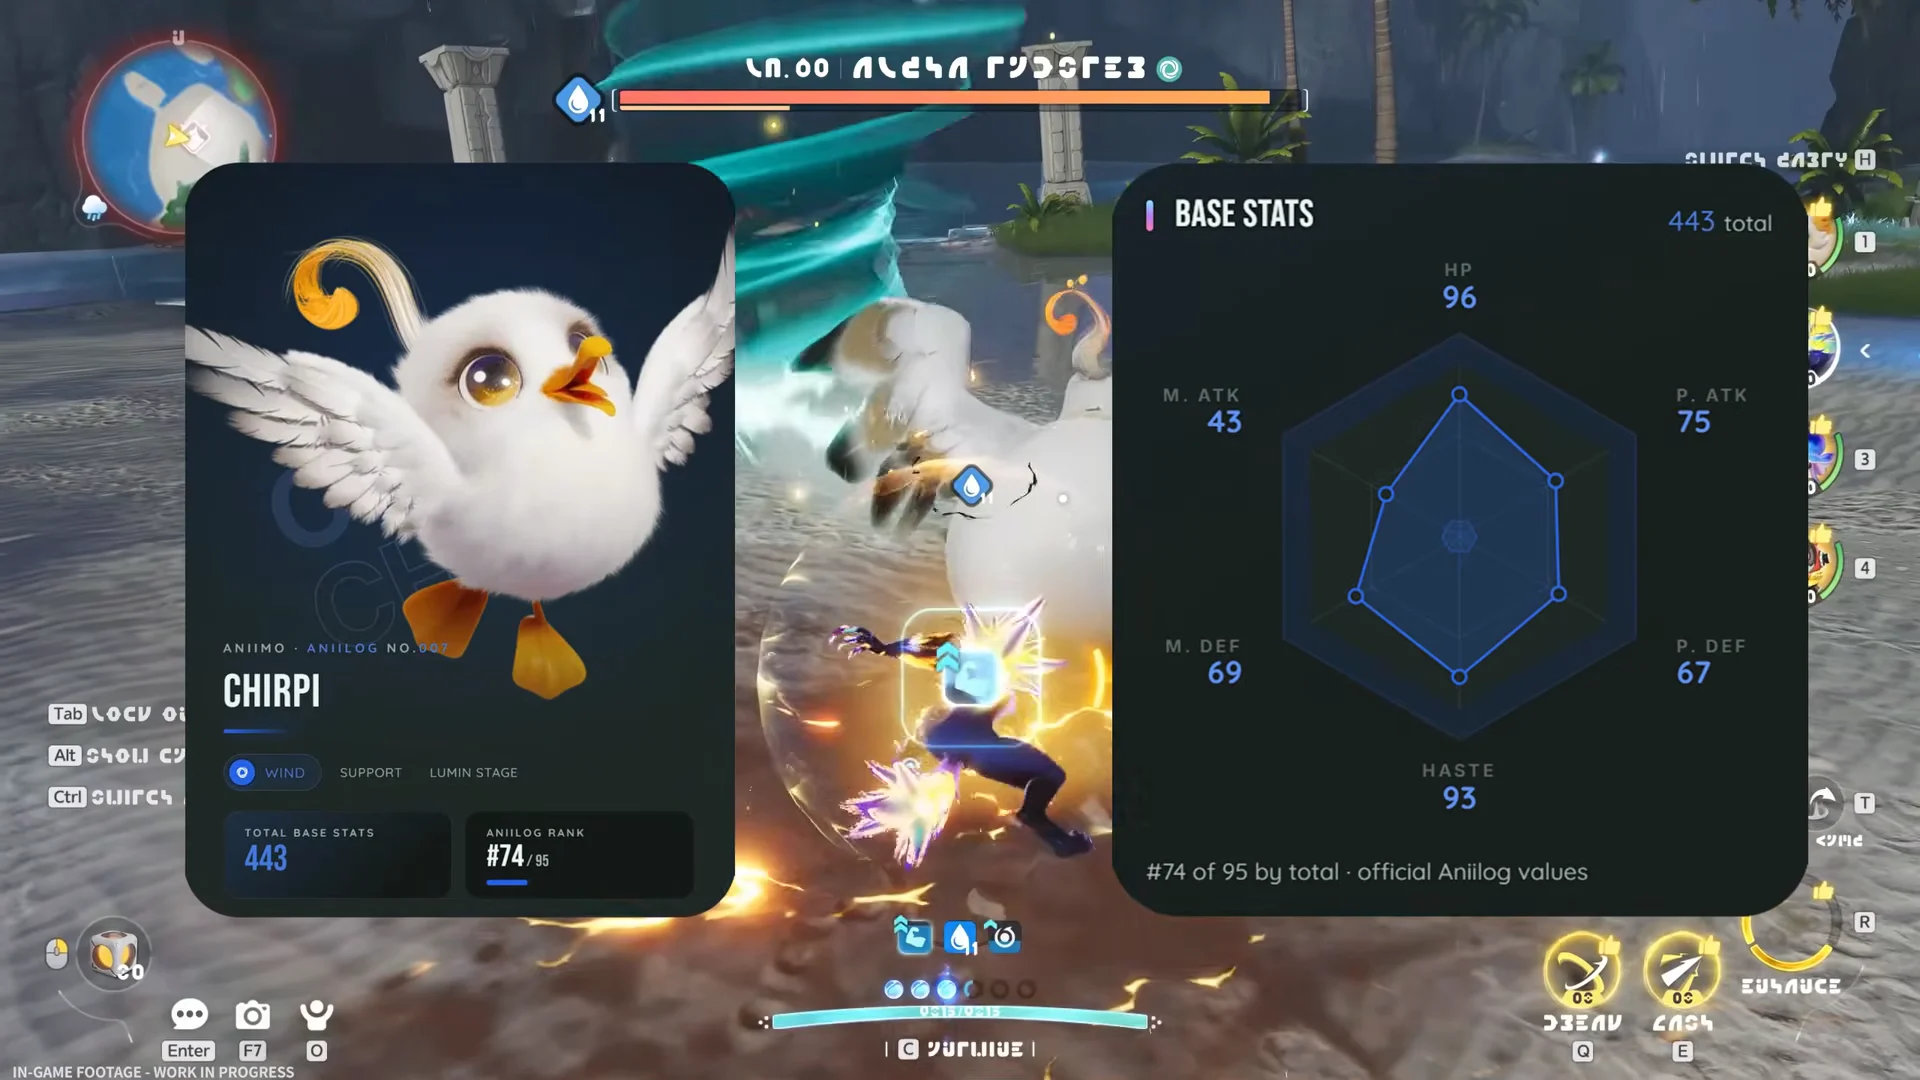
Each of its three branches fills a distinct role. Tromber is Support, with 522 total base stats, 110 EP regen, Fly Level 2, and the Zephyr’s Breath ultimate. Cornet takes the DPS role with 121 attack and Fly Level 3. Tubster is a Break option at 535 total base stats and 101 Break, with shields and damage reduction for the whole team.
Two early teams that cover every role
Which team you build depends on your starter. Both keep one carry, one breaker, one healer, and one buffer instead of stacking attackers.
| Team | Main DPS | Break / Sub-DPS | Heal + Support |
|---|---|---|---|
| Lunara ranged |  Lunara Lunara | Celestis | Flutternym, Turbo |
| Helion melee Break |  Helion Helion | Pomegg | Flutternym, Turbo |
If you picked Lunara, Celestis serves as a sub-DPS that punishes the Light, Fire, and Grass enemies common in the early regions, Flutternym provides healing and EP recovery, and Turbo opens with a buff. If you picked Helion, Helion and Pomegg already break well, and Turbo pushes Break efficiency further while its Cloud Shield covers the team. The simplest functional lineup is your starter, Glacy, Turbo, and a flex slot you swap based on the puzzle in front of you: open with Turbo’s Nimbi Burst, switch to your starter to spend it, and bring Glacy in when health dips.
For a Dark-focused setup that gets stronger as marks build, use Rookey, Fragrancier, Stellarys, and Witchin. Have Rookey Break the enemy, then use Fragrancier’s Secret Fragrance Mark and Fragrance Bomb to boost the party’s Dark damage before switching to Stellarys. In the background, Witchin’s Prank passive curses enemies and gives Stellarys energy when basic attacks hit.
How to know the team is working
The improvement shows up when bosses no longer drag into health-bar races: Break runs out, your buff activates, and you can use the damage window to finish the job. Three attackers may feel powerful for about an hour before progress stalls. A lineup with a breaker, healer, buffer, and carry can clear that same battle in a fraction of the time.
You can reset Capability Awakening on any Aniimo under level 60 and get the training materials back, so early choices are reversible. Catch several of each species until you find the stats you want, and put exploration skills—Hustle, Fly, and Swim—first. An Aniimo that handles a traversal puzzle may be the one you nearly left in storage.