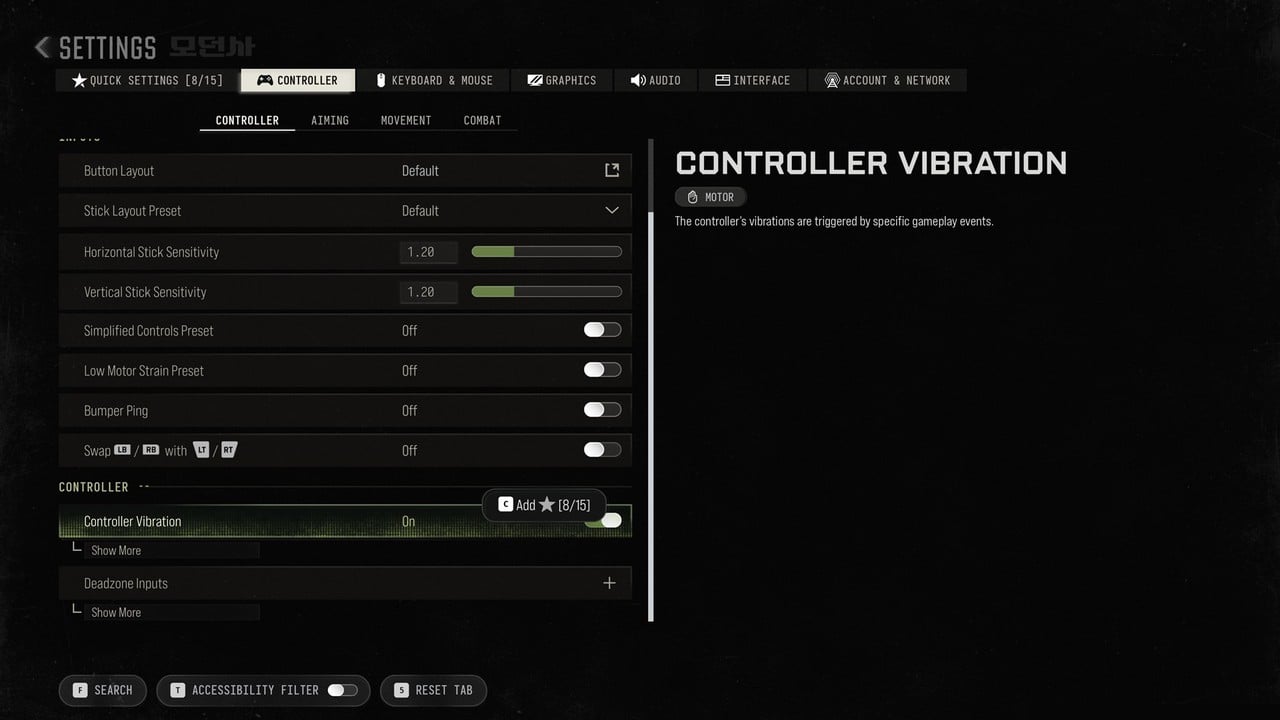
Call of Duty: Modern Warfare 4 spreads its controller tuning across several screens under Settings > Controller. Stick sensitivity and deadzones sit on the Controller tab. The response curve, ADS timing and aim assist live in the Aiming section; movement and combat behaviours are listed separately under Movement and Combat. The values below are the defaults on PC (Steam), along with the changes worth making. For the default button layout and PC keybinds, see our Modern Warfare 4 controls guide; to switch ADS or sprint between hold and toggle, see this hold and toggle guide.
Quick answer: Tune stick deadzone with Test Stick Deadzone, start on the Standard curve, raise stick sensitivity in small steps, and leave both aim assist toggles On.
- Deadzone: lower Left and Right Stick Min from 15 until the view drifts, then raise it back one step.
- Aim Response Curve Type: Standard while learning, then Dynamic or Linear.
- Stick sensitivity: raise Horizontal and Vertical from 1.20 gradually, keeping ADS Sensitivity Multiplier at 1.00 until hipfire feels right.
- Aim assist: Switch On both settings: ADS Aim Assist and Target Aim Assist.
Modern Warfare 4 deadzone settings
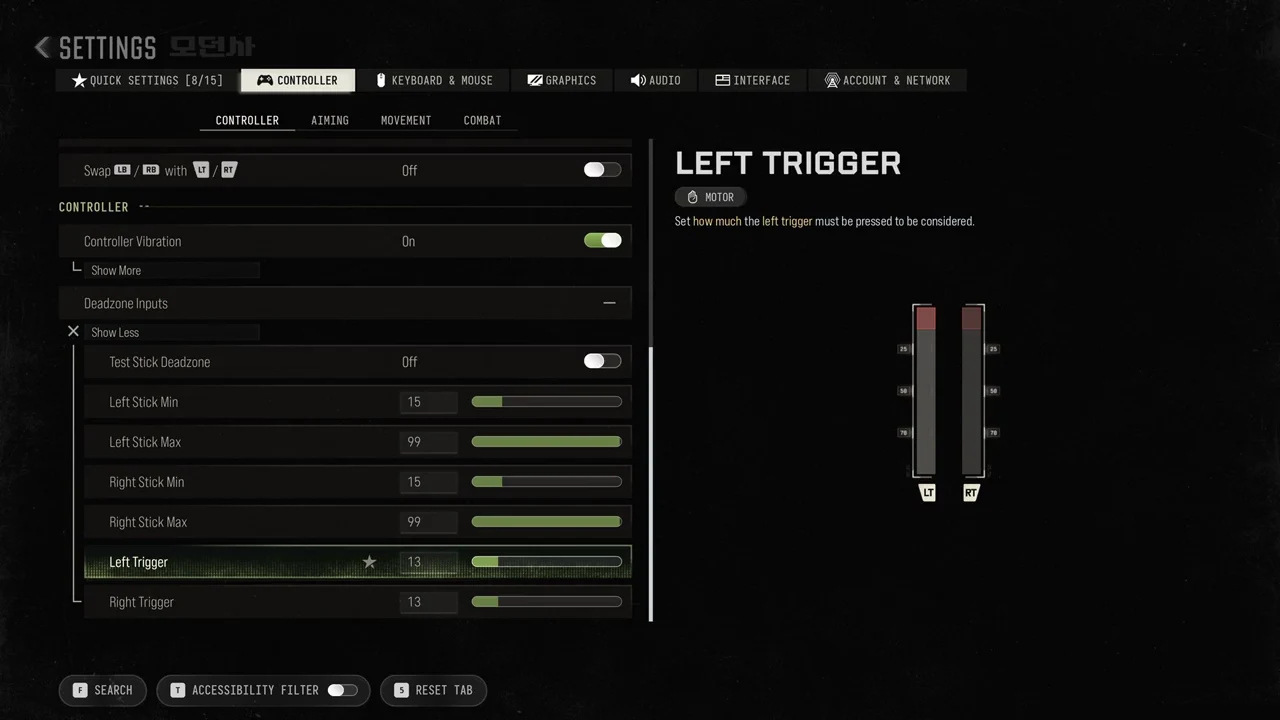
Deadzones decide how far a stick or trigger has to move before the game counts it. You’ll find them on the Controller tab under Deadzone Inputs, which stays collapsed until you open it with the + / Show More control. Here are the defaults.
| Setting | Default |
|---|---|
| Test Stick Deadzone | Off |
| Left Stick Min | 15 |
| Left Stick Max | 99 |
| Right Stick Min | 15 |
| Right Stick Max | 99 |
| Left Trigger | 13 |
| Right Trigger | 13 |
The recommended approach is to bring the stick minimum down until your controller starts drifting, then back off. That gives you the smallest deadzone your particular pad can handle without the camera wandering by itself.
Stick sensitivity and sensitivity multipliers
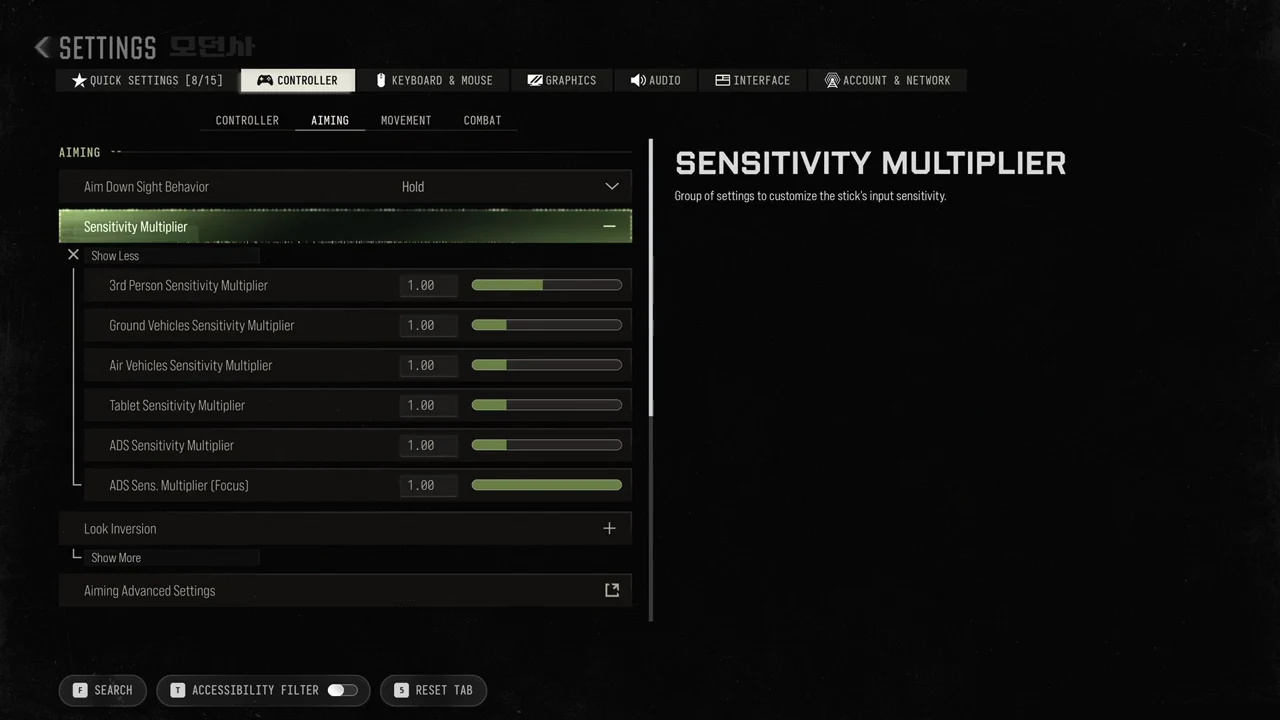
Base stick speed is set on the Controller tab under INPUTS, where both Horizontal Stick Sensitivity and Vertical Stick Sensitivity default to 1.20. Situational speeds are under Aiming > Sensitivity Multiplier, which the game describes as a “Group of settings to customize the stick’s input sensitivity.” Each multiplier starts at 1.00.
| Setting | Location | Default |
|---|---|---|
| Horizontal Stick Sensitivity | Controller tab | 1.20 |
| Vertical Stick Sensitivity | Controller tab | 1.20 |
| 3rd Person Sensitivity Multiplier | Sensitivity Multiplier | 1.00 |
| Ground Vehicles Sensitivity Multiplier | Sensitivity Multiplier | 1.00 |
| Air Vehicles Sensitivity Multiplier | Sensitivity Multiplier | 1.00 |
| Tablet Sensitivity Multiplier | Sensitivity Multiplier | 1.00 |
| ADS Sensitivity Multiplier | Sensitivity Multiplier | 1.00 |
| ADS Sens. Multiplier (Focus) | Sensitivity Multiplier | 1.00 |
The recommended order is to raise Horizontal and Vertical Stick Sensitivity in small steps first and leave ADS Sensitivity Multiplier at 1.00. Once hipfire feels right, adjust the ADS multiplier separately. Changing one value at a time makes it obvious which change caused which result.
Aim Response Curve Type: Standard, Linear or Dynamic
The response curve controls how stick movement turns into aim speed. It’s on its own page, Aiming Advanced Settings, and defaults to Standard. The game’s prompt is “Select the aiming response curve type that best suits your preferences and play style.” Here’s how it describes each option.
- Standard: “Ideal for new players, slow starting movement that speeds up over the aiming rate. Power curve map from aim stick to aim rate.”
- Linear: “Ideal for players who have mastered the tweaking of the aiming settings. The aiming stick maps directly to the aiming rate.”
- Dynamic: “Ideal for more experienced players, fast starting movement that slows down to the aiming rate. Reverse S-curve mapping.”
The recommendation follows the game’s own descriptions. Stay on Standard while you’re learning. Once you’re comfortable, try Dynamic, which starts fast and eases off as it approaches the aim rate. Pick Linear if you’d rather tune everything yourself and want the stick mapped directly to aim speed.
ADS Sensitivity Transition Timing
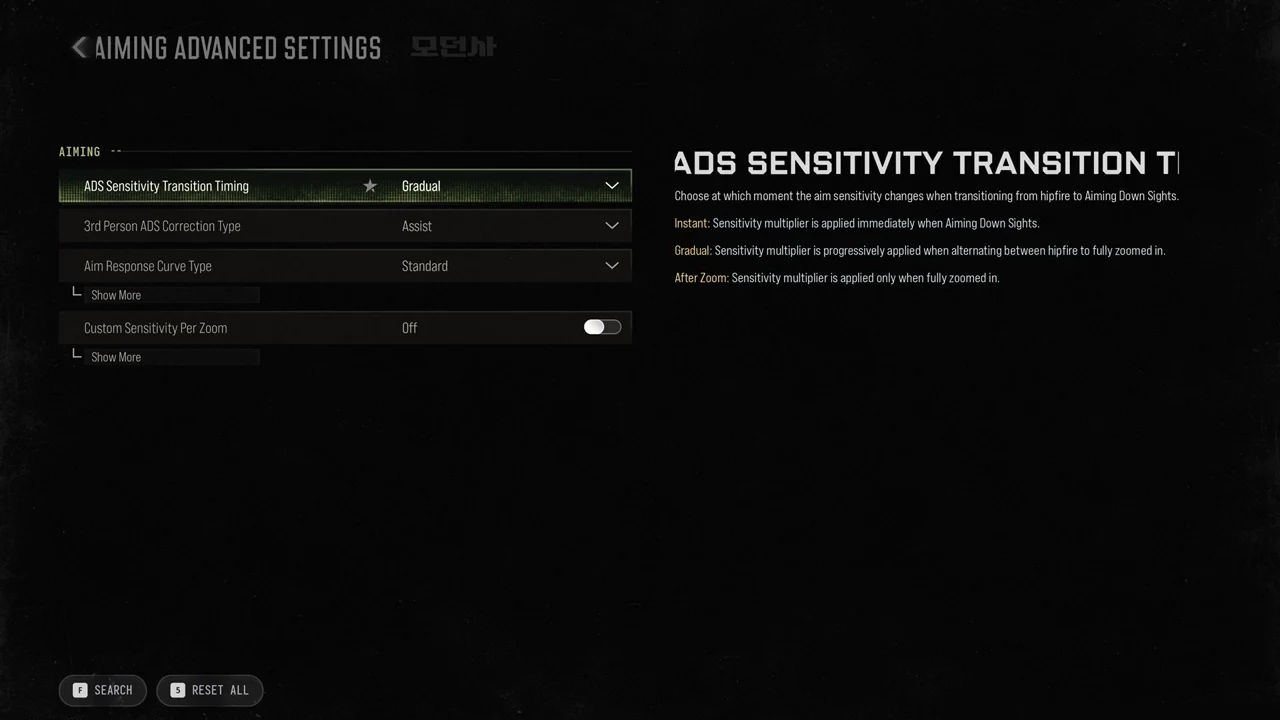
ADS Sensitivity Transition Timing is also on Aiming Advanced Settings, and it defaults to Gradual. The game explains it as “Choose at which moment the aim sensitivity changes when transitioning from hipfire to Aiming Down Sights.” There are three options.
- Instant: “Sensitivity multiplier is applied immediately when Aiming Down Sights.”
- Gradual: “Sensitivity multiplier is progressively applied when alternating between hipfire to fully zoomed in.”
- After Zoom: “Sensitivity multiplier is applied only when fully zoomed in.”
Choose Instant if you want the ADS multiplier to take effect right away. Keep Gradual for a smooth change between hipfire and full zoom. The same page also lists 3rd Person ADS Correction Type, set to Assist, and Custom Sensitivity Per Zoom, which is Off.
Aim assist settings in Modern Warfare 4
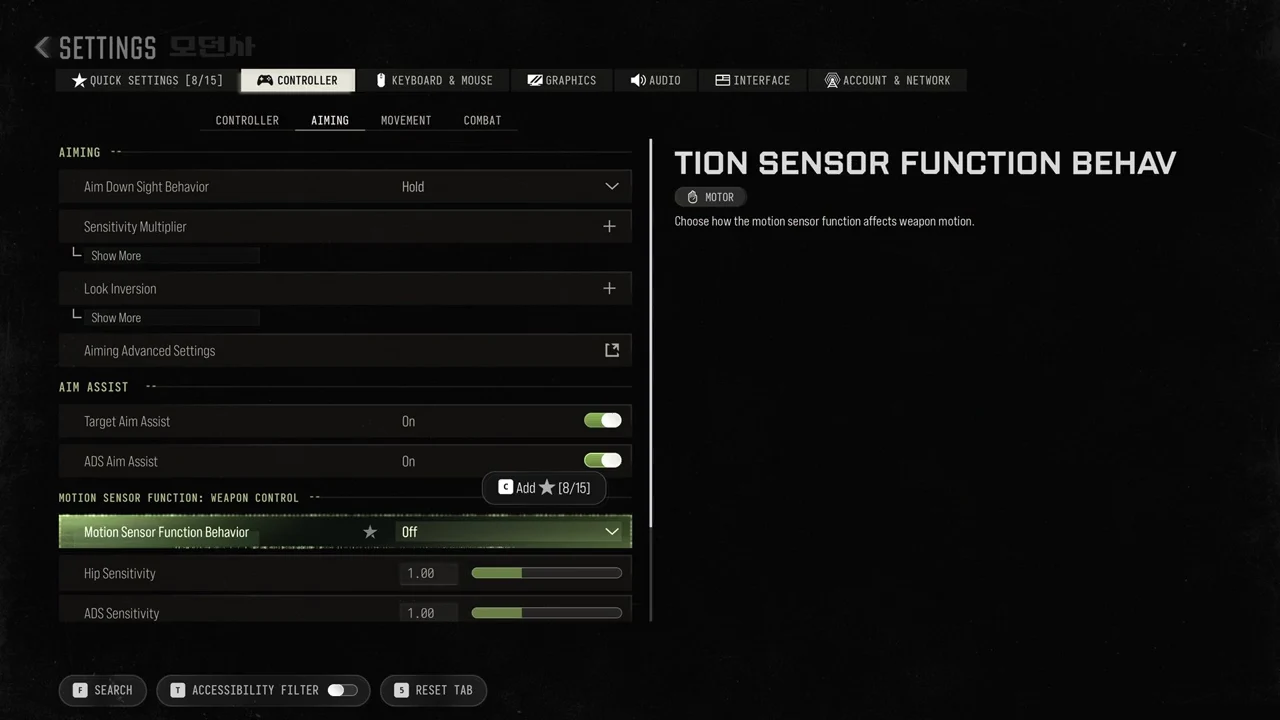
In the Aiming section, the AIM ASSIST heading contains two switches: Target Aim Assist and ADS Aim Assist. Both begin On, and the recommendation is to keep them enabled. Their entries appear after Aim Down Sight Behavior (Hold), then Sensitivity Multiplier, then Look Inversion, and finally Aiming Advanced Settings.
The gyro controls, listed as Motion Sensor Function, come next. Under Weapon Control, Motion Sensor Function Behavior is Off, described as “Choose how the motion sensor function affects weapon motion.” Hip Sensitivity and ADS Sensitivity both sit at 1.00, and the second is described as “Sensitivity of weapon motion sensor function control in ADS.” Under Camera Control, Motion Sensor Function Behavior is also Off.
Movement and combat behaviours worth changing
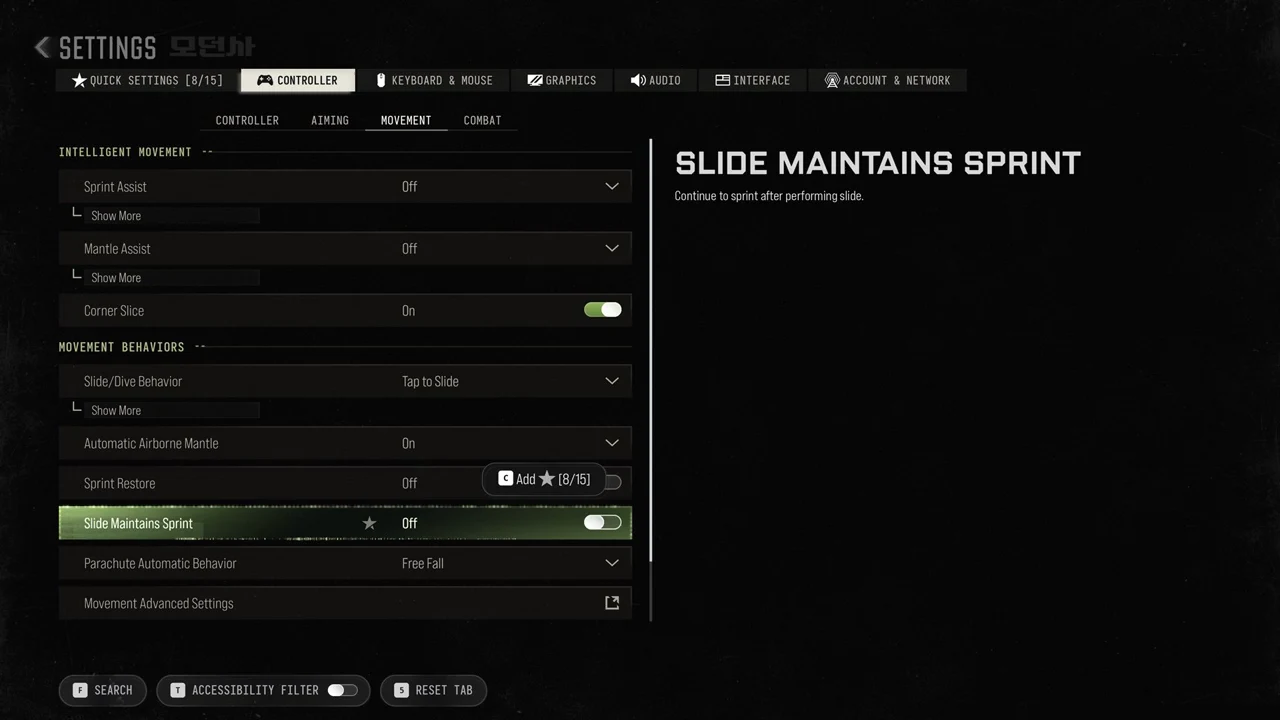
Keep Sprint Assist and Mantle Assist Off to retain control of when you sprint and climb. Enable Slide Maintains Sprint to continue sprinting when a slide ends; the game describes it as “Continue to sprint after performing slide.”
| Setting | Group | Default |
|---|---|---|
| Sprint Assist | Intelligent Movement | Off |
| Mantle Assist | Intelligent Movement | Off |
| Corner Slice | Intelligent Movement | On |
| Slide/Dive Behavior | Movement Behaviors | Tap to Slide |
| Automatic Airborne Mantle | Movement Behaviors | On |
| Sprint Restore | Movement Behaviors | Off |
| Slide Maintains Sprint | Movement Behaviors | Off |
| Parachute Automatic Behavior | Movement Behaviors | Free Fall |
Movement Advanced Settings
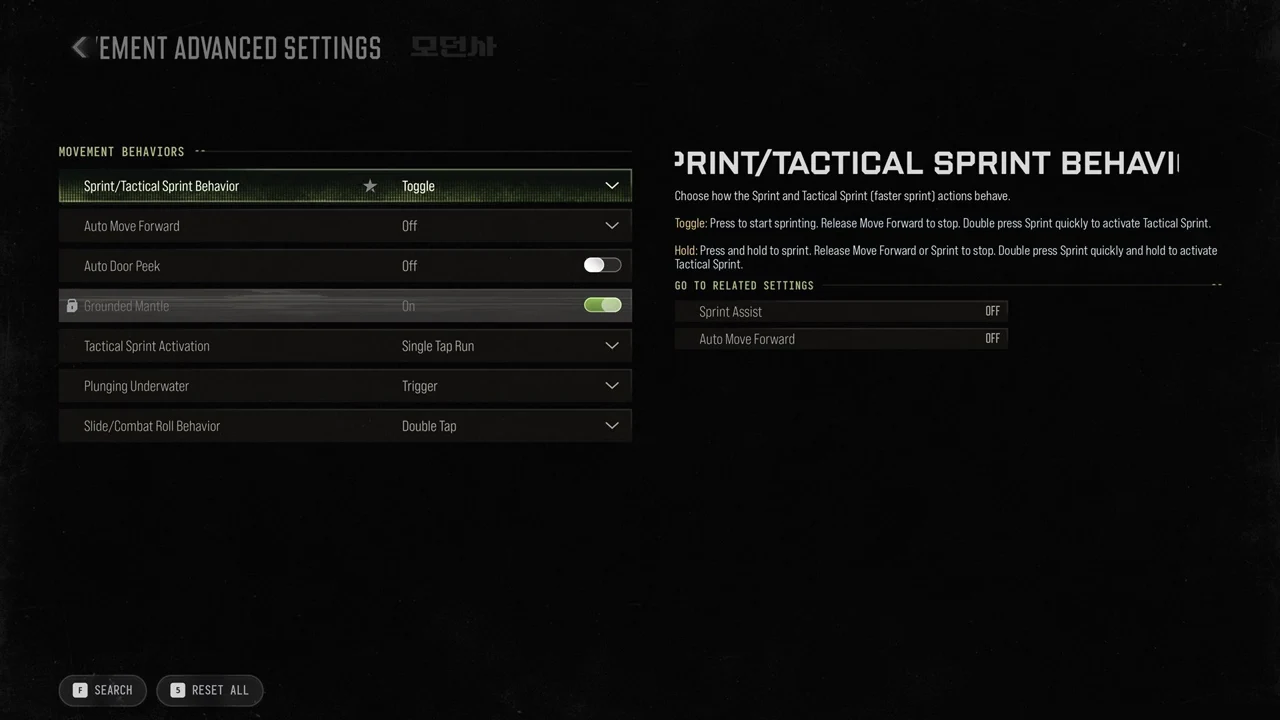
Movement Advanced Settings is described as a “Group of advanced settings to customize the movement behaviors.” Sprint/Tactical Sprint Behavior defaults to Toggle, with the description “Choose how the Sprint and Tactical Sprint (faster sprint) actions behave.” The two options work differently.
- Toggle: “Press to start sprinting. Release Move Forward to stop. Double press Sprint quickly to activate Tactical Sprint.”
- Hold: “Press and hold to sprint. Release Move Forward or Sprint to stop. Double press Sprint quickly and hold to activate Tactical Sprint.”
| Setting | Default |
|---|---|
| Sprint/Tactical Sprint Behavior | Toggle |
| Auto Move Forward | Off |
| Auto Door Peek | Off |
| Grounded Mantle | On (locked) |
| Tactical Sprint Activation | Single Tap Run |
| Plunging Underwater | Trigger |
| Slide/Combat Roll Behavior | Double Tap |
Combat and overlay behaviours
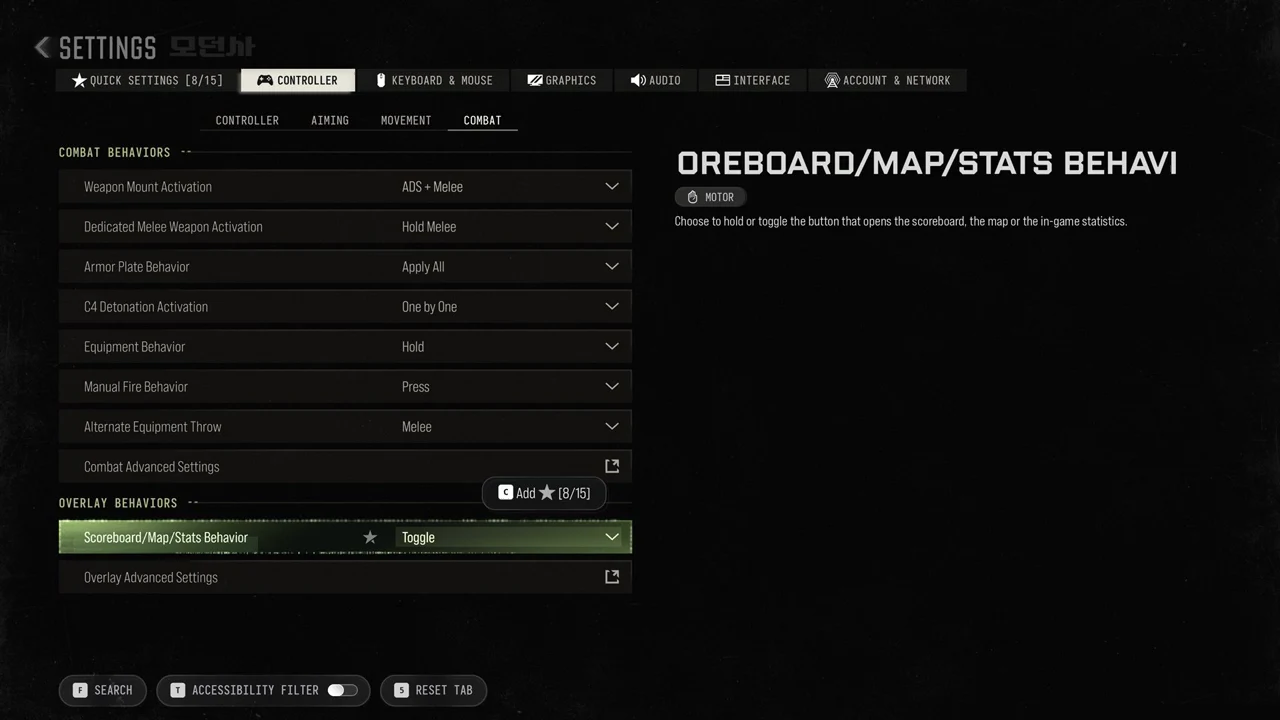
The Combat screen controls how equipment, melee and plates respond to your inputs. Under Overlay Behaviors, Scoreboard/Map/Stats Behavior defaults to Toggle, described as “Choose to hold or toggle the button that opens the scoreboard, the map or the in-game statistics.”
| Setting | Default |
|---|---|
| Weapon Mount Activation | ADS + Melee |
| Dedicated Melee Weapon Activation | Hold Melee |
| Armor Plate Behavior | Apply All |
| C4 Detonation Activation | One by One |
| Equipment Behavior | Hold |
| Manual Fire Behavior | Press |
| Alternate Equipment Throw | Melee |
| Scoreboard/Map/Stats Behavior | Toggle |