A stronger army in Command An Army is not the one with the rarest summon. It is the one that fits inside your Star Limit, has been ascended a few times, and stays together when you move. The game hands you a medieval siege battle with attackers and defenders, and gives you up to four equipped units plus your own character to swing it.
Quick answer: Redeem the codes for Gems, run a 10x pull on the Standard Banner, use Ascension on every duplicate you get, then equip the highest-value troops your Star Limit allows and keep them grouped with the follow command.
Get Gems first: codes and quests
Gems are the currency behind every summon, so the fastest way to a better roster is to stop spending and start collecting. Two reliable taps exist before you ever fight anyone.
RELEASE, BUGFIX, and REBALANCE. Redeem all three before you pull anything.
Tip: If a banner is running a unit you specifically want, bank Gems instead of pulling on impulse. Upgrade and ascension costs come out of the same pocket, and an un-upgraded rare loses to a developed common.
Summoning on the Standard Banner
The Summon interface is where the roster grows past your tutorial starters. A single pull runs 50 Gems and a ten-pull runs 500, so there is no bulk discount — the ten-pull is just faster and gives you more chances at the rarer end in one go.
Expect a lot of Spearman, Shieldman, and Scout Rider results. Four-star units are the rarest tier in the pool, and elites like Spartan and Immortal can take many attempts. That is fine. Duplicates are not wasted pulls, they are ascension fuel.

Confirmed unit roster and roles
| Unit | Source | Battlefield role |
|---|---|---|
| Mercenary | Starter | All-round melee body for most matchups |
| Shieldman | Starter | Heavy defense; absorbs frontal pushes |
| Spearman | Starter | Anti-cavalry reach on a defensive line |
| Archer | Starter | Ranged damage from behind the front |
| Knight | Tutorial | Shock unit; breaks gates and structures |
| Spartan | Standard Banner | Elite combat unit, very low pull odds |
| Immortal | Standard Banner | Durable melee with strong staying power |
| Crossbowman | Standard Banner | Ranged support with higher output |
| Scout Rider | Standard Banner | Fast cavalry for flanks and rushes |
Star Limit: the cap that decides your loadout
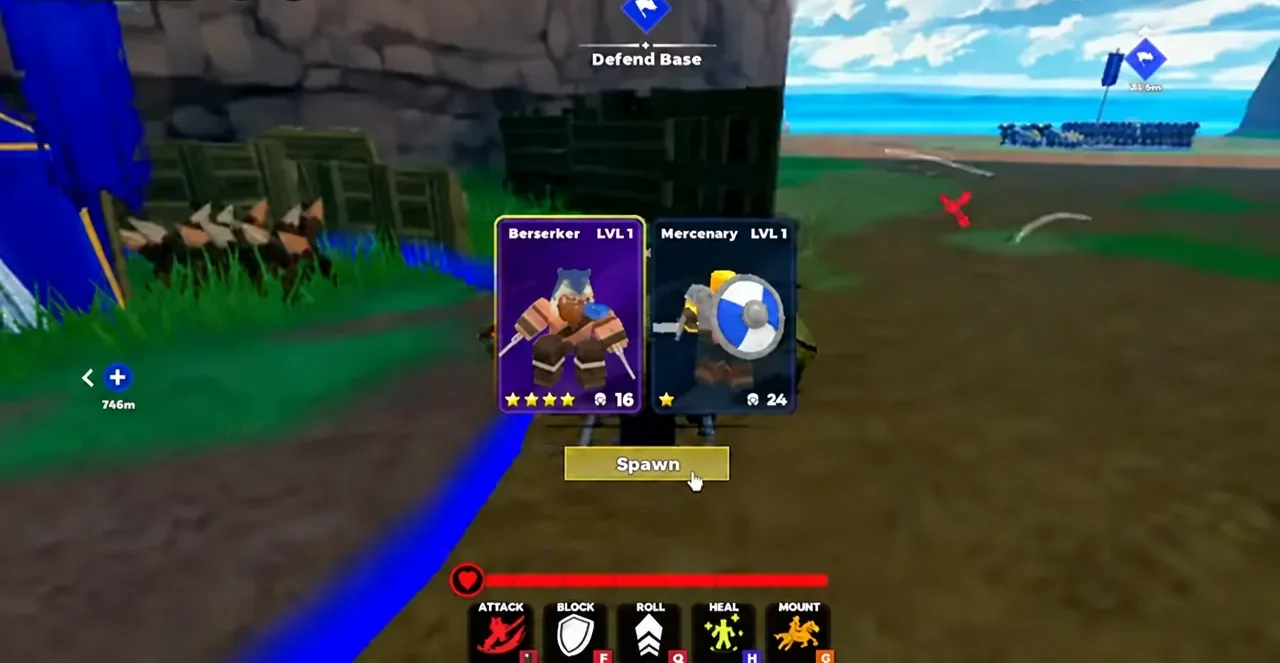
This is the mechanic most new players trip over. Every troop carries a star value, and your account has a Star Limit that caps the combined star total of everything equipped at once. Pulling a four-star does not mean you can field it.
If equipping a unit would push you over the cap, the game simply refuses. Early on, when the limit sits around 6, one expensive summon eats nearly your whole budget and leaves you fielding a half-empty squad. The cap rises as you level, which is why quest XP is worth chasing.
| Situation | What to do |
|---|---|
| New account, low cap | Field cheap starter units so all four slots are filled |
| One high-star summon owned | Pair it with low-cost bodies rather than benching it or overloading |
| Cap around 6 | You can usually add one extra body beside a small core squad |
| Cap raised by leveling | Swap a filler unit for a developed mid-star troop |
Ascension and evolution paths
Ascension combines two copies of the same unit and raises its ascension level, making the troop stronger without costing you a slot. Open the Ascension section whenever a duplicate lands and merge it. There is an Ascend All Troops option once you have the resources, but blanket-ascending scatters value across units you never field.
The payoff is real. A two-star Scout Rider that has been ascended and upgraded regularly outperforms a freshly pulled four-star Immortal that has had nothing spent on it. Judge a troop by how long it survives, how fast it clears bodies, and whether it helps you take a point — not by the star count.
Several units also have evolution lines that turn them into stronger versions of the same role.
| Unit | Evolution path |
|---|---|
| Mercenary | Mercenary → Squire → Knight |
| Shieldman | Shieldman → Sentinel → Imperial Wall |
| Spearman | Spearman → Pikeman |
| Archer | Archer → Longbowman |
| Scout Rider | Scout Rider → Cavalryman → Lancer |
Special units, the rarer ones with their own identities, do not always follow these standard paths and have different availability rules.
Building a four-unit loadout that covers its own weaknesses
Four slots is not many, and stacking four of the same troop type gives an opponent one obvious answer. A workable starting composition covers frontline, range, and speed, then adds an elite once the Star Limit allows it.
- A melee body such as Mercenary or Sword and Shield troops to anchor the center
- A ranged unit such as Archer or Crossbowman to work from behind that anchor
- A fast unit such as Scout Rider for flanks, chases, and repositioning
- A defensive or elite pick — Shieldman for holding, Spartan or Immortal when you have one
In the Units menu you can inspect a troop’s stats and hit the yellow Equip button to slot it. There is also an Equip Best option that fills your loadout automatically, which is a fine shortcut when you are still learning what each unit does.

Your own character sits outside this. Three classes decide how you personally fight: Assassin for fast single-target damage, Sword & Shield for balance, and Hammer for heavy but slow hits. A class switch costs 50 Gems between matches, so a first pick is not permanent.
Commanding troops in a match
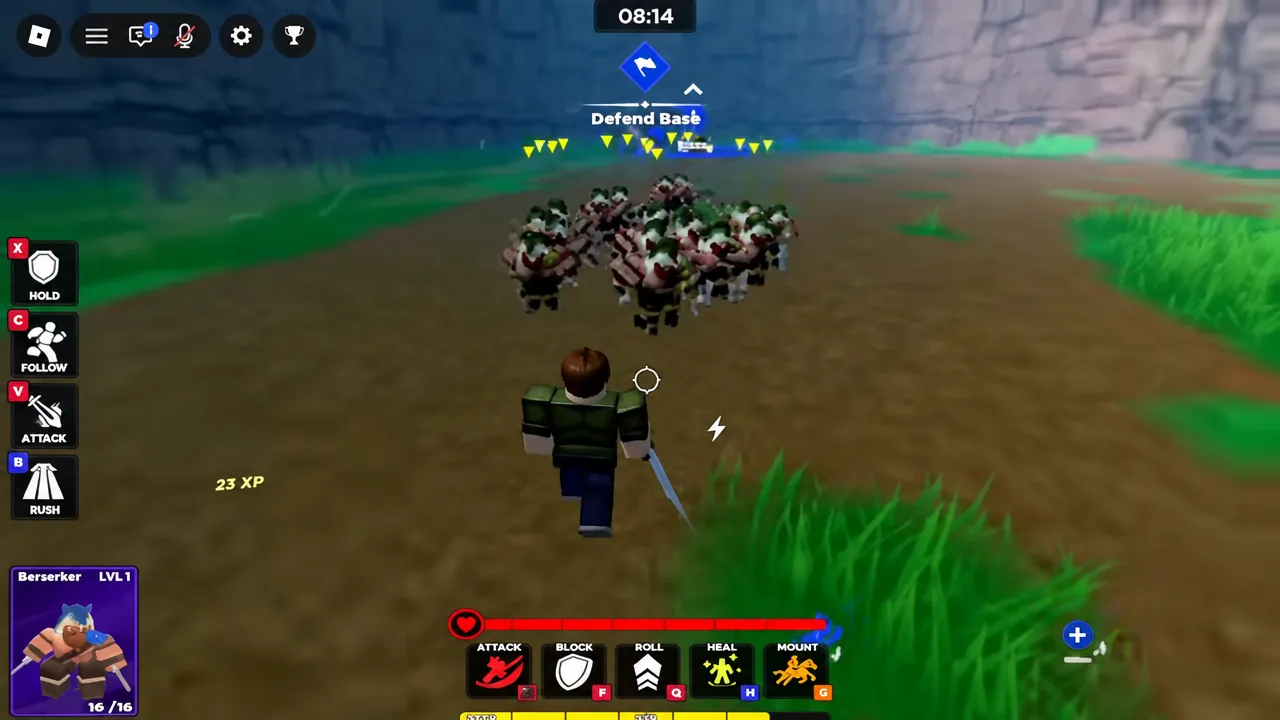
Good units badly commanded lose to average units held together. The single most useful input is the C key, which orders your squad to follow you, so the whole group travels as one instead of trickling into a fight.
Attacker and defender priorities
Each match splits into attackers and defenders, and the same loadout plays differently depending on which side you draw. Attackers advance, capture objectives, and break defensive formations. Defenders hold territory, protect supply points, and stall the push.
| Role | Do this | Avoid this |
|---|---|---|
| Attacker | Move the main force together, flank ranged troops, break a line from more than one angle | Charging cavalry into prepared Spearmen or a shield wall |
| Defender | Keep troops near the objective, screen Archers with Shieldmen, respond as attackers arrive | Chasing enemy players across the map for kills |
| Both | Regroup after gaining ground before pushing again | Abandoning a point you just captured |
The turtle setup — Shieldmen forming a protective wall with Archers firing from behind — is the defensive shape you will meet most often. Attacking it head-on feeds your troops into it. Circle the formation and hit the ranged units from the side or behind, because they collapse fast once anything reaches them.
You will know the loadout is working when your squad arrives at a point intact, clears the defenders around it, and still has enough bodies left to hold the ground afterwards. If your troops keep dying before they reach the objective, the problem is usually spacing or an un-ascended core rather than the units themselves. Fix the Star Limit math and the follow discipline first, and the summon luck matters a lot less.